April 2007 archives
you are here [x]: Scarlet Star Studios > the Scarlet Letters > April 2007
<< before
March 2007
after >>
May 2007
April 30, 2007
lsgl: first new shot in the can!
by sven at 11:59 pm

Woo! My first new shot is in the can!
The color's richer than yesterday's version. But there's also a more subtle touch here -- which I'm very pleased with... I've added a "depth of field" effect so the cave ceiling isn't quite in focus, and the Elders' eyes are just beginning to get blurry.
(I also got the pacing of the next two shots worked out, so I can move forward with compositing them this week.)
Reality check: Tomorrow's the first day of May... This year the Lovecraft fest has a new system of deadlines:
- July 1 - Earlybird Deadline
- August 1 - Regular Deadline
- September 1 - Late Deadline
- September 7 - Extended Deadline
...So, I've got all of May and all of June before the first deadline.
The only difference between the deadlines is price; I'm not worried about that. What I am worried about is whether or not I'll be able to film the deep history segment. That's supposed to be about two minutes of puppet animation.
I've designed the production process with severability in mind. That is, if I can't get to the deep history segment, the "bookends" portion of the story should still make sense without it.
And, if only a portion of the deep history gets filmed, then by doing the last third of it first I can create an abbreviated version of my film that holds together as well.
Naturally I want to see the whole story birthed -- without amputations... But if worst comes to worst, at least I've got a plan.
posted by sven | permalink | categories: let sleeping gods lie
side project: hand-drawn animation
by sven at 5:13 pm
I've started reading The Animator's Survival Kit again, after having put it down for about a year.
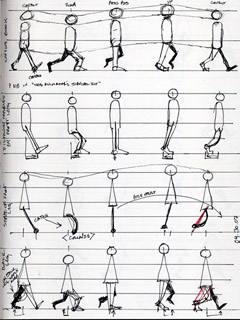
My jaw's been hanging floppy watching Justin Rasch learn how to animate puppets. Damn he's good! My suspicion is that he's going so fast and doing so well because he's done 2D animation in the past. Viewed frame-by-frame, I've noticed a few timing tricks in his clips that I know come out of the 2D tradition.
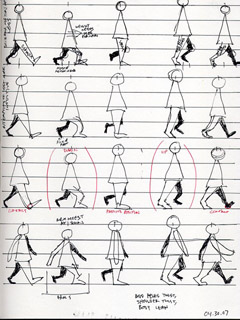
This observation clicked in my head with a little article over at AnimateClay.com, a simple way to get better sculpts.
"It’s very simple. If you draw something before you sculpt it, you have a better feel for it when you sit down to sculpt. It gives you a much better understanding of the shape, and feel of what you’re about to sculpt."
Since puppet animation is really just sculpting -- with the added dimension of time -- it seems like a "duh" that if I want to get better at stopmo, hand-drawn animation is actually the place to start.
Cross-fertilization, yo! ...'Cuz purists can only copy. If you want to learn how to make something new, then multi-disciplinary / mixed-media / synthesis / response is the only way to go!
posted by sven | permalink | categories: stopmo
wordwear at spring art sale sunday!
by gl. at 12:07 am
it will be a busy week! in addition to the emergence show on friday, i'll also be participating in the spring art sale at 100th monkey on sunday.
you haven't heard much about wordwear lately, but i'm still happily making them for clients. i am still delighted by how much they inspire people! the spring art sale is the week before mother's day, which allows you to choose something personal, inspirational & affordable for her this year while supporting local artists! i'd love to see you there, and if the weather is good, that just gives you that much more of an excuse. :)



i plan on making more wordwear this week & setting up a mini-station to create custom wordwear for customers that day, so they can browse my selection or bring something personally meaningful & truthful for me to make a piece they can take home that day! i worry about not having enough to sell: i'm going to ask if anyone in the sacred circle wants to have stuff on the table, too, but otherwise may try the "creativity encouragement" supplies again. wish i had more toby-like critters (though he may come along as a jewelry display :).
(i forgot to mention, that 100th monkey had wordwear on commission at their art store in january, which led to a custom commission. i also donated a necklace to their scholarship auction.)
since i've begun making wordwear i've learned to make the letters clearer (especially As), discovered you can salvage misturned letters simply by stamping over them again, and that the best technique to color the letters is by quickly rubbing off the initial rub'n'buff excess, then go in later for detail work (i was leaving a thick coat of rub'n'buff on till it all dried).
posted by gl. | permalink | categories: exhibits & events, other art
April 29, 2007
emergence opens friday night!
by gl. at 11:09 pm
i'll be in a show that opens friday night: emergence. serena barton just joined the central eastside arts district and so will be hosting shows every month. emergence will feature work that has been created at her workshops, and it may include all these pieces:
"reveal," which i created at serena's "layers of memory & imagination" workshop:

...and "sage," which i created w/ serena when she came to the studio after that workshop (and which has already been sold!):

...and one or more items from the "berthe series," which i made last week at serena's "not just a pretty face" workshop.



i'm planning on going to the opening: i'll probably be there somewhere between 6 p.m.-7 p.m. (there's another art show featuring artist books at the new american art union that i want to check out, too). no worries if you can't make it, but think good thoughts on friday!

posted by gl. | permalink | categories: exhibits & events
lsgl: compositing again
by sven at 11:08 pm
Today I started work compositing the "lavamen" into the cave environment. It was a slow start... It's been a while, and I had to re-figure out how to do this process.

This isn't a final shot -- but it's as far as I got today.
I've been dithering over whether or not to have the lavamen cast light onto the environment, which would anchor them into their setting more. I'm thinking that I probably won't.
The truth is that I dread how much time would be spent on rendering a subtle effect. The rationalization is that lavamen are supposed to be almost without substance, because humans have lives that are so much shorter than those of the Elders.
...And there's the technical problem of trying to use a point light to represent a whole human body glowing. ...And because of how I'm doing color, the light that's cast can only be white -- it couldn't be red.

If there aren't going to be any moving lights in this shot, then all I need to render out of LightWave is a still shot. So, my main problem is perhaps just getting the camera in the right place.
What I've done is create stand-ins for the explorers. I place the explorers relative to each other. Then I aim the camera at them. When I get the framing that I like, I parent the camera and the second lavaman to the first lavaman. Then I can place the first lavaman where I want, relative to the Elders.
[Explorers, I've decided, are six feet tall. The Elders are ten feet tall. ...Well, 10'6" if you count the eyeballs.]

As I'm getting the camera and the stand-ins in place, I'm constantly checking them against the actual DV footage of my actors.
To do this, I first have to first get my lavaman footage completely finalized in AfterEffects. I render out a QuickTime movie that is RGBA -- that is, it includes an alpha channel, so portions of the image can be transparent. In LightWave, I open up the compositing panel, and use the QuickTime file as my foreground. I can scrub the movie to where I want it using the Image Editor window.
Why is my footage brown you're asking? Well, that's what all my footage initially looks like. I've been unable to get the colors I want just by working in LightWave... Instead, I render out this drab shot, and then import it into AfterEffects for color correction.
Ultimately, the final shot is assembled in AfterEffects. I'll have a still shot that's just of the Elders, and then I layer my explorers on top of that.

You'd think that I could just do the compositing in LightWave -- but no! If I insert the explorers in LightWave and then do color correction, the lavamen suddenly become aquamen!
Incidentally, I'm often doing color tests in PhotoShop -- but for consistency's sake, final shots always have to be done in AfterEffects. Different programs process color differently. My default settings for color correction are:
- brightness: +30
- contrast: +30
- hue: +168
- saturation: +87
I can enter these same settings into PhotoShop, and I get remarkably different results. ...I should add, too, that these are just my default numbers. Each shot requires tweaking and individual attention.
posted by sven | permalink | categories: let sleeping gods lie
serena barton's "not just a pretty face"
by gl. at 4:54 pm
last week we hosted a portrait workshop, "not just a pretty face." i also attended this workshop, in part because one of the possibilities was using water-soluable oil paints, and i've never used oil paints before. it turns out the drying time drives me crazy, and i am very content to use acryclics for the rest of my life. :)
one of the other things i discovered is that i don't actually like painting faces. i like drawing faces, i like inking faces, and maybe tinting them w/ watercolor, but painting faces feels clumsy and thick and vague. my paint never goes where i want it to or how i want it to. during my first one i was really frustrated: i thought i was going to cry, but i told myself to just grit my teeth and stick with it for the next few hours. by the third one i was feeling much better, though i still can't say i feel very fond of the process.
we did two studies and a "final" portrait during the workshop. we probably had 30-45 minutes to do the studies and 1-1.5 hours to do the final. even so, we ran way over time. when we offer this class again, it will be our first 2-day workshop. :)
we picked several possible portraits from "the masters," but i ended up working on the same one each time: manet's "berthe morisot with a bouquet of violets." i tend to need repetition for reinforcement & progress, so even while i cringe to show them, i'm still pleased at this sequence:


the first is the orginal, the next two are studies, and the last is the final portrait i was working towards. nobody gets it when i say i think my second study looks like a female version of neil gaiman. ;) with the last one i was using much thinner paint, almost like layers of glazes or watercolors, rather than full-strength acryclics. there's plenty to critcize about each of them, but it is both a relief & a pleasure to see progress and development over the sequence. i'll never be manet, but i feel i learned something, and that's important to me.
the next workshop is another version of vicki lind's "don't think! paint!" that was so popular in november. we've already had a good response for it, but i'm a little nervous because it's the first workshop i won't be there for at all, even next door. i have another (exciting!) appointment i must attend that day instead (and which i expect to write more about later...!).
posted by gl. | permalink | categories: classes & workshops
April 28, 2007
lsgl: final beacon design
by sven at 11:59 pm
Finally finished the intergalactic distress beacon model tonight. It's about 95% of what I was hoping for -- which is pretty darned good!
I've also created the "aurora borealis" effect that will initially appear on the viewscreen. At this point, I'm still having trouble getting it to composit correctly. The image is turning out too dim.

Here's the "aurora borealis" effect that I'll be using in the film.
(Note that compression for web-viewing dumbs down The Pretty a fair deal.)
posted by sven | permalink | categories: let sleeping gods lie
April 24, 2007
lsgl: art deco bathysphere
by sven at 11:59 pm
Today's guiding thought: make the intergalactic distress beacon look like an art deco bathysphere.
The texture on "sputnik" looks a little too corrugated. The radar dish is too small. And those wings (while interesting) don't fit the look of the film.
With "the apple," I very much like the texture on the bottom half of the torso; it's structured like a venetian blind. I also like the narrow rim on the magic mirror.
The torso texture's a little too uniform, though -- and I'd like the arms to be angled out more. Time to try some new "gun" designs, too.
A different texture on the top half... Not bad. The "gun" array is interesting -- but I'm not sold. I curved the struts that go to the legs. But those legs... Really aren't working for me now.
Back to the idea of having ornamental legs. And maybe some "eye" thingies up at the top. Everything else is the same.
OK, let's try ditching the "radar dish" concept entirely. Instead, have a whole lot of turrets coming out in all directions. ...And make the magic mirror a little smaller, too.
This one's intriguing. Reminds me very much of Hayao Miyazaki's work -- e.g. the monsters in Nausicaä of the Valley of the Wind. Sorta anime, too. I could see using a variant of this -- but all those smokestacks would be a nightmare when it comes time to show something coming out of them.
Note: This is my 7th day of working on the beacon. I've got to conclude this development process soon!
posted by sven | permalink | categories: let sleeping gods lie
April 23, 2007
lsgl: geometry jam
by sven at 11:59 pm
It's always important to think about process. Get meta!
Today's brainstorm: Since I've been getting stuck in a rut with the beacon designs, give myself a time-limit to work against. Quick sketches -- 15 minutes each, then move on.
Of course, I bend my own rules... But the spirit of the challenge worked -- I've got some new directions. Quick and dirty, but that's the nature of sketches.
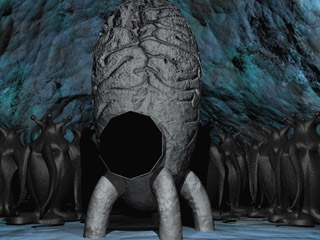
Part of what wasn't working with the brain beacon designs was the inter-splicing of organics and machinery. I dropped the radar array at the top completely for this one. In terms of brain beacon designs, this is the right direction to go in... But really, I think I've got to go back to my original vision, which was just a plain machine.
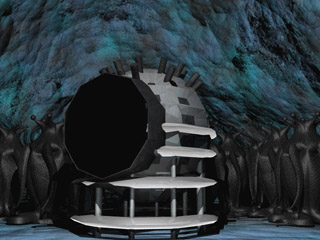
Instead of the "oriental vase" shape, what if I went more with a globe shape? This one reminds me a bit of the spaceship from First Men In The Moon (classic Harryhausen). Sort of a Jules Verne-ish steampunk direction.
(Incidentally, process-wise, it occurred to me that I've been working without reference materials... Cuz there are none! So, this afternoon I dragged out a pile of books about sci fi movies -- just to have something for inspiration.)
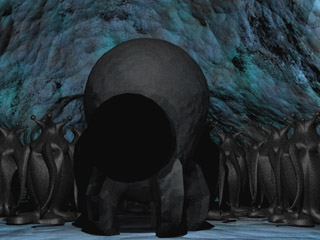
This one has a sort of egg shape for the torso. I realized that you can apply a radial fall-off to the stretch tool in Modeler (part of LightWave).
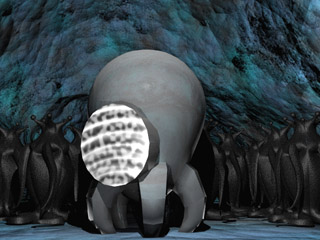
I'm really intrigued by that big circular view screen. It feels very classic 1950's sci fi... A feeling that I'm sorta going for here. I did some experiments trying to figure out how I'm going to put images on the screen. I think using an image map that's actually a QuickTime movie will be the most painless option.
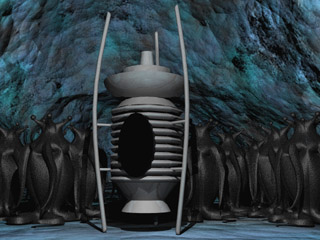
Ah! This one's simple, but I think it communicates "communication device" better than anything else I've done so far. Sorta reminds me of the moisture vaporators on Tatooine.
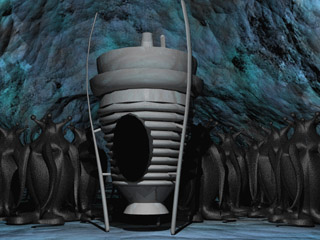
I took the stilt-waker model and distorted it with the stretch tool. It begins to approximate the vase shape that I'd been using so much. Hm. ...I do like having the "stilts" bent, though.
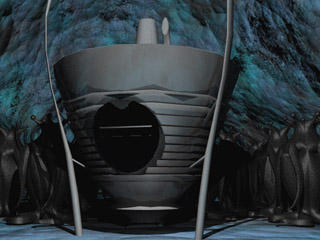
I took the model and squashed it even more. Now it's beginning to look like a cross between a bathysphere and V'ger from Star Trek: The Motion Picture. I really like what's happened to the ribbing! That's a texture I could see using on the final design!
Oh, FYI: for the "geometry jam", I did a whole bunch of stuff that you're not seeing, as well. (As has been the case every time I've posted about work on the beacon.) These were the designs that I was enough intrigued by that I bothered to texture them and render them out in LayOut (the other half of LightWave).
posted by sven | permalink | categories: let sleeping gods lie
April 22, 2007
lsgl: a more organic beacon
by sven at 11:59 pm
None of these designs look right to me... And instead of trying something really different, I think I'm getting stuck permuting the same set of ideas over and over.
I wanted to make the beacon's legs a little more organic...
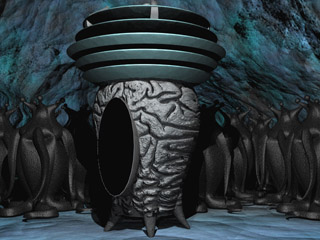
Then I thought it might "read" better as a transmitter if I turned the discs upside-down. But whoa -- that texture's not what I meant to do... Interesting, though!
Here's what I was going for.
Not too bad... But what if I took one of those discs off the top?
Little tweaks...
Feh! This thing is driving me crazy!
posted by sven | permalink | categories: let sleeping gods lie
April 21, 2007
lsgl: hybrid beacon
by sven at 11:59 pm
A shorter workday than usual -- but good progress, nonetheless.
My brother called to talk about the beacon design. He encouraged me to keep with the "brain beacon" concept. So I decided to try out a "hybrid" approach, where only the top of the torso would have brain folds.
To achieve the effect, I erased part of the image map in PhotoShop, leaving just the transparent alpha. To muss up the plain surface a bit, I added the procedural texture "turbulence" -- which gave the metal more of a galvanized appearance.
I suspect I'll be going with this concept... I'm going to need to do something about the legs and radar dishes to make them look more organic, though. As bro rightly points out, it's a little too much like a rocketship from the 1950s.
posted by sven | permalink | categories: let sleeping gods lie
April 20, 2007
artist's way open studio (april)
by gl. at 11:28 pm
what a lovely time last night! it was exactly what i want in a group: lively, generous, fluid conversation with plenty of art at the end. i think it helped that i tried to set a positive intent early on, and specifically asked people to be considerate of everyone: no politics or boy bashing. (i wish i had a better word than "boy bashing," though it's primarily what i want to eliminate.) instead, i asked people to talk about what they loved, or what they wanted to be doing.
i was thrilled joanne came! joanne was from one of my first artist's way groups in the studio, and she just got back from a trip to spain. she biked here on the springwater corridor trail, a route i have to remember to tell bicyclists coming from that side of town.

[flight: click the image to see the other collages]
i think this is one of my favorite collages. it's built on a card, but the hands and leg escape the borders. i couldn't bear to cut them off, so when they get put into a card they'll be folded over the edge. this would be a great time to learn some pop-up book techniques. :)
the next event is also collage, a guided soulcollage introduction may 2 that is already full. it's being led by someone i know from the unitarian artist's way group who has been trained by the creator of soulcollage, seena frost.
posted by gl. | permalink | categories: artist's way
lsgl: "brain beacon" models
by sven at 11:27 pm
Still working on the Intergalactic Distress Beacon.
At last night's Open Studio event, I found this fantastic image of a brain... It occurred to me that maybe the beacon works on telepathic principles -- so I scanned the image and turned it into my bump map.
The texture seems a little more "realistic," I think, if I also use the brain image to modify the color map.
I created a new model. This one has a larger mirror; the legs are smaller; the satellite dishes are even; and there's a rim at the base of the barrel. I also made the brain texture a bit bigger.
The idea of the brain texture seems cool -- but I'm not really convinced it's working out. So I replaced the brain texture with some plain metal textures.
Looking at the geometry with a plain texture on it, I realize I'm not very happy with this model. The "torso" looks too barrel-like to me. It lacks elegance...
All told, I don't think today's models really improved on my previous work. So far, the oriental vase model seems to be my favorite.
posted by sven | permalink | categories: let sleeping gods lie
April 17, 2007
lsgl: more beacon models
by sven at 11:59 pm
More work on the Intergalactic Distress Beacon today.
I did dozens of ballpoint pen sketches, then tried out a couple in LightWave. The first one is the closest to what I want.
I didn't mean to have it light up like a paper lantern... I'm still figuring out how translucency works. I may use a more subtle version of this effect when the machine gets turned on. If I give the light inside an animated texture and a reasonable fall-off, I think I can get something pretty delightfully bizarre going on.
I'm still trying to figure out how the explorers will interact with the beacon. It seems like there needs to be a control panel or buttons of some sort.
Had a new idea today: have a magic mirror. Like Arthur C. Clarke said, "Any sufficiently advanced technology is indistinguishable from magic." I can imagine the Elders staring into a palantir...
I like the last model of the day least of all. It looks too much like the transportation chamber from the 1986 version of The Fly -- crossed with a dalek.
I've been fiddling with scale. I want the beacon to big even compared to the Elders -- but the explorers also need to be able to interact with it. Figuring out how to make it functionally eye-level for both species has been interesting.
posted by sven | permalink | categories: let sleeping gods lie
April 16, 2007
lsgl: beacon mock-up
by sven at 11:59 pm
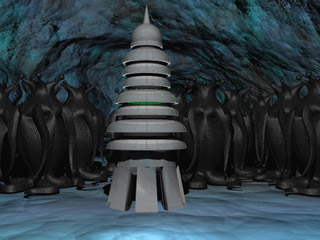
I feel like I'm back in the belly of the beast... When I wake up, the first thing I think about is what has to happen next on the movie -- and as I'm drifting off to sleep, it's the same.
Today's project was to do a mock-up of the distress beacon. I'm not satisfied with the shape of the thing yet... But I've got a "metal" texture that I could live with -- and the last-minute test of putting a light inside of the thing is promising.
Friday and Saturday were spent trying to get my old DV footage to fit the new storyline. I've pulled out every trick I can think of:
- flipping the image, so the characters face in the opposite direction
- shrinking the footage down to make the characters seem farther away
- taking characters from two different shots and compositing them together
- speeding up and/or slowing down footage
- running footage backwards
See, what was the Captain beckoning in a previous shot -- it becomes an angry gesture when run backwards! (Why not?) ...Makes my brain hurt, but I'm getting somewhere. And I figure I'd better be front-loading as much of the work as possible.
posted by sven | permalink | categories: let sleeping gods lie
April 12, 2007
casting in urethane foam
by sven at 8:00 am
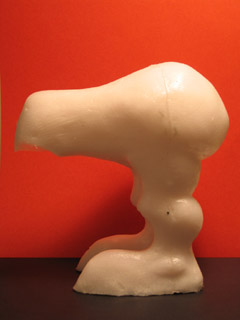
On Monday and Tuesday I did my first casting using foam latex. That makes this an opportune moment to mention that last month (3/17) I also finally got around to trying out flexible expanding urethane foam.
I got this particular urethane from MonsterMakers.com. It's the self-skinning variety. Like with the foam latex experiments, I decided to use the two-part mold that I made for the flightless bird sculpt last year. Since my interest right now is in the material itself, I didn't bother to make a puppet armature.
I was hoping to be happily proven wrong... But as expected, the casting turns out to be too tough for animation purposes. It's like a Nerf football -- but with skin that's almost as tough as a basketball in places.
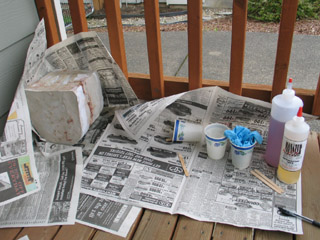
Urethane foam (I believe) has some of the same constituent chemicals as super glue. It'll stick to just about anything. So, before putting it into my mold, I painted the mold walls with liquid latex.
[That's a trick I read about in the StopMotionAnimation.com handbook... Although, re-reading the article now, I see that the latex trick is actually intended for non-skinning urethane. Oops.]
For the first pour, I mixed up 100 grams of component A and 50 grams of component B.
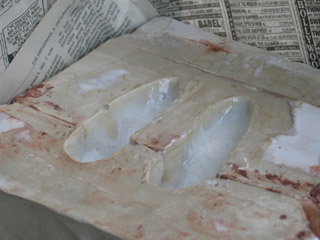
At first, it looked like I'd done a good job of estimating how much foam to mix. The material foamed up and came out of the feet... But then, to my surprise, it sank back down a ways.
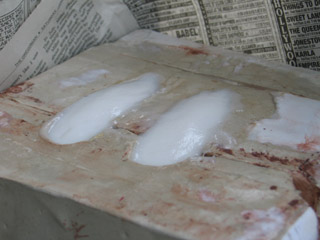
I mixed up a second batch to fill in the soles of the feet: 20 grams of component A, 10 grams of component B. I figured that ought to be more than enough.
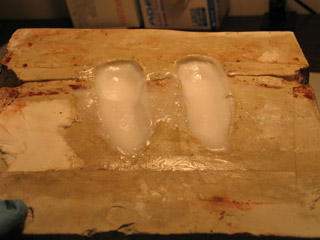
When I filled the feet, the foam rose up -- and then sank down again. Hm. The foam self-skins when it's against a mold wall... But I guess its surface tension breaks when in the open air. Curious.
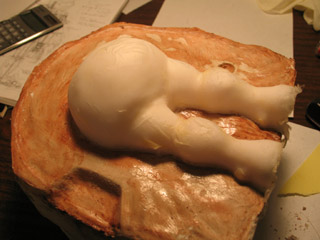
It took some work to get the casting out of the mold. Definitely an effort -- but not terrible.
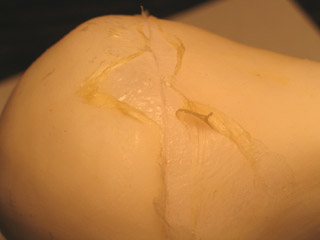
The latex skin didn't hold up very well. Particularly at the seam between the mold halves.
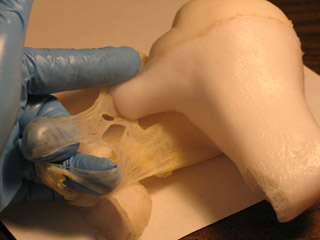
I just went ahead and peeled off all the latex. It came off easily. Unfortunately, the brush marks (from when I'd brushed the latex into the mold) all transfered to the urethane.
That being the case, I'm thinking that if I ever do flexible expanding urethane foam again, then I'll probably just use vaseline as my mold release -- and skip the latex.
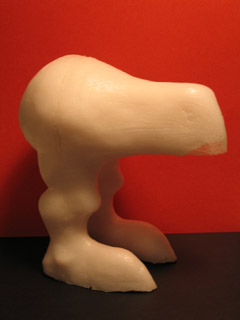
The final product isn't bad -- if it were intended to be a static sculpture. The main flaw is a small bubble that got trapped at the end of the beak. [I probably ought to have rotated the mold.] The seam line is minimal.
Conclusion: This particular brand of urethane is useless for puppets -- unless, perhaps, they're very thin puppets. The material is just too tough.
posted by sven | permalink | categories: stopmo
April 11, 2007
foam latex - first attempt
by sven at 10:25 pm
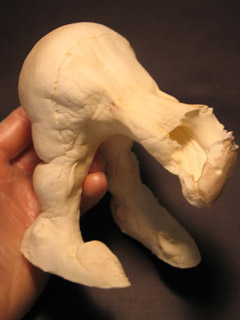
Monday (4/09) I did my first run of foam latex. It was a complete failure. Not unexpected, but demoralizing nonetheless.
Yesterday I did my second foam run. The results (pictured above) are unusable -- but still an improvement.
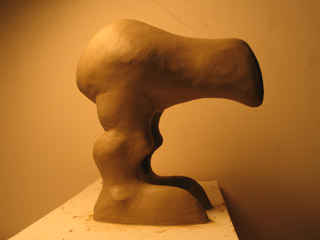
Here's the original sculpt, which I did back in May 2006. Sort of a wingless bird creature.
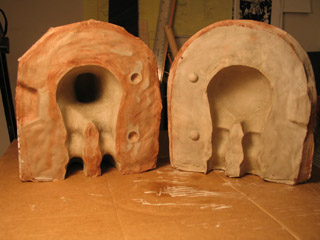
And here's the mold that I'm working with, which I made last June. It's just been sitting around, waiting for me to get back to my line of research on casting materials.
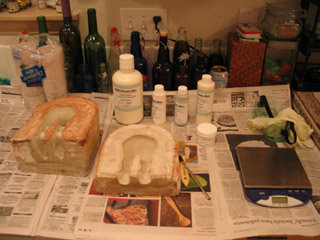
Why am I getting back to this project now? Because I wasn't happy with the tentacles on my first elder thing puppet. I want to test some different materials -- and rather than go through the whole process of making a new mold, I figured I'd get through my first mistakes more quickly by just using the mold I already have.
For the same reason, I decided not to bother with making an armature right now. This is purely about figuring out how to get the foam latex to do what I want it to.
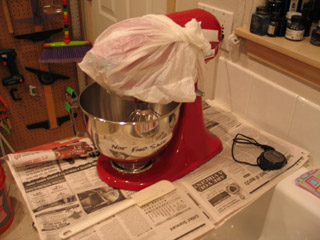
I bought a new mixing bowl and whisk attachment for my kitchen mixer that will be dedicated to foam latex. I covered the mixer's head with a plastic bag to help protect it from splashes. A plastic bag underneath the bowl would be a smart addition, too, next time.
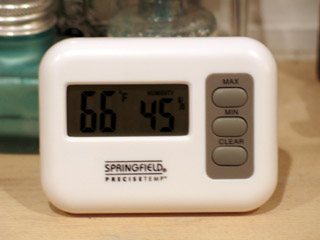
I looked around several stores for a a cheap, digital combo-thermometer/hygrometer (humidity detector). I finally found this one at Walmart, which just what I was looking for. It cost about $8. (Radio Shack was a real disappointment -- they only carried a $40 model.)
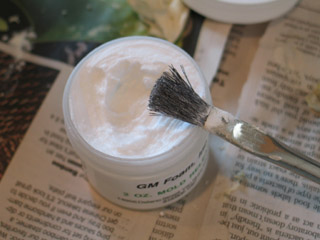
First thing to do: dust the inside of the mold with mold release. I need to remember to pick up a big batch of cheap acid brushes at Harbor Freight... You go through a lot of them in most casting processes.
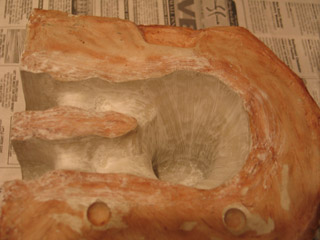
After the mold release dried, I took it out on the front porch and dusted out the extra with a chip brush. You know it's dry when it's turned from clear to white.
FIRST RUN
For my first foam run I decided to do a standard batch -- 150 grams of latex base -- so I could get a feel for how much that makes. The room temperature was 69 degrees, and humidity was 40% (it rained earlier in the day). I decided to go with the "normal room schedule" (68-72 degrees F).
The bad smell of foam latex is legendary. I wasn't all that impressed, though.
When you open up the canister, you get a strong smell of ammonia. If you've worked with liquid latex before, it's about the same.
When you bake the foam you get more of a sulphur smell, like eggs. It lingers in the room... But after airing out the studio and lighting up some vanilla candles, I think we'll be OK.
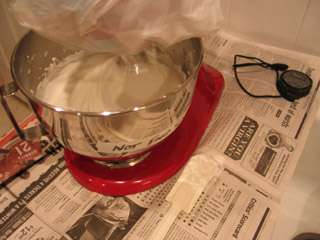
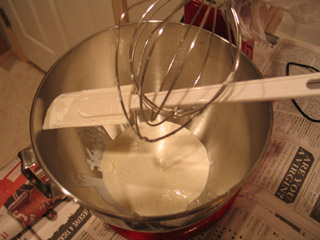
When I poured the first three ingredients into the mixing bowl, their level was about an inch below the bottom of the bowl's handle. When the foam reached peak volume, it had risen about halfway up the bowl's handle.
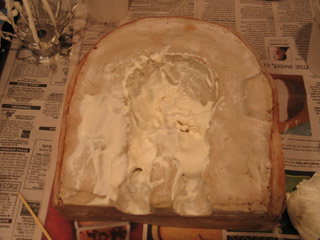
The foam gelled before I could get it into the mold. This was probably within a minute of turning off the mixer. I was trying to quickly brush some foam in with an acid brush, and then...
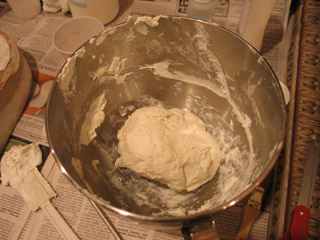
As I tried to see if I could quickly get at least some of the foam into the mold, it collapsed into a gummy wad, about the consistency of bread dough.
I noticed that the room temperature shot up to 72 degrees just during the last minute or two of the run (the thermostat turned on). That was probably a contributing factor.
SECOND RUN
Before I could do the second run, I had to clean out the mixing bowl, the whisk attachment, and the mold. I reapplied mold release.
The temperature was 68 degrees; humidity was 40%. I decided to decrease the refining period from 3 to 2 minutes, and the ultra-refining period from 3 to 2 minutes. I decreased the amount of gelling agent from 14 to 11 grams.
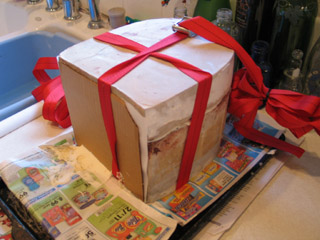
This go around I had enough working time. I quickly brushed foam onto the mold walls, then poured more in until each side was full. The foam had the consistency of whipped egg whites.
I strapped the mold shut... My straps are 13 feet long -- which is way too long. I used twist ties to try to keep the spare length out of the way.
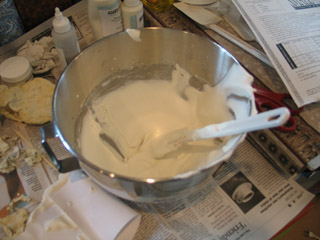
The flightless bird is fairly bulky puppet; even so, I only used up between half and 2/3 of the material that I made. I estimate that there are between five and six 150 gram batches in my kit... So I've already used up a fair amount.
There was an area of foam at the very bottom of the bowl that never gelled. This suggests to me that there's an area there that the whisk doesn't reach... Good to know!
I baked the mold for four hours. I was aiming for 190 degrees. My oven thermometer revealed that it was difficult to get this temperature. The oven tended to hover at 180 degrees... And then if I turned it up to 200, it would sometimes go up to 210.
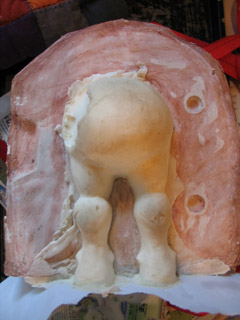
The initial demolding looked promising. The rear of the bird had a big air bubble -- but was otherwise pleasantly springy to the touch.
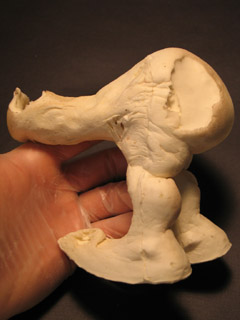
The nose, however, was another matter. Not only did it have a huge air bubble in it -- when I demolded it, it collapsed like a bad soufflé.
I should have let this mold bake for at least 6 hours... And maybe more. Not only is this a rather puffy character -- the mold is also ridiculously huge. I think the stone must have been doing a lot to insulate the nose from the oven's heat.
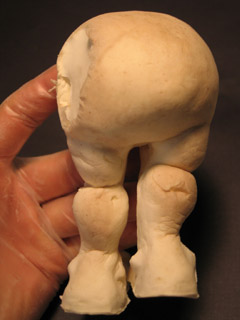
The entire thing has shrunk a little bit... But the rear end has maintained a consistency that I believe is what cured foam latex should feel like. So: progress.
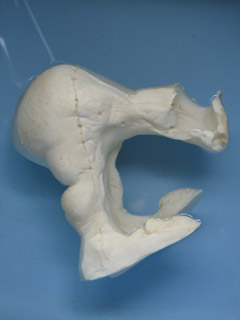
This morning I washed the foam in soapy water, as you're supposed to do. It was pretty neat to watch the foam suck up water.
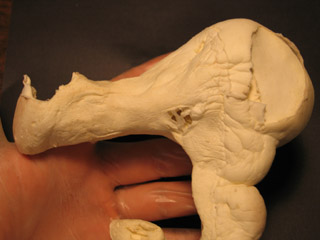
After squeezing out the water, there are wrinkles in the foam that I don't think are going to come out. I know that it's the nature of foam to wrinkle... Still, this doesn't make me love the material more!
I'm slowly getting the feel for this stuff... But I'd rather be using a material that involves less guesswork and witchcraft in its preparation.
I'm reminded of the silicone vs. foam latex comparison I did last May. Back then I concluded that I'd probably wind up using silicone as my primary casting medium. Now that I've had a little experience foam, silicone is seeming pretty appealing once again.
posted by sven | permalink | categories: stopmo
April 10, 2007
guest animator: hazel malone
by sven at 8:00 am
Hazel Malone is an aspiring animator here in Portland. To help her pursue the art, we've been scheduling time and setting her up with my animation equipment in the studio. Here are the test clips that she's made so far...
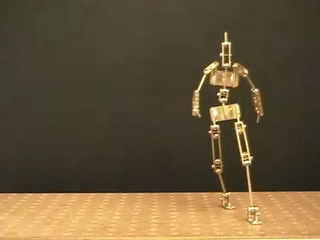
This quickie was what she did on the first day she came over (Feb 8). That's the Diplomat armature she used.
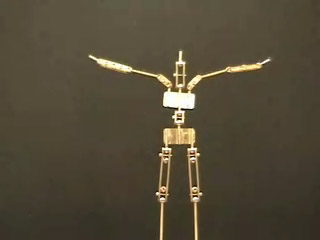
This second clip was done on Feb 12, again with the Diplomat. Personally, I see the influence of the Brothers Quay in the vibrating, flapping arms.

The third clip was done on Mar 29, this time with the Man of Steel armature. She described its action as "cowering in fear."
This clip also includes footage of Hazel's first puppet...
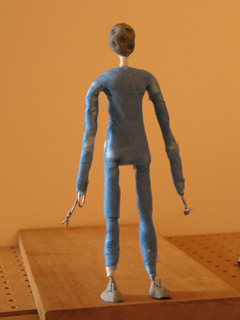
I'm very pleased that she found the demo wire armature tutorial I wrote helpful in constructing this. We've had a number of long phone calls, talking about the minutia of puppet fab and where to purchase materials locally.

The fourth clip was done on Apr 6, entirely with Hazel's puppet. I'm really charmed by the pup walking off the edge of the animation table.
We're going to have to see about getting these uploaded to the new Puppet Training gallery over at StopMoShorts. (nudge!)
posted by sven | permalink | categories: stopmo
April 9, 2007
toby's first easter
by sven at 12:00 pm

Toby seemed to really enjoy his first Easter.
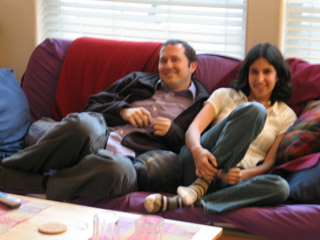
Our friends Kristen and Todd came over. They did us the honor of hiding eggs for our favorite fabric-based life form.
(We're not crazy if it's a mass hallucination... Right?)

We took Tobias to the bedroom to wait while Agent K and Sidekick Todd did the hiding...
Toby was very eager.

Egg #1: A purple one, sneakily hidden in the purple comfy chair from The Great Escape.

Egg #2: Yellow; hidden atop the butterfly kite that hangs on the livingroom wall.
(Toby has a very active imagination.)
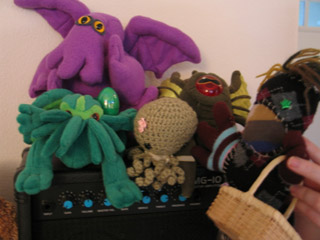
Egg #3: Green; hidden among the Lovecraftian denizens atop the piano.
Miss Suzie, the crocheted octopus, came into our home back at Christmas -- but this was Toby's first time meeting her.
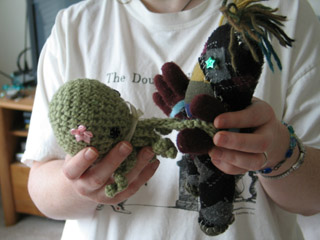
He was pretty astonished to meet someone with even more arms than him. I think they hit it off...
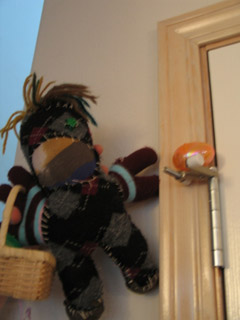
Egg #4: Orange; sitting atop the doorjamb of the closet by the staircase.
This one took the longest to find. It was above Toby's eye-level.
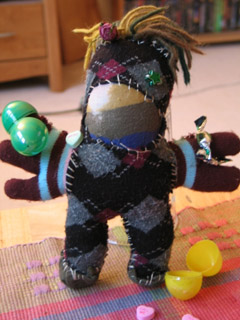
Toby's loot: Germ-shaped candies, some little mints, candy hearts, and a miniature rose (which came back with me from Halfland).
posted by sven | permalink | categories: toby
improving the next armature
by sven at 8:00 am
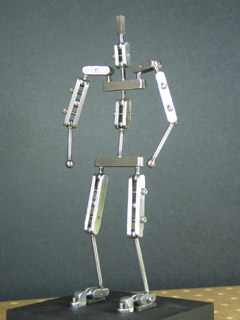
Here is the master list of things to improve on my next armature project.
A. GENERAL
- The biggest problem with the Drifter is that all of the joints have drift. Solving this problem has to be top priority.
- Avoid the lathe, drill press, and grinder. Try doing all their operations on the mill. My current belief is that the mill will be able to give better results on all accounts.
B. DESIGN
1. Joints
- drift must be eliminated
- there should be more space between sandwich plates than just the diameter of the rod
- leave more of a lip between a socket and the edge of the plate
2. Shoulders
- Double-jointed shoulders kink up. Step-block joints are the minimum requirement for adequate shoulders. Hinge and swivel joints would be even better.
3. Feet
- a foot bends at the toe, not in the middle
- the toe needs enough surface area beneath it to be able to grip the table when it’s tied down
- the sole should not be so long as to scrape the floor when the foot bends
- soles should be at least as wide as the ankle joint
- soles should be 1/16” thick, not 1/8”
4. Things To Add
- hands
- rigging point for jumps
- ”rectal tie-down” for sitting
C. PROCESS
1. Set-Ups
- make T-spacer that’s narrower than the sandwich plates
2. Ball Holes
- make attachable milling vise jaws to correct for loose jaw tilt error when locating ball center
- use “drill chuck tool holder” attachments to allow precise, uniform depth of holes
- only use center drill to “center punch” a mark -- not to drill any deeper
- use end mill to get a flat bottom inside the hole
- countersink the top rim of the hole
3. Sockets For Balls
- find way to eliminate plunge chatter
- drill holes at bottom of sockets to eliminate drift?
4. Radiusing
- use corner-radiusing end mill (to avoid grinder dust and plier marks)
5. Through-Holes
- make a slotted riser to hold work pieces up while being drilled
6. Threaded Holes
- try using the drill chuck method for tapping
- countersink rim of hole
7. Brazing
- use hard silver solder instead of SafetySilv 56
- leave parts in pickle longer
8. Maybe...?
- does the stock need to be squared?
- counterbore holes for screw heads?
- use a vibro-tumbler to remove firescale?
- do joint trimming with an end mill and an angle table?
posted by sven | permalink | categories: stopmo
April 8, 2007
lsgl: new script + animatic
by sven at 8:01 am
I'm back at work on Let Sleeping Gods Lie. It's my priority project for the next three months.
Yesterday I was determined to make some big progress. I managed to pump out an all-new chunk of script... And then on top of that, threw together a Quick & Dirty animatic.

The story told in the animatic is supposed to be a telepathic message that's accidentally triggered by the explorers when they discover the Elders' rescue beacon.
The animatic's been very helpful already. I can see now that there's a big section in the middle that I don't have visuals for yet. I know that I'm looking at putting together about 2 minutes of animation for this bit. And I can see that if I actually go through with this concept, I might well be biting off more than I can chew. (As usual.)
I'm really excited about a new sound design concept: since the Elders have five faces, I figure they should speak in multiple voices -- like a greek chorus. The voices in the animatic are just a test-of-concept. The script that's included below is a version that's already been revised, after having completed the animatic.
So, here's the "Deep History" script as it stands now...
For three voices:
- LO: A deep voice. A weary historian and authority.
- MID: A mid-range voice. A soldier.
- HI: A high voice. Somewhat vulnerable. A young child?
Except where noted, when one voice is speaking then the others say the same words at the same time, quietly in the background.
ALL:
We came from the first stars. Empire -- spanning the million worlds.
LO:
With the old science, our people created servants. Mindless and gibbering: the shoggoths.
We raised great cities on this planet.
And ruled as gods.
* * *
ALL:
War. With the ancient king.
MID:
Jealous, his army of leeches fell upon us.
Battle raged ten thousand years. We filled oceans with their blood.
Then: victory! The enemy is imprisoned. Trapped and dreaming on his sunken throne.
* * *
LO:
We celebrated our strength.
HI:
Told and retold the stories.
LO, HI:
But gods remembering old glory -- become weak.
Our people grown decadent: The old science is lost now. The secret of space-flight -- forgotten.
Dependent on the servants, we surrendered our power. We gave them intelligence. Language.
The shoggoths speak in voices that are --
ALL:
Our own.
In the beginning merely beasts... They had become our slaves.
* * *
MID ALONE:
Everywhere at once they rose up.
ALL:
Rebellion.
MID ALONE:
And we were helpless.
They smashed the cities. Murdered their own creators.
For our crimes, they hunt us down.
HI ALONE:
One by one, with immortal hatred. Until none are left.
We hide ourselves, waiting. To be rescued like children.
If anyone is left to hear this...
MID ALONE:
Send to us...
ALL:
Help.
posted by sven | permalink | categories: let sleeping gods lie
brazing and shining "the drifter"
by sven at 8:00 am
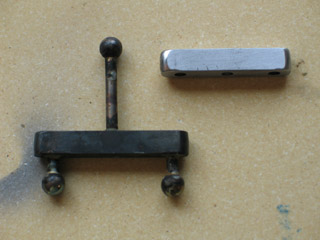
My brazing and shining skills have improved a great deal. The finished Drifter armature has really solid joins, and is really reflective when you throw a light on it. In this post I'll walk through the techniques I used on this latest project.
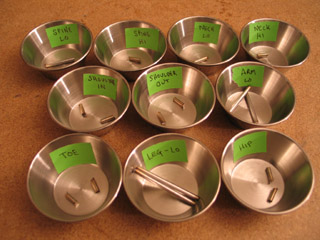
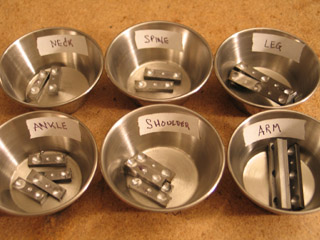
Here are all the segments of rod that I used for this project, in ten labeled bowls. They're actually bowls for dipping sauce, which I picked up at Pittman Restaurant Supply. ...A lot of time was saved, being able to confidently reach for whichever piece of metal I needed next.
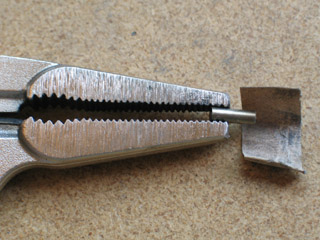
I prep the ends of all the rod segments by sanding them with a bit of fine-grit sandpaper. The purpose of this is to make sure that the rod is clean before brazing -- and to help make sure that the rod will fit inside of the ball hole.
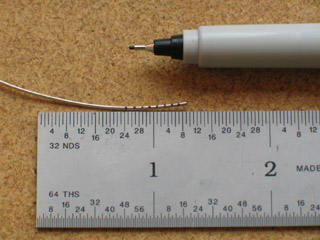
I'm using SafteySilv 56 to do my silver soldering. I use a fine-tip Sharpie marker to mark off 1/16" increments on the wire. I find it works best for me to have bits of soldering wire that are all about the same size. Instead of just eyeballing how much wire I need, I can keep notes and figure out how many bits particular joins require.
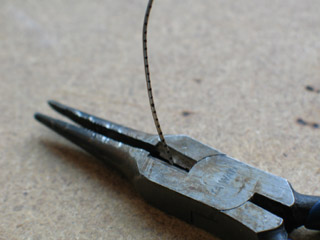
When I cut these little bits of SafteySilv, they want to go flying through the air. To avoid this, I keep my pliers flat against the table as I'm cutting. The little bits are trapped neatly underneath.
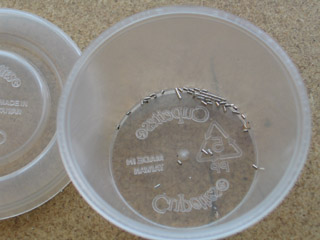
Once I've got a nice supply of silver solder bits, I put them into a plastic cup with a lid.
The lid's important. It's likely that there will be left-overs after I'm done brazing. I'll want to keep them for later... And at some point, it's innevitable that the cup is going to get tipped over. If there's no lid, the solder bits will definitely get lost.
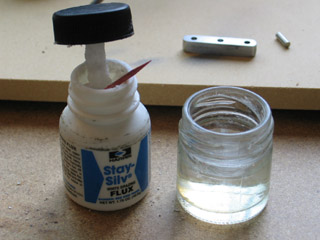
I'm using Stay-Silv flux. It tends to dry out. I've got a new trick to deal with that.
I use my pliers to cut a toothpick in half. I dip the broken end of the toothpick in water, and spread it over the surface that I'm going to braze. Then, I use the toothpick to pick up some flux, and I mix it into the moisture. This works particularly well when you're trying to get flux into tiny ball holes.
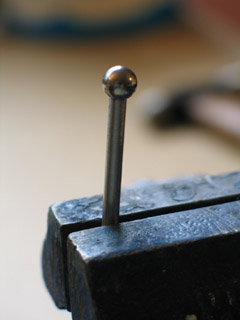
For brazing 1/4" dia. balls onto 1/8" dia. rod, I've found that one 1/16" piece of silver solder is the right amount. It creates an unbreakable bond, and almost no solder comes out the seam.
[Note: For joins where the rod is connecting a flat area (e.g. the chest block) you want the solder to flow out of the hole. With the ball, overflow would impede motion; but that's not the case in flat areas. For these, I use 4-5 pieces of solder to get a visibly trustworthy bond.]
Tom Brierton, in Stop-Motion Armature Machining, demonstrates brazing with the rod on top of the ball. Lionel Ivan Orozco, in his brazing balls to rod tutorial, demonstrates brazing with the ball on top of the rod. Which is the better method?
I believe it's better to braze with the ball on top of the rod. This way if molten solder and flux come out of the ball hole, they'll mostly run down the rod -- rather than damaging the ball itself. Also, by using this position you can usually grip the rod in a vise -- which holds it in place much more reliably than a pair of pliers. (If you opt for this method, refer to LIO's tutorial for some important details.)
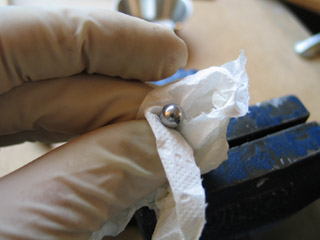
Before I light up my torch, I use a bit of toilet paper to wipe off the ball -- hopefully removing any stray drops of flux. Stray flux discolors the metal when heated... And you can't always see the clear fluid on the ball's surface.
I used a "little torch" to do the brazing. I used an oxygen-propane mix and a #7 tip.
Halfway through the job, I ran out of oxygen. Lesson learned: keep spare canisters of oxygen and propane on hand. I've been surprised at the variance in price. Oxygen costs (if I remember correctly) about $16.50 at Simon Golub & Sons -- But less than $9 at Ace hardware. I'll be keeping my eyes out now, looking for the best price.
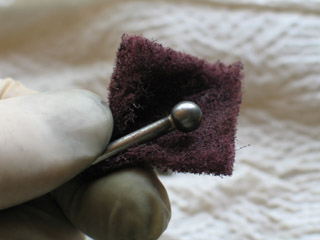
Using a big flame on the balls, they heat up quickly and don't develop much firescale (blackening). To clean them up, I use a bit of medium-grade ScotchBrite pad.
Initially when I heard about ScotchBrite pads, I thought it was the same stuff that you use to wash dishes. Well, it's the same makers -- but a completely different product. This stuff you find at a good hardware store. In Portland, I get it at W.C. Winks. It doesn't seem to be available at Ace (which is located much closer to me).
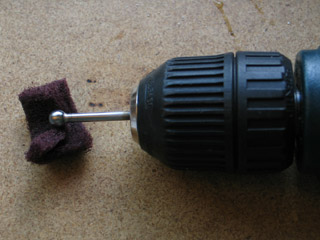
Here's a handy trick I came up with... You can put a ball-rod assembly into the chuck of a hand-held power drill to speed up the cleaning process.
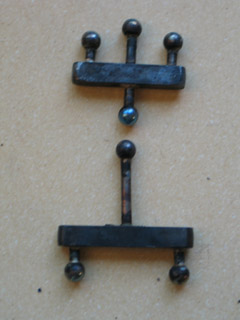
When I braze the armature's chest and pelvis, the firescale problem is much worse. Because there's more metal to heat up, I have to hold the flame on it much longer. If there's a way to avoid blackening my parts like this, I'd be very grateful to learn it!
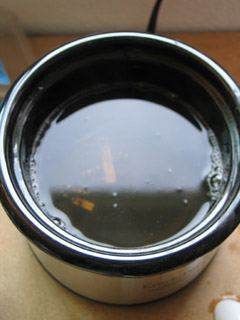
I now look at pickling as being mostly about dissolving leftover flux... But it does help loosen and get rid of some of the firescale too. It may be that if I left the parts in the pickle for a longer period, I'd get better results. I'm unclear at this point how long parts ought to sit in the liquid.
I'm using Sparex #1, which is specifically for steel. There's a note on the label that it doesn't work on stainless steel unless you run an electrical current through the mix... Something that I don't see myself attempting anytime soon!
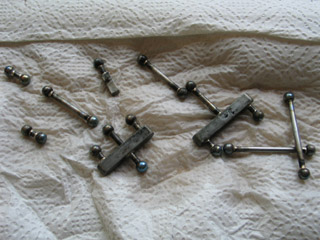
Here are the parts after being pickled. Better -- but not great. The rest of the shining I did with ScotchBrite. (I also used fine-grit sandpaper on the large flat areas.)
difficult bits: the chest, pelvis, and feet
Constructing the chest and pelvis blocks is rather challenging. Figuring out how best to hold the parts, and in what order parts should get brazed together -- it takes some thought. The following photos show a series of set-ups that worked out pretty well for me.
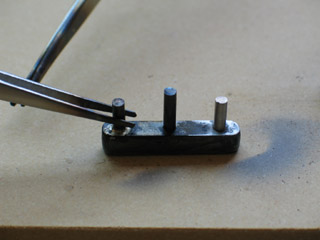
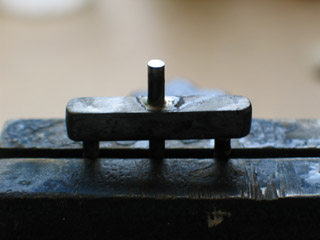
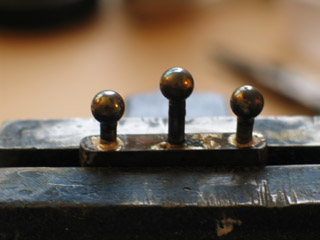
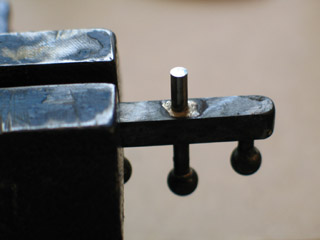
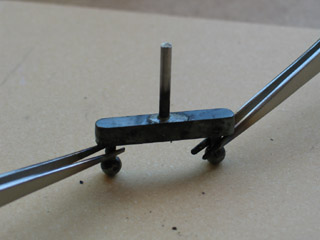
For me, the feet are usually the most challenging part of the armature to construct. I'm not entirely happy with this armature's feet, but let's take a closer look at them.
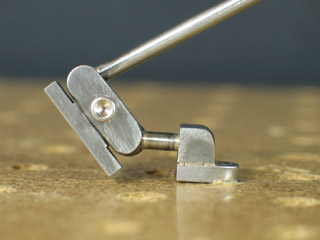
Problems with the feet:
- I made the sole of the foot too long -- it actually cuts into the ground when the armature goes up on its toes
- the joint in the foot should be closer to the toe, not right in the middle
- the sole of the foot isn't wide enough to feel really stable
- the sole of the foot is overly thick
- the toe barely has enough surface area to grab onto the floor when its tie-down is tightened
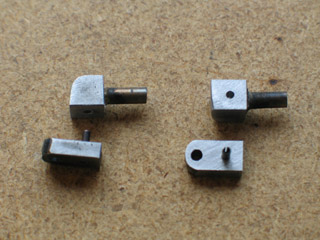
For the feet, I had to braze flat surfaces to flat surfaces. I find this more difficult that brazing balls onto rods -- where the silver solder is neatly tucked inside of the hole, and the rod holds it in place.
I used roll pins (AKA "tension pins") to create a mechanical bond between the parts that I wanted to braze. This makes the join stronger -- and holds things in place while you're applying the flame.
These are 1/4" long, 1/16" dia. roll pins that I got at Ace hardware. In order to make an appropriately sized hole for them, you need a #52 jobber. (Figuring out what size drill bit I needed, and then going out to buy it -- that ate up a work day.)
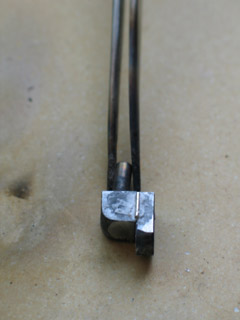
When you're brazing, the solder wants to travel toward the source of heat. That means that you can't just shoot fire at it -- you have to figure out where to place the flame so that the solder will flow where you want it to go.
For brazing the toe -- which you see above -- I laid wire on the side of the toe (which was pointed upward) and applied heat to the front. This worked adequately well, but not great.
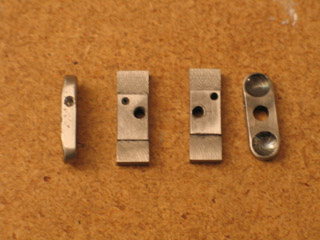
For the sole of the foot, I milled away a little metal on both ends so the balls of the joint couldn't accidentally rub. (I could also have just used a file -- but I was feeling fussy.)
I really needed the roll pins to hold the parts together for this set-up. In the photo above, the smaller holes are for the pins.
Heating up the ankle joint created firescale in the sockets, which is difficult to ScotchBrite out. One more reason why I'd like to learn how to better avoid firescale in the first place!
posted by sven | permalink | categories: stopmo
April 7, 2007
stopmo and storytelling skills
by sven at 11:59 pm
Last night I was thinking about making a new animatic for Let Sleeping Gods Lie. I sat down at the keyboard to capture some of that inspiration -- and the following "essay" (?) tumbled out.
(The tone of it sort of makes me feel like I'm standing on a stage, delivering a commencement speech to myself.)
...
STOPMO & STORYTELLING
A puppet is just a special effect.
Its sole purpose is to look good in front of a camera. It doesn't matter how well or poorly constructed it is. Anything that looks good, is good.
The goal is to make stories come to life on screen. Or if not "stories," then at least moving art that can be projected in a movie theater or on a TV.
There is a strong temptation to simply make exquisite dolls -- and dollhouse worlds for them to live in.
There's a strong desire to build perfect miniature versions of your characters, which you'll then -- someday -- breath life into.
It's not an entirely bad impulse... In order to make it through the telling of your story, you want puppets that are sturdy, and puppets that don't fight back when you try to pose them.
But let your imagination and excitement be for the storytelling.
If you work at the craft of making well-built puppets, then that is what you will become good at.
If you work at the craft of telling stories, then you will produce animations that look god-awful -- but you will produce a lot of them.
When your excitement is for making up stories, making up scenes, imagining powerful images -- then you can take that energy and do something that people will find worth watching -- in just an afternoon. It'll lack production values... But that's not the point.
My point is that creating stories is a skill. It is a skill that you can practice and develop.
It's not the same thing as just writing a script. (That's a skill, too.) What I'm thinking of is coming up with a story of some sort, and then getting it on screen -- no matter how rough the production values are.
If that's your passion... Then other skills will still develop (perhaps not as quickly as if they're your focus) -- and they will be appropriately subordinate to the greater cause.
Imagine that you have a collection of sketchbooks. One sketchbook contains the series of armatures that you've made while developing your skills as an armature-maker. One sketchbook contains the series of maquettes that you've made while developing your skills (and style) as a sculptor. And in another sketchbook, are the stories that you've made films of.
You can't learn how to be a painter very well if you spend the first four years of your career making just one painting. You need to make as many paintings as possible -- knowing that your early works won't satisfy you -- but that they are the first links in a long chain that eventually leads to what you want.
So imagine a story, and then get it onto the screen as quickly as possible. In a day. Half a week at most. Use still photographs, or hand puppets, or cut-outs -- whatever you know how to use well enough so that you can get the idea out.
Because in the end, every aspect of film production is about IDEAS.
The story is an idea. Making a better armature -- it's about your ideas surrounding armature-making. Sculpting: if that's what you find yourself working on, then there are ideas there that you're pursuing, too... Or rather, ideas that are pulling you on.
Let go of what your hands are drawn to do... Just long enough to look at all the different kinds of things that you could make. That you could study... Story. Sculpting. Lighting. Armatures. Mold-making and casting. Puppet fab (build-up, painting, costumes). Script-writing.
[Again, making stories and writing out scripts -- they're two different things.]
Be "meta" enough to switch between areas of study. Try to consciously choose what it is that you're going to study next.
posted by sven | permalink | categories: let sleeping gods lie, stopmo, writing
serena barton's "layers of memory & imagination"
by gl. at 5:51 pm
we hosted the collage workshop "layers of memory & imagination" a couple of weeks ago. it was a small but fun class. for the first time in a while, i was actually a participant as well as a host! serena is a gifted, caring facilitator who managed to be both accessible and non-intrusive.


[a couple of my collages from the workshop; click each to see them larger]
we were asked to bring images to work with that we found personally meaningful. most people brought family photos, but i brought these illustrations from stories i've carried with me for years. the first collage includes an image of yvaine from stardust; the second is silent bianca from the collection the girl who cried flowers. the first collage has gold leaf, braille, and a transfer of the august stars. the second has photocopies of an 1800s marriage contract i found in a dusty box on the floor of a used bookstore in England.
though i think everyone who came had a good time, i was surprised there wasn't more interest in this workshop. collage is our mainstay event, but it's very casual and short, so i thought people would jump at the chance to do it with an experienced instructor and a longer, deeper focus. and i wanted a good turnout for serena, because she rearranged her schedule to accomodate a student for another class (as well as an instructor who flaked on me).
i am more hopeful about serena's next workshop, "not just a pretty face". it involves oil paints and canvas, which makes me nervous (and nervous is often a sign i should go ahead & take the class, too :). at the moment we only have two more spaces left!
posted by gl. | permalink | categories: classes & workshops
sandwich plates for "the drifter"
by sven at 8:00 am
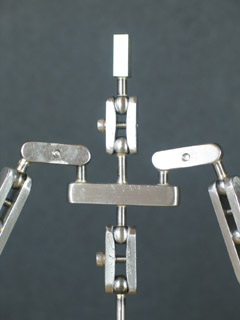
The sandwich plate joints on the Drifter don't work nearly as well as I'd like. I want to write out some notes about how I made them, while the process is still fresh in my mind...
Hopefully the notes will be of some use when I get around to making my next armature project.
A. CUT-OFF SAW
The first job was to rough cut my stock. I used 1/8"x1/4" 1018 steel bar for the sandwich plates.
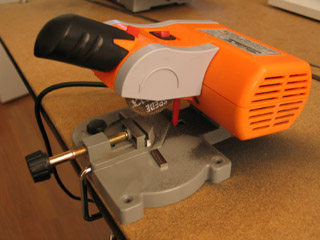
Now that I've got an abrasive wheel on the mini cut-off saw, it works great! For estimation purposes, it's good to assume that a cut is 1/16" wide... So, when I'm doing a bunch of cuts off of one strip, I tend to allow for 1/8" between the pieces I want -- which should leave a safe margin of 1/32" extra on either side of the cut.
B. MILLING
Next stop: the milling machine.
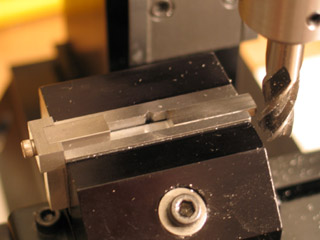
My general approach to making the sandwich plates this time around: use a T-spacer as often as possible. The job of the T-spacer is to give me identical registration each time I put a workpiece into the milling vise. All in all, the approach seemed sound.
After I've rough-cut a piece of steel, I need to face one side of it on the mill. One side has to be perfectly square -- or else the T-spacer won't do me any good.
(Note that the T-spacer in the photo above isn't being used for registration, but rather to balance out pressure on both sides of the vise.)
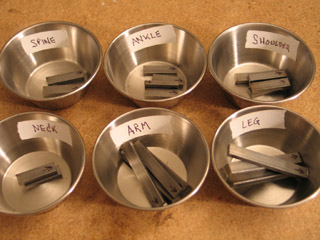
After I facing a plate, I'd mark the square side with a fine-point Sharpie -- just so I'd be clear which side was which.
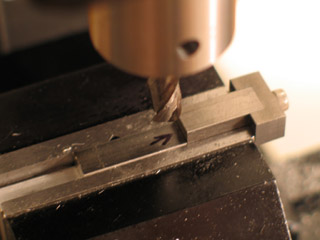
The more I think about it, I think I could have done a better job constructing the T-spacer. I measured and cut the two pieces of metal, and then screwed them together. I probably should have gone through those steps -- but left the nose long. Then, I could have milled it and been certain that the end was exactly the right length and perfectly square.
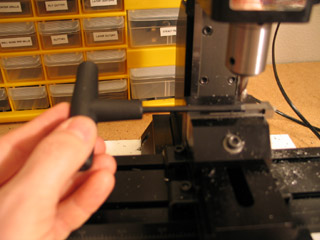
The other error I made with the T-spacer is that I made it .25" wide. I'm now thinking that I should have made it slightly narrower. After I got my plates registered, I had to gently tap on the T-spacer to get it out of the vise, and out of my way. Knocking the T-spacer out of the vise surely couldn't have helped my accuracy!
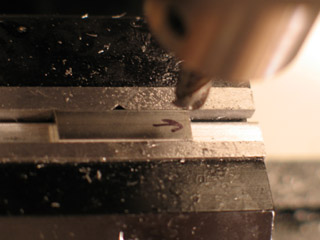
It doesn't matter exactly where in the vise the T-spacer puts the plate -- what's important is just that all the plates go into the vise in the same place.
After I've got my first plate locked in the vise, I use the wiggler to figure out where to drill the first socket. When I get the spindle over that spot, I get to leave it there for quite a while.
The way that I designed these plates, the center of the .25" dia. socket was .125" from the edge of the plate. In retrospect, i think I'd like to have planned for there to be a little bit more lip at the end of the plate. [Although, to an extent there was some lip, since the socket is shallow enough that it doesn't wind up having a full .25" diameter.]
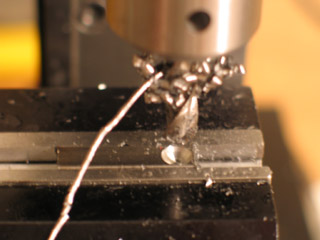
I had serious trouble doing plunge cuts with the ball-nosed end mill.
I got terrible vibrations ("chatter?") which left striations in the socket. I think that problem was due to me trying to make the plunge too quickly. I had assumed that I needed to make the plunge quickly in order to avoid work hardening -- like I did with the drill in the lathe method of drilling balls.
Making a shallow cut -- then backing off and starting again -- seemed to help. I tried making the cut much more slowly, and that also generally seemed to help. Sometimes it felt like the cutter was pulling itself down into the steel without my help -- but I'm really not sure if I was just imagining that.
I'm confused about what the rpm should be for this cut. I chose my rpm based on the shaft of the cutter being .25" dia. -- about 500 rpm, if I recall correctly. But the tip of the cutter isn't that wide... How do you choose an appropriate speed when the cutter isn't just cylindrical?
Drilling sockets is a pretty crucial skill. Based on some trial attempts a few months ago, I didn't think I was going to have any problems. Now I see that I ought to do some more practice cuts to figure this out, before I get into my next serious project.

Here's another principle that was guiding my process on this project: move the spindle as infrequently as possible.
I milled all the right-most sockets in all of the plates. Then I moved the spindle over and did all the cups in its next position. [I'm speaking inaccurately; the spindle doesn't actually move -- only the XY table moves.]
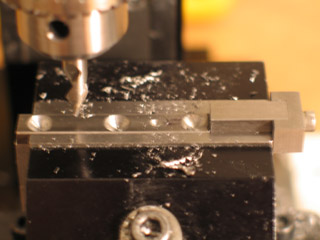
Operations on the drill press are almost always more "quick and dirty" than operations on the mill. I decided that because the holes for screws are designed to have some play in them, I ought to try making those holes on the drill press instead of on the mill.
In preparation, though, I used the #2 center drill to mark where the holes would go.
C. DRILL PRESS
That concludes the work on the mill. On to the drill press.
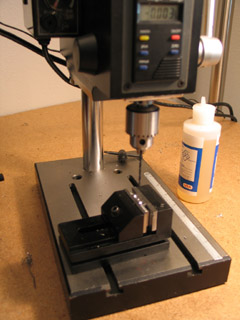
I have a small MicroLux drill press that I got from Micro-Mark a while back. I've been so enamored with the precision of my mill, I've hardly used it...
Still, I figure I ought to be learning to use "the best tool for the job" -- and oftentimes speed is more a more important factor than accuracy. I keep trying to remind myself: Be accurate -- but don't use more accuracy than the task requires.
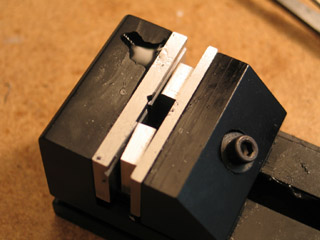
For this job, I made two risers -- so I could drill a hole in a work piece and not be cutting into the riser that's holding it up.
The more I think about it, I think it would probably be better to just make a single riser with a slot in the middle. Having two risers actually wound up being kind of fiddly.
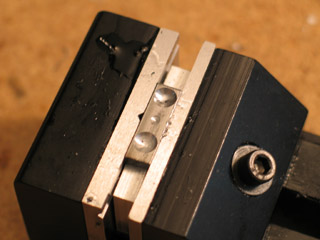
Drilling the holes using the drill press went just fine. I used a #43 jobber for the threaded holes, and a 1/8" drill bit for the through-holes.
Technically, you ought to clamp down the vise, and not hold it with your hand. At one point I got a lesson in why this is the case: My hand slipped, and the drill press picked up the vise and threw it off the table. ...Thank goodness I've chosen to work with small machines!
I gotta say, though, this experience does tempt me to shelve the drill press and just work on the mill. If I stop drilling balls on the lathe, then I could wind up doing pretty much everything on the mill -- which feels sort of elegant... I could clear some table space...
I've been thinking about using the method of tapping holes where you put the tap loosely into the chuck that just drilled the starter hole. ...That would potentially be another reason to not stick with the drill press -- it's easier to get the drill chuck exactly where I want it when I use the mill.
D. BENCH VISE WORK
The next job is to "tap" (put threads into) the screw holes.
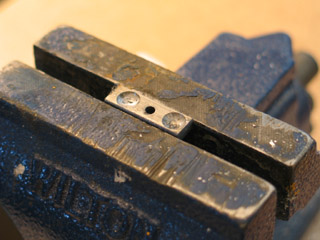
It usually makes sense to do all the operations of one kind on your work pieces, and then move on to the next step. ...Technically, I could have tapped each plate immediately after after drilling it -- while it was still in the milling vise. But I found it easier to just get all the drilling done, and then move over to the bench vise.
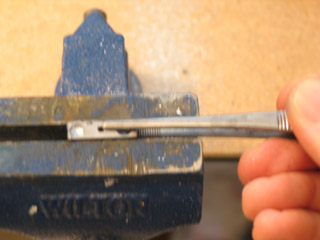
I love it when I've got just the right tool for the right job... Tweezers really came in handy when I needed to put sandwich plates into the bench vise. It's a little thing -- but so much easier than when I was trying to get the pieces placed using a flat needle file or a set of pliers.
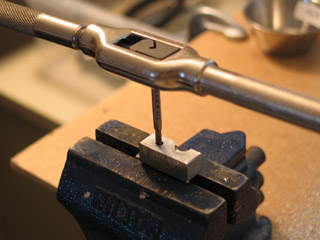
Sometimes my tap hasn't been completely perpendicular to the work piece. I recently read about making a "tapping block" to help guide the tap -- so I decided to try making a quick and dirty one for myself.
It's just a 1/8" hole drilled through a scrap of aluminum. It did seem to help a little when I was getting the tap started. Still, I know I can get my tapping technique better. This is an area for improvement.
[Note: I'm interested in trying out using a countersink for the edges of the threaded hole. Also for the rim of the ball holes.]
E. GRINDER
For the Drifter armature, I decided that I wanted to radius the ends of sandwich plates using the grinder. From what I've read, this is the quickest way to create rounded corners -- and it's usually plenty good enough.
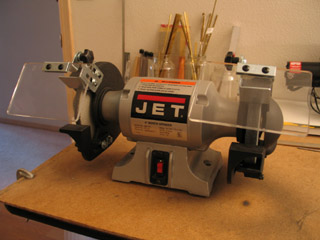
This is a 6" grinder. The wheels that it takes have to be 3/4" (or narrower) in width. I think if I were doing it again, I might buy an 8" wheel so I could use 1" wide wheels -- which seem to be the most common kind.
I've got the course grinding stone that came with the machine on the right, and a ScotchBrite wheel that I special-ordered from Palm Abrasive on the left.
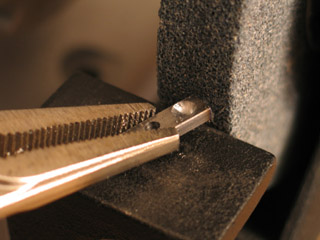
I roughed out a radius using the course grinding wheel, and then gave it a few smoothing passes on the ScotchBrite wheel. The ScotchBrite wheel developed a deep groove, which I'm not too happy about. The groove made work more difficult later on, when I needed to trim the joints.
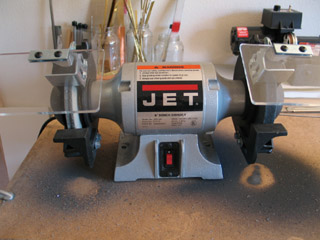
The grinder makes a hellacious amount of steel dust! I'm not sure how far the dust spreads; I'm worried about it getting into electronics that I've got in the same room. I've just purchased a good shop vac, which I hope to jury-rig into a dust collection system. I'm also considering replacing the coarse stone with an extra-aggressive ScotchBrite wheel to cut down on sparks.
I don't like the grinder much. Even with hearing protection on, I noticed my ears ringing a little afterwards. The dust is bad. Using pliers to hold the pieces I was grinding would leave marks on the metal. And occasionally a sandwich plate would skitter across the grinder, scraping up the part's edge.
It may take longer, but I'm eager to try using a corner radiusing end mill on the next project. I may even try using a tilting table and an end mill to trim the joints, rather than the ScotchBrite wheel. Slower, less "artful" -- but hopefully more uniform, functional and professional-looking.
F. FINISHING TOUCHES
After all the machining is done, I give each of the sandwich plates some individual attention.
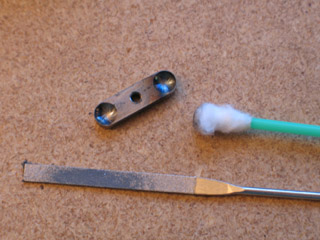
For plates with threaded holes, here's the order of tasks I used:
- diamond file the edges of the threaded hole
- use fine sand paper to shine up all sides (except the one with the sockets)
- use a ScotchBrite pad on the socket side of the plate
- use a tap to clear any residual grime out of the threaded hole
- clean dust out of the sockets with a Q-tip
(Several of those steps aren't necessary for the through-hole plates.)
...
Done!
Well, except for trimming. And it's best to do that after you've done a test assembly of the armature -- after brazing. You want to see how all the joints are working out before you start making special modifications.
posted by sven | permalink | categories: stopmo
April 6, 2007
drilling balls: two methods (part 2 of 2)
by sven at 8:00 am
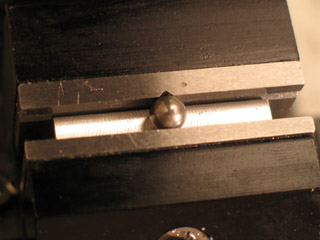
I'm walking through two methods for drilling balls. In yesterday's installment I discussed the lathe. Today I'll be discussing the mill.
METHOD #2: THE MILL
Drilling balls using the milling machine method requires some preparation and more set up time than the lathe method. However, it has several distinct advantages:
- If you have the right attachments, you can determine hole depth precisely.
- Because the ball sits on a hard surface, the drill cannot push it backwards.
- A milling vise is unlikely to mark the ball.
- The hole that you make holds cutting lubricant just where you need it -- which lessens concerns about work-hardening.
- Once a hole has been drilled in the ball, it may be possible to mill the bottom of that hole flat. (I haven't tried this idea out yet.)
- After you're set up for this job, it's faster to drill balls on the mill than on the lathe. (Approx 4 min. per ball versus 6.)
The main disadvantage is that it's more difficult to get the ball perfectly centered beneath your drill. If you're not very careful, it's easy to put a hole into the ball off-center.
A. PREPARATION
Before you can go through the process of drilling a ball on the mill, you need to first do two things:
- create a riser that will hold a ball at the right height in the milling vise
- get the mill's spindle dead center over the ball you want to drill
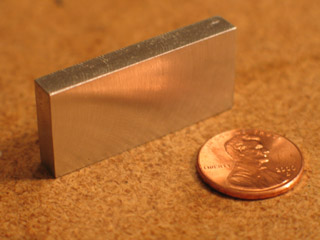
The milling vise has a groove vertical groove in the center of its fixed jaw that is intended to hold round stock in place. This groove is perfectly suited to holding a ball -- except that you also need to hold the ball up at the top of the vise jaws, so the drill bits can reach it.
I made this riser out of a bit of aluminum. Since the balls I'm drilling are .25" wide, I made it slightly narrower -- so it won't interfere with the vise jaws. (I've forgotten exactly how tall I needed to make it so that the ball is right at the top of the vise. Sorry.)
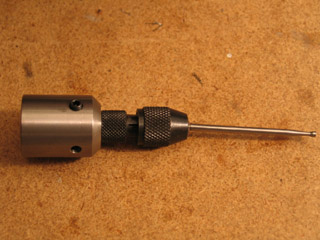
As for getting the mill's spindle dead center over the ball, we're going to need to use a simple (but astonishing) device called the "wiggler."
What is it? It's a needle that has a ball on one end; the ball is held loosely inside of a collet. At the other end of the needle, there's a small cylinder on its tip.
Using a wiggler is not at all difficult... But it's hard to understand how one of these things works if you've never seen it in action. I couldn't figure out the nature of the beast until I watched the SwarfRat video, Mini Machines 101 Volume 2 (Mill Series): Edgefinding & Location. ...Hopefully the photos here will help explain.
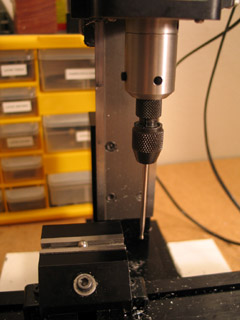
The plan is that we're going to figure out exactly where the edges of the milling vise are, and measure to the center of the ball from there.
Let's start with the X-axis. Attach the wiggler to the mill's spindle. Have the cylinder-tipped needle hanging down more or less vertically.
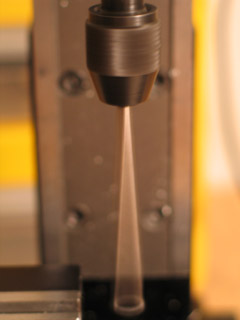
Turn on the mill to a high speed; say, 1000-2000 rpm. As the wiggler spins, you'll see that it's not hanging down perfectly vertical. That's OK...
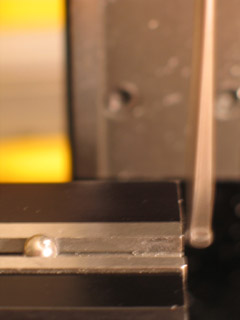
Move the XY table along the X-axis until it just starts to come into contact with the tip of the wiggler. (Don't worry, the wiggler won't hurt the vise!)

Slowly, keep moving the vise toward the wiggler. As you do so, it will push the wiggler increasingly into alignment, until it's spinning almost perfectly vertically.
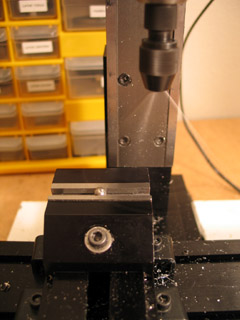
When the wiggler's needle seems vertical, start paying close attention to your digital read out (or handwheel markings, if you don't have a DRO). Move the XY table .0005" at a time...
Suddenly the needle will spin off, and spin wildly around! ...That's what it's supposed to do!
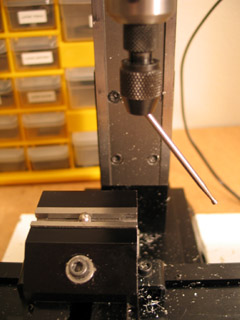
Turn off the mill's motor. You now know that .0005" ago you had the needle spinning "true". Back the XY table up a ways (to compensate for backlash), and then bring it forward again to where it was just before the needle spun off.
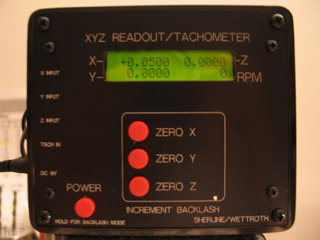
That little cylinder at the tip of the wiggler is .1" wide. In order to get the mill's spindle directly over the edge of the vise, therefore, we need to move it over .05" more -- to where the center of the wiggler would be.
Zero out your digital read out. You now know precisely where the edge of your vise is -- you can make all your future measurements from that point.
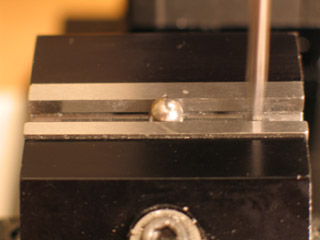
Next, we need to find an edge to measure from on the Y-axis. Which jaw should we use?
Well, the fixed jaw has the groove in it. The ball sits slightly inside of the groove, which means you won't be able to measure from there without doing some fairly complicated math.
The loose jaw is flat. If you find that edge, all you'll have to do is measure over one-half the diameter of the ball, and you'll be centered on the Y-axis. This is what I wound up doing, and I got very usable balls.
However, I did make an error here.
The loose jaw is nearly, but not perfectly vertical. Unlike a normal vise, which simply squeezes its jaws together, a milling vise pulls its loose jaw down at a 45 degree angle. It applies the greatest pressure at the center of the top lip of the loose jaw... What this means is that the loose jaw is going to be very slightly (almost unnoticably) tilted.
I got "good enough" results even so... But to get this method perfected, I'm going to need to machine some "soft jaws" which screw onto the milling vise's regular jaws. What we need is for the groove to be in the loose jaw, and for the fixed jaw to be perfectly flat and perfectly vertical.

Once you've found the edges of the milling vise and zeroed out the DRO, putting the spindle into position is a simple matter.
The Sherline milling vise is 1.95" wide. The groove in the milling vise that holds the ball -- it's exactly halfway across the vise's fixed jaw. So, on the X-axis, we want to move halfway across the jaw -- to .975".
The ball we're drilling is .25" in diameter; so half of that is .125". That's where we want to be on the Y-axis.
Lock your X and Y axes in place. Your spindle is going to stay in this position for the entire process of drilling balls.
B. DRILLING A BALL
OK, on to the drilling itself...
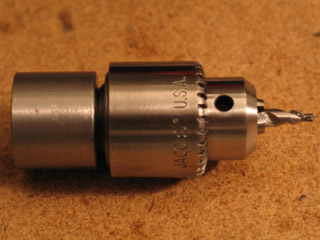
Step 1: Put center drill in drill chuck. I'm using a #2 center drill. The drill chuck pictured here is actually the same chuck that I used with the lathe method -- but I've unscrewed the morse arbor, and have attached a drill chuck tool holder in its place.
The drill chuck tool holder is a wonderful little attachment. Normally you'd use a drawbolt to pull the drill chuck's arbor into the mill's spindle. With this attachment, you can just screw it on like a end mill holder, using tommy bars. Much faster and easier! (And with all the repetitive steps in this process, you want all the "fast and easy" you can muster.)
I'm looking forward to getting set up with two drill chucks, both in tool holders, so I don't have to switch the center drill and 1/8" drill bit in and out. I want all my tool changes to be done with just a pair of tommy bars.
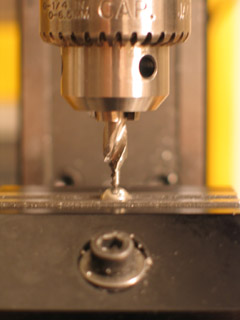
Step 2: Touch the center drill to the ball. Zero out the digital read out on the Z-axis. Raise the spindle back up and away from the ball.
It's important to find the top edge of the ball now. In a moment we're going to file it away; after doing so, it's no longer possible to figure out the precise position of our drill bit's tip.
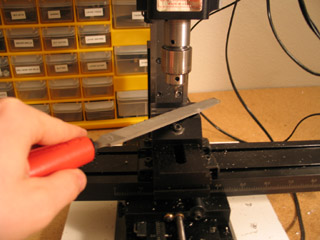
Step 3: File the ball. Use a bastard saw to make a small flat area on its top. Approx. 1/16" dia. should suffice.
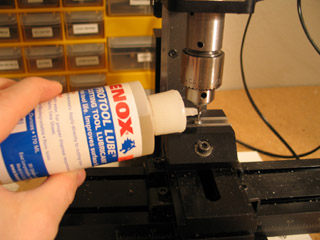
Step 4: Add a drop of oil. Just on top of the ball, to help keep the metal from getting hot and work-hardening as we cut.
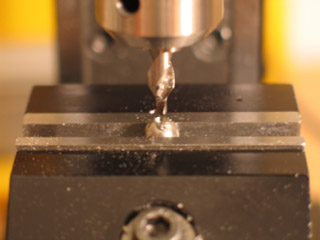
Step 5: Make a divot with the center drill. Put the center drill on a very high speed, say about 2000 rpm, and bring it down so it just kisses the ball. Don't go for any depth. Now, pull the drill back.
The next two steps are probably an error. As I now understand it, you shouldn't use the center drill to cut all the way down to its countersinking edge. Skip to step 8.
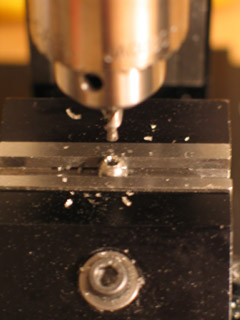
Step 6: Add more oil. The little divot you just made will hold it very nicely.
Step 7: Center drill deeper. Drill far enough down so that you get a hole with a beveled rim. This will help guide your 1/8" drill bit. It doesn't matter exactly how deep you make this cut, so long as you go to the same depth on all of the balls that you drill.
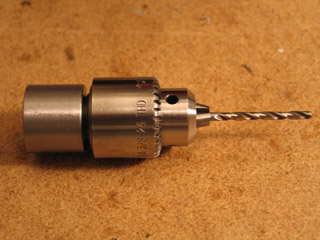
Step 8: Put 1/8" drill bit in chuck.
Step 9: Lower drill bit down to where it touches the ball. Zero out the digital read out. You're going to have to do some estimation to figure out how to compensate for the depth that you've already drilled using the center drill -- but so long as you've been consistent with that step, you should be able to drill holes with the 1/8" drill bit that are all nearly equal in depth.
However: If the center drill and the 1/8" drill bit were each in their own separate drill chuck and drill chuck tool holder, then there would be no variation of tool length -- and you could figure out precisely how deep you're drilling. That's what we really want.
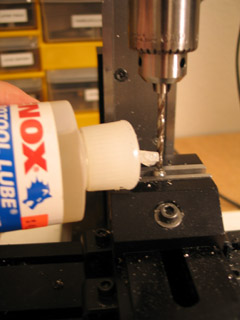
Step 10: Add more oil. The hole that you've made so far will hold quite a lot, and make work-hardening almost a non-issue.
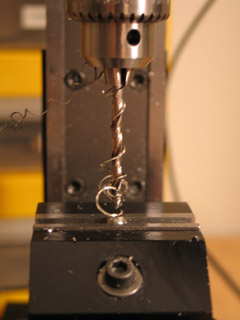
Step 11: Drill the ball. I used the same speed that I did with the lathe method: 1800 rpm. This seemed to work just fine -- but it's a decision that deserves review.
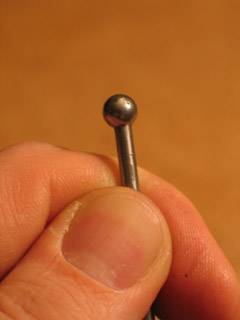
Step 12: Check that the hole is centered. Slip the ball onto the end of a piece of 1/8" dia rod, and spin the rod in your fingers. If it's not visibly off center, then you've produced a "good enough" ball. If two balls in a row check out OK, then you can eliminate this step -- your set-up is good, and will continue to produce good balls.
Congratulations! The ball is drilled. Now... Repeat.
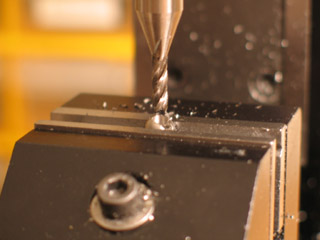
At one point I wondered if I could skip a few steps and just do a plunge cut into the ball with a 1/8" dia. end mill... No good! The end mill put too much stress on the ball, and the side of the ball broke.
Well, it was worth a try!
CLEANING THE BALLS
Before the balls are ready to be brazed onto rods, there's one more process we need to go through: cleaning.
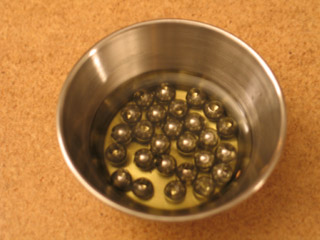
There's residual oil on the balls that needs to be removed. For a degreaser, I'm using Citrisolve. It's a household cleaner; the active ingredient is dilimonene. Dilimonene (as I understand it) comes from orange peel -- and you can smell it.

Dilimonene is one of the least toxic solvents you can use... But still, beware!
Even a "natural" solvent can harm you. I recommend wearing a respirator and working next to an open window.
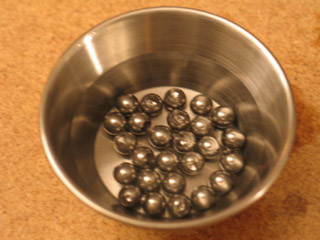
After the solvent has broken up the leftover oil from machining, rinse off the balls with water a couple of times.
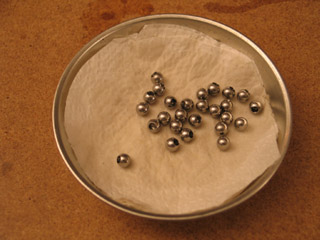
Lay out the balls to dry. As soon as the water has evaporated, they're ready for use.
...
Now you're done with the easy stuff, you can move on to making joints for the balls to sit in!
posted by sven | permalink | categories: stopmo
April 5, 2007
drilling balls: two methods (part 1 of 2)
by sven at 8:00 am

I'm going to walk through two methods for drilling balls. In this installment I'll discuss the lathe. In the next, I'll discuss the mill.
I took the photos in this tutorial while I was constructing my last armature (the "Drifter"). I made errors -- and I'll share those with you too, so you can learn with me. I don't claim that the methods I describe are "right" from a technical standpoint -- but they're what I know so far.
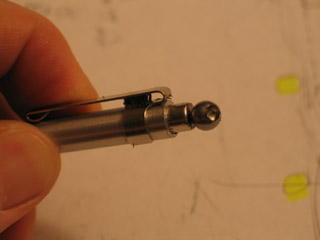
A helpful trick for working with balls, whether you're drilling them on the lathe or on the mill: use the magnet end of a metal scribe for picking them up and putting them where you want. I found this particularly helpful while trying to get balls into the lathe chuck.
METHOD #1: THE LATHE
Drilling balls on the lathe has one major advantage: the lathe will automatically center the hole for you.
However, drilling holes on the lathe also has several disadvantages.
- There's no way (that I know of) to drill a hole to a precise depth.
- Sometimes the drill seems to be pushing the ball deeper into the lathe chuck.
- I've had problems with the ball twisting in the chuck while I'm trying to drill it.
- Sometimes the lathe chuck marks the ball.
- Because the drill is sideways, oil tends to drip off of it.
I used the lathe method for drilling the balls of another armature (the "Man of Steel") six months ago. At the time, I felt that (with much experimentation) I had figured out how to get consistent results. On this most recent armature, I followed my notes from that previous project...
However, my results still weren't consistent. After an hour and a half of using this method, I had 9 successful balls and 6 failures -- a success rate that really seemed unacceptable. And then I broke my center drill. So I decided to try out an idea for drilling balls on the mill that I'd been considering.
The mill method took a fair while to set up... But I was able to drill balls faster and more consistently -- so I'm sold on the mill method now.
Still, I think I've figured out now what the main thing is that I was doing wrong on the lathe -- so I'm not going to say that the lathe method isn't worth pursuing.
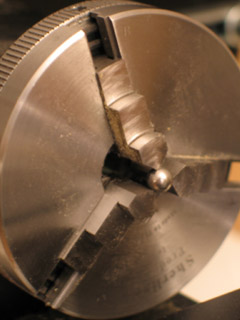
OK, so here we go!
Step 1: Put a ball into the lathe chuck. As I said before, using the magnetic end of a metal scribe makes this much easier. If you're using your fingers or tweezers, the ball tends to roll back into the lathe chuck -- and it's very difficult to get out.
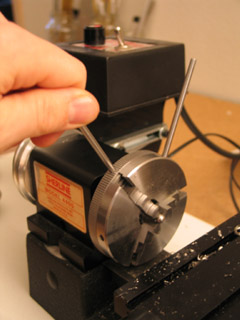
Step 2: Tighten the lathe chuck... I'm working on a Sherline lathe. I was having a hard time remembering which way tightened the chuck for a while. It turns out that the old mneumonic "righty tighty, lefty loosy" applies.
The lathe chuck is tightened using two rotating disks. Put a tommy bar in the disk that's closer to the motor and hold it still. Now put a second tommy bar in the disk that's facing you and turn it to the right (clockwise) to tighten.
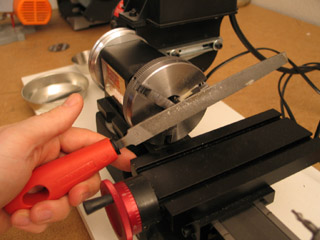
Step 3: File the ball. Before you do any drilling on the ball, you need to file a little flat spot on it. About 1/16" wide will suffice.
To do this, I use a fairly large bastard file. Tom Brierton recommends doing the filing with the motor turned on and the lathe spinning. I haven't had good luck with that. Instead, I rub the file back and forth, and give the lathe chuck a few spins by hand -- just to make sure the flat spot I'm making isn't at too much of an angle.
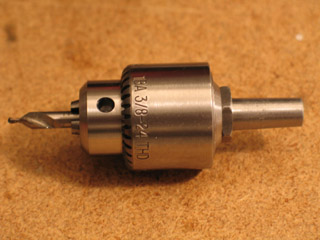
Step 4: Put center drill in drill chuck. When a normal drill bit first touches the thing that it's going to cut, it has a tendency to wander off center -- which can cause the bit to break. A "center drill" has an extra-thick shank that prevents this from happening. You use it to just start a hole -- which you then expand with a normal drill bit.
I'm using a #2 center drill in a 1/4" drill chuck that fits into the lathe's ram using a #0 morse arbor.
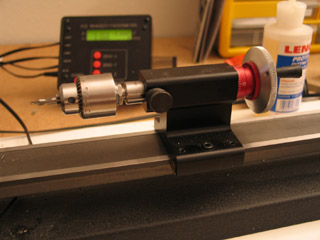
Step 5: Put drill chuck in lathe's ram. The "morse arbor" is a tapered bit of rod that you simply press into the lathe's ram; it doesn't need to be screwed in, or locked in some other fashion.
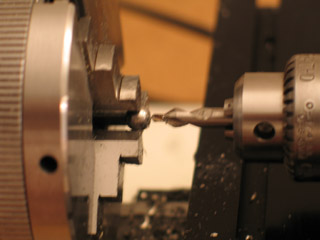
Step 6: Touch the center drill to the ball. At this point, the ram should be sliding freely along the lathe bed. Slide the ram up close to the ball, until the center drill is just touching the ball.
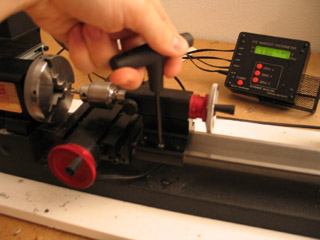
Step 7: Lock the ram in place. Now that you have the ram where you want it, use a hex key to fix it there.
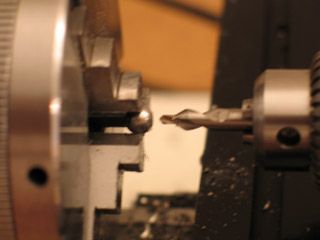
Step 8: Back up the center drill. Rotate the ram's handwheel one rotation in order to back the center drill away from the ball.
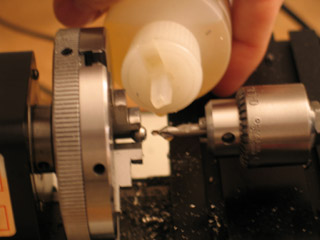
Step 9: Oil the center drill. Just drip a drop or so on the center drill's tip.
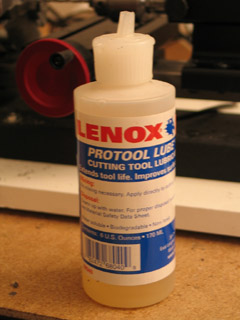
Here's a photo of the kind of oil that I'm using.
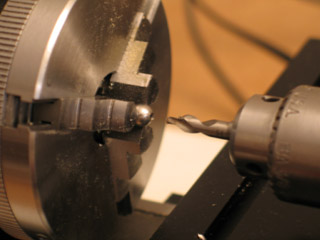
Step 10: Center drill the ball. I've found that to cut a type 302 stainless steel ball on my lathe, I should have it spinning at 1800 rpm. I arrived at that number by experimentation -- I haven't been able research my way to a "correct" answer yet.
It's incredibly important that you don't press the drill into the ball slowly. If you do so, then something called "work hardening" occurs (due to heat, I believe). The metal effectively becomes harder, and it becomes quite difficult to drill a hole at all. So when you press the drill into the ball, you need to do so quite quickly.
Here's where I think I made my main mistake:
As I now understand it, the center drill is really just that little tip. There's also a tapered cutting surface up at the shank. That bit, I believe, is for doing "counter-sinking": tapering the edge of a hole that you've already cut. See, the center drill that I'm using is actually dual-purpose.
I would press the center drill into the ball all the way up to the counter-sinking edge. I now believe that I should have only been making a little divot -- just enough to center the drill bit in the next stage of this process. I think that part of why the ball would sometimes twist on me is because as I tried to press a drill bit into the hole that I made, it would catch on the rim -- and the ball would deflect. A mere divot shouldn't cause deflection.
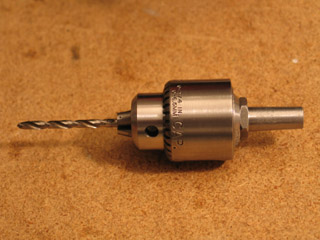
Step 11: Replace the center drill with a drill bit. Use the hex key to unlock the ram. Slide the ram back on the lathe bed, and then turn the handwheel backwards until the drill chuck pops out.
Since I'm working with a 1/4" dia. ball, I've chosen to use 1/8" dia. rod -- so I put a 1/8" drill bit in the chuck now. Put the chuck back into the ram.
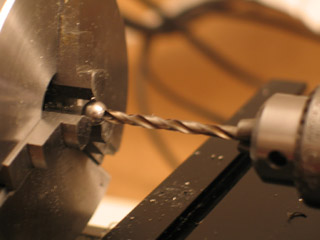
Step 12: Touch the drill bit to the ball's hole. Slide the ram down the lathe bed until the drill bit just touches the starter hole (or divot) that the center drill made.
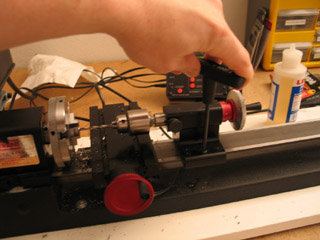
Step 13: Lock the ram in place. Now that we have the ram where we want it, once again use your hex key to fix it there.
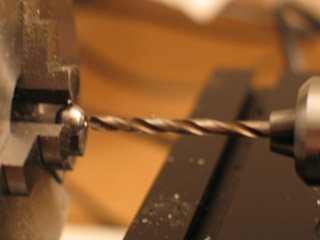
Step 14: Back up the drill bit. Turn the ram's handwheel one rotation backwards so that the bit isn't touching the ball.
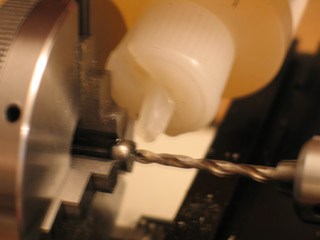
Step 15: Oil the drill bit.
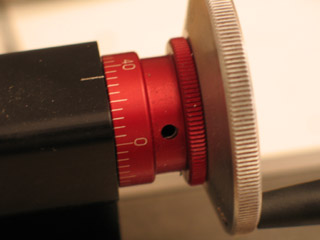
Step 16: Drill the ball. Again, turn the lathe on to 1800 rpm. To avoid work-hardening, press the drill into the ball quickly. (It's counter-intuitive, but the drill cuts much easier when you go fast than if you try to carefully go slow!)
One rotation of the handwheel is .05". The ball is .25" in diameter. I want to drill a hole halfway through the ball: .125". So, that's two and a half rotations of the handwheel. But: don't forget that since we backed off the drill one handwheel rotation from the ball, we actually need to go three and a half rotations forward now.
I strongly recommend counting out loud. Once you've gone through this process ten times, it's easy to get hypnotized and lose track of how many times you've spun the handwheel.
And here's where I made another mistake:
Because I filed a flat spot on the ball, and then used the center drill to make a divot, it's impossible for me to know at this point exactly how far away from the center of the ball my drill bit is. I have to make a guess in order to compensate. If I'm careful about center drilling to an equal depth each time, I can at least ensure that the depth I drill to is fairly equal each time...
However, I've repeatedly forgotten to take into account that the tip of the drill is conical. Even if I can somehow drill to the exact center of the ball, we're measuring from the tip of the drill -- a rod which has been cut off straight cannot reach that point.
It's not a big error when you're only looking at one ball... But if you ignore that error, you can wind up with an armature that's a full half inch taller than your blueprint.
I did!
...
So, there you have it: sixteen steps. It seems kind of foolish to list all of them out like this. After all, if you have your own lathe, then you surely understand how to work it.... However, I want to give the uninitiated a taste of how one actually works this device.
Also, at least for myself, spelling out the steps in excruciating detail helps me get faster at doing them. The "Drifter" armature required 20 drilled balls -- and I made six extra, in case of accidents. I believe at my fastest I could get through those 16 steps in 6 minutes. That's more that two and a half hours just drilling balls -- if I'm at my peak.
With the mill method, I could get a ball done in just 4 minutes. ...More about that tomorrow!
posted by sven | permalink | categories: stopmo
artist's way guided intent (april)
by gl. at 3:31 am
i was so exicted to have dayna here tonight! dayna was in my artist's way creative clusters two years ago but she shot off like a rocket & is now leading her own groups in salem and art classes all over the state. ordinarily when i host an event for someone else, i supply the, um, supplies, but dayna brought boxes and boxes and boxes and boxes and boxes of stuff!
she also asked me to lead the initial writing segment because it's not something she ordinarily does, but is interested in doing it more. because i wasn't facilitating, the first page wasn't all about thinking about the other people and how they were doing or what needed to be done next.
but i had "play by the rules" echoing in my head, so i wrote about the tension between my healthy respect for and desire for rules/structure and my appreciation for the phrase, "it's better to beg forgiveness than seek permission." as the timer beeped, i ended with, "when i don't like the rules, i make up a new game."

["breaking the rules": click the image to see the other shrines]
this was a hard object to take a picture of! it's constructed very much like a tunnel book, so the round object in the center is about an inch away from the top of the shrine, though 3 layers of box.
this marks a whole year of events based on artist's way themes, and brings us back to the beginning: safety. for many people, the easiest & safest tool to explore art is via collage, so i'll be hosting an introduction to SoulCollage to explore how we hold a safe space for ourselves and our creativity.
and i enjoyed dayna facilitating so much that i'm looking forward to another guest facilitator! for soulcollage it will be lynn sherman, who i know from the artist's way group at the unitarian church! lynn also came to the Fabulous End-of-Summer August Art Swap, where she surprised herself by discovering she wanted to inspire & support artists via fundraising & grants.
posted by gl. | permalink | categories: artist's way
April 4, 2007
new armature: the drifter
by sven at 9:00 pm
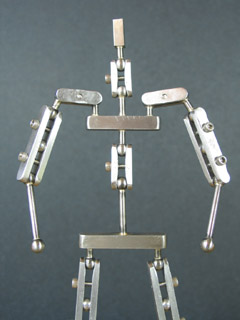
The "Drifter" is the fourth jointed armature that I've made in my own shop. Making it took 45 hours, over the course of 11 days.
It's made entirely of steel: 1018 for plates and rods, 302 for balls. The joints are all sandwich plate ball-and-socket. It stands 8 and 1/16" tall.
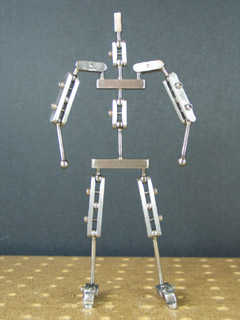
Why do I call it the "Drifter?" Well, because... Due to a mistake in how I engineered the ball sockets, every joint has a bad case of drift. Drat!
["Drift" is when a the ball is biased to follow a certain arc of motion, rather than moving smoothly in all directions.]
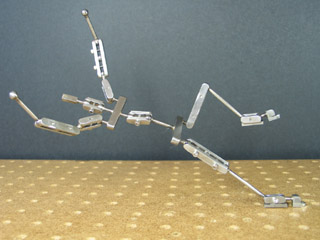
One of the first tests you do on an armature is putting it into an extreme lean. If your puppet can't lean forward without falling over, it can't walk or run. This armature passes the test. (The ankles have to be pretty tight, though.)
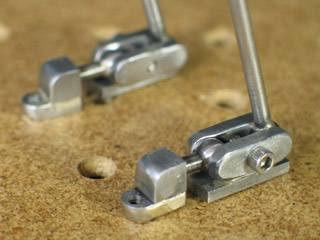
A notable feature of this armature is that it has jointed feet. Fussy to make -- but having a toe as well as an ankle allows you to animate walks much more realistically.
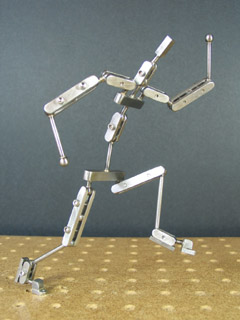
I'm not intending to put the Drifter inside a puppet. He's part of a series that I'm doing in order to teach myself the art of armature-making. I've already made a display stand for him. And I have plans outlined for my next two learning projects.
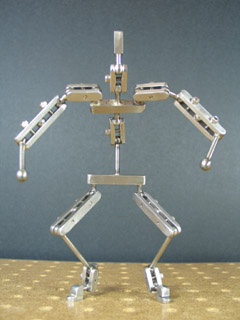
My past three armatures were meant to have human proportions. For this one, I had more of a "gnome" body in mind -- wider in the torso, and with long feet.
I had intended to give this design step-block hands... But when I discovered the drift problem, I decided to leave that for the next project. (Which I'm thinking will be constructed entirely from step-block joints -- no sandwich plates.)
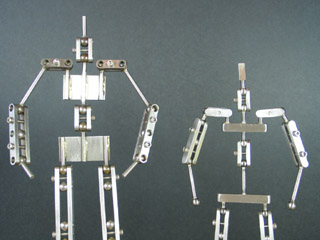
Here's a comparison of the Drifter with my last home project, the Man of Steel...
- The Man of Steel used open-hole sandwich plates, rather than a true ball-and-socket design.
- The Man of Steel used 5/8" dia. balls, whereas the Drifter uses 1/4" dia. balls.
- Rods are perpendicular to the chest and pelvis blocks on the Drifter -- rather than being laid parallel on pieces of flat stock, as I did with the Man of Steel.
- The Drifter has double-jointed shoulders in order to allow greater range of motion.
- The Drifter is the first home project I've done with jointed feet.
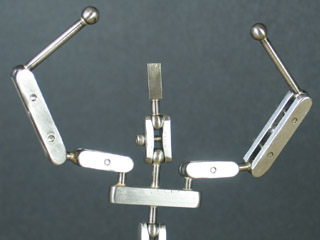
I have qualms about the Drifter's performance. However, my design and machining skills have come a long way during the past six months. My accuracy and efficiency in constructing this armature were far superior to the last attempt. The brazing job is much more reliable, and I was able to get a much better shine on the metal...
All in all, excellent progress.