you are here [x]: Scarlet Star Studios > the Scarlet Letters > notes on brazing
<< before
cutting rods to size
after >>
poem: i am not last in the line
July 1, 2011
notes on brazing
by sven at 7:00 am
I'm still not as proficient at brazing as I'd like to be. So I want to capture some notes, while this last project is still fresh in my mind.
1. CUTTING SOLDER
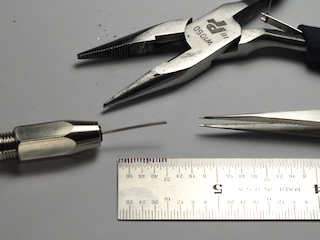
When cutting solder, you want five tools on hand:
- pin vise for holding the solder
- ruler for measuring
- fine-tipped sharpie for marking
- pliers for cutting
- needle-nosed electronics tweezers for picking up bits
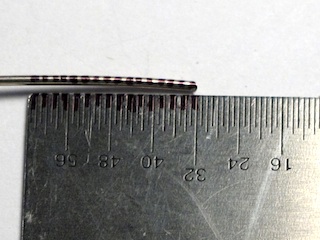
I'm using 1/32" diameter Safety-Silv 56 cadmium-free silver solder. Smallparts.com is supposed to carry it, but right now they're out and don't know if or when it'll be back in stock. It's hard to find, so I'm wondering where I'm going to get some more.
When cutting the solder, I try to look at the wire in terms of 1/64" increments. I have to wear optivisors (magnifying glasses) just to be able to see these measurements clearly. Blackening every other increment on the ruler helps. I can basically draw a line straight from these marks onto the soldering wire.
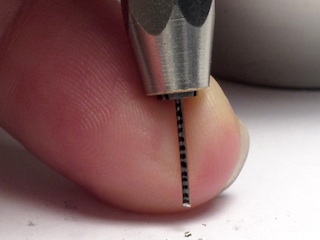
The pin vise is a new discovery. It makes holding wire while cutting very much easier. It also allows me to make cuts a good deal closer to the tail-end stub of the wire segment.
I've used the electronics tweezers before, but they really proved their worth on this project. I originally bought them for removing microscopic splinters from my fingers. I really ought to get a second pair now, to be dedicated to general shop work.
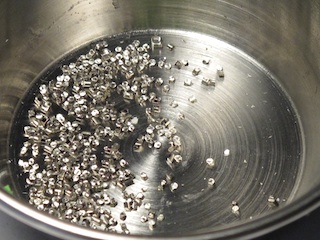
When cutting the wire, keep the pliers flat against the table. That way, the wire will get trapped underneath, rather than flying across the room. The cutting edge isn't in the middle of the tool — it's closer to one side. If you take advantage of this, you can easily cut 1/16" bits of solder, which are sometimes useful. Note, though, that the cutting action will cause the wire to be pressed down and gouge the table. Be sure to put down a self-healing mat.
When solder bits have been cut, don't presume they're all equal. Use your eyes. A 1/32" bit of solder will look roughly square. Visually gauge whether the piece of solder you're picking up is 1/64", 1/32", 3/64", or 1/16".
For 1/8" balls, I've found that 3/64" of solder works quite well. I've been putting 3/64" lengths into the ball holes… It might be wiser to put in three bits of 1/64" solder, so they can pack down into the hole. In a 5/64" deep hole, a longer piece of solder will prevent the rod from getting in — whereas bits can be stuffed in more compactly.
It would probably be wise to scientifically figure out exactly how much solder is required for any particular size of hole, so I stop guessing and thinking about it while doing work.
2. FLUX SAFETY
Safety first! Silver-Silv 56 is better than a lot of other solders which contain lead, cadmium, or antimony — but you still have to be thinking about the flux.
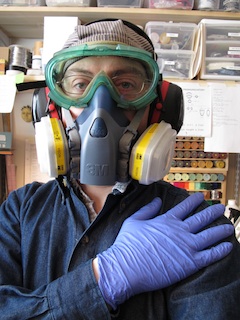
Harris brand flux contains fluorides, which can damage your lungs, and are absorbed through the skin. You might not know at first that it's gotten into you; this stuff causes subcutaneous chemical burns. So get used to wearing nitrile gloves. Don't go with latex; remember that it originally comes from rubber trees, which as an organic material is nearly as vulnerable as you are.
For flux fumes, go with the 3M 6003 respirator cartridges, which handle organic vapors and acid gas. These cartridges specifically mention fluorides as one of the chemicals shielded against, whereas simple organic vapors cartridges (6001) do not.
Even while wearing the respirator, be actively moving fumes out of the room. I've moved to a two fan set-up. One fan is set up at the window to pull fumes out. The other is set on the other side of my work table to push air towards the window. It gets a bit loud, which is why I wear the protective headphones.
3. BRAZING ON FLAT SURFACES
On this past project, I needed to braze rods to rings. It seems like most brazing set-ups are either vertical or horizontal: either laying flat on a table, or held upright in a vise.
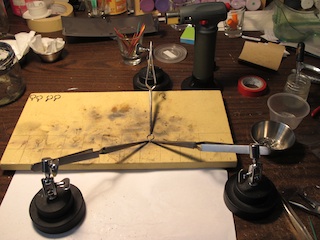
I'm using a ceramic tile bought from a jewelry supply store which is specifically designed to withstand open flames. Several years back I simply used a cinder block. I don't know if that was a good idea, or if I just got lucky with the stone not exploding. Either way, this is a much more elegant solution.
I think these posable tweezers are called "helping hands" — though there's another tool that possibly also goes by that name. It's good to keep at least four of them on hand for putting things in position. A brass rod turned out to be useful for poking at things if they started moving while under the flame.
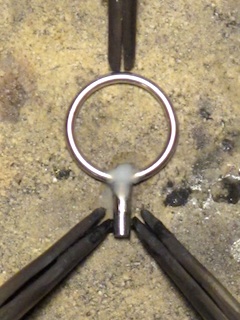
I still have to remind myself each time I do a new project: solder will only flow where there's flux. I'm beginning to think that you can't over-flux a part. For a while I was skimping on flux, because it seemed to leave bad black residue on parts. I think now, though, that the problem was that I overheated the parts, actually burning the metal. I probably wasn't using the right pickling compound back then, either. You need Sparex #2 to effectively remove flux residue from ferrous metals.
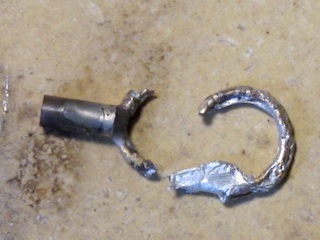
I did a bunch of shopping around to find appropriate jump rings. Ones with brass or steel cores worked fine, regardless of whether they were plated. Ones with "base metal" cores melted into a mess. It turns out that "base metal," used commonly in the jewelry industry, is composed largely of tin and zinc… The very same things you find in low-grade solder!
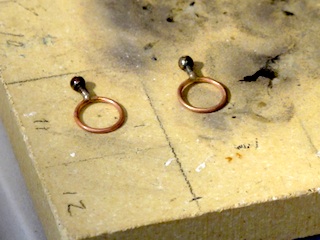
I've had a bad habit for a long time of quenching parts in water after they've been brazed. I'm making a concerted effort now to do the right thing and let them cool slowly. I think I just need to have a second ceramic tile for cooling. That way, valuable work space isn't being eaten up while I wait. Drawing a grid on the tile to help me keep small parts lined up also made the process feel better organized.
4. ERGONOMICS
The horizontal brazing work had me looking down at the table for hours on end. My neck is still in a lot of pain days later. I'm interested in re-working my ergonomics.
Regular tables are about 30" tall. Jewelers, who have to work with very small parts all day have special benches that are ~36"-39" tall. Back when I was working on the tiny Mi-Go maxillipeds for The Whisperer in Darkness I built myself a small jeweler's riser that clamps onto a normal work table. It's been absolutely great so far — and I think I can still do more to optimize the design.
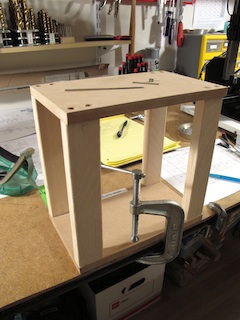
The riser gets more useful when combined with other things. I got a number of steel trays from a restaurant supply store; clamping one onto the riser gives me a nice rim to keep little parts from rolling off. Clamping a vise onto the riser also helps bring my work up to a comfortable height.
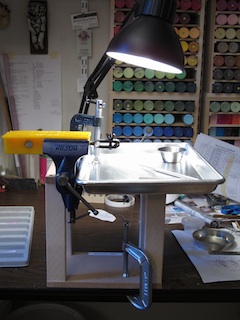
For the Mi-Go armature, I was doing crazy-small work with 000-120 screws. I had to come up with complicated strategies just for holding these things… For instance, putting a pin-vise into the larger vise, held between rubber jaws.
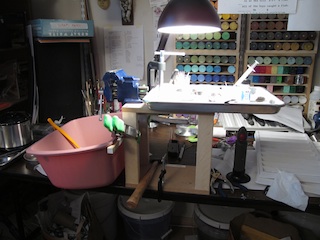
I re-configured the riser slightly on this last project. Besides having the vise on a different side of the riser, the main addition is a small bin located just beneath it, to catch tiny parts if they should fall.
This set up is good for vertical brazing, but it's not wide enough for the ceramic tiles if I want to do horizontal brazing. I'm considering making a wider jeweler's riser for that. (My neck may thank me.)
5. BRAZING BALLS
My method for brazing balls hasn't changed much — but I'm really thrilled to have found some better tools for moving solder bits and flux.
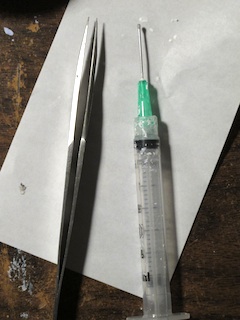
I've already said it: electronics tweezers, FTW. The other discovery is that I can make flux paste a bit more fluid with water, then deliver it where it needs to go using a syringe. Before, I was using tooth picks, which was clumsy and miserable. What's more, I'd need to leave the jar of flux open; the paste dries out quickly. Keeping the flux in a syringe keeps it good and wet.
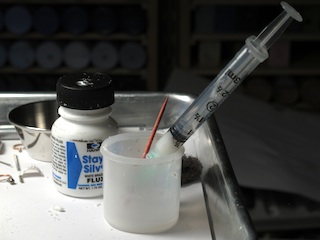
Flux paste seems to be water-based. Just use an eye-dropper to mix it with a little extra water in a small jar. Then it sucks up into the syringe easy as pie. (I should mention: I grind off the pointed tip of the syringe with a belt sander before doing this.)
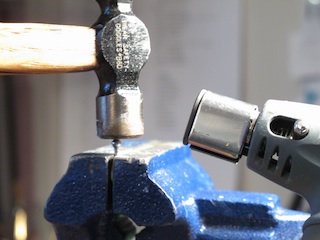
As always, I've got the rod clamped into a vise, and am holding the ball down with a hammer while it's heated. (Hot gas will make the ball want to pop off.) The hammer isn't an ideal solution, because it's also a heat sink cooling off the area that you want hot. I need to look into other tools for this job.
There's a temptation to loosen the downward pressure on the ball, in order to let it heat up more quickly. Bad idea. The ball starts to rise, and then when you press it back down, molten solder squirts out in blobs. Keep downward pressure constant.
Lionel Orozco says that the ball should be heated to a cherry red. Jeremy Spake tells me that this may actually be too hot — that you should specifically avoid getting to the cherry red stage. This matches my experience. I've seen in welding books that there are names for all the various colors that steel turns while being heated, and they are indicative of specific temperatures. I'd like to do deeper research at some point to truly understand how the color of the ball and the melting point of the solder match up.
Jeremy also suggests that the entire ball can be covered in flux. Very interesting! If I'm not overheating my metal, this might work out really well. Must experiment.
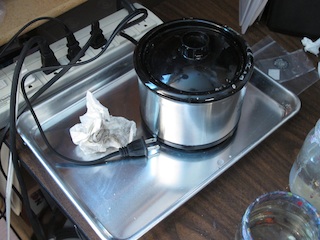
I've moved my pickling station closer to the window. Duh. And I've put it on one of those metal pans, to protect the work table. Incremental progress.
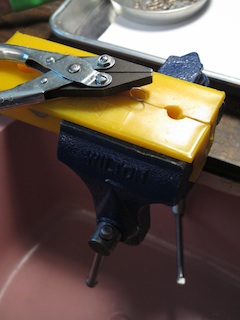
On this last project, I was having trouble getting a nice clean seam of solder where the ball and rod connect. It was turning out too blobby, which would have impaired range of motion. So I decided to use less solder — to the extent of not having a visible seam.
The problem with this strategy is that without the visible seam, there's no way to know for certain that you got a good bond. It's a big no-no in armatures… And let me tell you: the very last thing you want as an armature maker is for a ball to break off mid-scene while an animator's working!
So I came up with a stress test. I put rubber jaws onto my vise, and clamped the ball tight. I twisted the rod using parallel pliers. If the bond is weak, the ball breaks off; if the bond is strong, the rubber will tear first.
I think it's a good test. The pressure of the vise — even with rubber jaws — is greater than what the part will likely experience when it's in a step-block joint. It's definitely greater stress than human hands can exert (a poor test). And the stress test is based on twisting, which is the only way balls are really likely break off. I broke enough bad joins, I feel reasonably confident that the survivors will hold up.
Even so… It's kind of a miserable process. I really want a better strategy for clean, small ball seams the next time I do this.