July 2011 archives
you are here [x]: Scarlet Star Studios > the Scarlet Letters > July 2011
<< before
June 2011
after >>
September 2011
July 20, 2011
animation walk
by sven at 5:30 pm
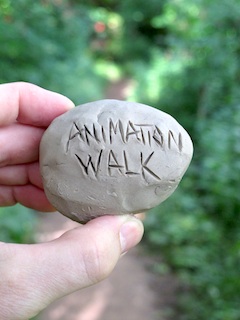
Experimental stop-motion animation driven by six principles:
- An animator animates.
- You can animate anywhere.
- Get out and walk.
- Every artist needs a sketchbook.
- Clay is your pencil — the photo is your page.
- Watch your mind evolve one frame at a time.
...It's been such a busy year, I had to find some way to squeeze in actual filmmaking!
P.S. As usual, the soundtrack won't be much good unless you've got decent woofers in your audio system.
posted by sven | permalink | categories: movies, stopmo
July 14, 2011
montreal stop motion film fest - call for submissions
by sven at 7:00 am
I got a note from the Montreal Stop Motion Film Festival asking for help promoting their event. I don't usually do this, but feel a kinship with other stopmoes, and a bit of a debt after other bloggers helped promote my fest.
It is free to enter. Just download a submission form, fill it out, and send it in along with your film. Deadline for submissions is Sept 26, 2011.
The festival will be held in Montreal, during Oct 21-23. Awards will be given in four categories: professional, academic, independent films, and commercials/advertisements.
(Jeffrey Roché, Emily Baxter, Grant Goans, Don Carlson — you all should be doing this!)
posted by sven | permalink | categories: exhibits & events
July 13, 2011
"mutate" in da vinci days film fest - july 16, 17
by sven at 1:46 pm
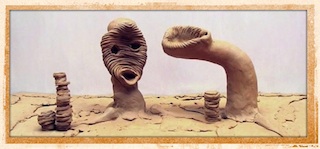
My short film Mutate will playing at the da Vinci Days Film Festival this weekend in Corvallis.
It's playing twice, so Gretchin and I will be taking a little vacation to check out the whole affair. It's part of the Animation Block, which will show on Saturday (July 16) at 3:45pm at the Darkside Cinema and Sunday (July 17) at 2:30pm at the Majestic Theatre.
I'm often amused by how festivals re-write my film description. Here's the da Vinci version:
Like an Animal Planet documentary from another dimension, MUTATE reveals the bizarre life-cycles of various alien creatures as they meld, merge, dissolve and evolve in surprising and frequently hilarious fashion.
Not bad. :)
posted by sven | permalink | categories: exhibits & events, movies, stopmo
July 7, 2011
northwest animation festival 2011
by sven at 8:00 pm
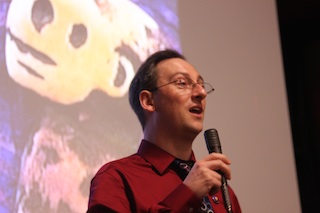
The inaugural Northwest Animation Festival took place just over a month ago. This was by far the most ambitious event I've ever organized: 78 films from nine countries, shown over the course of three days.
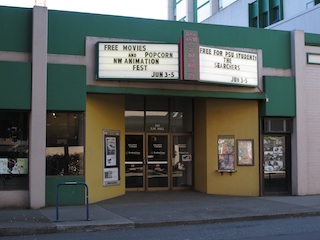
The 5th Ave Cinema was an excellent first venue. We had 100 seats, low rental fees, and full control of projection from a kiosk at the front of the room.
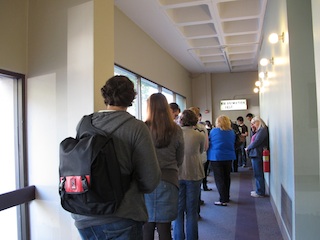
A majority of tickets were purchased in advance. Our Will Call table was set up just in front of the doors to Auditorium 2. The line for tickets stretched down the hall, but moved quickly once we opened the doors.
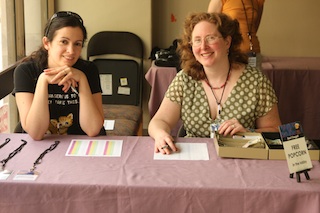
An important part of running an event smoothly is having enough volunteers. Depending on the night, we had up to eight positions:
- managing the line (jokingly dubbed "the bouncer")
- tickets - both Will Call and General Admission
- giving filmmakers their name badges
- auditorium door - handing out programs, making sure door closes quietly
- usher - with flashlight for late seating
- photographer
- projectionist
- emcee
A huge THANK YOU to everyone who helped out: Jeff & Dielle Alexandre, Carly Hirano, Gretchin Lair, Jessica Lockwood, Nick Nall, Temris & Matt Ridge, and Rebekah Villon.
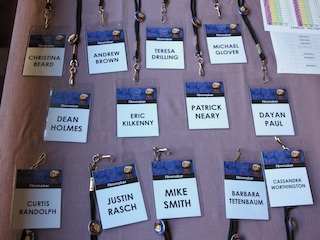
A lot of effort went into making the event's ephemera beautiful. The festival's logo went on our programs, tickets, filmmaker name badges, buttons, and some of the signage. Wherever we needed signs, I was sure to use the festival's font: century gothic.
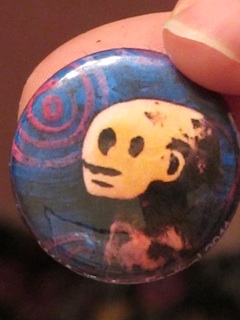
Gretchin generously took on a last-minute project at my request, producing a batch of 50 buttons as a special freebie for filmmakers and volunteers. Thanks to Bridget Benton of Eyes Aflame for lending us the button-making machine.
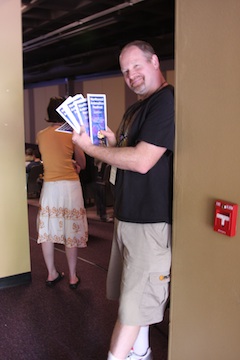
What makes a film festival different from just going out to see a movie at the cineplex? People. It begins with your interaction with the event staff, from ticket table to usher to emcee… And then during the show, it's getting to do Q&A with the filmmakers. It's a very different, more social experience when you know that the people who made the films are seated all around you in the audience. At the end of every film, the audience applauded. I didn't know to expect that — but it was awesome!
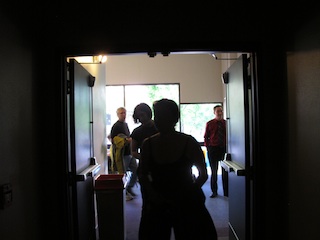
Coming into the auditorium, I wanted people to feel like they were entering a special, magical space. Lights were dimmed, the festival logo was on screen, and pre-show music set the mood (Cirque du Soleil.)
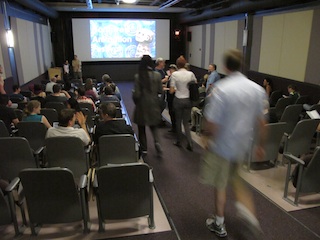
As people found their seats, I was delighted to say hello to many friends and acquaintances who'd made it out for the show. One of my few regrets is that I was unable to personally give all the filmmakers a proper greeting. Having spent so much time with their artistic works, I'd developed a fondness for these people I'd never met.
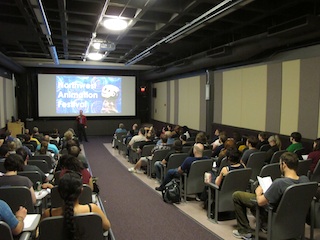
The job of an emcee is to shape expectations. Why are we here today? How should we judge the films we're watching? When do we start, take breaks, and end? Where can we congregate after the show? And when's the next festival going to be?
People just need to know what's going to happen. Focus on that, and you've got a good chance of avoiding Interminable Opening Speech Syndrome.
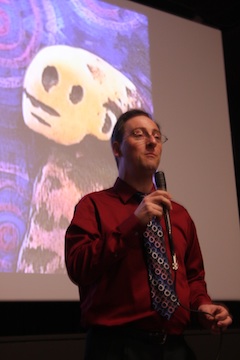
There IS a place for talking at length about the big vision, though: the director's statement in the program. Here's what I said in mine:
FROM THE FESTIVAL DIRECTOR I’m an animator myself. I love this magical art. So what do I want from an animation festival?
I want an abundant FEAST. Not just a dozen films — a hundred films!
I want to inspire fellow artists to make new work. The festival should stimulate imaginations — and give a concrete answer to that awful question, “What do I do with my film once it’s done?”
I want to help artists grow. I envision every animator being on a path to creating the best work of their life. Something profound or beautiful or funny or moving. Not everyone who submitted this year could be in the fest, but my hope is that everyone who stays on the path eventually WILL be shown.
Portland is an animation town. There is a family of artists here. The festival should be our annual family reunion, where we watch new talents gradually develop into masters.
It’s important to showcase the breadth of what’s being done with animation. There needs to be a place for people who still draw toons with pencil and paper; people who make vectors, layers, and Bézier curves in a computer; people who pose puppets one frame at a time; people who are making up entirely new ways to bring the still image to life.
Some films should be works of genius that just blow you away. But I also want to give screen time to the ones that make you say, “What a neat idea — maybe even I could do that!”
It’s OK if not every film in the program is your cup of tea. I’m confident that there will be something here for everyone. Hopefully you’ll get to experience a little bit of the delight that I’ve had while sifting through submissions… Discovering a collection of gems that dazzle.
— Sven Bonnichsen
I was surprised at how different the feel of the crowd was each night. Friday night people had a hard time getting settled down; some were arriving up to a half-hour late. Saturday, everything when remarkably smoothly, and people seemed to arrive ready to be absorbed in the films. Sunday I thought the room felt just a bit lethargic.
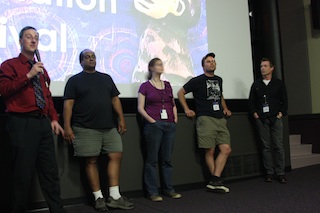
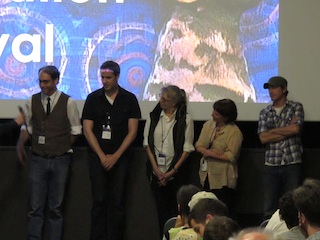
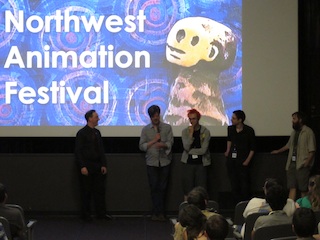
After each block of films, I'd invite all the filmmakers whose films had just screened to come up and answer questions from the audience. Gretchin coached me to say something like "So, what did you think?" immediately after the end of the films, to get a reaction from the crowd and warm them up. Justin Rasch helped me better understand the need to start the Q&A with some questions of my own, giving the audience a little time to start formulating what they might be curious about.
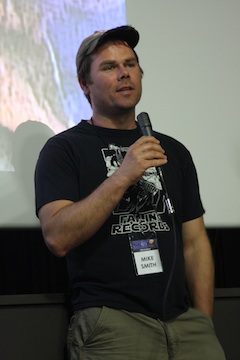
It's a special experience to be the filmmaker taking questions. None of your answers feel entirely adequate. You're hoping that the next question is directed to you — and simultaneously that the next question is NOT for you. You're standing beside these other filmmakers whose works just blew your mind… But for all the clumsiness, there's a rush of adrenalin from being in the spotlight. And even though all that you've done is stand up at the front of the room, somehow that actually does make you an authority — and everyone in the audience contributes their suspension of disbelief toward making that role a shared reality.
The festival was broken into 8 blocks of films. On Friday and Sunday I scheduled two 1-hour blocks, followed by a half-hour featurette. On Saturday I showed two 75min blocks. From the feedback I heard, both ways provided adequate time for stretching and using the restroom. The 75min blocks were significantly more difficult for me to assemble, though.
There's an art to creating a good line-up of films. I used three tools:
- photos of the films, which I could slide around on a big folding table
- a spreadsheet, which could automatically calculate the length of each block
- video clips in iTunes, which allowed me to hear soundtracks in sequence
I tried to put the very strongest films at the beginning and end of blocks. I tried to make sure there were short "palette cleansers" between longer films. I did a lot of color-coding in the spreadsheet, noting which films were light and funny, dark and gothic, or impenetrably abstract. I had further color tags to indicate whether a film was 2D, CG, stopmo, or hybrid/exotic.
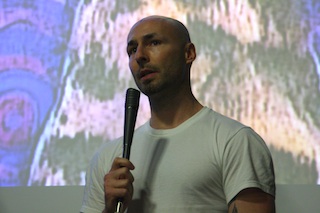
Basically, assembling a program of films is like creating a giant mix tape. Variety is crucial, and you have to pay a lot of attention to the highs and lows of mood/energy. The temptation to put all the dark, bleak films on one day must be resisted! Or, by the same token, the urge to group all environmental films on one day. Avoid theme!
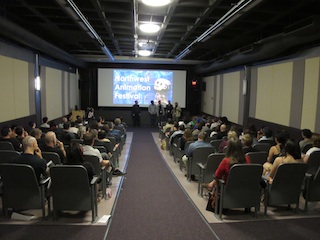
Despite juggling all those factors — strength, length, animation method, happy/sad, energy level — problematic similarities would still emerge. For instance, four films made conspicuous use of butterflies. Three featured skeletons. Two films had almost identical guitar riffs. The first shorts block had an overabundance of films where the predominant color was either white or muted/desaturated hues...
You do your best. I was very pleased to hear folks saying that the program seemed well-balanced. When it works, you don't even mind watching the films that "aren't your thing," because you trust that something else that you will like is only a film or two away.
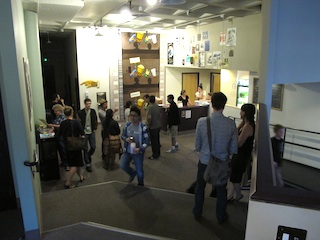
Depending on how many filmmakers were present for a particular block, I'd facilitate 5-7 questions, then go to intermission. People milled in the lobby and hallway.
We brought along a chime that was Gretchin's signature "time's up" sound back when she was running Artist's Way classes. Ringing it was en elegant way to let folks know when it was time to return to their seats.
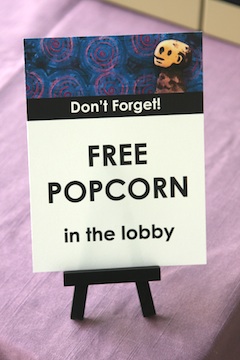
Another nifty thing about 5th Ave Cinema is that for an additional fee, you can provide free popcorn for your entire audience. Gretchin was marvelous, and donated popcorn to the festival. Because I was wearing my Festival Director hat, it was only slightly strange to be thanking Scarlet Star Studios for the generosity.

During the films, all the volunteers got to come into the auditorium and watch the program. Really, though, we could almost have had someone staffing the ticket table during the whole show. One night we had someone purchase a ticket for just the last half hour. Apparently they weren't very impressed with the John Wayne film in Auditorium 1, and wandered over to see what we had to offer.
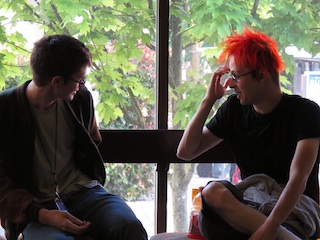
Both ASIFA-Portland and Cascade ACM SIGGRAPH were very helpful in getting word out about the festival. I'm embarrassed that I forgot to give either one time for promoting their group from the stage until the last day. It also took until Sunday to figure out where we could put an info table that wouldn't block traffic... And to start encouraging people to sign up for the email list to be notified about the next NWAF event.
I hope to foster community among animators, and for NWAF to become a valued community gathering. There's room for improvement.
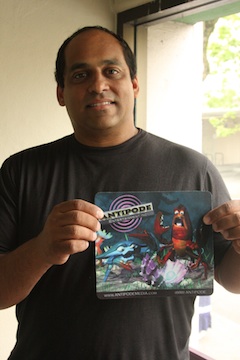
Several people traveled from out of state for the festival:
- Michael P. Glover - Milton the Demon Boy ..... New York
- Dayan Paul - Courageous Crustaceans ..... Nevada
- Curtis Randloph - Moon Diary ..... Washington
- Carly White - Pink Spray Paint ..... California
- Maureen Zent - Bostle Sleench ..... Georgia
And the winner for our imaginary "traveled furthest to be here" award?
- John Davide - Hope ..... England!
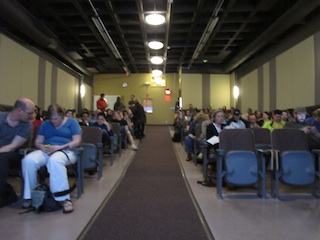
I was careful to let everyone know what we could and couldn't offer at our first festival — and still they came! It was a shock (albeit a pleasant one) when the first person let me know that they'd bought plane tickets. Suddenly the event became so much more real... Other people believed in it enough to make a journey!
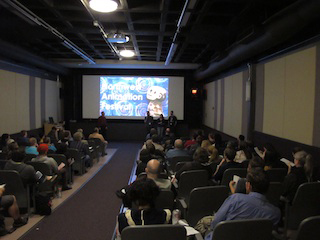
Most of the filmmakers currently living in Portland were able to come at least for their own film. Attendees included:
- Art Institute of Portland students - The Box Game
- Christina Beard - Maurauder's Mistake
- Jesse Brennan - Coffee Critics
- Andrew Brown - The Old Man and the Butterfly
- Matthew Dan - Chef Antonio
- Fashionbuddha - Phlush PSA
- Adam Fisher - Mashed, Timber
- Michael Graham - Colorless
- Troy Hileman - Inritus
- Dean Holmes - The Nose
- Eric Kilkenny - Ursula 1000 - Rocket
- Patrick Neary - Landscape with Duck
- Sam Niemann - Ruby Rocket, Private Detective
- Christopher Purdin - Chixulub
- Justin Rasch - Gerald's Last Day
- Jeff Riley - Operation: Fish
- Mike A. Smith - Missionary
- Barbara Tetenbaum - Old-Time Film
- Cassandra Worthington - Button Song
- Marilyn Zornado - Old-Time Film
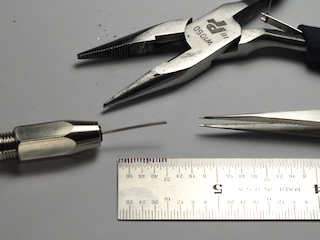
- pin vise for holding the solder
- ruler for measuring
- fine-tipped sharpie for marking
- pliers for cutting
- needle-nosed electronics tweezers for picking up bits
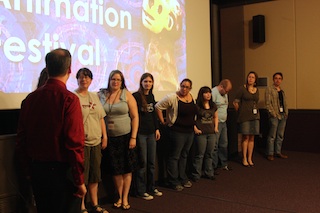
It was a very special pleasure to show The Box Game, which was created by more than 30 students at the Art Institute of Portland. It's an extremely well-crafted and delightful short. It deserves to be seen on a big screen — and I'm glad I could give its makers the opportunity to see it this way.
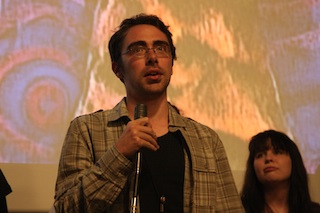
I'm very pleased about the relationship growing between NWAF and the Art Institute. Several films came from the school: The Box Game, Button Song, Colorless, Inritus, The Old Man and the Butterfly... And both Marilyn Zornado and Teresa Drilling (teachers at the school) made it a homework assignment for their classes to attend the fest!
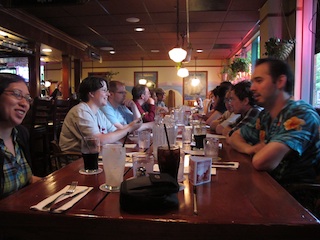
Each day of the fest, everyone in the audience was invited to walk a few blocks over to the McMenamins Market Street Pub. I had reservations — but our group was late to arrive on Friday, which made things awkward. Saturday and Sunday I wised up and sent an NWAF volunteer (Jeff) over to McMenamins to hold onto our table. By introducing him earlier in the evening, everyone knew who to look for when they arrived at the pub. This worked very well, and we wound up easily filling 20 seats.
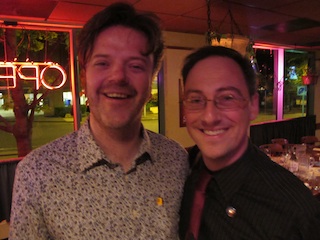
Probably my happiest story from the festival is about John Davide from England. As the pub was closing, he came up and thanked me profusely. In his words, the festival was a "life-changing experience." Regardless of whether his film was best in show — just to have someone believe in his work enough to put it up on the screen meant the world.
He stayed at a hostel on Hawthorne Street. After telling other guests about his film, the hostel manager took people's names down on a napkin and organized buying festival tickets for everyone!
John felt such warmth — talking with Jeff Alexandre, Matt Dan, myself, and others — he's seriously looking into moving to Portland... Perhaps to take some classes at the Art Institute. "London has lost its soul," he says — but in Portland, there's tremendous cultural support for creatives. I wish you the best, John!
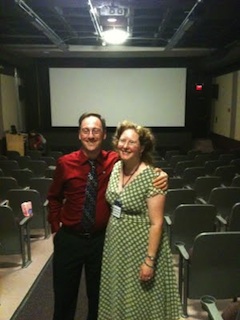
Lastly, THANK YOU to Gretchin for supporting this mad endeavor. Behind the scenes, she was making buttons, folding programs, making the special treat of popcorn happen. She lent me her computer for a few days while I was encoding the festival's eight DVDs. Anything I could ask for, she fulfilled.
Beyond the tangibles, though, she was nothing but supportive during the months when I had to quit doing anything but festival work... When she'd go to bed, and wake up to find me still sitting, typing in the same chair. Without her belief in me, this wouldn't be possible.

Would I do all again? ...YES.
The "Best of the NW Animation Fest" show is scheduled for September 10 at the Hollywood Theatre. It's a gorgeous 450-seat auditorium — and if all goes well this fall, it's where we'll do the 2012 festival next spring.
posted by sven | permalink | categories: exhibits & events, nw animation festival
July 4, 2011
clyde
by sven at 5:00 pm
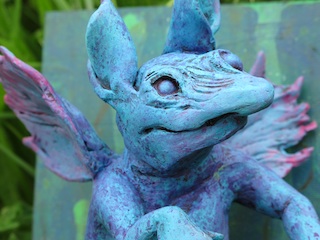
Happy birthday to my brother Shield! As a gift, I created this little goblin fairy, "Clyde."
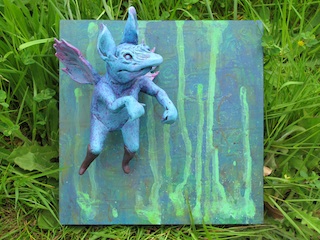
If you scan back through my work, you'll see that I've been experimenting with wall sculptures for several years. And monsters… Since childhood. This feels like the next evolution for both. Very excited.
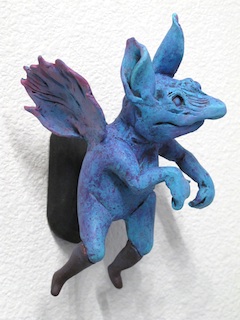
Clyde can be detached from the abstract painted backdrop panel. As an afterthought, I created an additional alternate wall mount, which focuses attention just on Clyde.
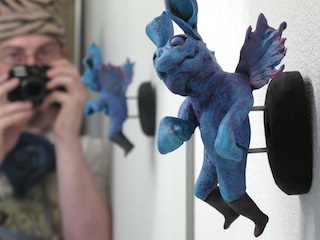
I think I kind of like the simple presentation better… But now Shield has both, and can pick whichever one works best for him.
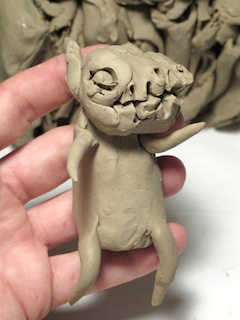
While figuring out what I wanted to do for this piece, I did some sketches in clay. I allow a lot of room for improvisation while sculpting — I thought you'd be interested to see how different the sketch is from the final.
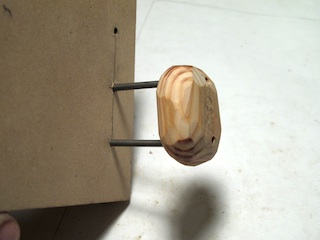
A big discovery on this piece: how to make a good core armature. I'm an armature guy — you'd think I'd already know what I'm doing. But armatures for stop-motion puppets and armatures for static sculptures are two very different things. Realizing that a simple block of wood on two steel posts makes a good core opens up whole worlds.
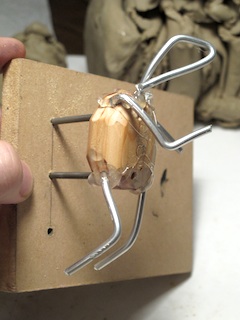
This armature isn't that great, actually. I was improvising, and didn't drill the holes for the rods perfectly straight. And I used hot glue rather than epoxy for attaching limbs. Still, the concept is there.
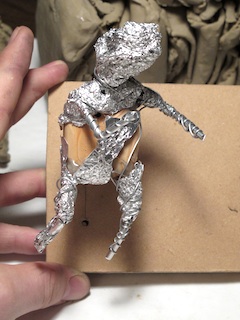
Super Sculpey (a polymer clay) needs to be fairly thin for baking. You bulk out the basic form using aluminum foil.
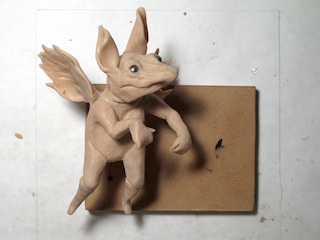
Here's the sculpture before baking or painting. After baking, I did a lot of work with sandpaper to smooth up the form.
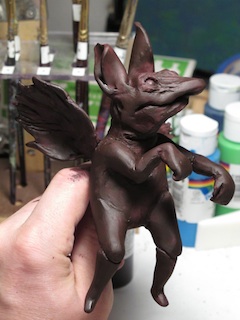
I wound up spending a fair amount of time painting texture, highlights, and subtly different colorings for different parts of the body. Basically, though, the paint job begins with a dark base color, then proceeds to dry-brushing on the blue. It's a good way to make sure that crevasses are dark — instead of trying to paint them in with a tiny brush.
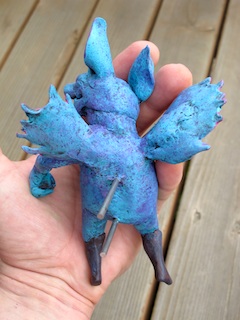
Here's what the back looks like with the two 1/8" dia. steel rods protruding.
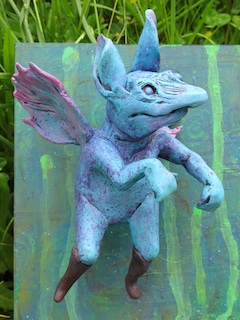
I hope that Clyde enjoys his new life with Shield and his family.
And Shield: stock up on sugar cubes. I think this little guy has a high metabolism.
posted by sven | permalink | categories: painting, sculpture
July 3, 2011
ken sipel visit
by sven at 4:00 pm
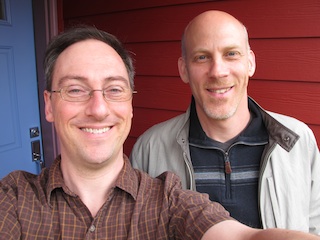
Ken Sipel is a fellow stopmoe and blogger. Last month I had the pleasure of meeting him in-the-flesh.
Ken was coming through town and contacted me to see if we might meet up. Absolutely! I love it when stopmo bloggers bridge the cyber divide — and encourage other readers to also come visit if they're near Portland.
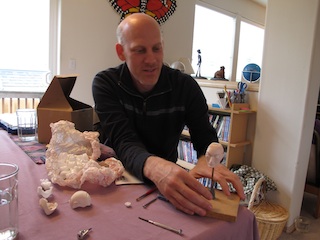
We talked about the NW Animation Festival and about my armature work. Then Ken gave me real treat, and let me see the work he's been doing on 3D-printed replacement faces for his puppet "Christian."
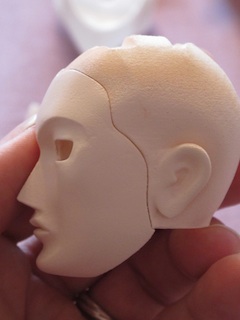
Since Coraline, a number of us have been speculating that indie animators might print puppet faces in resin using shapeways.com. To the best of my knowledge, Ken is the first to actually try it.
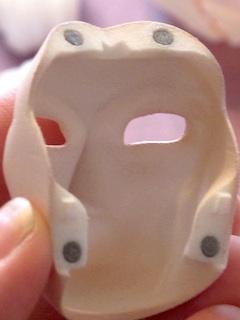
The photos that I took at the Coraline premiere party were apparently quite helpful in the design process. In the photos here, you can see that the puppet head is built from four main parts: the back of the head, the face mask, a core, and the eyes assembly.
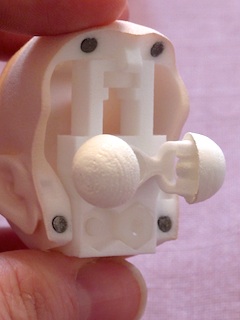
The back of the head attaches to the core with a screw at the top, which will later be covered by hair. The contours of the core could theoretically be rectangular, but become narrow at the jaw to allow a tight fit with the back of the head. The face snaps into place with tiny magnets.
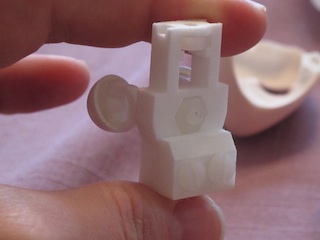
The core has a detachable part at the bottom that clamps around an armature's neck post. The eyes are half-spheres with tiny ball joints held in place by the pressure of the semi-flexible plastic sockets. The whole eye assembly can be detached from the core.
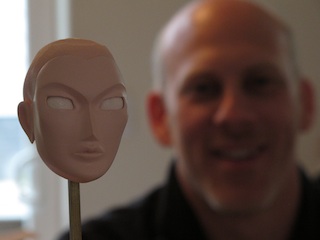
Congratulations to Ken on this ingenious puppet construction! I am thoroughly impressed with how his project CRS Glimmer is coming along, and can hardly wait to see further developments. Outside of feature films and big budget TV commercials, this is pioneering work!
posted by sven | permalink | categories: stopmo
July 2, 2011
poem: i am not last in the line
by sven at 7:00 am
I was thinking about why I feel it's important to write tutorials — and how some people prefer to keep knowledge secret. This is the poem that came of it.
I am not last in the line
I am not last in the line
and wouldn't want to be
so let me share what I learn
I cannot be toppled by competitors
if I share secret knowledge
because even if you know how
it's a steep climb to actually attain the summit
as long as I keep running
I'll always be ahead in the race
out in front of those who come after me
though still following bread crumbs
from those who've gone before
I'll have my time at the mic while I'm here
and after I'm gone
if I'm remembered at all
my name will be kept best
by those I troubled to help
June 28, 2011
posted by sven | permalink | categories: poetry
July 1, 2011
notes on brazing
by sven at 7:00 am
I'm still not as proficient at brazing as I'd like to be. So I want to capture some notes, while this last project is still fresh in my mind.
1. CUTTING SOLDER
When cutting solder, you want five tools on hand:
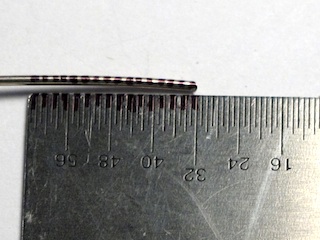
I'm using 1/32" diameter Safety-Silv 56 cadmium-free silver solder. Smallparts.com is supposed to carry it, but right now they're out and don't know if or when it'll be back in stock. It's hard to find, so I'm wondering where I'm going to get some more.
When cutting the solder, I try to look at the wire in terms of 1/64" increments. I have to wear optivisors (magnifying glasses) just to be able to see these measurements clearly. Blackening every other increment on the ruler helps. I can basically draw a line straight from these marks onto the soldering wire.
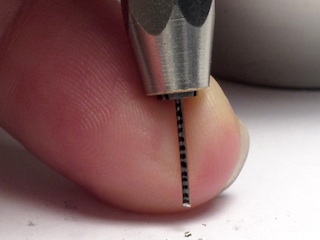
The pin vise is a new discovery. It makes holding wire while cutting very much easier. It also allows me to make cuts a good deal closer to the tail-end stub of the wire segment.
I've used the electronics tweezers before, but they really proved their worth on this project. I originally bought them for removing microscopic splinters from my fingers. I really ought to get a second pair now, to be dedicated to general shop work.
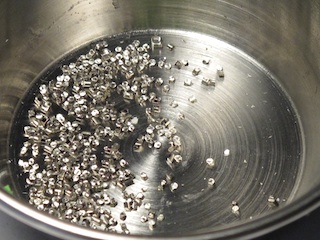
When cutting the wire, keep the pliers flat against the table. That way, the wire will get trapped underneath, rather than flying across the room. The cutting edge isn't in the middle of the tool — it's closer to one side. If you take advantage of this, you can easily cut 1/16" bits of solder, which are sometimes useful. Note, though, that the cutting action will cause the wire to be pressed down and gouge the table. Be sure to put down a self-healing mat.
When solder bits have been cut, don't presume they're all equal. Use your eyes. A 1/32" bit of solder will look roughly square. Visually gauge whether the piece of solder you're picking up is 1/64", 1/32", 3/64", or 1/16".
For 1/8" balls, I've found that 3/64" of solder works quite well. I've been putting 3/64" lengths into the ball holes… It might be wiser to put in three bits of 1/64" solder, so they can pack down into the hole. In a 5/64" deep hole, a longer piece of solder will prevent the rod from getting in — whereas bits can be stuffed in more compactly.
It would probably be wise to scientifically figure out exactly how much solder is required for any particular size of hole, so I stop guessing and thinking about it while doing work.
2. FLUX SAFETY
Safety first! Silver-Silv 56 is better than a lot of other solders which contain lead, cadmium, or antimony — but you still have to be thinking about the flux.
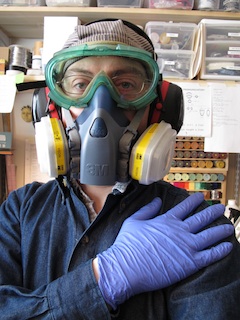
Harris brand flux contains fluorides, which can damage your lungs, and are absorbed through the skin. You might not know at first that it's gotten into you; this stuff causes subcutaneous chemical burns. So get used to wearing nitrile gloves. Don't go with latex; remember that it originally comes from rubber trees, which as an organic material is nearly as vulnerable as you are.
For flux fumes, go with the 3M 6003 respirator cartridges, which handle organic vapors and acid gas. These cartridges specifically mention fluorides as one of the chemicals shielded against, whereas simple organic vapors cartridges (6001) do not.
Even while wearing the respirator, be actively moving fumes out of the room. I've moved to a two fan set-up. One fan is set up at the window to pull fumes out. The other is set on the other side of my work table to push air towards the window. It gets a bit loud, which is why I wear the protective headphones.
3. BRAZING ON FLAT SURFACES
On this past project, I needed to braze rods to rings. It seems like most brazing set-ups are either vertical or horizontal: either laying flat on a table, or held upright in a vise.
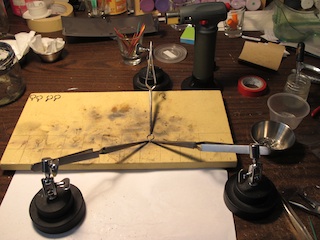
I'm using a ceramic tile bought from a jewelry supply store which is specifically designed to withstand open flames. Several years back I simply used a cinder block. I don't know if that was a good idea, or if I just got lucky with the stone not exploding. Either way, this is a much more elegant solution.
I think these posable tweezers are called "helping hands" — though there's another tool that possibly also goes by that name. It's good to keep at least four of them on hand for putting things in position. A brass rod turned out to be useful for poking at things if they started moving while under the flame.
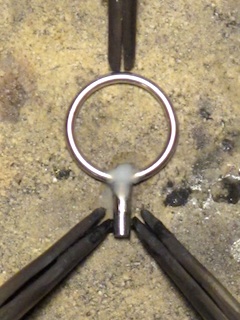
I still have to remind myself each time I do a new project: solder will only flow where there's flux. I'm beginning to think that you can't over-flux a part. For a while I was skimping on flux, because it seemed to leave bad black residue on parts. I think now, though, that the problem was that I overheated the parts, actually burning the metal. I probably wasn't using the right pickling compound back then, either. You need Sparex #2 to effectively remove flux residue from ferrous metals.
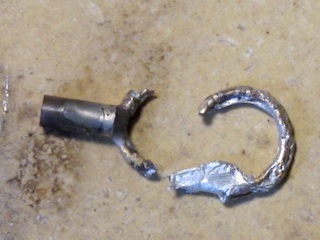
I did a bunch of shopping around to find appropriate jump rings. Ones with brass or steel cores worked fine, regardless of whether they were plated. Ones with "base metal" cores melted into a mess. It turns out that "base metal," used commonly in the jewelry industry, is composed largely of tin and zinc… The very same things you find in low-grade solder!
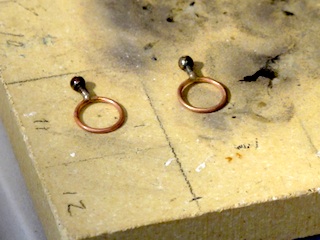
I've had a bad habit for a long time of quenching parts in water after they've been brazed. I'm making a concerted effort now to do the right thing and let them cool slowly. I think I just need to have a second ceramic tile for cooling. That way, valuable work space isn't being eaten up while I wait. Drawing a grid on the tile to help me keep small parts lined up also made the process feel better organized.
4. ERGONOMICS
The horizontal brazing work had me looking down at the table for hours on end. My neck is still in a lot of pain days later. I'm interested in re-working my ergonomics.
Regular tables are about 30" tall. Jewelers, who have to work with very small parts all day have special benches that are ~36"-39" tall. Back when I was working on the tiny Mi-Go maxillipeds for The Whisperer in Darkness I built myself a small jeweler's riser that clamps onto a normal work table. It's been absolutely great so far — and I think I can still do more to optimize the design.
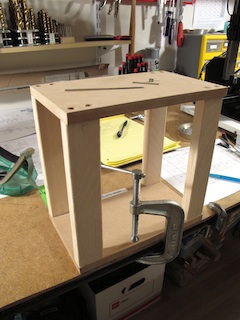
The riser gets more useful when combined with other things. I got a number of steel trays from a restaurant supply store; clamping one onto the riser gives me a nice rim to keep little parts from rolling off. Clamping a vise onto the riser also helps bring my work up to a comfortable height.
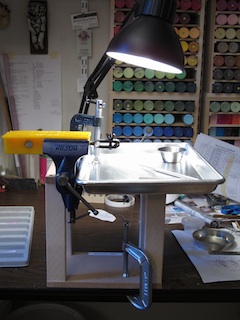
For the Mi-Go armature, I was doing crazy-small work with 000-120 screws. I had to come up with complicated strategies just for holding these things… For instance, putting a pin-vise into the larger vise, held between rubber jaws.
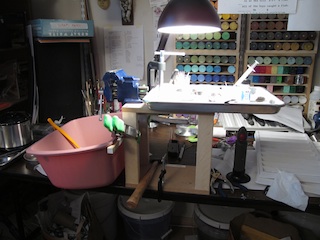
I re-configured the riser slightly on this last project. Besides having the vise on a different side of the riser, the main addition is a small bin located just beneath it, to catch tiny parts if they should fall.
This set up is good for vertical brazing, but it's not wide enough for the ceramic tiles if I want to do horizontal brazing. I'm considering making a wider jeweler's riser for that. (My neck may thank me.)
5. BRAZING BALLS
My method for brazing balls hasn't changed much — but I'm really thrilled to have found some better tools for moving solder bits and flux.
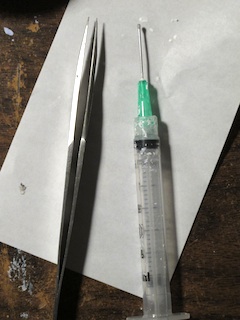
I've already said it: electronics tweezers, FTW. The other discovery is that I can make flux paste a bit more fluid with water, then deliver it where it needs to go using a syringe. Before, I was using tooth picks, which was clumsy and miserable. What's more, I'd need to leave the jar of flux open; the paste dries out quickly. Keeping the flux in a syringe keeps it good and wet.
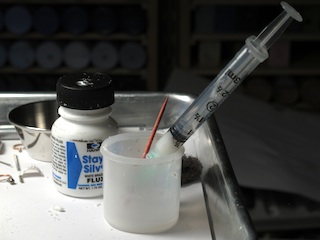
Flux paste seems to be water-based. Just use an eye-dropper to mix it with a little extra water in a small jar. Then it sucks up into the syringe easy as pie. (I should mention: I grind off the pointed tip of the syringe with a belt sander before doing this.)
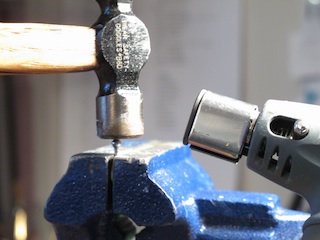
As always, I've got the rod clamped into a vise, and am holding the ball down with a hammer while it's heated. (Hot gas will make the ball want to pop off.) The hammer isn't an ideal solution, because it's also a heat sink cooling off the area that you want hot. I need to look into other tools for this job.
There's a temptation to loosen the downward pressure on the ball, in order to let it heat up more quickly. Bad idea. The ball starts to rise, and then when you press it back down, molten solder squirts out in blobs. Keep downward pressure constant.
Lionel Orozco says that the ball should be heated to a cherry red. Jeremy Spake tells me that this may actually be too hot — that you should specifically avoid getting to the cherry red stage. This matches my experience. I've seen in welding books that there are names for all the various colors that steel turns while being heated, and they are indicative of specific temperatures. I'd like to do deeper research at some point to truly understand how the color of the ball and the melting point of the solder match up.
Jeremy also suggests that the entire ball can be covered in flux. Very interesting! If I'm not overheating my metal, this might work out really well. Must experiment.
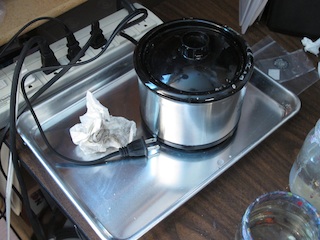
I've moved my pickling station closer to the window. Duh. And I've put it on one of those metal pans, to protect the work table. Incremental progress.
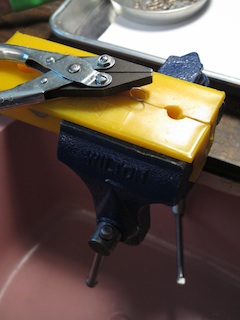
On this last project, I was having trouble getting a nice clean seam of solder where the ball and rod connect. It was turning out too blobby, which would have impaired range of motion. So I decided to use less solder — to the extent of not having a visible seam.
The problem with this strategy is that without the visible seam, there's no way to know for certain that you got a good bond. It's a big no-no in armatures… And let me tell you: the very last thing you want as an armature maker is for a ball to break off mid-scene while an animator's working!
So I came up with a stress test. I put rubber jaws onto my vise, and clamped the ball tight. I twisted the rod using parallel pliers. If the bond is weak, the ball breaks off; if the bond is strong, the rubber will tear first.
I think it's a good test. The pressure of the vise — even with rubber jaws — is greater than what the part will likely experience when it's in a step-block joint. It's definitely greater stress than human hands can exert (a poor test). And the stress test is based on twisting, which is the only way balls are really likely break off. I broke enough bad joins, I feel reasonably confident that the survivors will hold up.
Even so… It's kind of a miserable process. I really want a better strategy for clean, small ball seams the next time I do this.