you are here [x]: Scarlet Star Studios > the Scarlet Letters > cutting rods to size
<< before
evolution of the ball-drilling jig
after >>
notes on brazing
June 30, 2011
cutting rods to size
by sven at 7:00 am
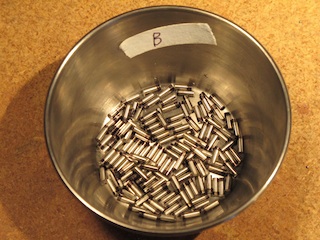
In making armatures, the smaller you work, the more you have to focus on precision. By the same token, when you start doing batches of more than 100 parts at a time, you start looking really carefully at each step of your process.
Rods are the simplest part of an armature. But during the past year, I've come to realize that they're as deserving of attention as any other component. Today I'm going to walk you through the process I've developed for making good rods… In excruciating detail.
Here are five guiding principles:
- Don't assume your rod is actually round.
Like in cooking, start with the best ingredients possible. I've moved to using type 303 precision ground rods, which are pretty close — but even then, while lathing you might discover a rod is .0005"-.0010" off on one side. - You can't get an accurate measure of length if the ends aren't flat.
Which means that before you can even check the length of a rod, both ends need to be lathed. - Protect your lathe's collet by chamfering rod ends.
You may not be able to see burrs on the end of your rod, but you'll feel them scraping the inside of the collet when you try to shove it in. Collets are precise tools; take care of them. - You can't put a rod in a hole of the same diameter.
If your rod is precisely 1/16" wide, and the hole it's supposed to go into is precisely 1/16" wide, the rod won't go in. You have to narrow the rod just slightly, so there'll be a little bit of play. - Don't keep numbers in your head.
When machining big tedious batches of things, trying to remember numbers will inevitably lead to error. Write things down instead.
OK… On to the step-by-step instructions. When you get good at it, this should take about 7-9 minutes per part.
Step 1: Rough cut your rod into segments
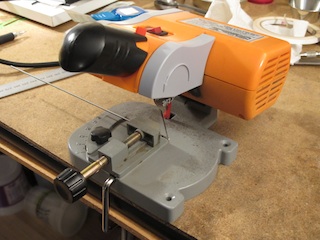
Start by marking the rod you're going to cut with a fine-point sharpie marker. Cut it into segments using a 1/16"-thick abrasive wheel on a mini cut-off saw. These things only cost ~$25 at Harbor Freight, as opposed to ~$60 at Micro-Mark. Great tool. Wear a tight-fitting face mask — you definitely don't want stainless steel dust in your lungs.
Step 2: Chamfer one end of the rod
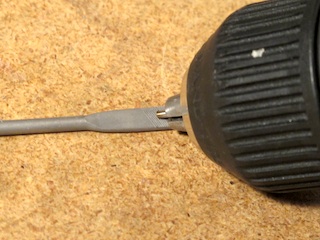
One end of your rod segment will be fairly smooth, the other will have a big burr hanging off it. Prep the smooth side to go into the lathe by filing the edges. I find it useful to put the rod into the chuck of hand-held electric drill, and simply run it across a stationary file.
Step 3: Flatten one end of the rod
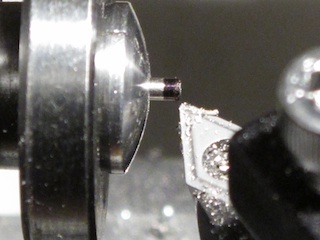
With one end of the rod chamfered, insert it into the lathe collet. If you're trying to work precisely, don't use a jawed chuck — it's just not as accurate. Lathe that big ugly burr right off.
Step 4: Chamfer and mark the flattened end
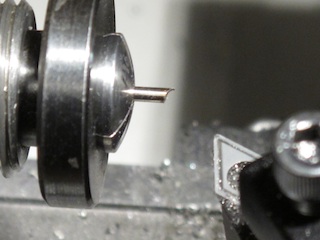
The end of the rod is flat, but there are still microscopic burrs on the edges. While the segment is still in the lathe, use a tiny diamond file to very slightly soften that edge. While you're at it, use a normal-sized sharpie marker to blacken this end of the part. It's helpful as you go through the process to be able to tell one end of the part from the other.
Step 5: Flatten the other end
Take the segment out of the collet and turn it around. Repeat step 3 and flatten the other end of the rod.
Since you've blackened one end of the rod, you don't have to bother chamfering this side. Just make sure that when you do further work on the rod, it's always this side that you're cutting.
Step 6: Measure the part
Using digital calipers, measure your part to see how long it is. Hopefully you've left yourself ~.0100"-.0800" of extra length, since we're still going to need to lathe the part to its final size.
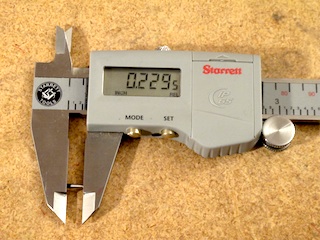
Step 7: Write down the measurement
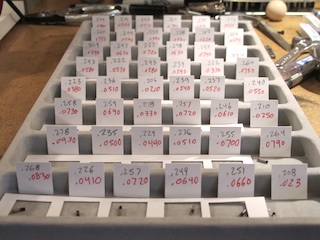
However long the part is, write that number down on a little scrap of paper. If you're doing a big batch of parts, I recommend getting yourself a cheap jewelry organizer (~$3) to use as a palette.
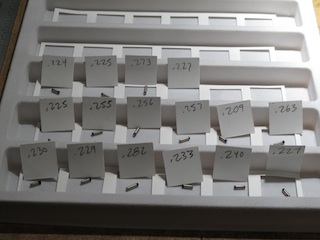
I've got a 3/4" square paper punch that came from a craft supply store — very useful for making the tiny bits of paper. Card stock works a bit better than typing paper, because the paper doesn't bend when you lean it against the walls of the jewelry organizer.
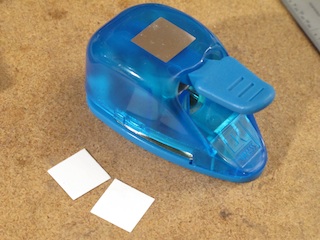
Step 8: Calculate how much to shorten the rod
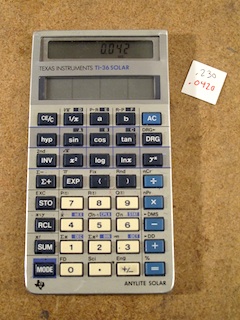
For the rod we're looking at below, I wanted the final length to be .1880". Since the rod at this stage was .2300" long, I just needed to subtract to figure out that I needed to remove .0420".
Step 9: Write down how much the rod needs to be shortened
On the same tiny square of paper, write down how much the rod needs to be shortened. I find using a red pen here helps keep the new number visually distinct. Anything that helps prevent errors is good!
Step 10: Locate the end of the rod
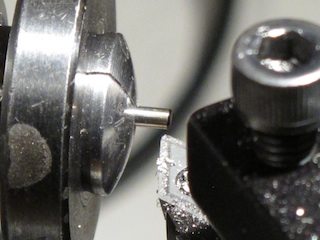
Put the chamfered end of the rod segment back into the lathe. Blacken the flat end of the protruding side with a normal sized sharpie marker. Bring your cutting tool in until it just touches the end. If you're careful, you should be able to remove less than .0005" of material while doing this. Listen for a change of sound when the tool touches the spinning rod, and look for whether or not the sharpie ink is being rubbed away.
Step 11: Cut the rod to its final length
Zero out the DRO (Digital Read Out). Use the lathe to cut off the amount of material that you wrote down in red. For 1/16" rods, I found that .0050" cuts worked well. You can take off more at a time safely — but the stress is more likely to cause the rod to move in the collet.
Step 12: Check that you hit the correct length
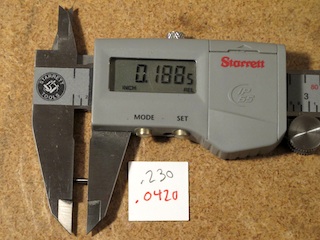
Sometimes things go wrong. Like when a rod moves in the collet, and you don't actually cut off as much material as you thought. Check your work with the digital calipers. In the photo below I was off by .0005" from my desired length of .1880". That was a perfectly acceptable level of error for this project.
The part is now at it's correct length.
Step 13: Position the rod for trimming its diameter
If this end of the rod is going to go into a ball, then you're going to need to trim its diameter. I find lathing about .0010" off all around gives just enough play to get the rod into the ball's hole while still keeping a close fit.
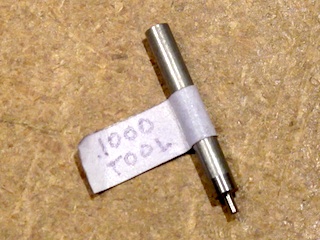
For this project, the ball holes were 5/64" deep (.0780"). I decided the diameter trim should be .0850" long. I wanted the rod to stick out .1000" from the surface of the lathe collet, so there'd be a margin of safety between the cutting tool and the collet. To accomplish this, I created a little tool that allows me to push the rod into the collet to a (reasonably) precise depth. Using the .1000" tool, position the rod in the collet.
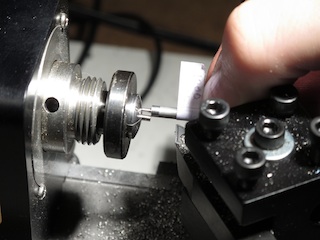
Step 14: Zero out the DRO where you want the diameter trim to end
As in step 10, blacken the end of the rod, and carefully bring the cutter in until it just touches. Zero out the DRO. Without performing a cut, move the cutter along the Z-axis to .0850". Zero out the DRO again.
Now, when you're trimming the rod ends, all you have to do is travel to zero each time. It saves a lot of brain power. (If you're doing a big batch of parts, you're only going to have to do this step once.)
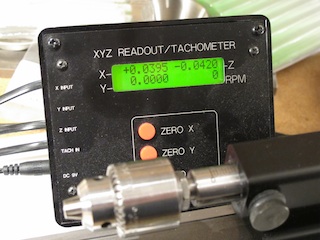
Step 15: Locate the side of the rod
Blacken the side of the rod. Move the cutter on the X-axis and watch for when it makes a mark in the ink. Figure out where the edge of the rod is and zero the DRO. Move the cutter in to X=-.0010. You're now ready to make cuts. (For a batch, you're only going to have to do this once.)
Step 16: Trim the end of the rod
With the cutter set at X=-.0010, move it to Z=0, and then back off from the part on the Z axis. Leave the X alone. Test the trim by placing a ball on the end of the rod. If it fits nicely, then you're done — or ready to trim the other end of the rod.
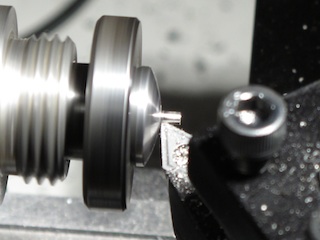
There, that wasn't so hard, was it?
Oh… I guess it was. Well, at least you've got a really great part to work with now. ;-)