you are here [x]: Scarlet Star Studios > the Scarlet Letters > making a replacement face kit
<< before
the beginning
after >>
"mutate" in film festivals
July 13, 2010
making a replacement face kit
by sven at 3:45 am
I've discussed mold design for my film, The Beginning. In this post I'll document how you take resin castings and turn them into a full replacement face kit.
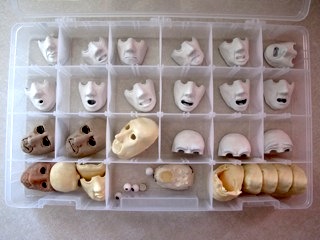
Fig.1: The mouths in my face kit are based on the visemes described in Preston Blair's classic book, Cartoon Animation. Every other set of mouth shapes I've encountered in books and online is derivative of Blair's seminal work. Many authors simplify Blair's shapes in ways that I consider mistakes; for instance, identifying vowels by alphabet letter rather than phonetic sound. For my purposes, I decided I could simplify the set very slightly and get away with 12 mouth shapes.
Problem: How do you name these mouth shapes? —Particularly the vowels? I decided for this project to do some in-depth research on how dictionary pronunciation guides spell out phonemes. The wikipedia entry on Pronunciation respelling for English proved extremely helpful… To my surprise, it turned out that there is no universal system! One system may define "ay" as sounding like pay — whereas another defines it as sounding like pie.
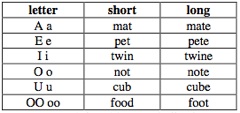
For my purposes, I decided that a simple and elegant approach would be to denote long vowels with capital letters, and short vowels with lower case letters. One additional vowel is required, though: OO/oo. Here's my pronunciation guide:
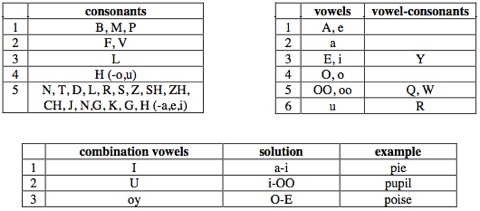
I also found it useful to reorganize the various phonetic sounds into four categories… Consonants, vowels, consonants that use vowel mouth shapes, and vowel sounds that are actually made by combining two other letters' sounds. Here's my cheat sheet:
Now that you understand how I've chosen to notate and organize phonemes, here's the list of the 12 mouth shapes I finally settled on:
- A e
- a
- BMP
- E i Y
- FV
- H(-o,u)
- L
- neutral
- O o
- OO oo QW
- u R
- X
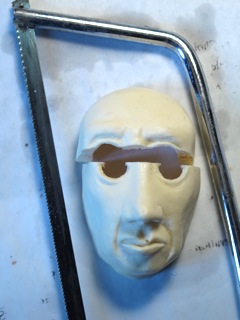
Fig.2: I had originally planned to do the replacement faces as single-piece masks. The problem with that plan, though, is that eyebrows would have to be re-applied every time the mouth moves. No good! So I decided to try the method used in Coraline: doing the forehead and lower face as two separate pieces.
I took a casting and cut it in half with a craft saw. The forehead gets discarded. I used a belt sander to smooth the rough edges of the lower face and make them perfectly flat.
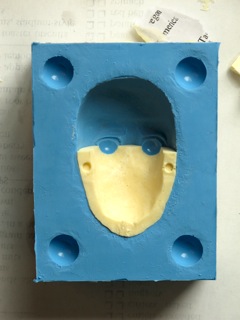
Fig.3: The half-face part I just made goes into the mold as a placeholder. I use a brush to thoroughly paint the part with vaseline, then do a casting of just the forehead, which will be a second placeholder. The two parts match up exactly now. Had I used the forehead piece that was cut off in fig.1, seams would have been much wider.
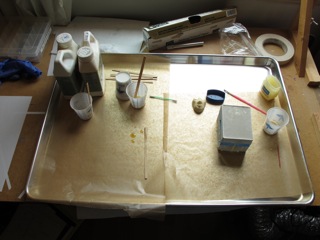
Fig.4: Working with silicone, polyester resin, and solvents is nasty, messy, and toxic. In addition to wearing my usual safety gear, I purchased a large metal tray from a restaurant supply store, on which to do all my chem work.
To make cleanup easier, I tried lining the pan with wax paper. Unfortunately, chemicals go right through it. In the future, I may try laying down Saran wrap or something similar instead.
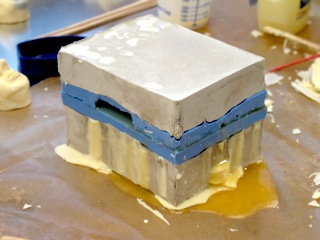
Fig.5: For casting the mouth and forehead pieces, I found that 10ml of part A combined with 10ml of part B gave me about the right volume. You need to have some overflow that will exit though the sprue holes in order to get a good casting. The area around the mold gets progressively messier with each casting.
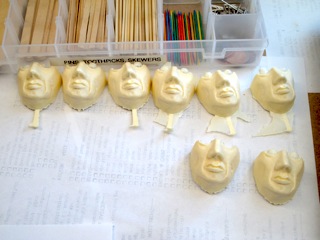
Fig.6: It takes at least an hour for the resin to fully cure. I found that the pieces were firm enough to demold at 30 minutes. Do not trim off flashing at that point, however — the curved casting is likely to get deformed by your grip while you work on it.
It took 15-20 minutes to release each casting, clean the mold, and pour in another batch of resin. So turn-around time for each part was about 50 minutes. Needing to make 12 mouths, 3 foreheads, and some spare parts to have on hand, this was more than 2 solid days of work.
It was a fairly frustrating part of the fabrication process… Not because I had to wait, per se — but because I had to repeatedly take off the gloves to work on a B project, then interrupt myself to put the gloves back on when the each new casting was ready. No sense of flow was possible. It would be preferable to be working on two casting processes simultaneously, to avoid switching gears so much.
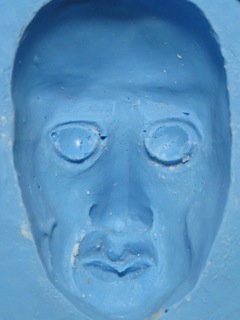
Fig.7: In all, I got 24 good castings out of the mold before wear and tear got too bad. Studying the mold interior, I think I see what went wrong. When I made the mold, I painted a thin detail layer of silicone onto the sculpt, then covered that with a thicker layer. Bubbles were trapped between the thin skin and the thicker one… So most damage was from the thin skin tearing away to reveal the air bubble trapped behind it. Use of silicone thinner probably also helped weaken the material.
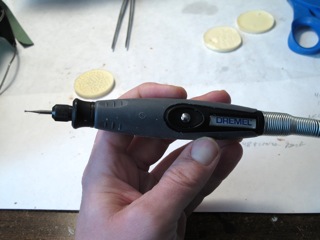
Fig.8: We don't need a set of identical faces — we need them resculpted with different mouth shapes and eyebrow positions. For this job, I tried a flexible shaft attachment with my Dremel roto tool for the first time. I was pleased — it was much easier to wield the tool while carving.
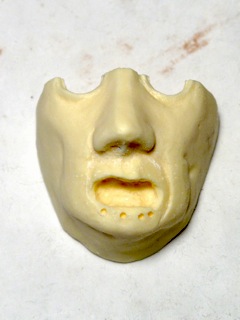
Fig.9: Resculpting a face involves carving away excess material…
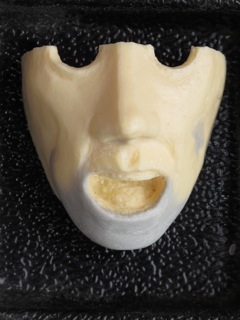
Fig.10: After excess material's been removed, new bits can be built up by adding epoxy clay. I used Magic Sculp, which has about a 4 hour cure time. Apoxie and Milliput are roughly equivalent leading brands.
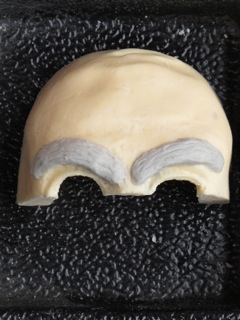
Fig.11: Eyebrows didn't require any carving. They just sit on the forehead.
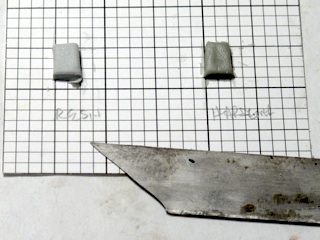
Fig.12: Using such tiny quantities of epoxy while sculpting, getting equal proportions of part A and part B can be tricky. I found it useful to flatten out dabs of epoxy on a piece of gridded paper and then use the guide lines to help me cut them to size. (Good free graph paper PDFs are available from incompetech.com.)
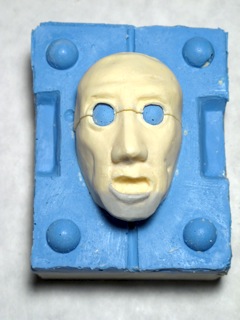
Fig.13: Are the face kit pieces working out? As an initial test, put the pieces back onto the interior mold face. I was pleased at this point to see that registration's pretty accurate.
Now we can proceed to making a base for the faces.
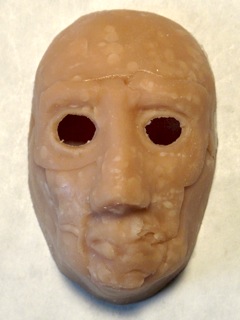
Fig.14: During the mold-making process, I made a Super Sculpey placeholder to establish the thickness of the faces. When it comes time to make a base for the faces, the Sculpey piece becomes useful again.
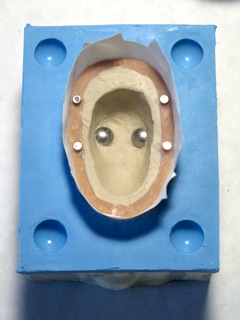
Fig.15: The base for the faces merely needs to support the eyeballs, so I put some Klean Klay into the mold, atop the Sculpey placeholder, to create some extra space. To set up walls around the edge of the face, I just used some tape. Tiny magnets were placed in their sockets in the Sculpey, and additional magnets were placed atop each of them. The second layer of magnets create sockets in the base.
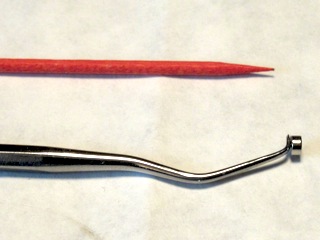
Fig.16: These magnets are so powerful, if they come too close to each other they leap out of their sockets and go flying across the room. Putting them in place was a bit tricky! Ultimately what worked best was to use a dental tool to maneuver them into place. I'd then pull the dental tool away while holding the magnet down with a toothpick.
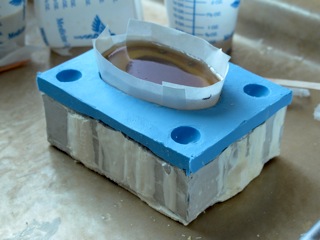
Fig.17: Pour part A and part B of the resin into two separate cups, then mix them in a third. Fill the mold.
Just before making the base, I discovered that all my resin hardener had dried up, and I had to go out to buy a new batch. The resin and hardener (part A & B) are sold as a set. I thought I'd use up the old resin before breaking in to the new… But when I mixed what I thought was part A with part B, I discovered — much to my chagrin — that I'd only mixed two cups of resin base together without any hardener. TAP plastics has switched which material they label as A and which they label as B!
Cautionary tale: double-check that you know which material is A and which is B before combining new and old materials!
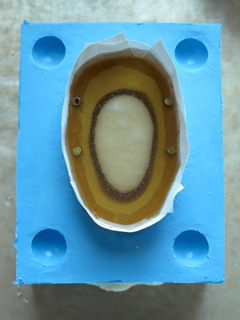
Fig.18: It's interesting to watch the resin cure. I would have expected it to start congealing at the edges of the mold… But actually it turns white in the center first.
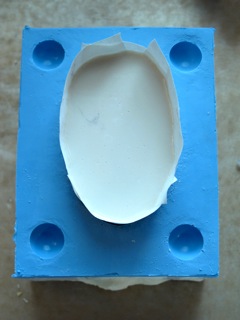
Fig.19: Here's the resin after it's fully cured. It's noticeably whiter than castings I did with the older materials. That clue turned out to be pretty important later on when things started to go seriously wrong…
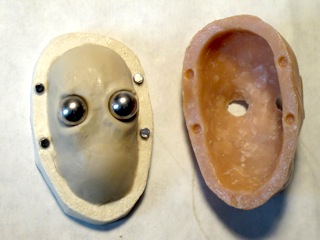
Fig.20: Here I've separated the base and Klean Klay from the Super Sculpey placeholder.
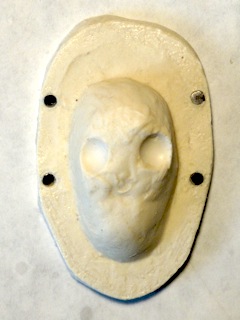
Fig.21: Here's the face's base after it's been cleaned up. Studying it, I realized that the bulge in the middle is unnecessarily large. With more flat area, there'd be more room for drilling tie-down holes.
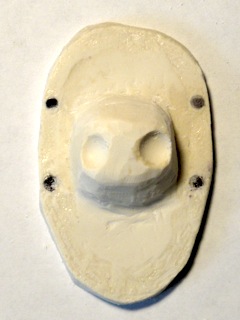
Fig.22: I used the Dremel roto tool to carve away more material. If/when I do this again, I'll try to remember that the only thing needing to go in the hollow space behind the mask is a support for the eyes.
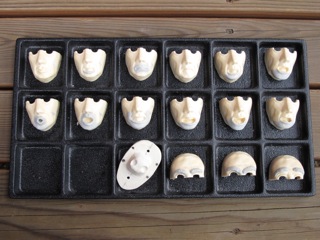
Fig.23: Here's the whole kit ready to be painted: 12 mouths, 3 brows, and a base. That useful organizer that they're in was less than $2 at a jewelry supply store. If you look closely, you can see that I've drilled two holes in the base for tie-downs.
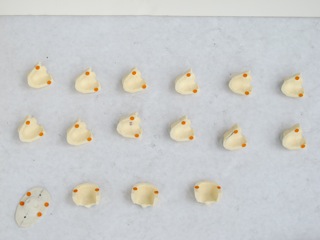
Fig.24: Before painting these faces with acrylics, it's a good idea to spray them with a layer of primer. To protect the magnets, I covered them with little sticker dots.
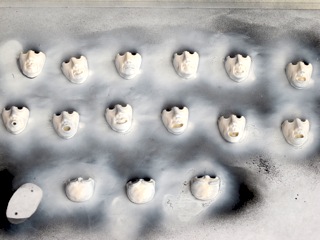
Fig.25: I sprayed the backs of the pieces with black primer and the fronts with white primer (Games Workshop brand). I was thinking about how theatrical masks tend to have their interior painted black. However, almost immediately after priming, I realized that replacement faces are different. You want everything to be flesh-toned — to camouflage the interior, in case the camera accidentally glimpses it through a gap between the eye and the eyelid. Black was a mistake.
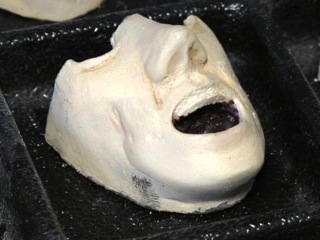
Fig.26: The day after priming the parts, I made a horrifying discovery. The primer was wet — completely uncured, it seemed. As I was applying acrylics, black fingerprints kept showing up. What a mess… I had no option but to strip off all the paint and primer and start over.
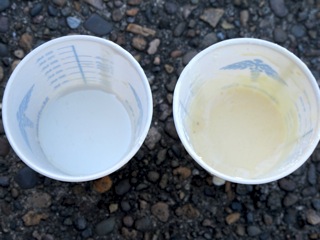
Fig.27: At first I thought that the problem was the primer. Did I not shake it long enough? Was it too hot on the day I sprayed? Too humid? Should I have washed the parts with soap before spraying? Research told me that primer can be fussy, and any of these mistakes might cause problems.
But then I noticed that the pieces were leaving oily marks on a piece of paper. Now I'm pretty sure that the primer wasn't the main problem. What's going on is that the resin chemistry was off — something is leaching out of the resin that either prevented the primer from adhering, or dissolved it overnight.
Remember that my old batch of resin hardener had dried out? The whole story is that some time ago, I was unable to open its container. So I cut a hole in the jug, and then later resealed it with tape. But the tape didn't adequately prevent evaporation. As the hardener reduced down, I was no longer creating the proper mix by combining equal parts of A and B. Comparing leftovers from an old batch with leftovers from the new batch, it's painfully obvious that the old batch is yellow — a sign of bad chemistry.
Lesson learned: Make sure your materials aren't past their expiration date! And make sure to keep them tightly sealed between uses!
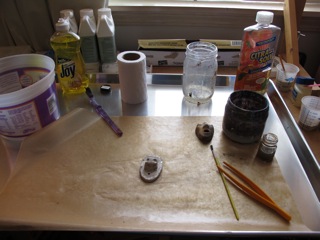
Fig.28: With so much time invested in this project, I couldn't just give up. I had to try to salvage the parts. It took five hours scrubbing with CitriSolv and an old kitchen sponge to strip off all the ruined paint and primer.
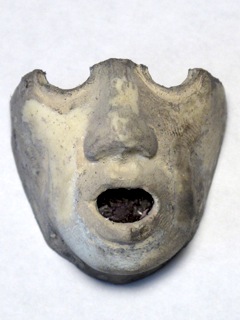
Fig.29: Even after the parts had been cleaned, there was a good deal of staining that's impossible to remove. It was pretty demoralizing to see my shiny new parts looking so grubby.
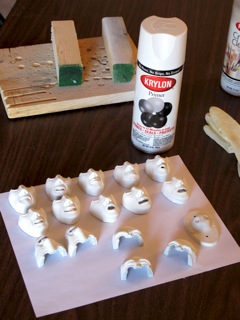
Fig.30: For my second attempt at priming, I was extra careful about shaking the can, heat, humidity, and cleaning. I washed all the parts with dish soap and dried them thoroughly with a hair dryer. The heat of the dryer seems to make more oils sweat out of the resin, so I tried to use it sparingly.
This time I went with Krylon white primer, feeling that it might be a more trustworthy brand… Even though it probably wasn't Games Workshop's fault that the first priming failed.
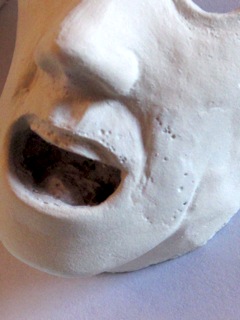
Fig.31: While re-priming the parts, I noticed that there was pitting on some of the surfaces. I think this must have occurred when I was scrubbing with solvent. In trying to solve one problem, I created another. If I wanted, I could fill all those tiny holes with epoxy… But by this point, I just needed to get the project done, and couldn't afford to be a perfectionist anymore.
As a final step, I used epoxy glue to fix tiny magnets into the backs of the face pieces — taking care to make sure that all the polarities were pointed in the same direction.
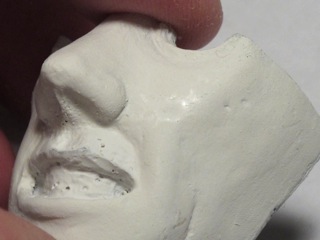
Fig.32: The white primer has survived better than the black did… But I'm seeing signs that it's also beginning to "sweat" a bit. Further proof that my main problem is bad resin chemistry.
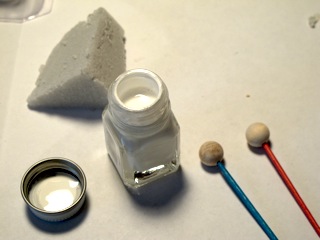
Fig.33: My original plan was to give the puppet eyes, hair, and a naturalistic paint job. However, I only allotted myself a month for this experiment, so plans changed. The faces are striking when they're all white; I determined to do a lipsync proof using that look.
I figured I should at least finish off the eyes, though. The plan was to paint 3/8" wooden balls with enamel paint. Pupils would be made from black dots of paper, which could float on a thin coat of vaseline.
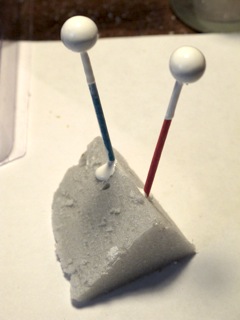
Fig.34: I drilled holes in the back of the eyes, planning to fill them with magnets. I temporarily hot glued toothpicks in those holes, so I could easily dip the balls into the paint. I dipped each ball three times, which created a gorgeous glassy look. However, it took days for the paint to really cure — and even then, the paint was more vulnerable to marks than I'd expected.
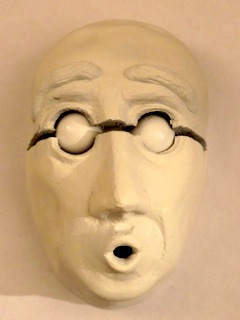
Fig.35: It turns out that with those extra layers of paint, the eyes became too big to fit in their sockets. Next time, I could either start with smaller balls, anticipating the size change — or I could just use delrin/acetal plastic balls and skip this issue altogether.
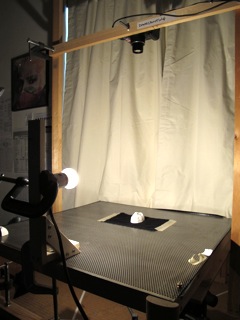
Fig.36: Onward to photography! For this project, I wanted to create a set of 36 face photographs for animation. That's 3 brows times 12 mouths.
I set up the camera as a downshooter and used Dragon Stop Motion as a video assist. Technically I didn't really need to use a framegrabber — but it made aligning the faces between shots a good deal easier.
The magnets work perfectly for fixing the face parts to the base. However, due to one of the base's magnets being a slightly tilted, the lower face can slide a little to the left or right. I think an important addition to the design would to add hemispheres (or something similar) to the edges of the face pieces, to help them physically key into the base.
The light, incidentally, is set into a handy little fixture that is nothing more than a socket and a plug. Very cheap — less than $2 — and available off the shelf at Home Depot.
The stage is a piece of perforated steel that I got from onlinemetals.com a few years ago. The tie-downs are what I always use: 3" 4-40 threaded rods and brass thumb nuts.
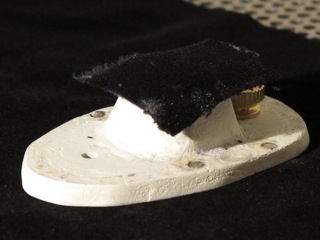
Fig.37: I wanted the face to be floating in a black void, so I taped down a piece of black velvet. I put a little bit of black velvet behind the face's eye holes, too, to hide the eye sockets. While the black looked inky in Dragon, when I rendered the final animation out of AfterEffects, I discovered a lot of color inconsistencies… Velvet was a good start, but I needed color keying to get a true black nothingness.
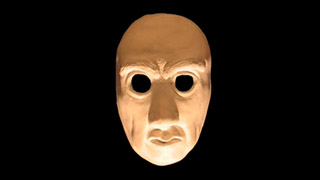
Fig.38: So finally the big question: How do you get rid of the seams in the mask?
I know, having attended a Laika presentation, that on Coraline they used Inferno as their software for seam removal. That software's alien to me, though.
Doing my own research, it looks like the magic bullet for this problem ought to be Adobe PhotoShop CS5's new tool "content aware fill," which the net has been buzzing about since its release in April. However, CS5 is incredibly expensive. Further research turned up that a FREE software called GIMP has a tool called "resynthesizer" that's supposed to do the very same trick. (Here's a useful comparison of "content aware fill" and "resythesizer.")
GIMP was originally written for Linux, but is available for Macs and Windows machines as well. Admittedly I'm not very proficient with the software yet, but still I was somewhat disappointed. Fixing each frame was laborious — and while better than the "smudge" tool alone, nonetheless created areas that stand out as blotchy when animated. (Out of curiosity, I'd like to try a demo version of CS5 at some point to see if it can do a better job.)
If these replacement faces were on a puppet that moves its head around a lot, maybe the smeared patches where seams have been removed would be less obvious. I don't know. On this project, though, I was able to employ a different method entirely, which worked quite well: I retouched just one face, and then used it as a clean plate — treating seam removal exactly like rig removal. This process still involves fixing frames one at a time… But simply erasing seams on the top layer in an image manipulation program is much, much simpler than having to blend, blur, and create pixels that additively cover up the unwanted lines.
So, conclusion? The replacement faces are a qualified success. They can look great when viewed from the front. Whether they can look good on a moving puppet, too, is unknown. The fabrication process is extremely laborious — easily eating up 100+ hours in the making. But once you have them, they're a great asset to have on hand. Right now, I'd say I'm 75% in favor of doing future puppet faces using the same method.