you are here [x]: Scarlet Star Studios > the Scarlet Letters > armatures: the step-block joint
<< before
november events
after >>
happy halloween from scarlet star studios!
October 27, 2009
armatures: the step-block joint
by sven at 4:26 pm

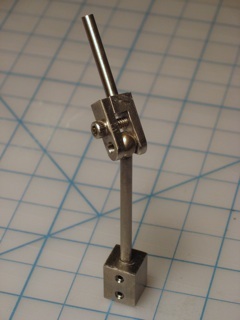
The step-block joint is the foundation of professional armature making.
When someone decides to try making armatures, usually the first joints they make are open-hole sandwich plates. You can do a lot with sandwich plates -- but by their nature, each set of plates captures two balls and gives you two pivot points. To avoid double-jointed knees and elbows, often you have to freeze one ball in place. A step-block joint, by having just one pivot point, gives you more control and precision as you design an armature.
Another virtue: Whereas a hinge or swivel joint only offers one axis of rotation, step-blocks offer two… And by adding a swivel in the step-block's butt, you approximate three. (That is, so long as the incoming rods are at roughly 90 degree angles. When the rods straighten out, you're left with just two axes again.)
Step-blocks are very modular, and lend themselves to being produced in batches. Stopmo studios tend to outsource the making of these parts to machine shops that employ CNC machines the size of a small trucks. Inside the studio, then, armature-building revolves around using these pre-made bits.
So, given how central step-blocks are to the life of an armaturist, I've been spending a great deal of time during the past few months refining my own designs.

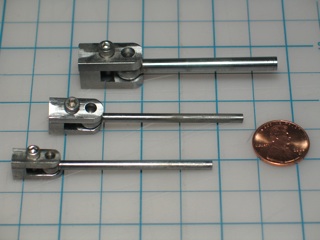
I'm aiming at being able to produce six sizes of step-block joints in my home studio. For simplicity's sake, I'm labeling them like T-shirts: XS, S, M, L, XL, XXL. These sizes are, respectively, 1/8", 5/32", 3/16", 1/4", 5/16", and 3/8" -- where the joints are defined by the diameter of the ball they use.
I've drawn up blueprints for all six sizes, but have only manufactured L, XL, and XXL joints so far. While step-block joints are generally very forgiving of slop in their manufacture, making the XS, S, and M sizes still requires being able to keep tolerances around the .0020" range (the thickness of a piece of paper) -- a skill I'm still developing.
For my own sake, I've also typed up a 10+ page document that lays out the logic of why certain ratios need to be so, which matches up available sizes of raw metal to parts, selects screw sizes, and so on.
I've written previously about why 1/8" balls represent a certain lower limit for miniaturization. As for upper limits, my Sherline mill can only accommodate cutters with shanks up to 3/8". I have 1/2" balls on hand -- but no means at present for milling ball cups for them to sit in.

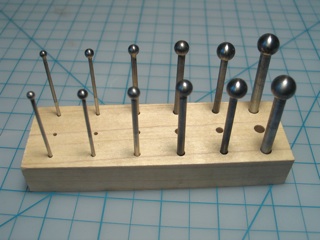
While working on step-blocks, it became apparent that I should have a set of balls brazed to rods on hand, for testing completed joints. I went ahead and made such a set, and then made a nice little wooden holder for it. I'm really pleased with it aesthetically, and it's proven to be extremely useful.

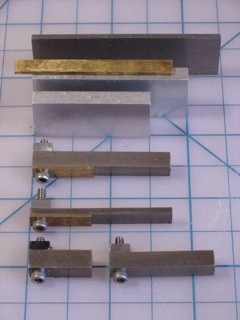
In order to take raw metal stock and machine it into a step-block joint, you need to be able to precisely position your work in a milling vise. Above you see the set of spacers I created for the job of making 1/4" joints.
Each size of joint requires different sizes of spacers. I've been adding to my collection of spacers haphazardly with each new size of joint that I work on. However, I've drawn up plans for a master set of spacers that can be adjusted to accommodate many different projects. It's sort of like the spacers that letterpress printers use, which they call "furniture." I'm looking forward to reporting more about that project in a future post.
(Oh -- in case you think all this research and development is purely academic… Let me remind you what you're not seeing in the photos: armatures that I'm constructing for the H.P.Lovecraft Historical Society's production of The Whisperer in Darkness! …Check out their blog!)
posted by sven | October 27, 2009 4:26 PM | categories: stopmo