February 2008 archives
you are here [x]: Scarlet Star Studios > the Scarlet Letters > February 2008
<< before
January 2008
after >>
March 2008
February 27, 2008
artist's way creative clusters begin march 18
by gl. at 3:21 pm
i'll be hosting another round of artist's way at the studio starting march 18. i'm offering an evening cluster & a morning cluster to encourage people to make more of what they love, whether it's visual, literary or expressive art. out of all the things we do, this is my favorite activity to facilitate. :) here's the announcement i sent out:
Gain confidence, courage and compassionate companions in an Artist's Way Creative Cluster! The Artist's Way offers you an opportunity to discover or recover your creative self. If you've tried to get through The Artist's Way alone, come join us! Your facilitator, Gretchin Lair, is a creative advocate known for her "splendid mix of honesty and art" and "quiet leadership."
Two choices for Spring 2008: only $250 for 10 weeks!
(RSVP and $125 deposit due by March 11)March 18-May 27
Tuesday mornings 10 a.m.-12:30 p.m.
Tuesday evenings 6-9:30 p.m.http://www.scarletstarstudios.com/artistsway/
artistsway@scarletstarstudios.com
503.762.6830If a creative cluster doesn't work for you this time, we have plenty of other opportunities for art exploration & creative self-expression! Our goal is to restore hope & faith in your own abilities, to encourage you to create fearlessly & truthfully.
of course, no prior art experience or talent is required, just a desire for & commitment to creativity. i hope both clusters fill with kind, generous, courageous people!
posted by gl. | permalink | categories: artist's way
February 26, 2008
a meeting of the muses
by gl. at 1:15 am
this month i had planned to have a "romancing your muse" workshop near valentine's day that would include wine, chocolate, music & flowers to entice and relax participants as they reviewed ways to increase visits from their muse for the rest of the year. i thought i could target the "hip chicks do wine" culture i see a lot in portland, so i was hugely surprised when nobody signed up for the workshop: this is the first workshop that's happened to.
fortunately i talked with serena & bridget at the monster month book release party about the poor attendance and came up with a better idea. so i scrambled to create a new event: "a meeting of the muses," where i invited the kindest, most generous muses i know over for a fireside chat.
we don't have a fireside, but i borrowed a chocolate fountain from linda. since i invited the muses with less than a week's notice, many of them regretfully declined, but i had a lot of fun with those who came! call it a "beta test," if you will.
we dipped strawberries & cookies into flowing chocolate, drank wine & pear brandy, and chatted about things i can't usually talk about with anyone: creating workshops that don't require "widgets," art & soul, certification, useful feedback & recent art therapy legislation, just to name a few topics. there was even an impromptu song about credentials and credibility. several muses met each other for the first time. i thought we would make art, too, and so i created a "love letters" exercise, but we just spent 3 hours talking instead! at the end of the event everyone took a rose home with them.
we had such a good time that this may become a quarterly event rotating to different studios. i know i'll host it again! i love it when i can transform an event from potential failure to success. (for instance, guided intent was created when meetup began charging for its services; instead of giving up the free collage night, i created a regular paying event to cover it.) i'm definitely looking forward to the next meeting of the muses!
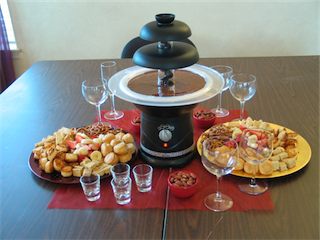
[chocolate fountain setup]
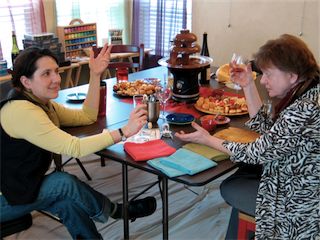
[bridget & serena commiserating]
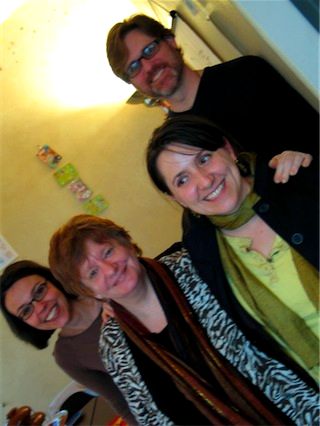
[other muses: consu, serena, bridget & mark. i may have been a little tipsy at this point.]

[chocolate fountain aftermath]
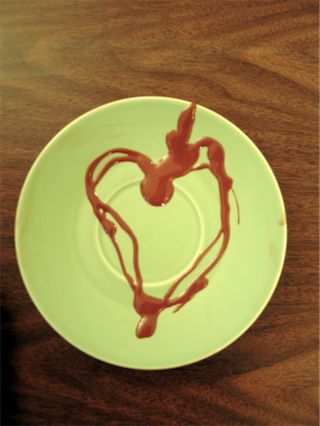
[love]
posted by gl. | permalink | categories: classes & workshops
February 20, 2008
artist's way guided intent (february)
by gl. at 2:35 am
a couple of weeks ago we hosted the february guided intent, whose theme was "strength." so i asked them to create "life plaques," an idea i got from dayna a long time ago.
in fact, we explored 3 different ways to explore our personal strengths: a mindmap on the table, an abstract visualization of four different personal strengths, and finally a life plaque based on one or more of the visualizations.
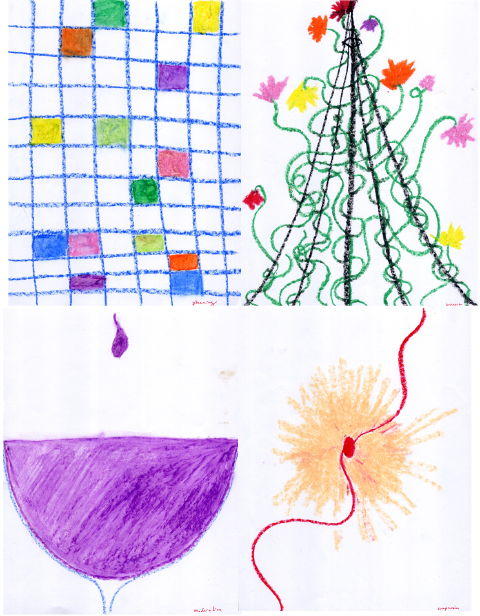
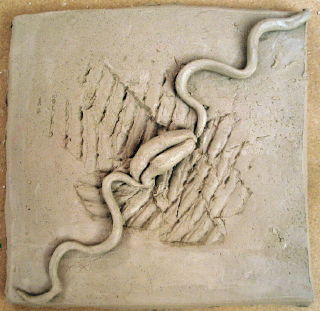
[compassion: click the picture to see the other life plaques and visualizations]
the next guided intent is one of my favorites. we'll be exploring compassion by sharing our stories "on stage" using a technique similar to playback theatre. playback theatre is a process that combines spontaneous collaboration with gentle direction. by being both storytellers and actors, we will see each other's stories through kinder eyes. it's often touching, hilarious, sad and bold all at once.
(it's also often difficult to convince people who don't consider themselves performing artists to try this, but i want to encourage people to try new things in a safe space as a way to increase creative capacity & vocabulary no matter what their dominant art is. :)
posted by gl. | permalink | categories: artist's way
February 14, 2008
essentials & influences - sven
by sven at 7:00 am
Our friend Dayna Collins started a meme a while back, asking what your influences are and what tools/materials are essential in your studio. Gretchin's already responded... The meme seems like a lot of fun, so I've wanted to answer too -- but it's also been challenging.
For influences, I came up with an initial list of 60+ musicians, artists, thinkers, etc. who've shaped who I am and what I do. Too many! So, finally I decided the only thing I can reasonably do is say who's influencing me right now. Maybe that makes this more a list of preoccupations... But here goes.
Influences:
- Julia Cameron's The Artist's Way: the practice of morning pages
- Chris Baty's No Plot? No Problem!: emphasis on generating page count while writing
- H.P.Lovecraft's At The Mountains of Madness: which I'm trying to adapt to film
- Ron Cole: exploring film distribution strategies
- Jamie Caliri: how he uses digital still cameras for animation
- The Animation Show of Shows: a compilation of award-winning animation
- Barry Purves: combining theater sensibilities with stopmo
- Julie Taymor: her knack for pairing cultural iconography and story
- Nick Hilligoss: foam latex puppet how-to
- Ten Tiny Dances: a model for brief motion experiments
As for "studio essentials," there was a temptation to list very specialized sets of tools/materials. For instance: what materials are essential for making puppets -- or what tools/materials I use for painting. I decided that the spirit of the question should be more along the lines of "what stuff do you keep around just in case?"... Like if you suddenly asked me to build something, what would I most likely pull out of my bag of tricks?
For this one, I'm cheating and upping my list to 20 items. ...So there!
Studio Essentials:
- safety: 3M brand carbon-cartridge respirator and wrap-around safety goggles
- hardboard, AKA masonite: 1/4"-thick stuff is good for constructing nearly anything
- foam insulation board: excellent for carving, can be layered to make thicker sheets
- 1"x2"x8' lengths of pine: good to keep some on hand
- abundant supply of fasteners: wood screws, 18 ga. wire nails
- cool-melt hot glue gun: finger burns are much less severe
- cordless electric drill: it's not a Sven project til there's been drilling!
- miter saw: for cutting perfect 90 degree angles (and other angles)
- electric jig saw: combined with 8' straight edge, avoids need for scary circular saw
- micro cut-off saw: phenomenal for chop cuts on anything 1/2" dia. or smaller
- small vise which can clamp onto the edge of a table
- clamps, clamps, clamps: c-clamps, corner clamps, gator clamps, extra-long clamps
- small needle-nosed pliers with built-in wire cutter
- hex key set (swiss-army-knife-style): every key you need, all in one place
- rulers: 5" plastic see-through ruler, 12" steel straight-edge, 8' aluminum straight-edge
- small self-healing cutting pad and X-acto knife
- 1" wide white post-it tape: good for labels, many other purposes
- sand paper: medium grit, good for wood and metal
- delta ceramcoat acrylic paints: cheap and plentiful
- storage box for paints: being able to see all the colors in one glance makes them much more usable
posted by sven | permalink | categories: miscellany
February 13, 2008
new technologies' effects on stop-motion animation
by sven at 7:00 am
(Another essay-like post that I've written for the pose-to-pose stopmo thread at StopMotionAnimation.com.)
I want to try to sum up a bunch of thinking I've been doing about how new technologies are affecting stop-motion animation.
THE TECHNOLOGY OF FILMING STOPMO ANIMATION
It seems to me that three technologies have really revolutionized how we work:
- the framegrabber
- the ability to capture digital frames
- the personal computer
I want to emphasize that early framegrabbers, such as the Lunchbox, were built to work with analog frame capture -- film-based movie cameras and tape-based videocams. Now that we're capturing frames with Digital Still Cameras and DV cams, most folks have software-based framegrabbers operating on their computers... But framegrabber tech is not inherently dependent on personal computers.
The personal computer, I'd say, has optimized the use of framegrabbers and digital image capture. Ideally, a computer will fulfill four functions:
- previewing what a DSC/DV cam sees before you snap a frame
- triggering the DSC/DV cam, so we don't have to risk touching it
- storing the images captured
- compiling many frames into a single file that can be played as a movie
There are ways to accomplish all four of these functions without involving a computer -- but it tends to be a much more difficult route. Newer framegrabber programs, such as Dragon, are attempting to integrate the four functions in a very stream-lined way... I think there's good reason to hope that Dragon is establishing a standard that future softwares will emulate.
THE ANIMATOR'S WORK-FLOW
Here are the major ways that I see new technologies affecting how animators do their work:
1. With framegrabbers, less mental focus is required.
Before framegrabbers existed, animators had to essentially become "human framegrabbers"... Going into an intense state of "animation hypnosis," where the world slows down to "puppet time," and one almost sees the arcs traced by a puppet's limbs as tracer-lines floating in mid-air. With the aide of framegrabbers, you don't necessarily have to go into such a deep state of concentration. This is both a good and a bad thing. On the one hand, it greatly relieves stress on the animator -- you're more able to take bathroom breaks and recover from lapses of attention while shooting. On the other hand, profound concentration was a crucible that forged the greatest masters of our art. Without the constraint of having to "do it all in your head," it's easier to produce lazy-but-tolerable performances.
2. With digital image capture, you get unlimited takes.
Film stock and developing is expensive. Digital frames, on the other hand, cost essentially nothing. Don't feel that your last shot was up-to-snuff? No problem! Shoot again -- the only cost is time.
3. We can rehearse with the puppet's body, not just our own.
When you only had one chance to shoot an animation sequence, rehearsing had to be done either by drawing thumbnail poses or by acting out the sequence with your own body. These are still extremely valuable tools. But now we have an additional tool: shooting test frames using the puppet itself -- with the very camera that we'll use for the final shoot, locked-off at the same angle. This is very handy... Often times a puppet's body has limitations that our own bodies don't. Being able to rehearse using the puppet itself gives us the most accurate information possible when we want to test our acting ideas.
4. Different acting ideas can be tested quickly using pop-throughs.
Back when animation could only be accomplished using film cameras, pop-throughs were a luxury that only film studios could conceivably afford. That's changed. Now, essentially anyone who's using a digital/computer workflow can do a pop-through -- for no added financial cost, and using far less time than a full-blown take. Better yet, pop-throughs can be created non-linearly, being assembled out of photos that were taken in no particular sequence during a visual brainstorming session. Presumably, having more options to choose from will give us a better end product.
THE CULMINATIVE EFFECT
Working at home, the solo animator is always both an actor and a director.
As an actor, the animator has to try to get inside the mind of their character and deliver a performance. The puppet is just a very small costume. Like a stage actor, the animator tries to embody certain emotions and tries to hit a few planned gestures at certain points in time... And similarly, there will always be an element of improvisation in the actual moment-to-moment doing of the performance.
As a director, the animator is concerned with planning blocking, gestures, and expressions. As Marshall Mason wrote in Creating Life on Stage, "A director is a sculptor of motion..." At a certain level, improvisation never goes away -- but it can be vastly limited.
So, we are always both actor and director -- but the more exploit these new digital/computer tools, the more the balance shifts toward us being directors.
Ultimately, stopmo is always a "straight-ahead" process... But the technology now allows us to emphasize choreography more than ever before. Stop-motion can actually become quite like 2D animation: using pop-throughs as reference (possibly even rotoscoping them), we can just about establish keyframes -- and then plan our inbetweens with pre-determined spacing charts.
Think about it: Where do you fall on the continuum right now? Are you more an actor-animator -- or a director-animator?
Perhaps even more importantly: Where do you personally find fun in the animation process? Is your joy more in living inside the puppet, moment-to-moment? Or is joy for you in the development process that happens before the camera starts shooting?
posted by sven | permalink | categories: stopmo
love, love, love
by gl. at 1:26 am
sven's brain has been gushing essays and i'm still trying to catch up with stuff that happened two weeks ago!
for instance, on first friday we attended both "the love show" at launchpad gallery and "love bites" at bite studio.
i've never been to art shows where i've known so many people! several of my artist's way clients jumped at the chance to show together, and then those of us who didn't show came to support them. so we saw justine, emma, emily, anna, dayna, elizabeth & her niece and lynn, in addition to adrienne, bridget, romaine & alisa! i was also delighted to see art on the walls by people i knew, even if i didn't see them at the opening: shawn, consu, kristen maus, beth ann, jennifer mercede. there was lots of good art but i think my favorite piece was an anatomically-correct heart-shaped book with a niche carved out to fit a tinier heart-shaped book inside.
then sven & i stopped by to see bite's first-ever show, orchestrated by shawn (another artist's way client). she was glowing in pleasure and exhaustion, but took the time to explain to us how "biting" works: it's the process used to create an etching in a copper plate. i was also impressed with a "hard candy print" by another artist which was created by pouring hot hard candy into a mold and then pressing the etched plate into the candy and popping it off when it's solid again, leaving the impression behind.
posted by gl. | permalink | categories: artist's way, exhibits & events
February 12, 2008
the director-animator
by sven at 7:00 am
(A note-worthy comment that I made on this thread at StopMotionAnimation.com.)
"If for example your puppet is to laugh in reaction to something, you conjure that feeling inside yourself in order to portray it through the puppet.It's that same sort of thing in animation, only slower."
Ah! This comment helped me a lot, Ron. Yes: that sense of finding a feeling in yourself and using it to express something through the puppet is a core part of the performance. No matter what else I'm doing when I'm animating, there's still always going to be some part of me that is engaged in this very intuitive, organic, improvisational approach.
BUT, let me now propose a distinction. If there can be an Animator-Actor, then there can also be an Animator-Director.
ACTORS VS. DIRECTORS
Think about the division of labor between actors and directors in theater. (Acting and directing for film is pretty different in a number of ways, so set that aside for the moment.) Her are some observations in broad strokes...
An actor's concern is revealing character. A director's concern is telling story.
An actor creates their performance out of a script, blocking, gestures, and expressions. On top of these observable things, though, they also add emotion, motivation, meaning, and an energetic awareness of the other actors whom they're interacting with.
A director creates their version of a story by suggesting blocking, gestures, motivations... If the actors are good, then the director doesn't have to micromanage. On the other hand, if they're working with beginning actors, the director might have to get very specific about things such as cheating poses to the audience, explaining to actors what motivates their character to "pick up this ball, which reminds you of your childhood" -- and so on.
DIRECTOR-ANIMATOR METHODS
When we're solo animators, not working in a studio, then we get to be both actors and directors at the same time. And yet, there is still a fundamental difference in approach. It seems to me that an actor works from the inside-out -- whereas a director works from the outside-in. (E.g. finding poses that will communicate an emotion, rather than emotions which will communicate no matter what action you do.)
I strongly suspect that I am a Director-Animator more than I'm an Actor-Animator. Sort of like how I know that I'm more of a Fabricator-Animator than a Motion-Animator. (Or a Set Builder-Animator, as castlegardener has identified himself.)
When you're directing live human beings on a stage, you can make suggestions -- but the performances are ultimately up to them. Directing puppets, I have a profound level of control... It can almost be like being a dance choreographer! You can choreograph blocking, gestures, expressions to a phenomenal extent with puppets... My sense is that you could assemble pretty great performances out of these elements, without having to experientially go very deep into the puppet's head.
DIFFERENT TYPES OF DIRECTORS
I'm going to go a step farther, and suggest that there are different types of theater directors too, depending upon what kind of play is being staged. For instance, if you stage something like Oscar Wilde's "The Importance of Being Earnest," you're probably going to use a fairly melodramatic style. Something more modern, like Edward Albee's "Who's Afraid of Virginia Woolf?" is going to be more naturalistic.
Myself, well, given what I've done so far, it looks to me like my innate directing style may be musical theater. In my Professor Ichbonnsen clip, I'm pairing up gestures with words and phrases -- which is what you do when you have actors who are singing. (It's kind of like what the 2D animators call "Mickey Mousing," where you have the characters bouncing in time with the beat of the music.)
If I know that this is my directorial style, it allows me to consciously alter it for good effect. For instance, rather than hitting all my cues with full energy, I can pull the punches for a more subtle performance. Or, I can intentionally choose physical actions that contradict what the character is saying with their dialogue, to create a more sophisticated meaning.
DEVELOPING THE PERFORMANCE
It's all very nice, of course, that I'm getting a grip on what my own preferences are... Where this might be useful for other folks, though, is in looking at how we develop our performances.
What I think I'm hearing from most folk is that they imagine what they want their character to do, they act it out a few times, and then they animate.
The types of theater directors that I find exciting (from reading and hearing speakers) seem to be the ones who put their actors through exercises to discover more information that can be channeled into the actual play.
Here's an example from the book "Julie Taymor: Playing With Fire":
"She devoted the early rehearsals to finding ideographs -- essential, emblematic gestures. Her Prospero, Robert Stattel, looked for the movement that captured despair at the loss of one's library, one's source of knowledge, pleasure, and power. His ideograph -- holding his hands together like a book, which then opened like a door, leaving him outside -- used literal images to heighten the sense of his loss when those pictures dissolved. Ferdinand and Miranda searched for expressions of the discovery of physical desire. Ferdinand's gesture -- running his right hand down his left arm, finally grasping the wrist -- mixed sensuality, urgency, and awareness." (p.34)
When I read this, what immediately comes to my mind is how Harryhausen characterized Mighty Joe Young. He decided that whenever Joe gets frustrated, he bangs his fist on the ground several times. It's a simple concept -- ("ideograph" is a fancy word) -- but it's a powerful one, and one that comes from the world of directing more than acting.
I find myself asking: What else is there in the world of directing, besides ideographs, which I don't know about yet? ...Which could maybe contribute to creating great performances?
I absolutely want to study books about acting (which I've heard recommended to animators several times)... But hypothetically, how far could I go towards creating great performances if I read nothing but books about directing?
(Anyone want to recommend any good books about directing?)
;-)
posted by sven | permalink | categories: stopmo
February 11, 2008
2008 guiding principles
by sven at 7:00 am
Rather than making New Year's resolutions this year, I've decided to compile a list of principles that I want to keep in mind during the next 12 months. I spent January slowly collecting them, and now finally feel ready to assemble my little manifesto...
2008 GUIDING PRINCIPLES
1) I want writing to be at the core of what I do.
The stream-of-consciousness is the origin of all intelligence. Tap into it, write it down, and thought will progress from tangled to untangled. Old thoughts will be acknowledged and inescapably replaced by new insights. "Let me write," I tell myself, "and I'll be brilliant."
2) When I don't write, my feelings about work-to-be-done get impacted, preventing me from making progress and from feeling present.
I don't believe laziness or procrastination are a sign of personal weakness. If I find myself avoiding a task, it is almost always because I am lacking some essential piece of information and feel confused. When I know exactly how to proceed, no task seems really hard. Writing is the means to discover my block -- what it is that I don't even realize I don't know.
3) Turn down the volume on outside noise in order to amplify the interior voice.
I mean this very literally. I find it helpful to wear earplugs when I journal. When I want to really throw myself into a project, it can be helpful to stop listening to music, watching movies, and surfing the internet for a few days. Conversely, when I have a huge amount of information to get down on paper, turning on background noise can sometimes help me pace myself and not hit brain fry too soon. Be conscientious about adjusting level of focus.
4) The more stuff I get down onto paper, the more room there'll be in my head for new ideas.
Psychologists say you can only keep seven things in your head at once. One strategy is to let thoughts compost -- insights occur to you like flowers popping out of the mud. For all that I want to accomplish, though, I don't feel like I have time to wait for ideas to just "come to me." I need a strategy that's more active. I find that by shoveling out the mud, I discover seeds waiting for me down there in the dark -- and they seem to grow much faster when I bring them out into the sun and water them every day.
5) Questions are the essence of thought.
When you articulate a question, several possible answers instantaneously suggest themselves. Often the necessary answer is so obvious, you skip right over it to the next question. I believe this is how thought actually works -- it's just that most of time when an insight occurs to us, we're unaware of having first posed a question. The exercise of brainstorming questions is the fastest route I know to progressing any project.
6) Enumerate all possible options, and the correct solution will make itself apparent.
If there is planning and decision-making to be done, don't do the work in your head. Write it all down. It's much easier to make a choice when you've articulated what your options actually are -- than when you're simply trying to pick the right one out of thin air. Note: Laying out paragraphs is better than single sentences, which in turn is better than sentence fragments or single-reminder-word headings.
7) Thoroughness is more important than brevity.
"I'm sorry I didn't have time to write you a short letter, so I wrote you a long one." I love this quote, variously attributed to Abraham Lincoln, Mark Twain, and others. The ability to write something concisely is the endpoint of exploring your topic in all its facets. Don't skimp on the exploratory phase, and don't feel guilty for being long-winded when writing publicly.
8) Hammer on the story.
In art... All art -- be it painting, novel-writing, cinema, sculpture, or theater... We are presenting the audience with a story. Keep coming back to this: what is the story that you are trying to tell? Your style may be abstract or literal -- but if you are clear about what it is that you're trying to do, and what it is that you want the audience to feel, your art will always be more powerful.
9) Know your subject inside and out.
In fiction, discover every detail about the world you are building. In the technical skills of art-making, discover every possible variation for a particular technique -- and what the pros and cons are for each one. Capture what you are learning in writing, as you're learning it: both as notes and as fleshed-out essays.
10) Health is not optional.
Writing is physically demanding. Sitting for hours on end can weaken circulation and even lead to heart problems. Break it up. Make sure that mental motion is fueled by the physical motion of walking. Lubricate the mental gears by drinking lots of water. Look at every leaf of kale or spinach as another page in your book of writings.
posted by sven | permalink | categories: writing
February 10, 2008
lsgl - story development work
by sven at 7:00 am
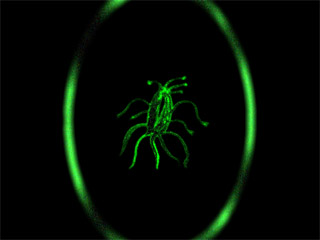
Back in September, I promised myself I'd get back to work on Let Sleeping Gods Lie on January 15, 2008. And so I did.
Where I left off in autumn: thrashing around in Act II, trying to figure out how to tell the billion year history of the Elder Things cinematically. On my first day back, I did much the same... Experimenting with different visual looks -- but feeling like I was pretty much just flailing.
So, I've taken a step back. One of my mantras for 2008 is "hammer on the story." Novelists are encouraged to know the world that they're writing about inside-out. That's what I'm going to try to achieve with LSGL. I'm going to do my brainstorming in writing, until I've answered every question -- and what has to be shown on screen becomes perfectly obvious.
My second week back at work on LSGL, I set myself a big challenge: write 50 pages of story development within seven days... And so I did!
I wrote 51 pages -- 27,968 words -- in 17.25 hours, over the course of four days. My averages are: 3 pages per hour, 548 words per page, 1621 words per hour.
For comparison, during National Novel Writing Month (NaNoWriMo) the goal is to write 50,000 words in 30 days. Granted, doing story development is much different from writing a coherent narrative... But still, it pleases me to no end to think that I generated more than half a novel's worth of text in four days.
And, frankly, there's little doubt in my mind that I'll hit 50,000 before February's over. My goal this month is to know exactly what my final vision for LSGL is -- by the 29th. I've got a ways to go yet.
For the obsessively curious, here's your chance to read the story work I did in January:
- January 17 - 10.5 pages
- January 18 - 5.5 pages
- January 23 - 10.5 pages
- January 24 - 17.5 pages
- January 25 - 13.5 pages
- January 26 - 10 pages
(Total for January: 67.5 pages ... 37,181 words.)
posted by sven | permalink | categories: let sleeping gods lie
February 9, 2008
lsgl trailer on strange aeons dvd!
by sven at 7:00 am

Exciting news: the Let Sleeping Gods Lie teaser trailer will be included on Lurker Films' new DVD, Strange Aeons!
This is the 5th DVD in the H.P. Lovecraft Collection. The digital files just went to the DVD production service today, but you can place an order with Lurker Films immediately.
The feature film of the collection is "The Thing on the Doorstep" by Maelstrom Productions -- nice folks, whom I've met through the H.P.Lovecraft Film Fest. The collection also includes the rollicking stopmo short, "From Beyond," by my good friend Michael Granberry.

The timing of this blew my mind: Andrew Migliore, head of Lurker Films and the HPLFF, called me with the opportunity actually during the Monster Month book release party! It turns out that one of the shorts he'd intended to include was too low-resolution -- so a space to fill opened up. I gotta say... It's awful lucky for me that I'm right here in Portland, on Andrew's home turf.
I'm utterly thrilled. Being a film collector myself, my "true north" as an artist is to have the products of my labors purchased and prized by other collectors.
Finally finishing LSGL is my top priority for 2008. I haven't written about it yet, but I did make some big strides in January... More about that tomorrow.
posted by sven | permalink | categories: let sleeping gods lie
February 8, 2008
my stopmo camera set-up
by sven at 7:00 am
"A Word From Professor Ichbonnsen" was a big leap forward for me in several ways. I did lipsync for the first time... I explored a pose-to-pose approach to stopmo... And I shot using a digital still camera.
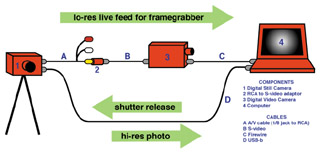
I recently wrote a post titled "how to connect your digital still camera to a computer - explained"... So I'm not going to go into every detail about my set-up today. However, what that post was really missing was a good diagram. ...So here ya go, I've created one.
Note: In this configuration, the DV cam is being used as an analog-to-digital converter.
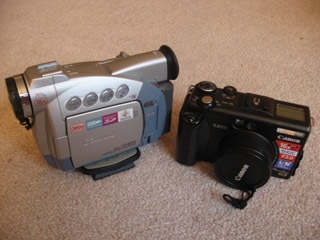
On my first stopmo film, The Great Escape, I used the DV cam for image capture. The picture quality was nowhere near as good as what I can get with the still cam -- but one nice thing was that I only needed one cord (the FireWire) going between it and the computer.
Oh, and I guess another nice thing was that I only needed one piece of software running: FrameThief. Using a DSC, I need 3 softwares running simultaneously: FrameThief, RemoteCapture, and Proxi.
Proxi -- since you probably haven't heard of it -- manages applescripts, so I can trigger FrameThief and RemoteCapture with a single keystroke. I am much indebted to Evan DeRushie for sharing the relevant script with me, and pointing me in Proxi's direction.
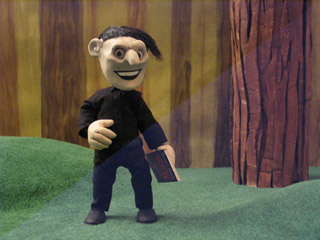
There is a perennial problem with using a DSC to shoot stopmo: flicker. Stopmoes complain about flicker furiously... But you don't often see an actual example. I thought it would be illustrative to show an abandoned shot here.
Watch the clip. See how some frames are randomly lighter than others? That's flicker. I made the still shot above out of a flicker frame and a non-flicker frame to highlight the contrast.
There are several possible causes of flicker:
- A camera's internal programming automatically adjusts the images it takes, before you ever see them. This can lead to inconsistencies. The way around this problem is to shoot in RAW format. When you look at a RAW file, you're seeing what the capture chip actually saw. The files are huge, but you also (I'm told) have a lot more ability to adjust the images.
- With most DSCs, the camera's aperture re-adjusts itself with each shot taken. For consumer-grade cameras, there's just nothing to do about this. For the high-end DSLR cams, though, you can get lenses that don't auto-adjust. It's a very pricey solution.
- Fluctuations in electrical current can effect both the camera and your lighting set-up. In a residential home, a refrigerator turning on or off can have a significant impact on your images. The solution: to get a voltometer which can smooth out the spikes and dips in your current.
Thanks to some early-morning advice from my photo-wiz friend Michael Hall, I was able to figure out how to use RAW files. And happily, that solved most of my flicker problems.
(By the way: most image editing software can't deal with RAW files. Luckily, by digging around in my applications folder I was was able to find a program -- which came with the camera originally -- that can translate RAW files into jpgs.)
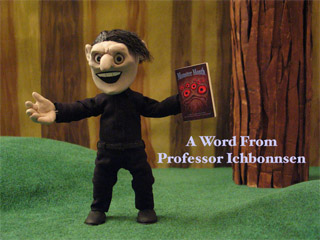
So, most of my flicker woes were solved... But not all of them. If you watch the final film carefully, there's a hint of flicker in that first shot of Ichbonnsen.
It's a curious flicker, though... It seems to move from the top of the screen to the bottom... It doesn't seem even. Could it be the result of a reflection, or some other practical lighting condition?
Right now, I think looking into voltometers is my next least-radical step.
posted by sven | permalink | categories: stopmo
February 7, 2008
monster month book release party - part 2
by sven at 7:00 am
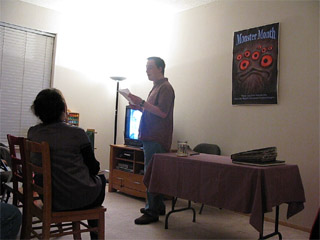
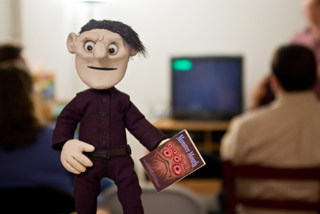
Professor Ichbonnsen couldn't make it to the Monster Month book release party -- but he was kind enough to send a letter to be read in his absence.
Watch the video to see me giving a dramatic reading -- (almost worth it for the audience participation alone!) -- or just go ahead and read the text below.
Thank you one and all for coming out tonight.
Your show of support -- not merely for this book which we have published, but for the cause of Cryptozoological Awareness -- means the world to me... And it may, ultimately, be that which saves our endangered world.
For decades, academics and politicians have scoffed at the mere suggestion that Monsters might exist on this planet with us. Narrow-mindedness, pure and simple... A comforting illusion, to believe that all things that can be known already are known.
Those of us who dare to imagine, dare to seek, and by raw courage dare to discover -- we face this tremendous prejudice every day of our lives. And so I want thank you again... For I understand quite well what the personal cost of attending this event may be for those of you here tonight. Ostracism by friends and family.... An FBI file with your name on it... Or perhaps even worse...
Yes, I say "even worse" -- because I have recently discovered that denial of the existence of Monsters is in fact being spearheaded by a well-funded yet shadowy conspiracy of unknown parties!
As those of you who have already read my book know, a serious attempt on my life -- and on that of my trustworthy assistant Scarlet -- was made while we were recently traveling though India. We still do not know who hired the one-eyed pilot, or how the hideous mutants, which we were delivered unto, figure into the conspiracy's far-ranging plot...
But, since then we have suffered, yes, another assassination attempt. And though we escaped with our lives -- I have every reason to believe that this was an act of the same shadowy forces, trying to silence our Cause.
The details of the plot are almost too tedious to relate... A rare and poisonous snake, secretly deposited in our hotel room -- a species which, I freely admit, I have always been quite eager to see in the flesh -- but not within the confines of my own bed.
You will be glad to know that with quick thinking, lightning reflexes, and the sacrifice of very tasty ham and banana sandwich, both Scarlet and I escaped unharmed.
Unfortunately, we know now that our assailants are very close behind... And so once again, we go into hiding... Traveling by night, using forged identities, staying in the homes of individuals who belong to a vast underground network of Cryptozoological Freedom Fighters.
You, too, my friends may be called to the Cause! Whatever you can do -- whatever small thing, to help spread the word -- please, take that step.
For our own safety, and for the safety of all involved in producing this event, Scarlet and I cannot risk being in Portland tonight, where we will certainly be expected. So I ask you now: Take our place -- be where we cannot be -- be that voice of reason in a world that denies the truth.
For the sake of the defenseless Monsters whose habitats are being lost --
For the sake of the defenseless Humans, who have unwittingly encroached upon the territories of carnivorous Monsters --
For the sake of Monsters and Humans alike, defending our shared world against invasive species from Mars and beyond --
Join me in making a Revolution of Cryptozoological Awareness!
Thank you. Please enjoy the rest of your evening at the Monster Month book party.
Sincerely,
Professor Ichbonnsen
January 31, 2008
posted by sven | permalink | categories: bestiary, exhibits & events
February 6, 2008
monster month book release party - part 1
by sven at 5:24 pm
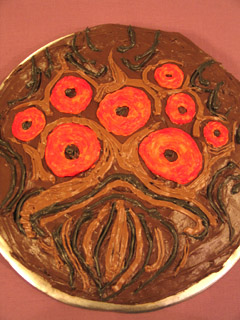
January 31, 2008, we hosted the Monster Month Book Release Party.
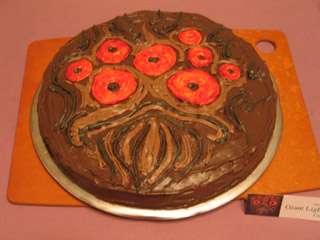
The aspect of the party that I'm most proud of: I made a huge cake and frosted it to look just like the monster on the book's cover!
Two hours to bake, two hours to decorate. Chocolate "black magic" sponge cake, 4 hand-mixed colors of homemade cream cheese frosting, 12"-wide pan. Oh yeaaaahh...
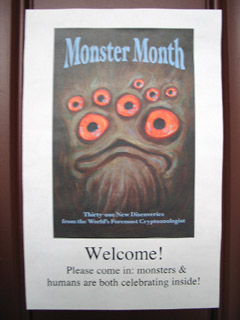
The sign on the front door: "Welcome! Please come in: monsters & humans are both celebrating inside!"
(Thanks to Gretchin for putting together the signage!)
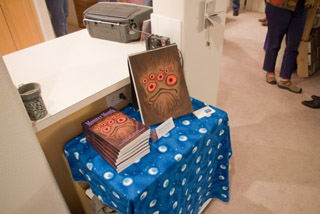
As you enter, there's a stack of books for sale, and the original painting for the book cover.
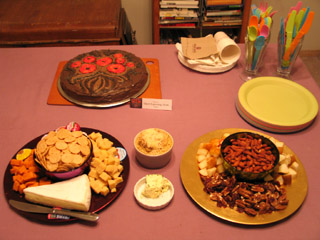
Lots of yummy snacks. Rice crackers and five kinds of cheese... (Kinda overdid it on the cheese.) Hummus... Apples, pears, almonds, and a sweet pecan-cranberry-pepper mix.
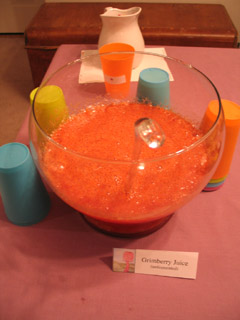
And... Grimberry Juice! Compliments of Prof. Ichbonnsen's colleage Professor Amberson.
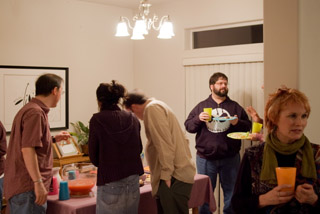
In write-ups about events, people often declare "it was a success!" ...What does that actually mean?
In this case, what I can tell you is that people were talking with each other the whole night long... You actually almost had to shout, the room was so loud... None of those pesky awkward silences ever descended on us. And although the event technically ended at 9, it wasn't til 11:30 that the last of our guest finally cleared out.
Heh. I think I've just begun to outline a Beaufort scale of party "success."
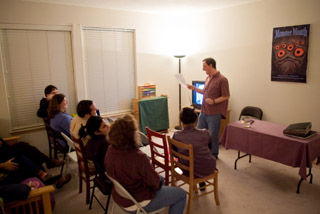
People started arriving at 7. At 8, we gathered in the living room for the reading portion of the evening. Pretty much every chair we own was set out... Which just managed to comfortably accommodate the 15 of us.
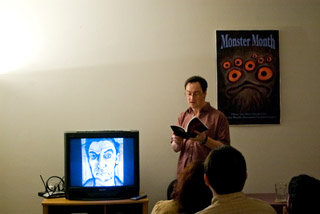
Despite best-laid-plans, the Professor himself was unable to make it to the event...
But he was kind enough to send a letter of welcome/explanation/apology, to be read in his absence.
I did the honors... Then went on to discuss how the book project came into being, and what it was like working with the World's Foremost Cryptozoologist. I concluded this bit of the evening by reading the chapter from the book titled "An Underwater Adventure - Darker Things Beckon."
The audience participation was hilarious -- gasping at all the right moments, heckling and playing along in the kindest way...
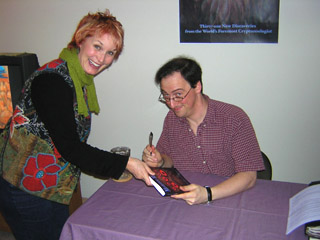
And then came cake and the signing of books. Need I say, this was the first time I've signed a book since... My high school yearbook?
Go ahead -- try to imagine what you'd write in a book, if you published one. If you come up with a clever way to deal with this pleasant-yet-awkward situation, please tell me the secret!
As it was, our friend and fellow Artist's Way teacher Dayna Collins got something to the effect of: "To Dayna -- You are the first person I've ever signed a book for! Thank you for your support and encouragement. -- Sven Bonnichsen."
It got even harder after that.
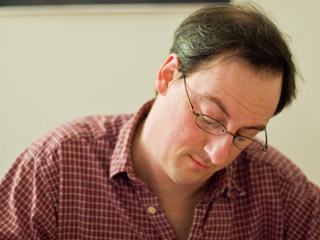
My friend and Weekly-Get-Together-To-Watch-Classic-Star-Trek buddy, Michael Hall, was kind enough to take a bunch of the photos you see here. Thank you!
Gretchin, in addition to helping with signage, managed getting the food set up, answering the phone, keeping track of time, taking money for book purchases, and and and... Oh, and she also found this website, blockposters.com, which allowed us to assemble the ultra-cool poster version of the book cover. For that and a whole bunch more... Thank you!!
Philip Flores has posted a short review of the event... As has Dayna. And now Linda and Bridget. ...Thank you!!!
And...(oh my)...How could I forget the groupies of my fledgling fan club, Bridget Benton and Linda Womack? ...Thank you!!!!
And lastly, to everyone else, who either came or who sent good wishes: THANK YOU!
posted by sven | permalink | categories: bestiary, exhibits & events
February 5, 2008
the making of "a word from professor ichbonnsen"
by sven at 9:15 pm
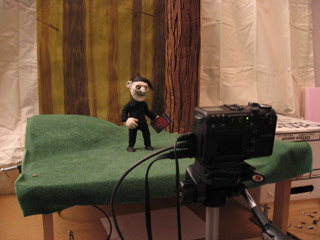
I've been flummoxed for a month about how to structure a post describing the making of "A Word From Professor Ichbonnsen." I think now what I'll do is use this post to illustrate the "pose-to-pose" (or "keyframing") method of doing stopmo, which I've been writing about...incessantly...for the past day or so.
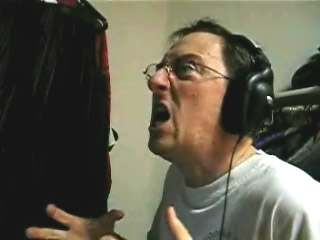
"The sound leads." Here's an amusingly embarrassing clip of me recording the voicetrack. (Thanks to Gretchin for thinking to tape this!)
I did the recording in a walk-in closet, thinking that the clothes would help prevent echoes. I used the built-in microphone in my laptop and GarageBand for capture. I did some clean-up of the sound afterwards using Sound Soap.
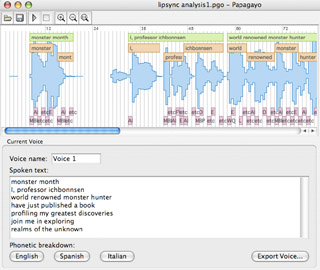
After finishing the voicetrack, I imported the sound file into the free lipsync analysis program, Papagayo. Doing the analysis is actually very intuitive and simple to do -- but the mouth shapes that come with the program (to demo your lipsync) are pretty useless.
I decided that after doing my analysis and transferring it to X-sheets, I should proof the lipsync to make sure it looked right. A fairly easy task -- and not having to worry about whether the mouths are right during actual filming... Well, that more than makes up for the time spent on proofing.
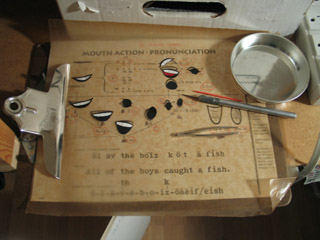
The mouth shapes that I used on this project are straight out of Preston Blair's book "Cartoon Animation." I've looked through quite a few books, and so far nothing comes close to the clarity of Blair's mouth shape illustrations. Good way to learn on my first serious lipsync'd film, I figure.
The mouths are photocopied onto sticker paper, hand-colored, and cut out. I've got a reference key attached to a clipboard. I tried covering the reference sheet with acetate -- but to my surprise, the stickers adhere to it strongly. I tried using wax paper instead and found that it both easily releases the stickers, and I can see the reference chart through it with no problem.
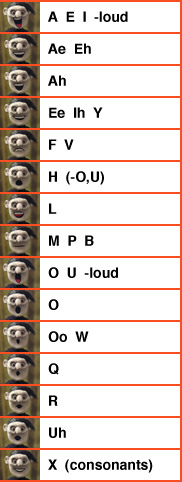
Phonemes are the audible sounds that make up words. Visemes are the visual mouth shapes of a language. You can figure out lipsync analysis by looking in a mirror... But I decided that while it may not be 100% accurate, I'm quite content to at least rough out an analysis by having a cheat-chart of which visemes go with which phonemes.
While Blair's book was an invaluable starting point, I did need to make judgement calls about which visemes I was going to include, and exactly how I wanted to map them to phonemes.
I found it very useful to re-name the phonemes... Linguistic marks are troublesome to create on a computer -- transliterations work better here.
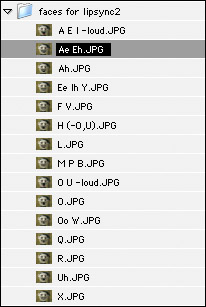
I locked down my camera and photographed the puppet's head wearing each of my 15 mouth shapes. I imported these 15 photos into AfterEffects. Reading through my X-sheet notes, I dragged instances of the photos into a new timeline, creating a lipsync proof film, one frame at a time.
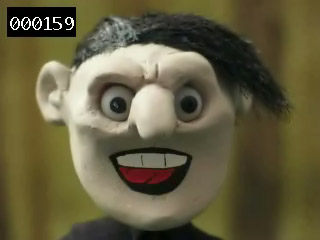
While still in AfterEffects, I added on a time code -- so if I found a frame that looked wrong, it would be a simple matter to locate and correct it. I was really astonished when I was doing lipsync tests a month or two back to discover just how much a single bad frame can stand out. I got lucky this time, and felt satisfied with my lipsync on the first try.
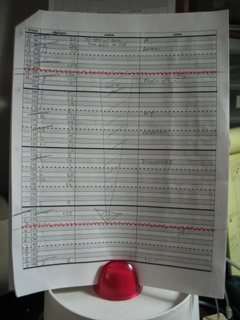
To finish up pre-production work on the lipsync, I went through my X-sheets and made sure that every frame was marked for which mouth would be required. As an example, "Sven" might get written out as: 1-X ... 2-FV ... 3-Eh ... 4-Eh ... 5-X.
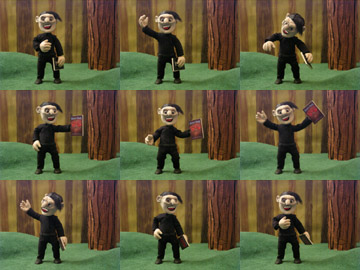
With the voicetrack all pre-planned, I moved on to developing poses. To do this, I started by just brainstorming all sorts of poses that might fit with the energy of the scene. This is a short clip, and Ichbonnsen doesn't walk anywhere, so nine photographs of pose options seemed plenty.
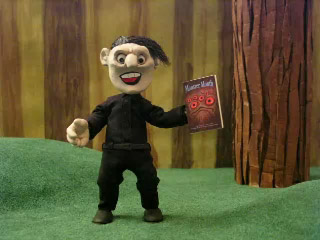
Selecting five photographs from the visual brainstorm, I assembled them into an order that seemed to make sense. Using the script and the X-sheets to choose logical moments for pose changes, I created a new "pop-thru" clip in AfterEffects. This clip would be my visual reference while filming.
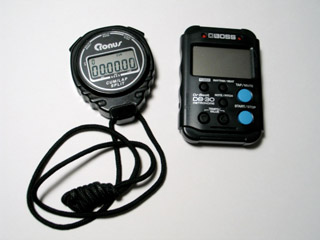
I made notes on my X-sheets about how long each pose should last. One last thing to do: figure out how long each transition between poses should take.
I've tried using a stopwatch while acting out the poses to try to figure out timing. I don't like it. It's hard to stop and start the stopwatch with precision... And time is measured in 1/100th of a second -- rather than 1/24th, which is what I need for animating.
So, I switched over to using an electric metronome. Mind you, I don't care about "beat mapping" the entire film -- all I want is to figure out how long each transition should last. Setting the metronome to 60 beats per minute (bpm) gives me a "click" each second -- that is, every 24 frames. 120bpm is a click every 12 frames... 180bpm is a click every 8 frames... And so on.
Listening to an audible beat while acting out the transitions made it very easy to get a sense of how long a particular transition should last. I'm excited: it feels like if I continue using this method, I'll very quickly be able to get a sense for how to estimate how long any particular action will take on screen. (Well, so long as it's a very short action!)
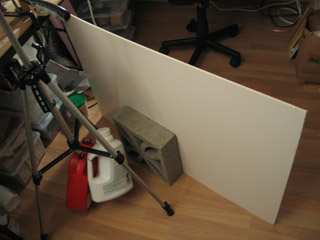
On to filming. ...D'oh! Ten frames in, I kicked the tripod and ruined my shot!
Well... I had a little insight about the tripod while working on this film. When I kick the legs of my tripod, it's usually not at the very bottom -- it's halfway up. So, this time around, I used a piece of foamcore sandwiched between bricks to create a wall -- which keeps me from coming anywhere near the damned thing.
And the wall worked like a charm!

Here's your reward for wading through this long post: The finished film!
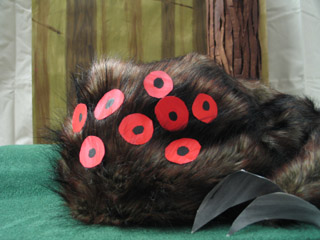
But wait... One last extra treat: A peek at the film that didn't get made.
Everything I've described in this post happened in one long marathon, during the Saturday, Sunday, and Monday leading up to midnight of New Year's Eve. As late as Friday, I was planning on going with a different script, one which had the Professor getting swallowed by the "giant lightning sloth" pictured on Monster Month's cover.
Ultimately I could see that I just wasn't going to have time to get an adequate monster puppet built. As you can see above, though, I bought faux fur and was roughing out the thing over a cardboard frame.
Heh... And besides not having time for fabrication, I realized too late that set wasn't big enough to get something as big as the lightning sloth in frame. Y'know, I originally wanted to shoot with a 16:9 aspect ratio... If that's going to be the case, gotta have a wider set next time!
posted by sven | permalink | categories: stopmo
February 4, 2008
principles of pose-to-pose stopmo
by sven at 6:07 pm
I thought of a different way to summarize the animation approach I'm exploring. Here are six key aspects:
1) The Sound Leads
When you don't have a voice track, you have a lot more freedom. As soon as you have talking, you're committed to a more structured approach. Lipsync more or less demands using an X-sheet. Yet, there's still room for improvisation with the body.
Personally, I'm finding that I prefer animating when there's a voicetrack. When I know what the character is thinking, I have more fixed points in time to which I can attach interesting gestures. I'm tempted, the next time I animate a non-speaking sequence, to record a dummy voicetrack of the character's thoughts -- just to help guide my performance.
(I know that Nick's animations more often than not don't have a voicetrack -- so this is probably one of the most fundamental points at which our methods begin to diverge.)
2) Use Your X-Sheets
Lots of animation gets done without X-sheets. For me, X-sheets are vital for lipsync... I want to have done my voicetrack analysis and checked it for accuracy before I start the real animation, so I can just focus on the rest of the performance. Further, I figure the more information I'm able to capture on the x-sheets in advance, the more additional details I'll ultimately be able to layer in.
3) Hold-Transition-Hold
The rhythm of the animation that I'm doing is "hold-transition-hold." I make sure a pose "reads" by holding it still -- until it's time to transition to the next pose. Hypothetically, a pose could be held for as little as two or three frames... It needn't necessarily feel like the motion is "stop-and-start." Hold-transition-hold doesn't preclude overlapping action, either; secondary motions can be hold-transition-hold on their own time-line.
4) Non-Linear Pose Development
By using a digital camera locked down in the same position that I'm going to use for the final shot, I can take a whole bunch of shots of different pose options, brainstorming... Instead of treating a pop-through as a sort of dress rehearsal for the final performance, I assemble a pop-through from photographs taken in no particular order. A virtue of this method is that it allows you to select your best options from a large pool. A limitation is that you can only really swap between photos taken when the puppet was standing on the same spot (i.e. walks may be more problematic).
5) Animating To A Beat
How do you decide how much time a transition should take? Rather than acting out each action and timing it with a stopwatch, I'm trying to use a metronome to learn what 4 frames, 8 frames, 12 frames (etc.) feel like in my body. Rather than assign a unique time-period to each transition, I'm trying to learn how to estimate how many frames different actions will take, based upon their musicality -- which is interpreted in terms of "beats per minute."
(Note: I recognize that this is an atypical use of the phrase "animating to a beat," which usually refers to animating a character moving in time with music.)
6) Pop-Thru Rotoscoping
Stopmo animation is inherently a "straight-forward" process; you can't work non-linearly, tweaking different frames into perfection. The closest we can come to a "pose-to-pose" process, I believe, is establishing keyframes -- and then figuring out how to get from one to the next.
In order to simulate keyframes, I am using photographs of the puppet that I am animating, taken from the same camera angle as the final shot. These "keys" are assembled into a pop-through film which can then either be used as a reference clip, or for actual rotoscoping.
posted by sven | permalink | categories: stopmo
pose-to-pose stopmo
by sven at 1:42 am
[Note: I've also posted this entry at StopMotionAnimation.com, where it is being discussed here: http://www.stopmotionanimation.com/dc/dcboard.php?az=showtopic&forum=9&topicid=4968&mesg_id=4968&page=]
Stopmo as we've always known it is "straight ahead." Click a frame... Move the puppet... Repeat.
Cel animation can be "straight ahead," but most of the time it's "pose-to-pose." You draw the extreme poses in a sequence, and then fill in the "inbetweens."
While working on the "A word from Professor Ichbonnsen" short, I decided that I really wanted to find a way to make stopmo as pose-to-pose as possible.
See, there's a lot that you can do to plan your stopmo... But it seems to me that there's a prevailing notion in the stopmo community that you should just start shooting and improvise your way forward.
As I'm working my way through Barry Purves' new book, I've been struck by the feeling that although he plans his animation in detail, there's still a strong physical memory of improvising your way forward...
And this makes me feel that the full extent of the framegrabber revolution has not been fully appreciated yet... That there is a technological generation gap between Barry and I -- and that because of the ways that I am learning to make stopmo now, I will never feel the animating process in my body the way that he does.
Here is the process that I came up with for making stopmo essentially "pose-to-pose."
First I recorded my soundtrack, broke down all the phonemes using the freeware "Papagayo", and then transferred the timing for mouth shapes to an X-sheet (AKA "exposure sheet" or "dope sheet").
I didn't want to have to think about whether or not the lipsync was right while I was animating, so I decided to test it to make sure it was solid. I took 15 photos of stationary heads wearing my collection of mouth stickers. I brought those photos into AfterEffects, and then threw instances of them into the sequence indicated by my X-sheet. I exported the sequence as a QuickTime, and confirmed that the lipsync would be good.
Next, I needed to develop the body's poses. To do this, I locked my camera in place, and simply took a bunch of shots of different poses -- brainstorming them, in no particular order.
I took these possibilities into AfterEffects, and found an order where my favorite poses flowed together in a way that seemed to make sense with the audio track. I marked on my X-sheet how long each pose was supposed to be held.
That dealt with poses... Finally I had to figure out my transitions. Rather than use the stopwatch, as is traditional, I used a metronome. 60bpm (beats per minute) = 1 beat per 24 frames. 120bpm = 1 beat per 12 frames. 180bpm = 1 beat per 8 frames. (I got this idea from LIO's site, but also saw the idea of using musical beats per minute in the book "Timing for Animation.")
For me, it was profoundly useful to be able to act out my transition to an ongoing beat, rather than trying to start and stop a watch. I decided "OK, this transition is fast -- it gets six frames... This transition is slow -- it gets 12 frames..." And so on.
When I went to animate, I kept my QuickTime of the poses open in a side window for reference... But animating was basically just a matter of transferring my X-sheet notes into the puppet's body: Pose... Transition... Pose... Transition...
I really, really liked doing almost all of the planning work before I got to the animator's table. And yet, I'm having some cognitive dissonance.
Barry talks elegantly about a puppet being like a tiny costume that the animator projects themselves into... A concept I mentioned myself, previously, in the essay on stopmo aesthetics....
But when you do the planning in advance, it doesn't quite feel like that. At least, not how I think the experience is supposed to feel.
I'm focussed, and I'm putting out animation that I like... But am I truly animating? In the sense of putting a bit of my own life into the puppet?
Granted, this was a very simple clip I did -- the Prof's feet never move... Maybe I'll discover when I have to do a shot with walks and such, that there are motions that simply cannot be planned... But honestly, I suspect that with being able to take test shots with a DSC, there are few "extremes" that you can't plan out in advance.
How big of a revolution is this? How much has the experience of stopmo animating changed -- perhaps forever?
posted by sven | permalink | categories: stopmo
February 3, 2008
how to connect your digital still camera to a computer - explained
by sven at 11:59 pm
I just wrote a long email to a friend explaining how a Digital Still Camera might be connected to a computer. It seemed to me that this information might be useful to others, so I decided to repost it here.
If you haven't visited the Scarlet Letters blog before, please note that this is specifically intended for people who do stop-motion animation.
==============================
So, let's say you have a digital still camera and a computer. How do pictures get from your camera to the computer?
PATH #1: USB CORD
I'm going to answer the question "How do pictures get from your camera to your computer?" with another question: "How do you usually download your photos?" Usually when you take photos and then download them, they go through a USB cord.
But, how does the computer know to download them? Software. If you're using a Mac, you open up iPhoto and it recognizes that a camera is attached to the computer, and it downloads them for you. OR, you might have software that came with the camera that allows you to download the photos you took.
Now, certain software allows you to do something more than just download photos... It actually allows you to activate the camera's shutter by pushing a key on the computer. For Canon brand cameras (at least when I bought mine), this software is called RemoteCapture. The ability to snap off photos without touching the camera is something that we as stopmoes very much want -- because if we touch the camera to take a shot, we're going to very slightly move it -- and that messes up our shots.
A program like RemoteCapture can be used as a basic framegrabber. Whatever you can see in the LCD screen on the back of your camera, RemoteCapture can show you on your computer screen. This is a sort of "live out." You don't have niceties like onion skinning and toggling... But it can work OK.
Wouldn't it be nice if you could just use a USB cord to hook up your camera to the computer, and then turn on a framegrabber like FrameThief or Dragon? Well, too bad! It doesn't work, and here's why... Every brand of camera uses a different language to talk with the computer. Each kind of camera will only interface with the computer using a proprietary software. If you attach your camera to the computer with a USB cord, FrameThief won't know that there's a camera attached at all -- it has no way of talking to the alien device.
However, this may not be the case if you're using Dragon with a Canon or Nikon camera. Part of what's so exciting about Dragon is that the Caliris (as I understand it) have bothered to look into what language these cameras use, so Dragon can itself function as a RemoteCapture program.
PATH #2: AV OUT
(Just to remind you, the question is: "How do pictures get from your camera to the computer?")
Many digital still cameras have the ability to capture short videos. If you look at the side of your camera, there's probably a 1/8" wide hole somewhere marked AV. (It may be color-coded yellow.) What comes out of this hole?
Video can come out of this hole. And that's what a framegrabber wants to see. A framegrabber to be able to show you what the camera is looking at, and change the image in real time as you move the camera around.
But here's the problem. The signal that is coming out of that hole is analog, not digital. It's intended to be connected to a VCR -- not a computer. However, fortunately, there are ways to convert that analog signal to digital.
Let's take another look at that hole. Like I said, it's 1/8" in diameter. The cord that you're supposed to attach there is called an AV cord, and the other end of it should split into 3 connectors: red, white, and yellow. The red-white-yellow end is called "RCA." If you have a stereo, the red and white connectors may look very familiar -- they're the ones that carry the right and left signals for stereo sound. The yellow one carries video -- which is why the 1/8" hole may be marked with yellow.
OK, so let's say that you have yourself an AV cord (1/8" connector on one end, RCA on the other end). What can we connect the red-white-yellow end to? Like I said, you could connect it to a VCR -- but that does us no good. You could also connect it to an analog-digital converter, and from there send a digital signal into the computer.
You could buy a stand-alone analog-digital converter. The last time I checked (which was a while ago), they cost about $250. OR, you might be able to use a digital video camera. That's what I do. I have a Canon ZR45 DV cam, which does the job. Unfortunately, a DV cam that's being used as an analog-digital converter may not work for all digital still cams -- so you have to check.
Here's how I get my DV cam to work with the digital still cam and the computer... The DV cam can't accept the RCA cable directly; but it does accept an S-video cable in. So I went to Radio Shack and bought an RCA-to-S-video adaptor for about $30. It's about the size of an A battery. So, I've got an ugly chain of cables -- but it works to get the analog signal from my DSC into my DV cam: Digtital Still Camera -> AV cord -> RCA to S-video adaptor -> S-video cord -> DV cam.
From the DV cam to the computer is much easier -- I just need a FireWire cable. Make sure the settings on the DV cam are correct, and your framegrabber can now see what whatever would normally be showing on your DSC's LCD display. (It's worth noting that if I want to capture images using my DV cam, the FireWire is all I'll ever need.)
Are we ready to shoot films with the DSC? Not quite. There's one more important thing to deal with. See, the image that is being sent from the DSC to the computer is whatever you would normally see on the camera's LCD screen. That means the resolution is probably 640x480 pixels -- which is far less than what you were probably hoping for.
Understand that what you're seeing in the framegrabber is not what you're going to use for your final film -- it's just a preview that helps you take the "beauty shots." How do you capture the beauty shots? There are two solutions.
Solution #1: You can use a remote control to trigger the DSC's shutter, and capture all the images on the camera's memory card. Later on, you download the photos and assemble them into a film. There are two problems with this solution... You can only take as many photos as your camera's memory can hold... And, more significantly, it's a pain in the ass to delete a photo if you decide you made a mistake. Part of the whole point of having a framegrabber is being able to realize when you made a mistake, and backtrack by deleting some photos.... But if the beauty shots are all on the camera's memory card, you can't delete mistakes immediately -- you need to make a note for later, to delete the problem images after they've been downloaded.
Solution #2: You can run two programs at once: The framegrabber, and your camera's proprietary Remote Capture software. The framegrabber will save its files in one folder, and the Remote Capture software will save its (considerably larger) files in another. Each time you want to take a photo, you need to hit two buttons -- one in the framegrabber, one in the Remote Capture program. There are ways to make this somewhat simpler... You can create a script that will allow you to trigger both softwares simultaneously... But, as you can see, this actually requires a third piece of software to be running at the same time.
And, yes, this is what I actually bothered with when I shot my "A Word From Professor Ichbonnsen" short.
PATH #3: SPYCAM
(Again, the question is: "How do pictures get from your camera to the computer?")
There is a more low-tech strategy for getting pictures into the framegrabber, a strategy which has worked for folks like Nick Hilligoss for years. That is: Attach a tiny spycam to the optical viewfinder of the camera.
As I mentioned in the previous section, the wiring for connecting a DV cam (or a digital spycam, or a webcam) to the computer is easy: all you need is a FireWire cable.
The image that your framegrabber uses will likely be a bit dark... And due to parallax, it won't be exactly what the DSC sees when it takes a shot -- but it's pretty close, and good enough to let you know that everything is in frame.