you are here [x]: Scarlet Star Studios > the Scarlet Letters > sandwich plates for "the drifter"
<< before
drilling balls: two methods (part 2 of 2)
after >>
serena barton's "layers of memory & imagination"
April 7, 2007
sandwich plates for "the drifter"
by sven at 8:00 am
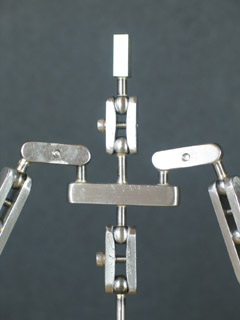
The sandwich plate joints on the Drifter don't work nearly as well as I'd like. I want to write out some notes about how I made them, while the process is still fresh in my mind...
Hopefully the notes will be of some use when I get around to making my next armature project.
A. CUT-OFF SAW
The first job was to rough cut my stock. I used 1/8"x1/4" 1018 steel bar for the sandwich plates.
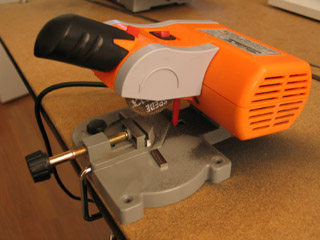
Now that I've got an abrasive wheel on the mini cut-off saw, it works great! For estimation purposes, it's good to assume that a cut is 1/16" wide... So, when I'm doing a bunch of cuts off of one strip, I tend to allow for 1/8" between the pieces I want -- which should leave a safe margin of 1/32" extra on either side of the cut.
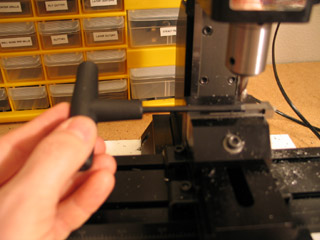
B. MILLING
Next stop: the milling machine.
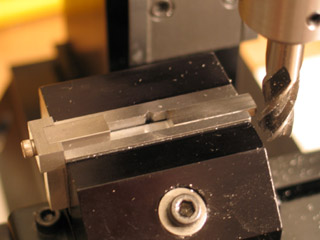
My general approach to making the sandwich plates this time around: use a T-spacer as often as possible. The job of the T-spacer is to give me identical registration each time I put a workpiece into the milling vise. All in all, the approach seemed sound.
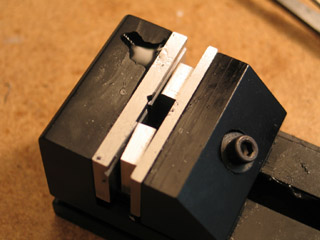
After I've rough-cut a piece of steel, I need to face one side of it on the mill. One side has to be perfectly square -- or else the T-spacer won't do me any good.
(Note that the T-spacer in the photo above isn't being used for registration, but rather to balance out pressure on both sides of the vise.)
After I facing a plate, I'd mark the square side with a fine-point Sharpie -- just so I'd be clear which side was which.
The more I think about it, I think I could have done a better job constructing the T-spacer. I measured and cut the two pieces of metal, and then screwed them together. I probably should have gone through those steps -- but left the nose long. Then, I could have milled it and been certain that the end was exactly the right length and perfectly square.
The other error I made with the T-spacer is that I made it .25" wide. I'm now thinking that I should have made it slightly narrower. After I got my plates registered, I had to gently tap on the T-spacer to get it out of the vise, and out of my way. Knocking the T-spacer out of the vise surely couldn't have helped my accuracy!
It doesn't matter exactly where in the vise the T-spacer puts the plate -- what's important is just that all the plates go into the vise in the same place.
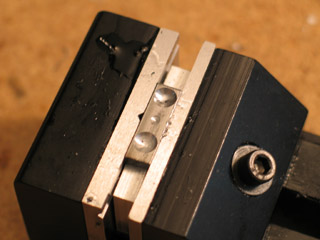
After I've got my first plate locked in the vise, I use the wiggler to figure out where to drill the first socket. When I get the spindle over that spot, I get to leave it there for quite a while.
The way that I designed these plates, the center of the .25" dia. socket was .125" from the edge of the plate. In retrospect, i think I'd like to have planned for there to be a little bit more lip at the end of the plate. [Although, to an extent there was some lip, since the socket is shallow enough that it doesn't wind up having a full .25" diameter.]
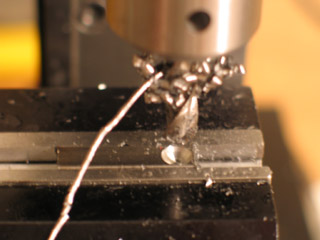
I had serious trouble doing plunge cuts with the ball-nosed end mill.
I got terrible vibrations ("chatter?") which left striations in the socket. I think that problem was due to me trying to make the plunge too quickly. I had assumed that I needed to make the plunge quickly in order to avoid work hardening -- like I did with the drill in the lathe method of drilling balls.
Making a shallow cut -- then backing off and starting again -- seemed to help. I tried making the cut much more slowly, and that also generally seemed to help. Sometimes it felt like the cutter was pulling itself down into the steel without my help -- but I'm really not sure if I was just imagining that.
I'm confused about what the rpm should be for this cut. I chose my rpm based on the shaft of the cutter being .25" dia. -- about 500 rpm, if I recall correctly. But the tip of the cutter isn't that wide... How do you choose an appropriate speed when the cutter isn't just cylindrical?
Drilling sockets is a pretty crucial skill. Based on some trial attempts a few months ago, I didn't think I was going to have any problems. Now I see that I ought to do some more practice cuts to figure this out, before I get into my next serious project.

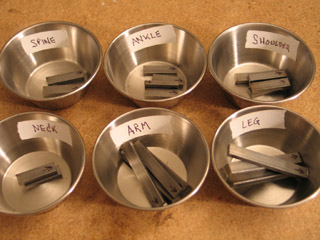
Here's another principle that was guiding my process on this project: move the spindle as infrequently as possible.
I milled all the right-most sockets in all of the plates. Then I moved the spindle over and did all the cups in its next position. [I'm speaking inaccurately; the spindle doesn't actually move -- only the XY table moves.]
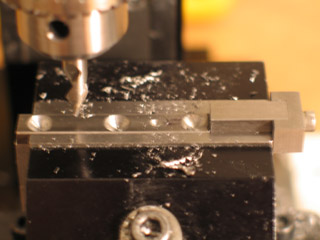
Operations on the drill press are almost always more "quick and dirty" than operations on the mill. I decided that because the holes for screws are designed to have some play in them, I ought to try making those holes on the drill press instead of on the mill.
In preparation, though, I used the #2 center drill to mark where the holes would go.
C. DRILL PRESS
That concludes the work on the mill. On to the drill press.
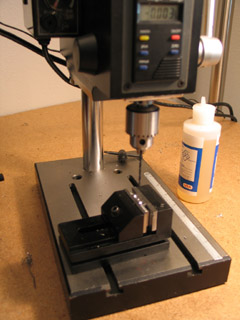
I have a small MicroLux drill press that I got from Micro-Mark a while back. I've been so enamored with the precision of my mill, I've hardly used it...
Still, I figure I ought to be learning to use "the best tool for the job" -- and oftentimes speed is more a more important factor than accuracy. I keep trying to remind myself: Be accurate -- but don't use more accuracy than the task requires.
For this job, I made two risers -- so I could drill a hole in a work piece and not be cutting into the riser that's holding it up.
The more I think about it, I think it would probably be better to just make a single riser with a slot in the middle. Having two risers actually wound up being kind of fiddly.
Drilling the holes using the drill press went just fine. I used a #43 jobber for the threaded holes, and a 1/8" drill bit for the through-holes.
Technically, you ought to clamp down the vise, and not hold it with your hand. At one point I got a lesson in why this is the case: My hand slipped, and the drill press picked up the vise and threw it off the table. ...Thank goodness I've chosen to work with small machines!
I gotta say, though, this experience does tempt me to shelve the drill press and just work on the mill. If I stop drilling balls on the lathe, then I could wind up doing pretty much everything on the mill -- which feels sort of elegant... I could clear some table space...
I've been thinking about using the method of tapping holes where you put the tap loosely into the chuck that just drilled the starter hole. ...That would potentially be another reason to not stick with the drill press -- it's easier to get the drill chuck exactly where I want it when I use the mill.
D. BENCH VISE WORK
The next job is to "tap" (put threads into) the screw holes.
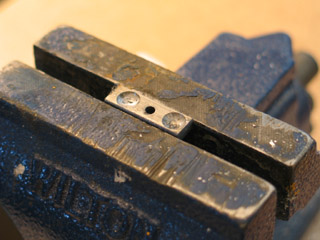
It usually makes sense to do all the operations of one kind on your work pieces, and then move on to the next step. ...Technically, I could have tapped each plate immediately after after drilling it -- while it was still in the milling vise. But I found it easier to just get all the drilling done, and then move over to the bench vise.
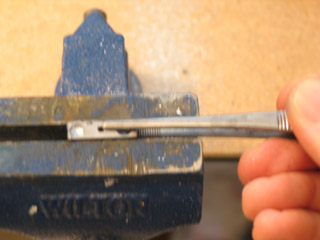
I love it when I've got just the right tool for the right job... Tweezers really came in handy when I needed to put sandwich plates into the bench vise. It's a little thing -- but so much easier than when I was trying to get the pieces placed using a flat needle file or a set of pliers.
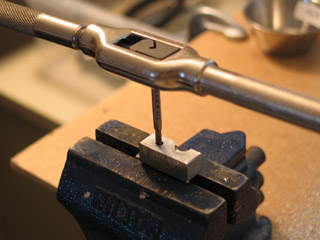
Sometimes my tap hasn't been completely perpendicular to the work piece. I recently read about making a "tapping block" to help guide the tap -- so I decided to try making a quick and dirty one for myself.
It's just a 1/8" hole drilled through a scrap of aluminum. It did seem to help a little when I was getting the tap started. Still, I know I can get my tapping technique better. This is an area for improvement.
[Note: I'm interested in trying out using a countersink for the edges of the threaded hole. Also for the rim of the ball holes.]
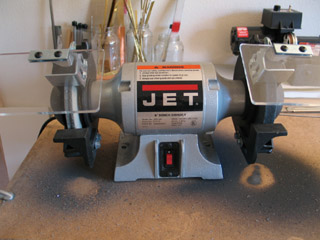
E. GRINDER
For the Drifter armature, I decided that I wanted to radius the ends of sandwich plates using the grinder. From what I've read, this is the quickest way to create rounded corners -- and it's usually plenty good enough.
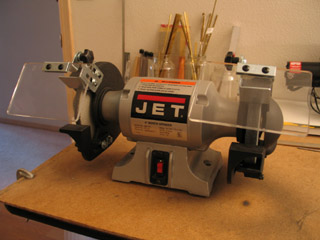
This is a 6" grinder. The wheels that it takes have to be 3/4" (or narrower) in width. I think if I were doing it again, I might buy an 8" wheel so I could use 1" wide wheels -- which seem to be the most common kind.
I've got the course grinding stone that came with the machine on the right, and a ScotchBrite wheel that I special-ordered from Palm Abrasive on the left.
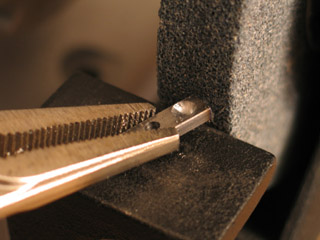
I roughed out a radius using the course grinding wheel, and then gave it a few smoothing passes on the ScotchBrite wheel. The ScotchBrite wheel developed a deep groove, which I'm not too happy about. The groove made work more difficult later on, when I needed to trim the joints.
The grinder makes a hellacious amount of steel dust! I'm not sure how far the dust spreads; I'm worried about it getting into electronics that I've got in the same room. I've just purchased a good shop vac, which I hope to jury-rig into a dust collection system. I'm also considering replacing the coarse stone with an extra-aggressive ScotchBrite wheel to cut down on sparks.
I don't like the grinder much. Even with hearing protection on, I noticed my ears ringing a little afterwards. The dust is bad. Using pliers to hold the pieces I was grinding would leave marks on the metal. And occasionally a sandwich plate would skitter across the grinder, scraping up the part's edge.
It may take longer, but I'm eager to try using a corner radiusing end mill on the next project. I may even try using a tilting table and an end mill to trim the joints, rather than the ScotchBrite wheel. Slower, less "artful" -- but hopefully more uniform, functional and professional-looking.
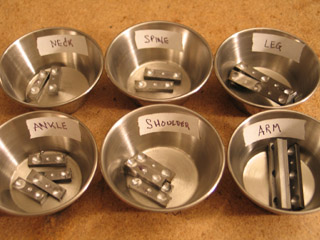
F. FINISHING TOUCHES
After all the machining is done, I give each of the sandwich plates some individual attention.
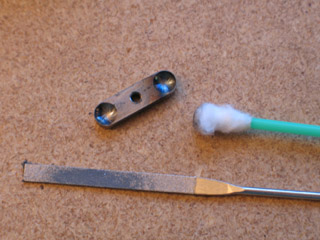
For plates with threaded holes, here's the order of tasks I used:
- diamond file the edges of the threaded hole
- use fine sand paper to shine up all sides (except the one with the sockets)
- use a ScotchBrite pad on the socket side of the plate
- use a tap to clear any residual grime out of the threaded hole
- clean dust out of the sockets with a Q-tip
(Several of those steps aren't necessary for the through-hole plates.)
...
Done!
Well, except for trimming. And it's best to do that after you've done a test assembly of the armature -- after brazing. You want to see how all the joints are working out before you start making special modifications.