you are here [x]: Scarlet Star Studios > the Scarlet Letters > drilling balls: two methods (part 2 of 2)
<< before
drilling balls: two methods (part 1 of 2)
after >>
sandwich plates for "the drifter"
April 6, 2007
drilling balls: two methods (part 2 of 2)
by sven at 8:00 am
I'm walking through two methods for drilling balls. In yesterday's installment I discussed the lathe. Today I'll be discussing the mill.
METHOD #2: THE MILL
Drilling balls using the milling machine method requires some preparation and more set up time than the lathe method. However, it has several distinct advantages:
- If you have the right attachments, you can determine hole depth precisely.
- Because the ball sits on a hard surface, the drill cannot push it backwards.
- A milling vise is unlikely to mark the ball.
- The hole that you make holds cutting lubricant just where you need it -- which lessens concerns about work-hardening.
- Once a hole has been drilled in the ball, it may be possible to mill the bottom of that hole flat. (I haven't tried this idea out yet.)
- After you're set up for this job, it's faster to drill balls on the mill than on the lathe. (Approx 4 min. per ball versus 6.)
The main disadvantage is that it's more difficult to get the ball perfectly centered beneath your drill. If you're not very careful, it's easy to put a hole into the ball off-center.
A. PREPARATION
Before you can go through the process of drilling a ball on the mill, you need to first do two things:
- create a riser that will hold a ball at the right height in the milling vise
- get the mill's spindle dead center over the ball you want to drill
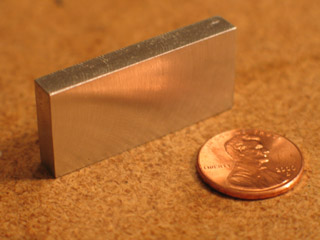
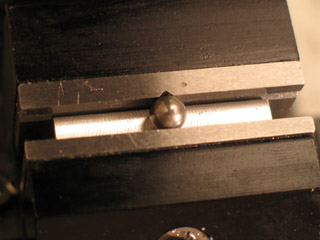
The milling vise has a groove vertical groove in the center of its fixed jaw that is intended to hold round stock in place. This groove is perfectly suited to holding a ball -- except that you also need to hold the ball up at the top of the vise jaws, so the drill bits can reach it.
I made this riser out of a bit of aluminum. Since the balls I'm drilling are .25" wide, I made it slightly narrower -- so it won't interfere with the vise jaws. (I've forgotten exactly how tall I needed to make it so that the ball is right at the top of the vise. Sorry.)
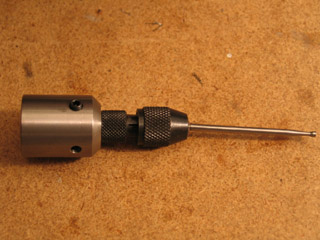
As for getting the mill's spindle dead center over the ball, we're going to need to use a simple (but astonishing) device called the "wiggler."
What is it? It's a needle that has a ball on one end; the ball is held loosely inside of a collet. At the other end of the needle, there's a small cylinder on its tip.
Using a wiggler is not at all difficult... But it's hard to understand how one of these things works if you've never seen it in action. I couldn't figure out the nature of the beast until I watched the SwarfRat video, Mini Machines 101 Volume 2 (Mill Series): Edgefinding & Location. ...Hopefully the photos here will help explain.
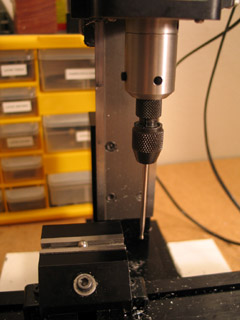
The plan is that we're going to figure out exactly where the edges of the milling vise are, and measure to the center of the ball from there.
Let's start with the X-axis. Attach the wiggler to the mill's spindle. Have the cylinder-tipped needle hanging down more or less vertically.
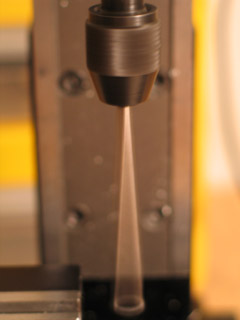
Turn on the mill to a high speed; say, 1000-2000 rpm. As the wiggler spins, you'll see that it's not hanging down perfectly vertical. That's OK...
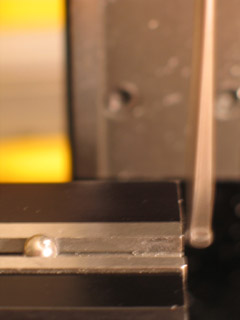
Move the XY table along the X-axis until it just starts to come into contact with the tip of the wiggler. (Don't worry, the wiggler won't hurt the vise!)

Slowly, keep moving the vise toward the wiggler. As you do so, it will push the wiggler increasingly into alignment, until it's spinning almost perfectly vertically.
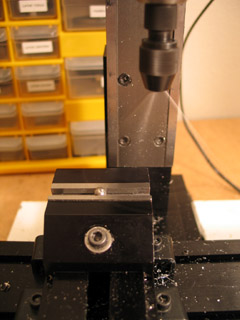
When the wiggler's needle seems vertical, start paying close attention to your digital read out (or handwheel markings, if you don't have a DRO). Move the XY table .0005" at a time...
Suddenly the needle will spin off, and spin wildly around! ...That's what it's supposed to do!
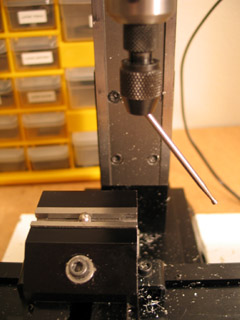
Turn off the mill's motor. You now know that .0005" ago you had the needle spinning "true". Back the XY table up a ways (to compensate for backlash), and then bring it forward again to where it was just before the needle spun off.
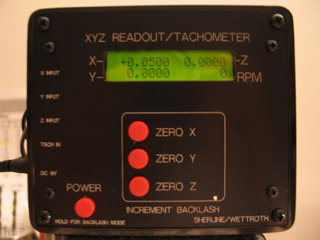
That little cylinder at the tip of the wiggler is .1" wide. In order to get the mill's spindle directly over the edge of the vise, therefore, we need to move it over .05" more -- to where the center of the wiggler would be.
Zero out your digital read out. You now know precisely where the edge of your vise is -- you can make all your future measurements from that point.
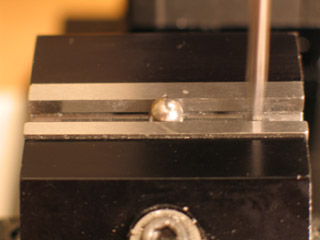
Next, we need to find an edge to measure from on the Y-axis. Which jaw should we use?
Well, the fixed jaw has the groove in it. The ball sits slightly inside of the groove, which means you won't be able to measure from there without doing some fairly complicated math.
The loose jaw is flat. If you find that edge, all you'll have to do is measure over one-half the diameter of the ball, and you'll be centered on the Y-axis. This is what I wound up doing, and I got very usable balls.
However, I did make an error here.
The loose jaw is nearly, but not perfectly vertical. Unlike a normal vise, which simply squeezes its jaws together, a milling vise pulls its loose jaw down at a 45 degree angle. It applies the greatest pressure at the center of the top lip of the loose jaw... What this means is that the loose jaw is going to be very slightly (almost unnoticably) tilted.
I got "good enough" results even so... But to get this method perfected, I'm going to need to machine some "soft jaws" which screw onto the milling vise's regular jaws. What we need is for the groove to be in the loose jaw, and for the fixed jaw to be perfectly flat and perfectly vertical.
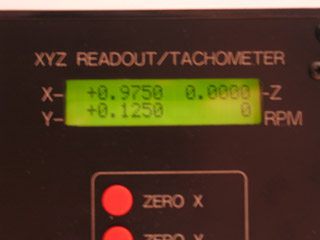
Once you've found the edges of the milling vise and zeroed out the DRO, putting the spindle into position is a simple matter.
The Sherline milling vise is 1.95" wide. The groove in the milling vise that holds the ball -- it's exactly halfway across the vise's fixed jaw. So, on the X-axis, we want to move halfway across the jaw -- to .975".
The ball we're drilling is .25" in diameter; so half of that is .125". That's where we want to be on the Y-axis.
Lock your X and Y axes in place. Your spindle is going to stay in this position for the entire process of drilling balls.
B. DRILLING A BALL
OK, on to the drilling itself...
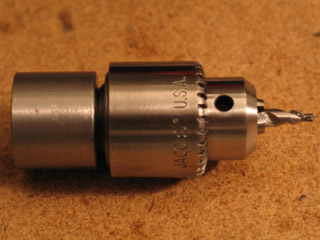
Step 1: Put center drill in drill chuck. I'm using a #2 center drill. The drill chuck pictured here is actually the same chuck that I used with the lathe method -- but I've unscrewed the morse arbor, and have attached a drill chuck tool holder in its place.
The drill chuck tool holder is a wonderful little attachment. Normally you'd use a drawbolt to pull the drill chuck's arbor into the mill's spindle. With this attachment, you can just screw it on like a end mill holder, using tommy bars. Much faster and easier! (And with all the repetitive steps in this process, you want all the "fast and easy" you can muster.)
I'm looking forward to getting set up with two drill chucks, both in tool holders, so I don't have to switch the center drill and 1/8" drill bit in and out. I want all my tool changes to be done with just a pair of tommy bars.
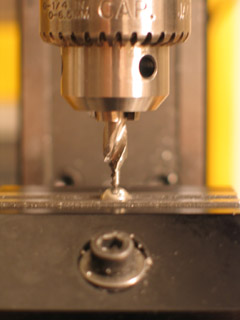
Step 2: Touch the center drill to the ball. Zero out the digital read out on the Z-axis. Raise the spindle back up and away from the ball.
It's important to find the top edge of the ball now. In a moment we're going to file it away; after doing so, it's no longer possible to figure out the precise position of our drill bit's tip.
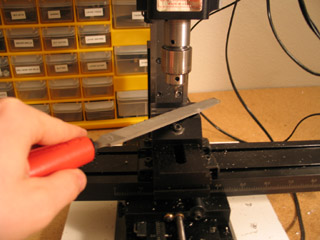
Step 3: File the ball. Use a bastard saw to make a small flat area on its top. Approx. 1/16" dia. should suffice.
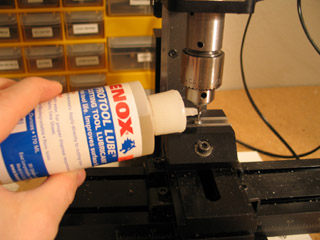
Step 4: Add a drop of oil. Just on top of the ball, to help keep the metal from getting hot and work-hardening as we cut.
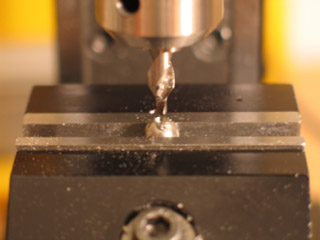
Step 5: Make a divot with the center drill. Put the center drill on a very high speed, say about 2000 rpm, and bring it down so it just kisses the ball. Don't go for any depth. Now, pull the drill back.
The next two steps are probably an error. As I now understand it, you shouldn't use the center drill to cut all the way down to its countersinking edge. Skip to step 8.
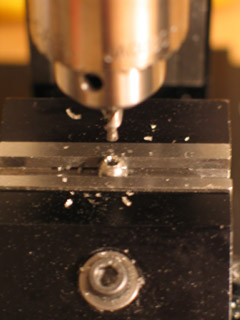
Step 6: Add more oil. The little divot you just made will hold it very nicely.
Step 7: Center drill deeper. Drill far enough down so that you get a hole with a beveled rim. This will help guide your 1/8" drill bit. It doesn't matter exactly how deep you make this cut, so long as you go to the same depth on all of the balls that you drill.
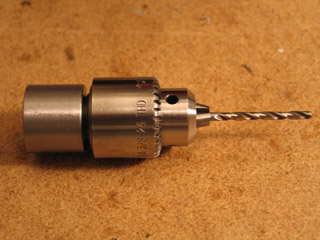
Step 8: Put 1/8" drill bit in chuck.
Step 9: Lower drill bit down to where it touches the ball. Zero out the digital read out. You're going to have to do some estimation to figure out how to compensate for the depth that you've already drilled using the center drill -- but so long as you've been consistent with that step, you should be able to drill holes with the 1/8" drill bit that are all nearly equal in depth.
However: If the center drill and the 1/8" drill bit were each in their own separate drill chuck and drill chuck tool holder, then there would be no variation of tool length -- and you could figure out precisely how deep you're drilling. That's what we really want.
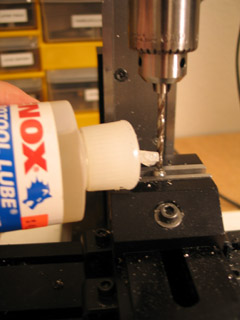
Step 10: Add more oil. The hole that you've made so far will hold quite a lot, and make work-hardening almost a non-issue.
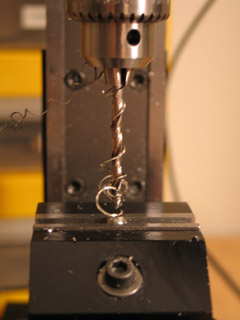
Step 11: Drill the ball. I used the same speed that I did with the lathe method: 1800 rpm. This seemed to work just fine -- but it's a decision that deserves review.
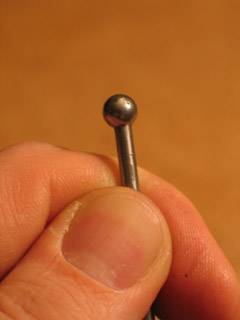
Step 12: Check that the hole is centered. Slip the ball onto the end of a piece of 1/8" dia rod, and spin the rod in your fingers. If it's not visibly off center, then you've produced a "good enough" ball. If two balls in a row check out OK, then you can eliminate this step -- your set-up is good, and will continue to produce good balls.
Congratulations! The ball is drilled. Now... Repeat.
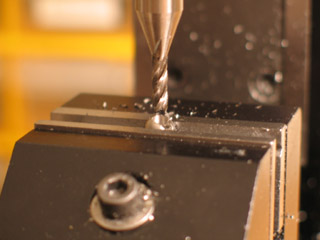
At one point I wondered if I could skip a few steps and just do a plunge cut into the ball with a 1/8" dia. end mill... No good! The end mill put too much stress on the ball, and the side of the ball broke.
Well, it was worth a try!
CLEANING THE BALLS
Before the balls are ready to be brazed onto rods, there's one more process we need to go through: cleaning.
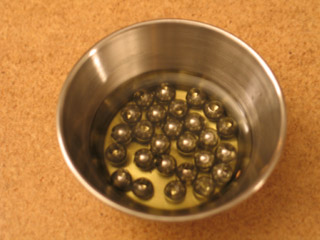
There's residual oil on the balls that needs to be removed. For a degreaser, I'm using Citrisolve. It's a household cleaner; the active ingredient is dilimonene. Dilimonene (as I understand it) comes from orange peel -- and you can smell it.

Dilimonene is one of the least toxic solvents you can use... But still, beware!
Even a "natural" solvent can harm you. I recommend wearing a respirator and working next to an open window.
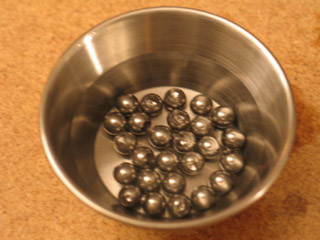
After the solvent has broken up the leftover oil from machining, rinse off the balls with water a couple of times.
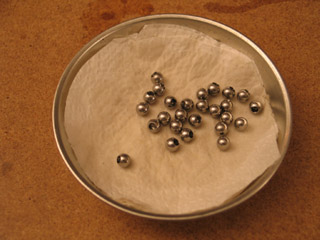
Lay out the balls to dry. As soon as the water has evaporated, they're ready for use.
...
Now you're done with the easy stuff, you can move on to making joints for the balls to sit in!