March 2007 archives
you are here [x]: Scarlet Star Studios > the Scarlet Letters > March 2007
<< before
February 2007
after >>
April 2007
March 31, 2007
the comeback kid
by gl. at 11:40 am
exciting news! gocco is likely to make a comeback this summer!
"march 29, 2007 i've spoken to a reliable source at the certain u.s. retail chain mentioned below, who has confirmed they have worked out a deal with riso japan to import b-6 or b-6 compatable machines and supplies to the u.s. for their own stores. some of the supplies have already arrived at their warehouse, and they hope to roll out the complete system, classes and a media campaign this summer. until everything is in place, they prefer not to be identified."
i'm amazed but exceptionally pleased; i was pretty sure this wouldn't happen. i just hope the retail chain realizes that those of us who bought a TON of supplies when we didn't think it was coming back probably won't be buying more for a while. so if sales start slow, i hope they hang in there!
posted by gl. | permalink | categories: printing
March 29, 2007
eating poetry: gocco printing with chocolate
by gl. at 11:40 pm
for the edible book tea, i had a lot of different ideas, but the one that gave me the most pleasure was doing some sort of interactive edible printing project. i wanted everyone to print their own or mark their own edible item. i was thinking of doing a "jello journalism" setup, like a hectograph. while researching that possibility, it suddenly occured to me that a gocco would be even better! and boy have i been looking for a good gocco project!
for those who can't wait for the punchline, the basic recipe for the chocolate gocco ink i used is hershey's syrup mixed with powdered sugar until it reaches a consistency similar to that of riso ink. it was perhaps a 1/4 cup of syrup to 5 or 6 heaping tablespoons of powdered sugar. i tried several different formulations & chocolates and that was the best one (and the most reproducible). the "ink" will thicken in the refrigerator; it's better fresh and at room temperature. but the other secret was crepes. wonton wrappers didn't work nearly as well for a good impression. i didn't try other mediums once i found crepes, so there may be other surfaces that work well. the sweet crepe recipe seems to have worked slightly better than the savoury crepe recipe.
the whole process took me about a week to nail down (roughly 15 hours). i could only work on it "after hours," when all my other work was done, which often meant i was testing after midnight. here's how it all went down:
day1: buy egg roll & spring roll wrappers at uwajimaya. pick poem, create poem layout in illustrator, photocopy poem, set up gocco, burn screen. make chocolate sauce from melted chocolate chips, test print on egg roll wrapper. the chocolate is much too thick, wash screen. test prints w/ hershey's chocolate syrup (3 different kinds!), but the syrup is too thin. the screen breaks apart under all that washing, so i burn a new screen. begin to wash screens much more carefully. test print w/ hershey's syrups most promising, but i think the type is too small. reset & adapt poem to configure for larger type, photocopy, burn new gocco screen. test print w/ hershey's syrup: words are forming, but i'm not thrilled. attempt to toast egg roll wrapper prior to printing & burn it. toast another egg roll wrapper. test print w/ a mix of chocolate syrup, cocoa powder & powered sugar. better print, but the toasted egg roll wrapper crumbles and gets all over the place. test another print on plain & toasted egg roll wrappers. test print on spring roll wrapper (blech!!). i care a lot that this is actually an edible book. take a short nap, clean up kitchen, fret. (end at 5 a.m.)

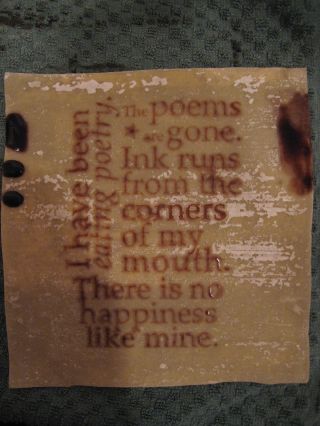

day2: think of using crepes! thanks, sven!
day3: make 2 savory crepes to test, realize i don't have enough syrups to do much more. when i try to mix the syrups with cocoa and thin with water, it squishes out the edges of the screen -- but it prints one good print on the darker side of the crepe! a true success! make 10 more crepes. make another batch of ink with the rest of the syrups & powdered sugar. 5 successful prints in a row! leave the rest for tomorrow's tests, clean up kitchen. feeling cheerful. (end at 3 a.m.)


day4: pick up an extra bottle of hershey's syrup & a jar of papa haydn's chocolate sauce after visiting michaelmas. i didn't even know papa haydn's sold its chocolate sauce in jars. while smooth and decadently delicious, the sauce doesn't print at all, even if thinned w/ milk. it did have the highest proportion of actual chocolate of all the sauces available on the shelf at zupan's: is particle size an issue? it also squishes and gets all over gocco press (though the syrup also gave me that problem). feeling frustrated. wondering what my plan b is. clean up kitchen. amazed the screen seems to still be holding. (end at 3:30 a.m.)

day5: make cherry pi for 3/14! (related only in that i had to wait till that was done to work on the "eating poetry" project.) after the total non-success of the premium chocolate sauce, am glad i bought the extra hershey's syrup. this was, happily, the easiest day yet: i created more ink from about a 1/4 cup of hershey's syrup and 5 or 6 heaping tablespoons of powdered sugar. i finally think to apply a very thin layer of sauce, which works like a dream! no squishing out the sides, but continues to have even coverage and am able to pull multiple prints. the crepe sticks to the screen and must be peeled off, pulling very thin strings of syrup from the letters. neat! use up rest of crepes: i now have enough pre-printed crepes for plan b, which simply involves picking a crepe & eating it rather than everyone printing their own -- but at least there's still poetry involved! write some of the process down. clean up kitchen & gocco. (end at 2:30 a.m.)

day6: cut waxed paper to cover print bed. set up studio for edible book tea. print poem & art onto paper so people can see the source (but then i leave them on the printer!). make blank crepes w/ the sweet crepe recipe instead of the savory crepe recipe. these turn out lighter in texture and may even make better surfaces (carmelization?). to make the printing side dark enough, i leave it in the pan for 1.5 minutes. am finishing the crepes minutes before the event is set to begin. at the event, i describe the project, pray, print... hooray! a beautiful print! when i let others print, the results aren't as good, but i can't tell what they're doing differently. they fill the printed crepes w/ strawberries & whipped cream, though, and it's so delicious it hardly matters. (end at 3 a.m.)


wrap up: i am pretty pleased with the way these turned out, though of course i'd like even better, more consistent coverage. maybe what i'm really looking for is a chocolate embossing technique. :) i printed about 25 of these crepes for the event without evidence of clogging, though i have no idea how many more i could have gotten out of it. as far as i can tell, the screen is still usable. thank you, gocco!
posted by gl. | permalink | categories: printing
March 26, 2007
armature teaser
by sven at 11:59 pm
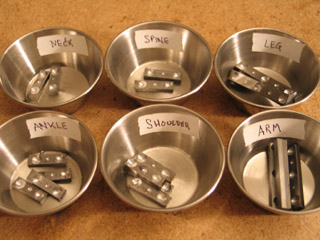
I just wanted to tease y'all a little... Saturday (3/25) I started work on a new armature.
The big picture:
- steel again
- actual ball-and-socket joints (rather than open-hole)
Design improvements:
- square stock at neck for better attachment of head
- body blocks perpendicular to incoming rods
- different shoulder design, to increase range of motion
- step-block wrist joints
- wire fingers
- ankles closer to soles of feet
- hinged toes
Changes in the construction process:
- drilling balls using mill (instead of lathe)
- brazing using oxy-propane "little torch"
- cleaning balls using Scotch-Brite pads
- doing rough-cuts using mini cut-off wheel
- on the mill, I've learned how to use a "wiggler" for locating edges
- using drill press for through-holes
- sandwich plates radiused using grinder (rather than a jig and rotary table)
- trimming the joints using Scotch-Brite wheel on grinder
- handy metal bowls to keep groups of parts together
More soon!
posted by sven | permalink | categories: stopmo
March 25, 2007
toby's travels: trip to the beach
by sven at 1:17 pm
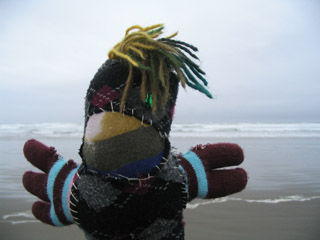
This past week we went for a little overnight vacation at the coast. It was Toby's first time seeing the ocean!
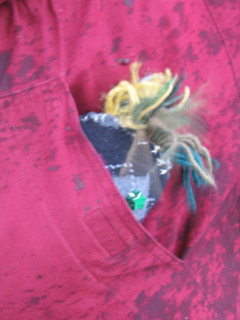
It rained pretty much the whole time we were there. Toby wasn't big on getting wet (being pretty much a sponge) -- but he did finally venture out of Gretchin's pocket when we got down to the waves.
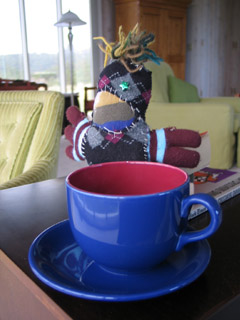
We had a leisurely time... Making vegetarian corned beef sandwiches (originally intended for St. Patrick's day), crepes filled with asparagus and with strawberries... Lounging on the couch, reading books aloud...
Toby shared a nice cup of tea with me.
(I think he may have been under the impression that it was his own personal hot tub.)
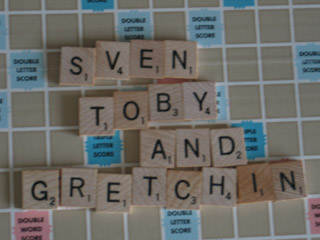
We played a good game of Scrabble.
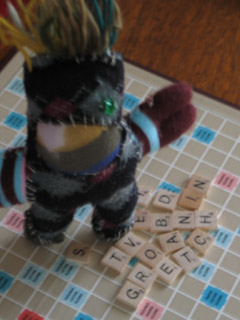
Toby's not very good at Scrabble yet.
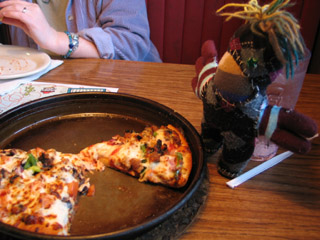
I have a fondness for Pizza Hut when we travel... So on the way home, Gretchin treated us.
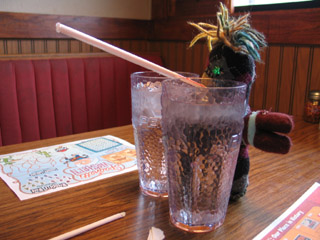
Coming back from the salad bar, Toby was hiding behind the water glasses and blew straw wrappers at us.
Silly boy!
posted by sven | permalink | categories: miscellany, toby
March 17, 2007
open studio second anniversary & edible book tea
by gl. at 9:17 pm
beware the ideas of march! the open studio second anniversary & edible book tea contained a wonderful range of "books": creative & tasty non-fiction, poetry, journals and reference materials. it's sort of an odd anniversary: we've actually had artist's way events for over 3 years, but the first open studio, where we branched out into regular events, was two years ago.
i printed excerpts of "eating poetry" by mark strand onto crepes using a gocco machine w/ chocolate sauce. i wanted to make an interactive piece so everyone could print their own crepe. gocco-ing with chocolate was one of those things i knew was theoretically possible, but i couldn't find anyone who had done it before. shu-ju mentions trying some tests for the iprc text ball, but it didn't work out.
in all i spent about 15 hours working out the details of the gocco chocolate-printing process, which i'll write about in another post. i was a little nervous, epecially when my first experiments earlier in the week were dubious. so when we printed the first crepe at the event, i was thrilled and relieved to discover it had worked!
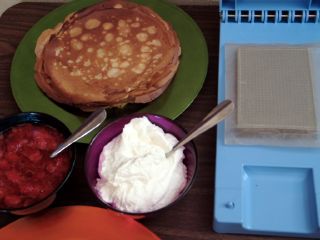
["eating poetry" setup]
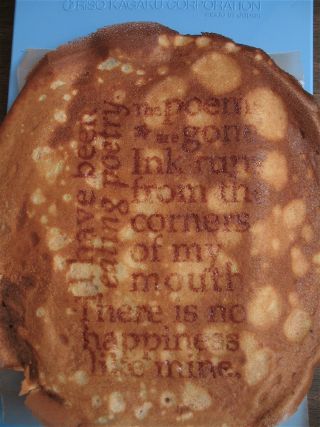
[gocco crepe print: click the image to see the other edible books!]
also, it's one thing to make a technically edible book, but to make a tasty edible book is even harder. crepes, homemade whipped cream & strawberries are delicious even without poetry. :)
our next guided intent event features dayna collins, a former artist's way creative cluster member! she's really doing great work in salem, and when i saw the matchbox shrines she made during the virtual open studio in january, i knew they would be perfect for the last theme in the guided intent series, which is faith:
"Faith is an essential component of our art. We should all have a holy reminder of our commitment to create, helping us pray for guidance & courage. So come create tiny matchbox shrines to celebrate & believe in our arts! "Faith" is the last of the Guided Intent series before we begin the cycle anew. So I am thrilled to announce our first guest facilitator for a Guided Intent: Dayna Collins, who is one of our own members!
"Dayna is a collage, assemblage, and mosaic artist and is the founder of Alley Art, an eclectic art style that incorporates collage with 3D mixed media on bowling pins! She facilitates Artist's Way groups in Salem. Dayna offers workshops on a variety of topics in Portland, Salem, and Sisters, and works part-time as a counselor at Serenity Lane. Her passion is helping others discover their own creativity and living a life filled with joy."
posted by gl. | permalink | categories: artist's way, other art
March 12, 2007
speaking @ the "world puppet animation" show
by sven at 3:30 pm
Yesterday I had my speaking engagement at the "World Puppet Animation" show. Thanks gl. for taking photos!
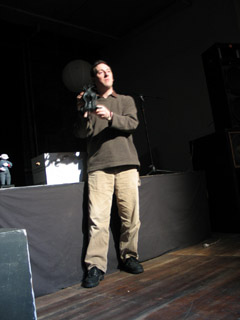
I felt it went pretty well. When I spoke, I felt like I knew just what I wanted to say -- and I didn't "um" much. After the films were over, the audience wanted to hear about my reactions to what we'd seen... I wasn't as sure-footed for that part, but see now how I could be better prepared to respond in the future.
There were 9 or 10 of us at the show. I suspect it being a Sunday -- and the Daylight Savings change -- probably kept numbers low.
There was a version of Puss and Boots by the Diehl brothers from Nazi-era Germany that was astonishing; the puppets and sets all looked like they were made by master doll-makers.
We saw a George Pal short -- featuring his unique replacement animation technique -- which I'd seen previously in The Puppetoon Movie. [If you're into stopmo, you must see this film!]
There was a Rankin & Bass-style film from Czechoslovakia titled "The Problem" which I absolutely adored -- and which I will probably never have the opportunity to see again. I'm very glad I went to this show -- even if I hadn't been speaking!
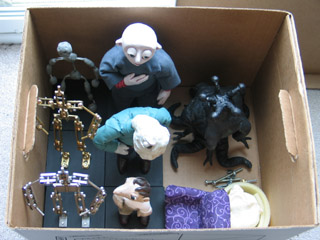
I didn't have any written notes for the speaking... But I did have a mental outline. Here's what I said, as best as I can reconstruct it.
[I. INTRODUCE MYSELF]
My name is Sven Bonnichsen. I'm a mixed media animator. That means I do two-dimensional drawn animation, computer animation, and stop-motion puppet animation. My focus is on puppet animation, and I specialize in making metal armatures -- the skeletons that go inside of puppets so they can hold a pose.
[II. DIFFERENCES BETWEEN TYPES OF ANIMATION]
I want to start by saying a little about the differences between puppet animation, drawn animation, and computer animation.
When you're doing drawn animation, you start by making your "keyframes" -- the most important poses in a sequence. Then, you draw the "in-betweens" that get you from point A to point B. This is all on paper -- so as you work, you can flip through the pages to check that your animation is going how you want it to.
Not so with puppet animation. With puppet animation, you start with frame one, and just have to keep going forward. Once you start work on a sequence, you have to keep direction of momentum and arcs of motion all in your head -- so it's very important that you do NOT stop in the middle!
Computer animation, like drawn animation, makes use of in-betweens. You define point A and point B, and then let the computer figure out how to move your model from one point to the other.
Computer animation is very popular with big movie studios because you can have a whole team of animators working on one sequence. One person can be working on the motion of the arm, while another is working on the eyes -- and you can go back and edit what you've programmed endlessly.
Not so with puppet animation. With puppet animation, it's much more like a performance -- and the animator is like an actor. It's just one person going "mano a mano" with the puppet, getting into the puppet's head, breathing life into it.
One thing that I really appreciate about puppet animation, personally, is this tactile experience of being able to manipulate the puppet with your own hands.
Right now I'm working on a film titled "Let Sleeping Gods Lie" -- which, if all goes well, will appear in the H.P. Lovecraft Filmfest this October. In it, I've got these creatures with five legs. I'm trying to figure out how on earth a thing with five legs is supposed to walk...
In the film I've got both a CG model of the critter and a puppet version. When I'm working with the CG version, with the computer screen between me and it, I can't figure out for the life of me how it's supposed to move. But when I work with the puppet model, holding it in my hands I can begin to get a sense of things. "OK, as it leans this way, the weight of the thing has to transfer from this tentacle to this one..."
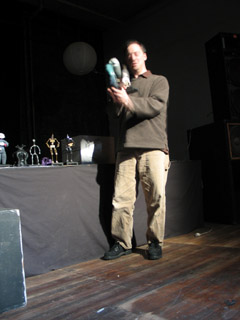
[III. PUPPET ANATOMY]
OK, so that's a little about the differences between different types of animation. Now I'd like to tell you a bit about the anatomy of a puppet, so you can better appreciate what you're going to be seeing tonight.
[III-A. TIE-DOWNS]
The most important thing to know about a puppet is that it has to be able to remain absolutely still between frames. When you're animating, you create the illusion of life by very carefully moving the puppet a little bit at a time. If the puppet twitches uncontrollably each time you snap a frame, then the illusion is destroyed.
So, one of the first things I always check on a puppet is if it can do an extreme lean. [I demonstrate Percy leaning forward.] Think about it: If you're taking a step, there's that moment before your foot touches down when you're leaning far forward... Can the puppet hold that pose without tipping over?
In order to keep the feet planted where they belong, you use "tie-downs." You drill holes in the floor of your set, and then these screws [I demonstrate] come up from underneath, and screw into little nuts in the feet of the puppet.
[III-B. ARMATURES]
In order to hold poses, the puppet needs to have a good armature inside of it.
There are three main types of armatures: ones that are made out of wood, or wire, or metal ball-and-socket joints.
Wood armatures were used a lot in early Eastern European puppetfilms -- but they're not used very much anymore, because the joints tend to wear down and lose their tension.
Wire armatures are the easiest type to make -- and are still used quite a bit in professional productions.
Metal ball-and-socket armatures are in many ways the best sort of armature, and get used extensively in feature-length projects.
Differences between wire armatures and ball-and-socket ones:
With wire armatures, you always have to be aware that the wire is ultimately going to break.
There are things that you can do make it less of a catastrophe when the armature does break. You can make your puppet with a detachable head and hands. That way when the wire breaks, the parts that you put the most work into -- which get the focus on screen -- can still be salvaged. [I demonstrate detaching Percy's hand.]
On a person, the elbow bends at one point. With a ball-and-socket armature, you can also have the elbow bend on a point -- which is nice. On a wire armature, though, if you bend the wire repeatedly on one point, it's going to break a lot quicker. So what you want to do is have slack at the elbow, so the wire bows gently, and the stress on the wire gets distributed.
Generally speaking, a ball-and-socket armature isn't going to break. But sometimes the joints do get loose -- and you're going to have to get inside the puppet to tighten them.
A ball-and-socket armature is sturdier and more precise than a wire armature. (With a wire armature, the wire springs back a little when you pose it.) But ball-and-socket armatures are also generally bigger -- and they're more expensive and labor-intensive to create.
So there are pros and cons to both.
[III-C. PUPPET COVERINGS]
Now, once you have your puppet armature, what are you going to cover it with?
There are three main options...
You could cover the armature with Plasticine and do claymation with it.
(A lot of people use the word "claymation" to mean anything that's stop-motion. "Claymation" is actually a trademarked term, coined by Will Vinton -- most famous for the California Raisins -- whose studio used to be right here in Portland. However, the word has gone into common usage... Sort of like how "Kleenex," which is a specific brand, has become synonymous with "facial tissue.")
For a very detailed puppet, you could cast the armature inside of a flexible material, such as foam latex -- which you might find in the soles of your shoes -- or silicone. The puppets in "The Corpse Bride" were made from silicone, which was a tremendous technical breakthrough.
Or, a third option, you could wrap the armature in strips of cushion foam [I demonstrate] -- like the foam you'd find in your couch -- and make the head and hands out of something hard, like Super Sculpey or Epoxy clay. Then, the body, you'd probably cover in fabric to make clothes -- or perhaps in fur, if it's an animal. This is more or less the process that was used to make the original King Kong puppet in 1933.
So: That's generally how to build a puppet for puppet animation.
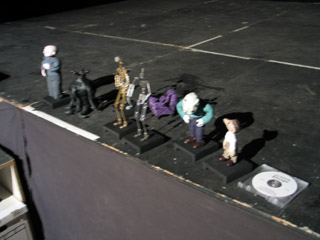
[IV. THE STOPMO COMMUNITY TODAY]
I want to wrap-up by saying that we are living in very exciting times, in terms of stop-motion animation.
When you're learning how to do puppet animation, there's an incredible learning curve. You need to figure out how to make armatures, and do puppet fabrication, and make clothes, and build sets and props, and rig lights, and work the camera...
Up until about ten years ago, you really had to hunt and search to find information about how to do this stuff. But now, an amazing online community of animators has been forming, sharing knowledge -- making it easier to learn the art than it ever has been before.
(And, with digital cameras and laptop computers now -- just about anybody who wants to could get into this art!)
The main hub for information -- globally -- is StopMotionAnimation.com. It has a sister website, StopMoShorts.com, which has a quarterly challenge, to encourage people to make puppetfilms.
[V. CLOSING - FREEBIES]
I just want to show you now my puppets "Dad" and "Jimmy," who starred in a film that I made this last year for StopMoShorts.com. Dad is a sort of gruff, authoritarian father; and Jimmy is his mischievous son, who doesn't want to do his chores.
I've brought along copies of the film, "The Great Escape," as freebies. Who here would like one? (Pass them back, please...)
OK, that's it. Thank you very much to Dennis Nyman. Are there any questions that anyone would like to ask at this point?
...
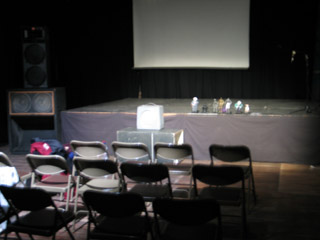
posted by sven | permalink | categories: exhibits & events, stopmo
March 11, 2007
demo wire armature
by sven at 3:10 pm
REMINDER: Tonight I'll be speaking at the "World Puppet Animation" show at Disjecta (230 E. Burnside) at 7:30pm. ...Don't forget that Daylight Savings Time ends today -- make sure that your watch has "sprung forward!"
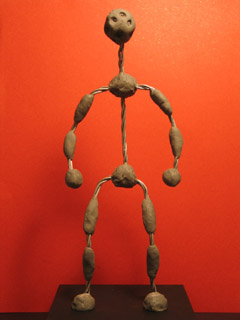
For public speaking, it seemed like it would be a good idea to have a demo wire armature that hasn't been covered up with foam, Sculpey, and the like.
I've talked about how to do all this before, but this'll be a nice review.
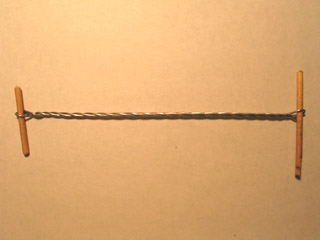
When you make a wire armature, it is imperative that you not scratch or nick the wire. If the wire is scratched, it's guaranteed to break. So: avoid using pliers!
My method is to slip two pieces of scrap dowel through the loops at the ends of my wire and twist by hand. [Another method is to put one end into the chuck of a power drill. I've tried this; it tends to twist the wires too tightly.]
Using multiple strands of wire gives you a stronger armature. If one strand breaks, the others can still go on working. It's generally a bad idea to use just one strand of wire for any part of the armature.
Twisting wire is the simplest way to make an armature -- and it works quite well. However, it should be noted that twisting immediately introduces stress into the wires. There is another method where you don't twist the strands of wire together, but instead wrap them together loosely with thread and then use Barge rubber cement (found at hardware stores) to bind everything together. I have not tried this approach myself yet, but understand that it is a somewhat more professional method.
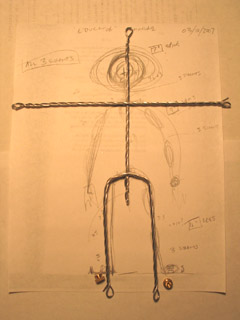
I'm using 1/16" aluminum armature wire for all parts of this armature. Aluminum armature wire can be found at art and craft supply stores. Unlike the aluminum wire you find at hardware stores, it is annealed -- which means that it is softer and more pliable.
There are, of course, other kinds of wire that you can use. The two main contenders are steel and lead. Lead has no "spring back" when you pose it -- but it is very breakable (and toxic). Steel is very strong -- but consequently also has a lot of spring back. Annealed aluminum is a nice compromise between these two: it's durable, and has minimal spring back.
After annealed aluminum, steel florist's wire (often thread-wrapped) is probably the most common wire used among amateur animators. Soldering wire has reasonably good animating qualities -- but also contains lead. Copper tends to break fairly quickly, and is generally avoided.
I strongly recommend putting in the effort to find aluminum armature wire. However, if you are set on using a different type of metal, do a bend test. Flex a piece of your wire at a single point repeatedly. How many bends did it take for it to break? ...The answer should give you some sense of how the wire will hold up while you're animating.
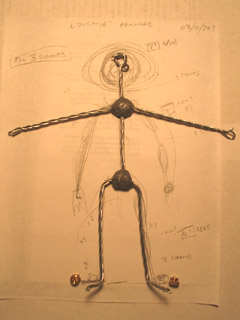
My armature is made out of three segments: the legs, the arms, and the spine/head. For each of these segments, I twisted together three strands of the 1/16" wire. The segments are held together with plumber's epoxy putty.
Look for epoxy putty in a hardware store, either in the adhesives aisle or with the plumbing supplies. Epoxy putty is about the size and shape of a roll of 50 pennies. It is made of two chemicals which, when kneaded together, react with one another and become very hard. "As hard as steel," the advertising says... Which is a bit of an overstatement -- but not by much.
Epoxy putty typically either has a 5-minute or 20-minute cure time. I recommend going with the 20-minute variety. The reality is that it will be too hard to work with by the end of 5 minutes (though it's not yet cured). You need that time to knead and apply the material.
For safety's sake, one should wear gloves while mixing epoxy putty. Simple latex gloves help, but the epoxy actually passes through a latex barrier quite quickly. Nitrile gloves give you much better protection; they can be purchased online via Amazon.com or locally at a medical supplies shop (the sort that specializes in serving the needs of people with disabilities and the elderly).
Epoxy is a sensitizer. Given large enough eposures over time, you will (guaranteed) develop a chronic allergic reaction to the material. How long it takes to develop a sensitivity varies from person to person. There is also anecdotal (but not scientific) evidence that prolonged, unprotected use of epoxy putty can cause "nerve death in the fingers."
Bottom line: epoxy putty is a nearly irreplacable media in the animator's tool box -- but do use it as safely as possible!
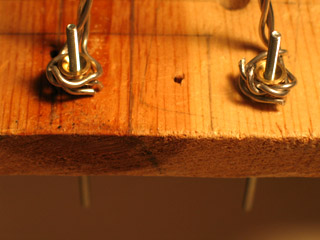
For a humanoid armature, you're going to want tie-downs in the feet.
The easiest way to make feet tie-downs is by epoxy-puttying in nuts. You'll drill holes in the floor of your set; then you'll reach under the set and insert screws through those holes into the soles of your puppet's feet. Another option is to drill wood screws through the feet from above -- but doing so will require puppet feet that can be peeled back to reveal the armature. [For how to hide holes in the set, see Mike Brent's helpful tutorial.]
Pretty much any kind of nut will work. I've chosen to use knurled nuts -- which are handy, because they have a groove around the middle that gives the wire a place to sit while you work.
You're going to want feet with flat soles. So, it's useful to epoxy the nuts in place while they're already screwed onto a piece of wood. Here I'm using a piece of scrap wood that's hanging off the edge of my table. I've also fabricated a piece of wood that sits up on risers before, to have an easier way to tie down puppets while I'm working on them.
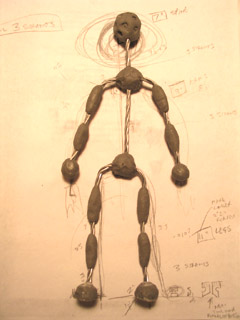
Add in epoxy putty "bones" as necessary.
Leave as much room between bones as possible. On people the elbow may bend on a single point -- but if you do this with wire, it won't last very long. Allowing the wire to bow at joints will prolong its life.
In my experience, the part of a wire armature that gets the most stress is the shoulder. Often it's a good idea to have the shoulder wires come up out of the shoulders and then bow downward -- just so you have some extra slack. I neglected to include shoulder slack while making this demo.
This demo armature is suitable for many types of puppet. You could cover it in oil-based clay to do "claymation." You could cast foam latex or silicone around it...
Most likely, though, you'll use a build-up process. The hands, feet, and head will be solid pieces made from Super Sculpey or an epoxy clay (such as Magic Sculp or Apoxie). The body will be built up with strips of cushion foam and then covered with fabric clothing.
...
And there you have it! It's pretty easy to build one of these armatures -- the real trick is just figuring out what materials you need, where to get them, and then actually collecting them all. ...Good luck!
posted by sven | permalink | categories: stopmo
March 9, 2007
elder thing puppet test
by sven at 4:40 pm
Yesterday I was a busy boy. I built a new puppet and tried out animating it.
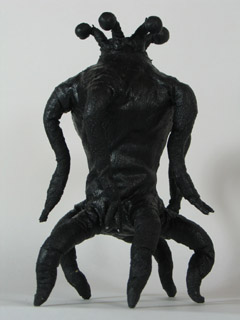
While I was driving to Tucson, I thought through some changes in the script for Let Sleeping Gods Lie. I've been really unhappy for some time with the "joke ending" I'd originally planned. I've come up with a story now that is much more dramatic -- while still using my basic elements.
But changes? Oh dear...
I'm loath to ask my actors to come back for yet another shooting session. I still might be able to avoid it... I've decided that my storytelling style has generally been too linear; I want to switch my approach to "hitting the high points." By using a style that's similar in pacing to a movie trailer, I may be able to get away with using only what I've already got in the can. ...And then if there are a few vital pick-up shots, I may try using myself as a stunt-double.
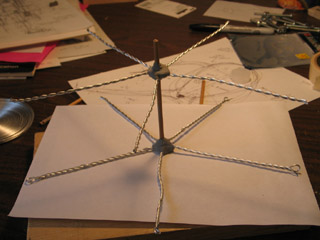
An important development: I'm adding a whole new section to the film. I'm calling it the "deep history segment." Because it's a sort of flashback, I think it's appropriate for this segment to have a different visual style. I'd been contemplating animating something viscous -- like black molasses, or a mixture of ink + hair gel on glass. But then yesterday it struck me: why would I not use puppets?!?
So I set out to build a "quick and dirty" elder thing puppet -- just for proof of concept.
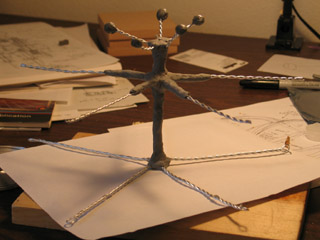
The limbs are made from 1/16" aluminum armature wire: two strands for the arms and eyestalks, three for the legs. The arm and leg wires are 6" long.
The spine is a piece of wooden dowel, and the limbs are attached with plumber's epoxy putty. After fixing the limbs onto the dowel, I added an additional layer of epoxy -- just to make absolutely sure everything holds together.
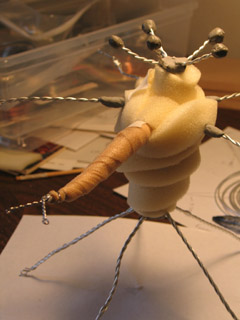
I've got 1/4" and 3/8"-thick sheets of cushion foam on hand, which I cut into long strips and wrapped around the armature to bulk it out. Most of the time I chose the 1/4" foam. It allows greater control -- but does take quite a while to layer.
The foam strips are held onto the armature with athletic tape.
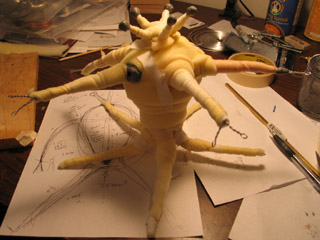
It's a little hard to see in this photo, but I remembered to add a rigging point for this puppet. In one of its "armpits" I epoxy-puttied a 1/2"-long piece of 7/32" K&S.
[Notice that underneath the puppet you can see the rough blueprint that I drew for scale before starting construction.]
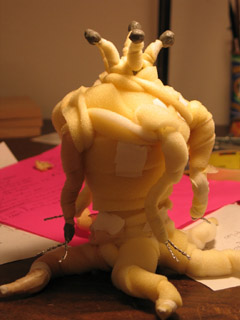
There, the foam-wrapping stage looks about complete!
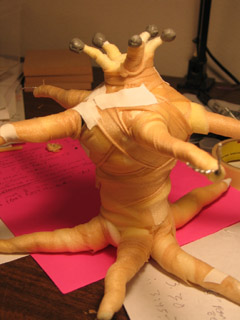
Next, I refined the form of the Elder with althletic underwrap. This is an extremely thin non-adhesive foam tape.
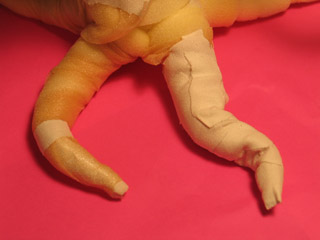
I had the thought that maybe I ought to use the athletic tape -- which is flexible -- as the final form-shaping layer. I tried this idea out on a leg tentacle... And found that I didn't like the way it crumples when the tentacle bends.
However, for the torso -- which is not meant to bend -- the tape worked out very nicely. It's sort of like applying papier mache -- but with cloth Band-Aids. The tape did a nice job of refining the form; it also accepts paint better than the porous foam does.
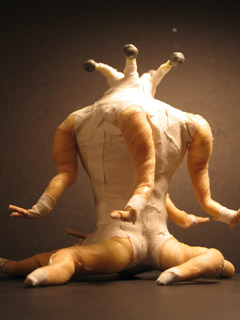
Here's the pup, all ready to be painted.
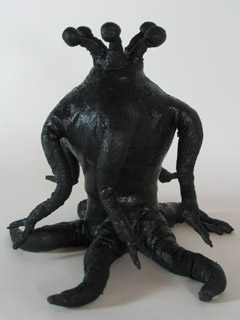
I mixed mold-building latex with black acrylic paint for the paint job.
My latex has the consistency of thick mayonnaise. I would rather have used a more liquid variety -- but didn't have any on hand.
Why use latex? I was hoping to smooth over the texture. And I wanted something that would help hold the underwrap all together. And I've read about this technique -- but hadn't tried it yet -- so I wanted to try something new.
Nick Hilligoss describes puppets that have been painted with liquid latex as bending "like a rubber boot." Yep -- that's what it's like!
I don't really like how the latex turned out... How it crumples when you bend it. How it wants to stick to itself. [I know I could apply talc -- but it's important that this pup be as black as possible.] ...Still, it's good enough for a test puppet.
Almost forgot: I also added a little bit more epoxy to the eyeballs, just to make them bigger.
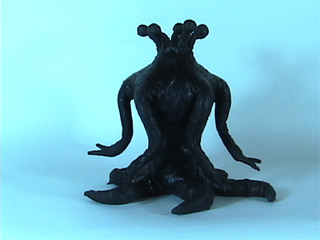
On to animating! The first test was a very simple "whipping" motion with one of the legs.
I've got some new photo lights. This was their first outing. Turns out their light is extremely blue. Not too happy about it.
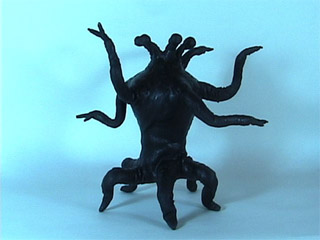
One of the big mysteries with the Elders is: How the heck do they walk?
I haven't really figured it out yet, but I've begun to get a better sense for how weight shifts from one leg to the next.
...This is one of the HUGE benefits of making an elder thing puppet: I don't know how I'd ever be able to figure out how they move if I was just positioning pixels with a CG version. I need to hold the creature in my hands and be able to push it around, trying out different possibilities in a concrete way.
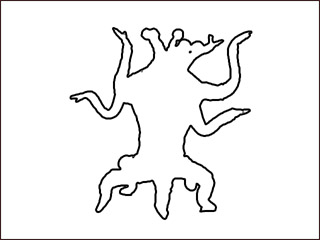
I've been trying on a new hat lately. I'm playing with calling myself a "mixed media animator." (I also heard the phrase "animation artist" recently, which I kinda like too.)
I love stopmo. But "mixed media animation" is probably a better label for the style that I'm ultimately going for. Not just using CG effects to enhance stopmo -- with digital water, skies, and fire. No, what I want to do is mix CG, cel animation, motion graphics, and puppetfilm in innovative ways that blur the lines.
The clip above is a good example. I've taken the puppet animation and used AfterEffects to turn it into what look likes a digital line drawing. ...I like!
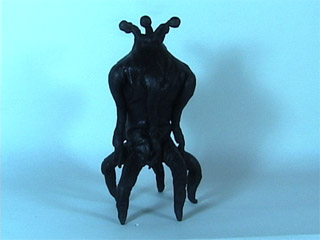
Another thing I've been aching to see is how the elder things stand up.
Looking at the prior "walk test," it seemed to me that the Elder was almost comical -- waving its arms around hysterically. These creatures are millions of years old, frighteningly intelligent and dignified. Maybe they don't move their arms much at all? Maybe they don't writhe -- which has always been the assumption -- maybe every motion is very purposeful.
Important puppet construction note: This puppet sorely needs tie-downs at the ends of each of the legs and at the base of the spine. Animating a two-legged puppet without tie-downs is painful, but can be done in a pinch. Having five legs all subtly shifting as you animate, when you really want them to stay fixed to the ground? ...Intolerable.
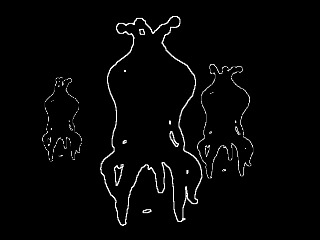
It's going to take more playing around, but I'm beginning to have insight into the Elders.
(Huh. Does puppet pushing constitute method acting?)
Their limbs are fast and lithe. But lifting up their torso -- that's heavy, so the rise has to be more deliberate and burdened.
As I'm animating, there's a tendency for me to choose one of their five faces and think of it as the front. When I do so, I see a pair of arms and a pair of legs -- which looks almost human, if I don't focus on the other spare limbs.
I think I can use this impression of humanity to good effect at key moments in the film -- but I must beware. What are the other faces doing and thinking while I'm looking at this particular side? Maybe it's better to conceptualize the Elder as five separate people, all standing back to back. Kind of like certain photos of multi-faced (Indian?) gods that I've seen.
The eyestalks... If they function like human eyes, then they ought to dart around from focal point to focal point. But there's a danger of making the critters too human. In the "standing up" test, I tried having all the eyes swing around in unison -- which produced a sort of sea anemone effect. Plausible, but very appropriately alien.
For this last clip, I tried using AfterEffects to multiply the critter, and tried out using white lines on a black background. This is very close to what I think I'm going to ultimately use. I thought I'd like to use a "lens flare" effect to create green, star-like eyes... But it turns out that I'd probably need to use LightWave to get what I want -- which may not wind up being worth it.
...
Holy cow! All that in one day??
posted by sven | permalink | categories: let sleeping gods lie, movies, stopmo
the night has a thousand eyes
by gl. at 11:39 am
trixie has a new friend! meet the googly eyed car!
she's still being created, but it's fun to meet another car with a blog.
posted by gl. | permalink | categories: trixie
March 8, 2007
artist's way guided intent (march)
by gl. at 7:34 pm
spring is in the air and art is blossoming! coordinating mind, heart & hand was the purpose of last night's blind contour drawing activity. we drew and drew and drew and drew! I can't even believe how much we drew!
each of us started with a random object and swapped with each other at the end of 10 minutes. we did that excercise four times. then we did a self-portrait; then we did portraits of each other; then we colored the enclosed spaces on one or more drawings.
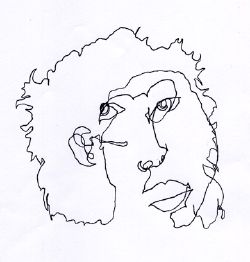
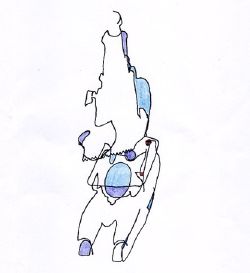
[self-portrait & microscope: click the picture to see the other photos]
i've done a much better blind self-portrait before: in fact, it's what originally made me so happy about the process. but i've discovered that if part of your brain is faciliating the event, it's difficult to approach it with the same amount of zen. :) this self-portrait looks like two portraits, each at different angles. but i think my hair is spot on. ;)
the most disappointing part of this event was the attrition rate again. this time, half of the rsvps didn't appear and never contacted me. man, that sucks. it looks like the only strategies left are to collect payment in advance or stop hosting them. i have two more guided intents i -must- host because i have guest facilitators (eee!), but it's not like i make enough money off the guided intent to be worth all this hassle, so the latter option is not out of the question.
having said that, i'm very excited about the next event, which is the edible book tea to celebrate our second anniversary! i very much enjoy celebrating creativity of all types, including culinary, and i was charmed when i attended something like this in san diego several years ago.
posted by gl. | permalink | categories: artist's way
March 4, 2007
speaking about stopmo on march 11
by sven at 5:13 pm
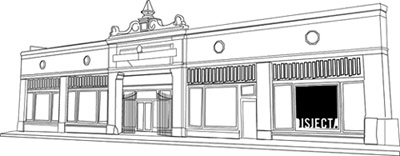
On Sunday, March 11, I'll be present at the Dennis Nyback Cartoon Extravaganza to speak about puppet animation. I'll be bringing along puppets and armatures for show and tell.
The Extravaganza is a 21-day-long film series being presented at Disjecta, located at 230 E. Burnside. The series runs from Feb. 23 through March 15; all shows at start at 7:30pm and cost $6. The theme of the March 11 show is "World Puppet Animation."
Independent film archivist Dennis Nyback has organized this film series as a special fundraiser to support the Oregon Cartoon Institute, which is beginning work on a documentary about historic Oregon animators.
I met Nyback and documentarian Anne Richardson at the Feb 28th showing of Ladislav Starevitch films, at which point they invited me to speak. I am honored to be able to contribute in this small way to their efforts.
Here is what the Oregon Cartoon Institute Newsletter had to say:
On Wednesday February 28th the best crowd so far, on the fifth day of the Dennis Nyback Cartoon Extravaganza, showed up to see Ladislaw Starevitch animation at Disjecta (230 E Burnside). Among the crowd was Sven Bonnichsen, animator http:///www.scarletstarstudios.com/ . Mr. Bonnichsen generously explained to the crowd basic puppet design for animation using the armature method. Mr. Bonnichsen has graciously agreed to bring armatures and puppets to World Puppet Animation Night on March 11.
I hope that my local readers will strongly consider coming out for the "World Puppet Animation" show on the 11th. ...But even if that doesn't strike your fancy, do take a look at the calendar of shows -- there's something for everyone in this amazing, one-time-only festival.
posted by sven | permalink | categories: exhibits & events, stopmo
March 3, 2007
toby's travels: tucson, los angeles
by sven at 11:59 pm
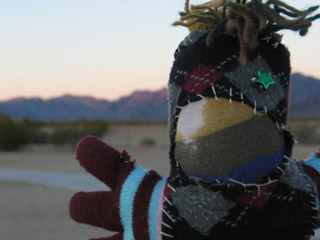
Fair warning:
For those of you averse to hyperbolic cuteness -- lookawaylookawaylookawaylookawaylookaway...
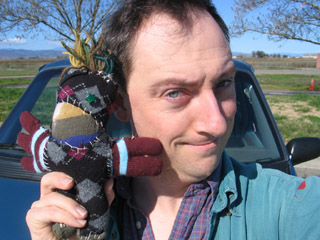
Toby had never even left Portland before -- so he leapt (literally) at the opportunity to accompany me on my road trip to Tucson.
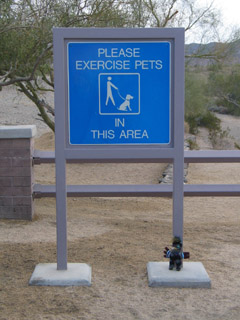
On the way down, we slept in the back of the Svan at rest stops.
The first night out, Toby was so excited, he kept bouncing all around the car... Taking photos of him was the only thing I could think of to try to wear him out.
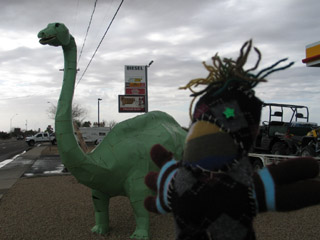
It's curious to me, the number of gas stations that have dinosaurs in front of them -- but aren't actually Sinclair. ...Do Sinclair gas stations actually even exist anymore?
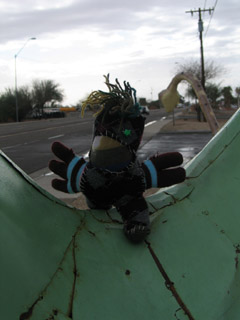
Toby's a little unclear on the distinction between animate and inanimate objects.
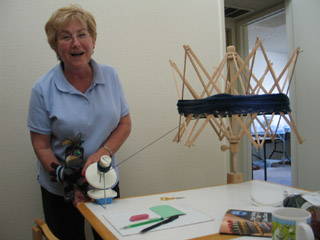
My mom was charmed to meet Tobias. He seemed to have a lot of fun in her arts/crafts space.
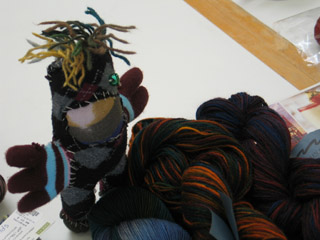
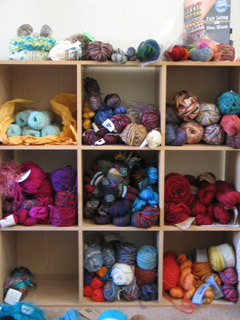
Encountering mom's yarn collection, I finally had to explain to Toby where babies come from. "Well, you see Tobes, when an artist loves her old socks very much..."
Toby's favorite game is "hide and peep."
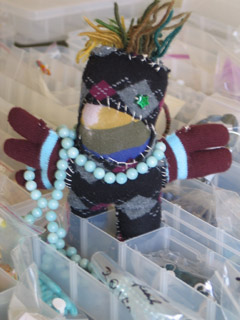
Mom spoiled the boy... She let him into her beading materials and helped dress him up.
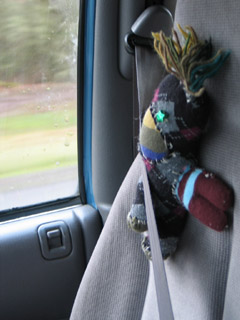
After a couple days of visiting family, we got back on the road.
...And, yes, Toby does always wear his seat belt when we travel.
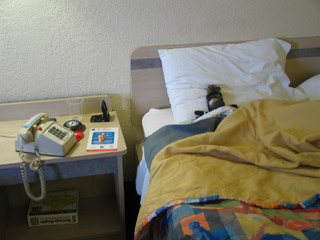
On the way back, the Svan was loaded down with boxes, so we stopped for the night at a hotel. (Note that by this time I'd gotten wise to wearing earplugs at night.)
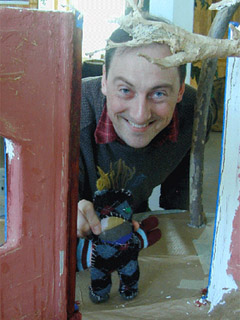
Ah, but before going straight home -- a stop to visit Shelley in Los Angeles!
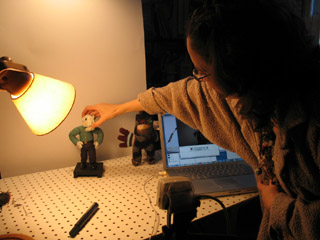
When Shelley and I were animating, Toby got really interested.
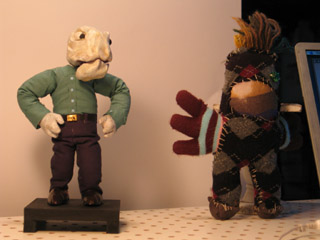
He really wanted to be a part of the show. (Much to Dad's exasperation.) But there's just a certain something that he lacks. Talent? ...No.
A skeleton.
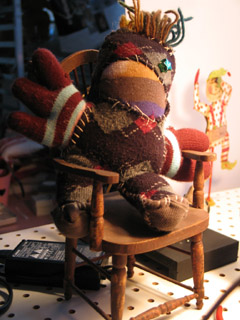
We mollified the boy by giving him a "director's chair" from which to shout.
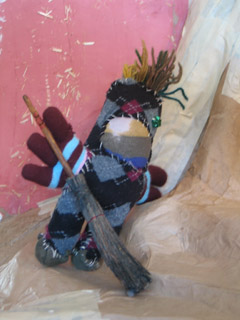
Toby did make himself useful, though. With all those arms, he was a demon with the broom.
We believe in "leave no trace" camping.
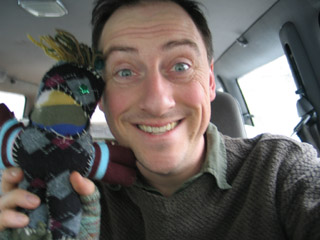
965 miles and a blizzard later, we found ourselves sitting in the driveway back home -- and paused for one last photo. A little travel weary and more than a little crazed... But glad for the adventure, and happy to come back to Gretchin.
posted by sven | permalink | categories: miscellany, toby
March 2, 2007
giftmas!
by gl. at 12:04 am
today has been a day of unexpected abundance. almost everywhere i went i was either giving or getting surprises!
for instance, when i rendezvoused at linda's house for a meeting today, she had gifts for each of us, including a large folded roll of copper & a couple of old train books down in the basement.
when i took pictures of carol's piece so she could submit it to the the 100th monkey's recycled show, she sent me away with several curls of leafy paper, two colors of wire, several felt "wish" gift card holders, a bag of magazines, several colors of large rolled paper and a narcissus.
when i got home, i was delighted to discover a package from jeffrey, who sent me beautiful cigar boxes from new orleans!
and after dinner, sven sent me for a walk around the neighborhood to find hidden treasure.
i balanced my karma by dropping off delicious ginger gems to mph, lending serena a flat-panel screen for her event tomorrow, & dropping off a copy of paul simon's surprise for kristen & todd.
the studio loves to give and to get gifts. thank you, one and all!
posted by gl. | permalink | categories: miscellany
March 1, 2007
24 hours in halfland
by sven at 9:00 pm
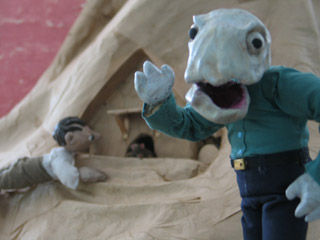
On my way back from Tucson, I made a detour through LA... And suddenly found myself in Halfland!
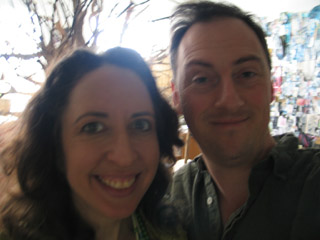
Check it out! Shelley and I co-exist!
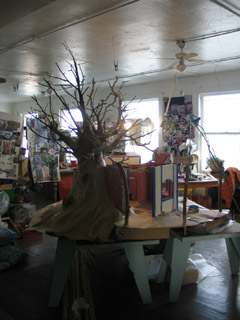
I got to see with mine own eyes the Halfland set being made...
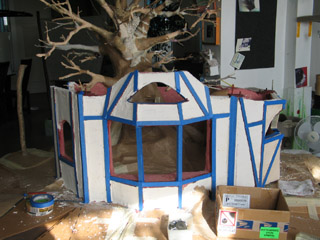
It's big, yo! And it's going to be even bigger! Very impressed.
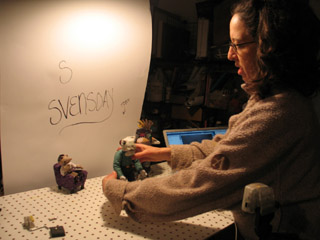
Well, you get two animators together, whatcha gonna do? Um... Animate?
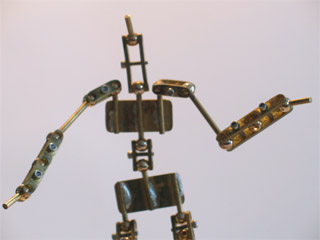
Shelley wanted to see the difference between using a webcam and using a digital still camera. We threw a sheet of pegboard on top of some cinderblocks. I opened up the laptop and connected my Canon Powershot G5. I did capture using Canon's proprietary software, RemoteCapture. (DSCs are notoriously difficult to get running happily with a framegrabber.)
I had the Diplomat with me, and threw this sloppy clip together in a minute or two. "Proof of concept."
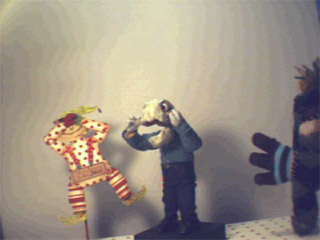
We detached the still cam and replaced it with the "Honorary Strider Stop Motion Patrol Unibrain Webcam of Joy" -- which works seamlessly with FrameThief.
Shells really liked animating Dad... I suggested hot-gluing lengths of armature wire onto the back of Webster the elf -- and then he got in on the action.
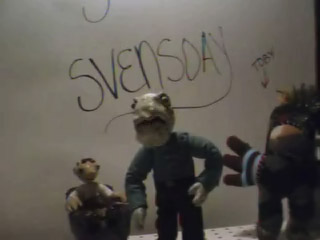
Next, I gave Shells a quick tutorial on how to capture sound, analyze it in Papagayo, and do lipsync in FrameThief. ...What a trip to see someone else breathing life into my pups!
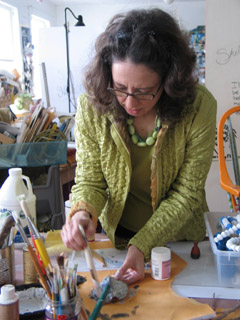
I had the opportunity to look at Shelley's scrapbooks from her time working with Julie Taymor. I love all the textures -- which is something Shells is really good at. So, the next morning Shelley gave me an impromptu workshop on textures and improvisational puppet construction.
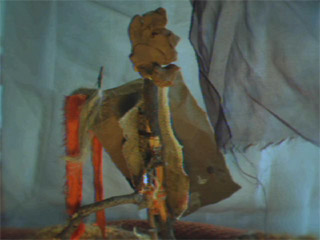
Here's what we came up with: a puppet with tree branches for legs, a paper and burlap torso, and an earthen clay head. We tried standing him up with bits of plasticene... But it wasn't very stable. So instead, each of us held one leg, and I told Shelley how much to move for each frame.
The end result seemed too fast, so we slowed it down. Shelley hadn't seen this function of QuickTime Pro before -- so I was glad to be able to do another micro-tut.
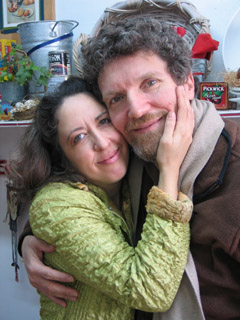
I can hardly begin to describe what lovely hosts Shelley and Paul are.
Waiting on my pillow I found a little bowl of chocolates and a baby rose. Before I went to bed, Shelley snuck a hot water bottle into the bed, so I could warm my feet. When I woke in the morning, a terry-cloth robe and slippers were waiting for me.
And -- OH! -- the meals! I was particularly taken with the mascarpone/lemon curd/peaches concoction that Shells improvised. Gonna have to try making that one myself!
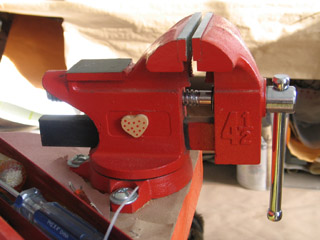
The thing about Shelley that I'm most left with is her loving attention to details. I mean, look at that vise! Who glues a little wooden heart onto their vise?!? Things like this were gently tucked into nooks all around Paul and Shelley's home.
On one of the walls there were two photos next to each other. One of a catepillar. One of a moth. Shelley hand-fed THAT catepillar -- and it became THAT moth.
Imagine it: patiently feeding a catepillar and then getting to see it transform.
There. Now you understand Shelley.
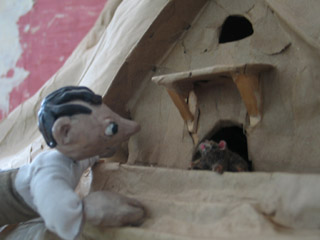
I had a tremendous time in Halfland -- it was sad to have to leave. And there was so much more to the visit than what I've been able to write...
Let's just end with the symbolic photo: a meeting of worlds.