you are here [x]: Scarlet Star Studios > the Scarlet Letters > casting a resin head
<< before
new floor in sven's lab
after >>
product review: mini cut-off saws
January 15, 2007
casting a resin head
by sven at 8:00 am
Friday was a "stopmo play day"... I put the newly renovated studio to good use, exploring mold-making and casting.

Back in early December, I had a spare hour or two after helping Gretchin with prep for one of her holiday sales. So I pulled out some "Chavant NSP - Medium, Brown" and sculpted this head.
I cleaned it up just a little bit on Friday, smoothing the surface with Brylcreem and a paint brush.
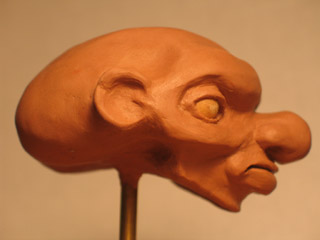
Here's some of what was going through my mind:
Just before Thanksgiving I had a little breakthrough, some insights about character design. Working in my sketchbook, I made rows of circles -- each one a blank face -- and then tried varying the facial features systematically.
Do I like big, medium, or small eyes the best? Do I like the eyes to be close to the nose, centered, or out toward the ears? Do I like the eyes to be high on the head, in the middle, or down around the jaw? ...Pages of variations like this gave me a much better sense of what sorts of characters I want to be creating.
This head was attempt to take some of those sketches into the third dimension.

Also, during the past month or so, I've been putting some energy into studying anatomy. I learned a good deal when I was taking that sculpture class with Kim Graham last summer. I've now picked up some anatomy books, and have been making practice sketches of skulls and skeletons. I figure, the more anatomy you can put into a sculpt, the more realistic/plausible-looking your result will be.
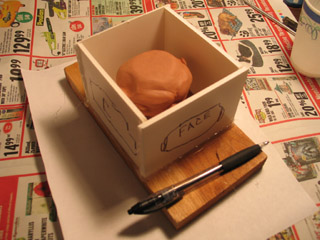
The head was sculpted without an armature. For the sake of making a mold, I put it on a piece of 3/16" brass rod, and fixed that into a piece of wood.
To make a mold box, I cut out pieces of foamcore and used hot glue to seal the edges together.
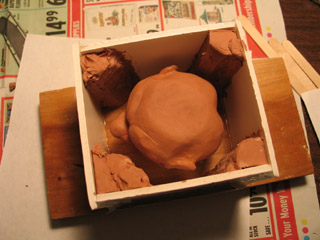
For this one-day project, I wanted to get my hands dirty -- and not get stuck over-thinking it. I knew at the outset that this might mean some significant screw-ups. But oftentimes getting a feel for mistakes gives you an even better grasp of how to do things right later on. So, I was prepared to see how things would go wrong.
Case in point: When I opened up my container of silicone base, I didn't have as much left as I'd remembered. I hastily put some wedges of clay into the mold box to take up space -- just hoping that I'd have enough silicone for the mold then.
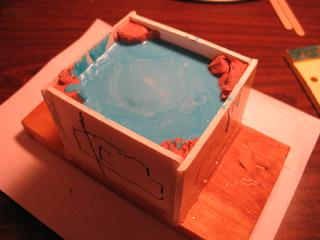
I'm using silicone from TAP Plastics. Why TAP? Because they have a storefront in town where I can browse, instead of having to buy online.
It took two batches of silicone to fill the box. The first was just silicone base plus the quick cure catalyst (6-8 hour demold time). I thought I'd try the trick where you make a hole in a paper cup and drizzle the silicone into your mold -- the idea being that the string of silicone will break up bubbles. The silicone was so viscous, though, it didn't really want to cooperate. It didn't really even want to fall out of the hole.
So, for my second batch, I mixed in 10% silicone thinner (which also functions as a filler). This poured a good deal more easily -- but at this point I forgot to try the hole-in-the-cup trick.
The silicone just barely managed to cover the head.
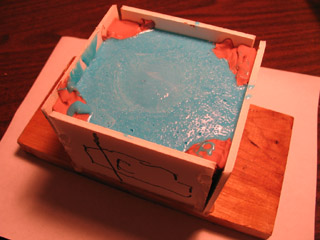
Silicone cures via a chemical reaction between the base and the catalyst. As such, it can be speeded up by adding heat. I've tried this with good results using DragonSkin. I decided to try it with the TAP silicone.
This one of those mistakes I alluded to earlier...
I put the mold in the oven on an old pizza pan. [We've dedicated the oven in the studio kitchen to chemical play.] The oven only goes as down to 170 degrees, so I had to prop open the door to take it lower. You can cure DragonSkin in 30 minutes at 150 degrees. I was indecisive and varied the temperature between 130 and 150 degrees during the baking period.
I left the mold in the oven for 2 hrs 15min -- and probably could have taken it out sooner. When I retrieved it, I discovered that the hot glue had melted and the mold walls had popped open. The clay space-fillers looked nearly liquified. ...And yet, the silicone mold itself seemed pretty OK.
[The top has a slight tackiness to it -- which I attribute to the silicone thinner. The sides are properly dry.]
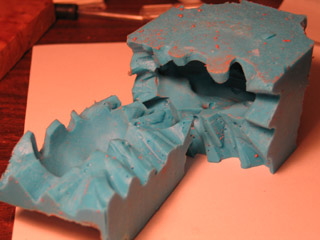
When you make a puppet body out of DragonSkin silicone, you're baking the silicone inside of a plaster mold. Nothing's going to melt. ...So, while I proved to myself that I could successfully speed up the curing time of a silicone mold by adding heat, I also discovered that this is inappropriate when your original is made out of oil-based clay and your mold box is made of materials that melt at low temperatures.
Surprisingly, the silicone took a pretty good impression -- even with the clay liquifying. However, because the clay head got melty, it left a lot of residue on the interior of the mold. I cleaned it out with an old paint brush and isopropyl alcohol -- but I still couldn't get every fleck.
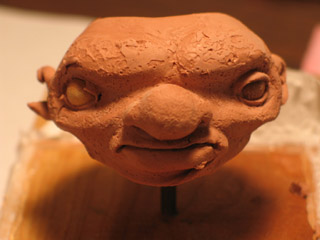
The original clay head was demolished because I put it into the oven. Next time, I think I'll put it in the refrigerator or freezer before pouring the silicone, and then just let the silicone cure at room temperature overnight.
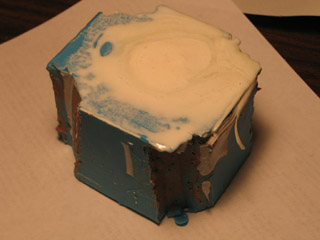
OK, now that the mold is made, it's time to make a casting.
I used TAP Quik-Cast Polyurethane Casting Resin, and mixed in microspheres to make the casting more lightweight. The pour hole is where the brass rod used to be; I enlarged it into a funnel with an X-Acto blade.
In terms of gooeyness, silicone is like slightly liquified peanut butter. Simply dreadful. Resin, on the other hand, pours very easily. It went through the pour hole without incident.
However, I didn't bother to drill a hole in the mold for air to vent out of -- so I did have to awkardly tip the mold around a lot, trying to get bubbles to come out.
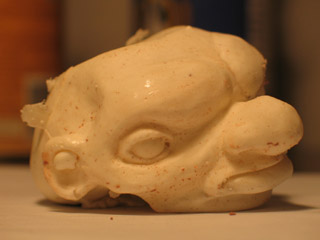
Despite all the mistakes I made, I got a surprisingly good casting out of this mold.
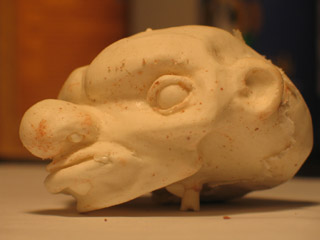
Because the silicone wasn't properly degassed, there were a lot of bubbles in the mold. The resin faithfully reproduced these bubbles in the casting.
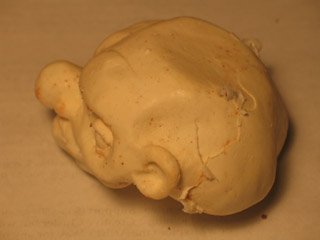
When I cut open the cured silicone, I tried to use a jeweler's cut -- making a zig-zag cut with an X-Acto blade. I was a little disappointed with the results. I got quite a bit of flashing along the split-line -- particularly at the top, where the silicone was too thin.
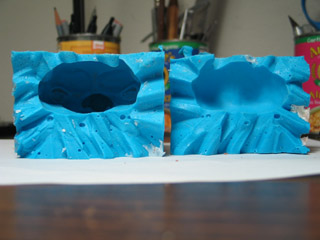
The resin seems to have cleaned out the remnants of clay left inside the mold. So, I've got a half-decent mold to play around with some more now.
I'm thinking that I want to try a hollow casting. I've seen this done in puppet animation to get a very lightweight head.
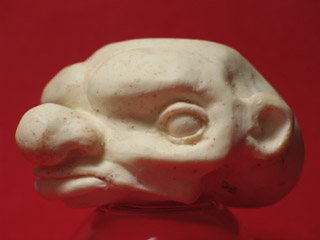
I'm also considering adding a venting hole in the chin. When I'm pouring resin, the chin is the highest point inside of the mold, and a big air bubble gets trapped there.
I didn't realize it immediately, but the casting actually came out with a hollow chin. As everything cooled off, the chin kinda shrivelled up. Now it looks like the head doesn't have a jaw at all.
Oh well. Plenty learned.
posted by sven | January 15, 2007 8:00 AM | categories: sculpture, stopmo