you are here [x]: Scarlet Star Studios > the Scarlet Letters > how to make a brass ball-jointed armature (part 4 of 5)
<< before
how to make a brass ball-jointed armature (part 3 of 5)
after >>
how to make a brass ball-jointed armature (part 5 of 5)
June 23, 2006
how to make a brass ball-jointed armature (part 4 of 5)
by sven at 9:04 pm
Making sandwich plates is the most time-consuming aspect of building the armature.
Most tutorials have you making sandwich plates one pair at a time. I'm going to show you a more efficient method. We're going to bind two long strips of K&S together, and drill all our holes at once. Then, we'll chop the length into individual joints, and give them some minor finishing touches. I call this the "sushi roll" method.
Using the "sushi roll" method, we'll create our sandwich plates in four stages: (a) registration, (b) drilling, (c) cutting, (d) finishing.
A. REGISTRATION
There are two big advantages in binding your long strips of K&S together. One: You won't have to waste so much time getting work pieces into and out of the vise, each time making sure that everything is properly aligned. Two: Registering the long strips with one another will give you more accurate alignment than if you try to mate short plates together.
Now, let's get to it...
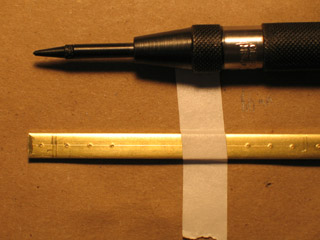
Step 1: Marking where the strips will be attached. Take one piece of 12" x 1/4" x .093" K&S and tape it down onto your work table. At each end, find the center (1/8" from either side). Scribe a line between those two points, all the way across the strip. Now, from each end, measure 3mm in and use the spring-loaded center punch to start a hole. Measure 3mm farther in and scribe a line perpendicular to your first. These 6mm of material on either side of the strip will be where you attach the top and bottom strips together. These bits will be waste material at the end of the process.
Step 2: Marking the lengths of individual plates. Based on your particular puppet design, use the scribe to mark in the ends of each individual joint. Leave at least 2mm between each joint.
Step 3: Marking where holes will be drilled. Use the spring-loaded center punch to mark where the joints' holes will be drilled. As a reminder to yourself, you may want to use a fine-tipped Sharpie marker to circle all of the points that will be screw holes -- just so you don't accidentally forget and drill them too large.
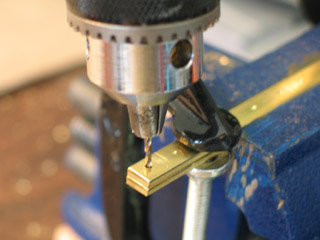
Step 4: Clamping the strips. Now that you've marked your measurements on the top strip, put a second (unmarked) brass strip underneath it. Place these two pieces into the vise together with about 1" hanging outside of the jaws. The vise assures that the strips will stay perfectly aligned with one another horizontally. We also want to make sure that the strips are held together vertically while being drilled -- so use an additional 2" C-clamp to bind the top and bottom plates together. Make sure that the C-clamp is at least 1/2" away from your end hole. If the drill chuck bumps that clamp, it will put sideways stress on your drill bit and cause it to break off in the hole.
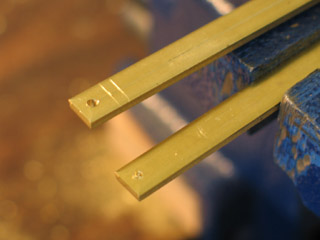
For steps 5 - 8, we're going to focus on just one end of the strips.
Step 5: Drilling an end hole. Use a 1/16" bit to drill an end hole. Pay close attention: this is the step in building the armature where you are most likely to break a drill bit! Sometimes the drill will go through both strips with no problem... However, sometimes the bit will go through the top plate, and then have trouble digging into the second. If you feel any resistance at all, STOP and remove the upper plate. There should be at least a small mark on the bottom plate; start drilling again from there.
I strongly recommend having three or more extra 1/16" drill bits on hand. Given my own experience, it is likely that you will break at least one or two while getting a feel for how to do this right.
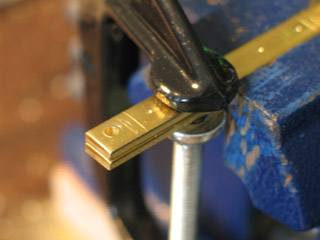
Step 6: Expand the end hole. If you've separated the top and bottom plates, put them back together now, taking extreme care to line the holes up perfectly. Re-clamp the plates with the C-clamp -- again, at least 1/2" away from the hole. The 1/16" hole that you've just made is a pilot hole. Use another drill bit to expand it to 3/32".
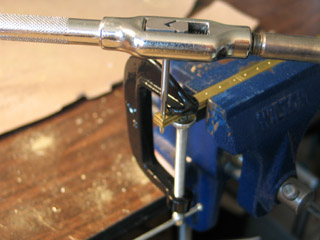
Step 7: Tap the end hole. You're done drilling your end hole. Move your C-clamp as close to it as possible. Use a 4-40 tap to thread the hole. When the tap gets through the top plate and begins to go into the bottom plate, the wedge-action of the threads will try to pry the two plates apart from each other. This is why you need the clamp as close to the hole as possible -- to prevent the plates from being pried apart.
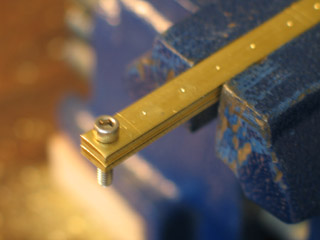
Step 8: Screw the two plates together. Now that you have a threaded hole passing through the end of your two strips, bind them tightly together using a 4-40 socket cap machine screw. You'll need the 3/32 hex key in order to do this.
Repeat steps 4 - 8 on the opposite end of the strip. ...You now have your basic "sushi roll", which we will proceed to drill, and then cut into segments.
B. DRILLING
Next, we're going to drill all the holes that we need in our sandwich plates.
Note: It's generally faster to change a drill bit than to unclamp and reclamp your work piece. In the following process of drilling, you'll actually probably want to complete steps 1 - 3 on a section of the "sushi roll", then slide the whole thing over in the vise and do another section (repeat).
...Nonetheless, for clarity of explanation I'll be speaking as if step 1 must be fully completed before moving on to step 2, and step 2 must be fully completed before moving on to step 3. If you do choose to fully complete each step before proceeding on to the next, work will go a bit slower -- but it will also help you keep track of where you are in the process.
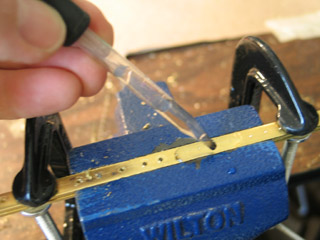
Step 1: Drill pilot holes. Use a 1/16" bit to drill all of the points you marked with the center punch. Having screwed the top and bottom strips together is going to save you a lot of grief in terms of keeping the two strips registered... However, you're still going to want to use C-clamps to keep the strips pressed tightly together vertically. I recommend using one clamp at either side of the vise. If you don't, the bottom strip may bow outward slightly when the drill bit reaches it. A bowed strip can potentially break the bit when it passes through.
Brass is soft enough that I find I can get away with using almost no lubrication. When making these pilot holes, however, I do find it useful to apply some. I use an eyedropper to put a few drops of water on the spot where I'm drilling the hole. This makes the plunge noticeably easier.
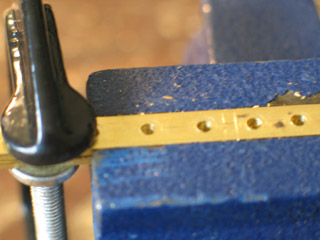
Step 2: Expand holes to 3/32". Use a 3/32" bit to expand all your holes. No lubrication is necessary. The drill should pass through the strips very smoothly at this point.
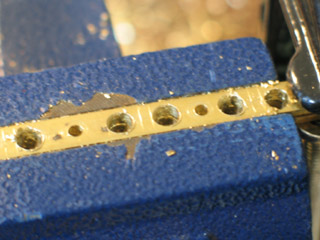
Step 3: Expand just the holes for balls. Now we're going to expand all the holes where balls will sit to 11/64", while leaving the holes for screws as-is. The 11/64" bit has some tendency to walk and to chatter while making this plunge -- so be careful. Your joints will still function if the holes are not perfectly centered between the edges of the plate -- but you want to get them as close to center as possible.
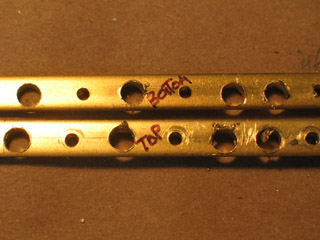
Step 4: Separate the strips. Remove the "sushi roll" from the vise and clamps, unscrew the strips, and put them on the work table. As you are doing this, be careful not to flip either over or turn them around -- keep their orientation. Use a fine-point Sharpie marker to label one "top" and the other "bottom". (It doesn't matter at this point which is which.)
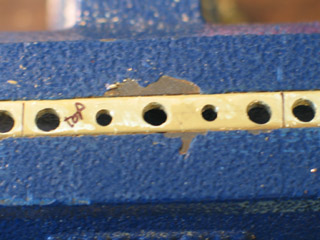
Step 5: Complete the top strip. Put just the top strip in the vise (no C-clamps necessary). Expand all of the remaining 3/32" holes to 1/8". This is the hole on a joint where the socket cap screw will slide through freely. Remove the top strip from the vise.
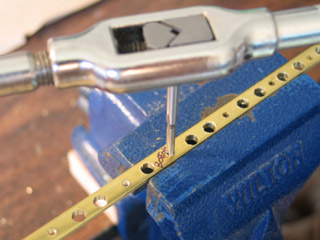
Step 6: Complete the bottom strip. Put the bottom strip in the vise (no C-clamps necessary). Use a 4-40 tap to thread all of the remaining 3/32" holes. This is the hole on a joint where the socket cap screw's threaded tip will attach. Remove the bottom strip from the vise.
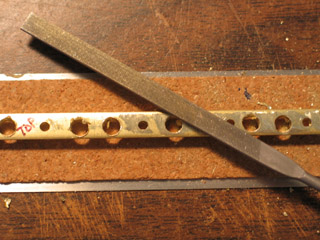
Step 7: File the strips. Use a flat needle file to de-burr the top and bottom strips. For each strip, file both sides.
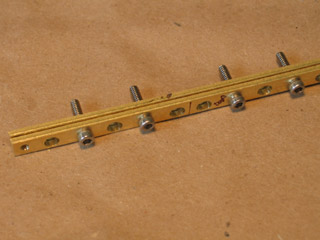
Step 8: Screw the strips together. Put the top and bottom strips back together. With the exception of the end holes, put a 4-40 screw in every threaded hole. Tighten them with your hex key. There -- you've completed the "sushi roll", and are ready to chop it into individual joints!
C. CUTTING
We're entering the stage of this process where you're going to be creating large amounts of brass dust -- which will shoot up at your face. Make absolutely sure that you're wearing wrap-around goggles and a tightly fitting dust mask!!! You really, really don't want metal slivers in your eye or brass dust permanently lodged in your lungs. Any additional precautions that you want to take in terms of limiting the spray of dust should be put in place at this point.
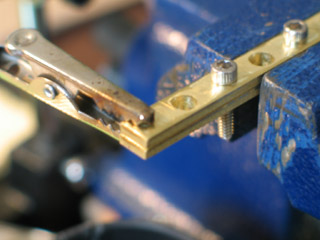
Step 1: Position the "helping hands" and cut. Clamp your "sushi roll" in the vise with at least 1" hanging out over the edge. You're going to cut off the end hole where we originally registered the top and bottom strips. Clamp the bit that you're going to cut off in the "helping hands". Use the Dremel rotary tool's reinforced cut-off wheel to make the cut. At this stage, you can simply eyeball your cuts.
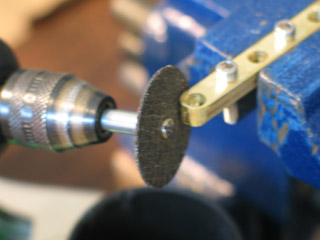
Step 2: Round the end. The hole that's now at the end of the strip will be seating a ball. Use the Dremel to round off the area around it. This is a matter of sculpting; it is not extremely precise. Try to have that outside rim be about 1mm wide. (You'll be surprised how narrow you can make the rim of the joint and still have it be functional.)
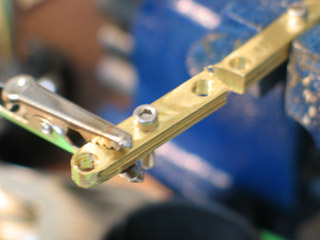
Step 3: Move on to the next cut. Scoot the "sushi roll" forward in the vise so you can cut this joint off from the whole. Be careful -- the metal where you were grinding will be hot. After you've made the cut, round off the outside edge of the next joint.
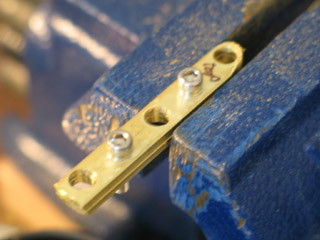
Step 4: Rounding off the opposite ends. After you've cut all of the joints off from the "sushi roll", put them back in the vise one at a time and round off their opposite ends.
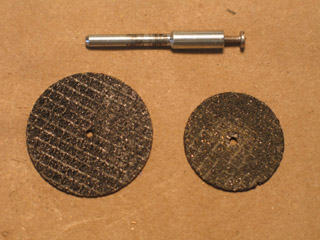
A word of caution: You're going to be giving the Dremel's cut-off wheel a lot of wear. Take a moment to notice how big it is. A new cut-off wheel is about the size of a quarter. You can easily wear that down to the size of a dime if you're not paying attention. As the wheel becomes smaller, it will become increasingly difficult to chop off sections of the "sushi roll". Also, be aware that the wear you put on the face of the cut-off wheel can ultimately lead it to crack and fly off the tool toward your face. ...So, be sure to replace your cut-off wheel before it gets too worn out!
D. FINISHING

You're almost done making the sandwich plates! Now it's time to give each one a little individualized attention.
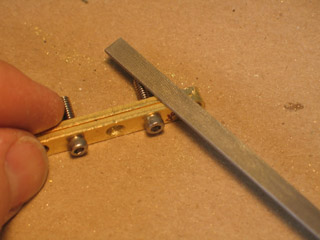
Step 1: File the outside of the joint. Use the flat needle file to remove any burrs left over from the grinding process.
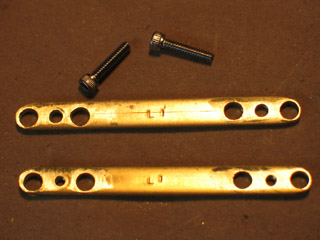
Step 2: Label the plates. Unscrew the joint. Carefully separate the plates, maintaining their orientation, and place them both face-up next to each other. Label each plate of the joint. Using a metal scribe for labeling works fine. Personally, I prefer to use metal letter stamps, for a more easy-to-read and elegant look. If you choose to use metal stamps, be sure that you don't make your marks too close to any of the holes, or else the holes will be deformed.
Each pair of plates will only work with one another, and can only be used in one orientation. Carefully labeling your mated pairs (in a way that also indicates orientation) will save you a lot of grief later on, if the plates should accidentally get separated.
Step 3: File the inside of the joint. Use the flat needle file to remove any remaining burrs on the insides of the joint. Be careful not to introduce any nicks on the rims of holes that seat balls, as these may later cause scratching.
...Congratulations! You're done making your sandwich plates!
Leap from here to...