you are here [x]: Scarlet Star Studios > the Scarlet Letters > how to make a brass ball-jointed armature (part 3 of 5)
<< before
how to make a brass ball-jointed armature (part 2 of 5)
after >>
how to make a brass ball-jointed armature (part 4 of 5)
June 23, 2006
how to make a brass ball-jointed armature (part 3 of 5)
by sven at 9:03 pm
OK, it's time to get to work! We're going to assemble the balls and rods in three stages: (a) cutting rod, (b) drilling balls, (c) soldering balls onto rods.
A. CUTTING ROD
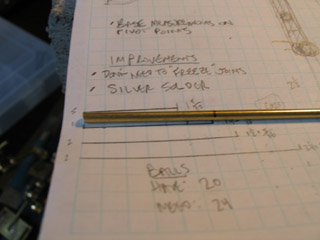
Step 1: Measure. It's a bit awkward to measure a rod with a ruler. A useful trick is to make your measurements on a piece of graph paper, and then hold the rod against that measurement. Mark the rod with a fine-tipped sharpie.
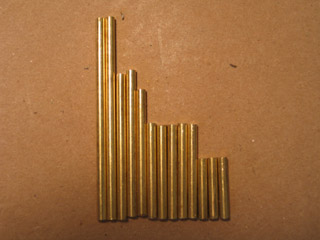
Step 2: Cut. Put your rod in the vise and cut. Since the blade of your cutting device has width, you're going to have to go through a process of cutting one segment, removing the rod from the vise, and then making a new measurement for the next segment (repeat). For just cutting rod, a hacksaw works fine. A jeweler's saw (in my experience) doesn't last very long before breaking. My preference is to use the Dremel rotary tool, which can make cuts very quickly.
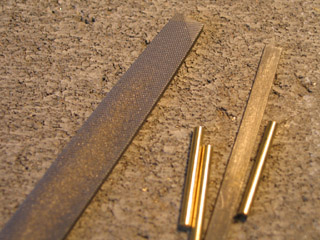
Step 3: File. Use your flat files to de-burr the rods. And while you've at it... You're going to want a symmetrical armature: arms equally long, legs equally long, etc. Take a moment to compare the matching limbs. File until they're equal.
B. DRILLING BALLS
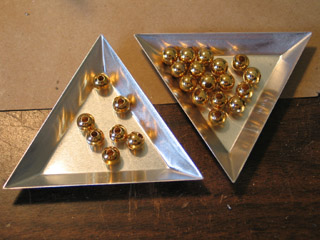
One of the big advantages of using hollow beads for balls is that you don't have to go to pains to get the hole centered when you drill. The bead's pre-made holes act as a pilot hole, which guides your drill straight through the center! All we need to do is enlarge the existing hole to 1/8".

Step 1: Position the bead in the vise. Place a bead in the vise and orient it so that the hole is turned upward. This is where those rubber vise grips come in handy: they hold the bead firmly in place without scratching it. I find it very helpful to use the round needle file for positioning.
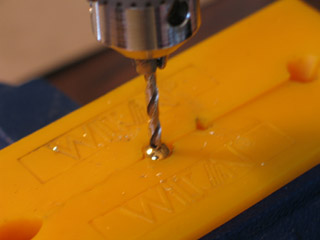
Step 2: Enlarge hole with drill. Use the 1/8" drill bit to enlarge the bead's hole. It's so quick and easy -- this is probably my favorite step in the whole armature building process.
Repeat the process, drilling the rest of your beads.
C. SOLDERING BALLS ONTO RODS

Here's the product that we'll have after completing this next stage. The idea is to put little pieces of soldering wire inside of a hollow bead, put rod through the hole, and then heat the bead with a butane micro-torch until the solder inside melts.
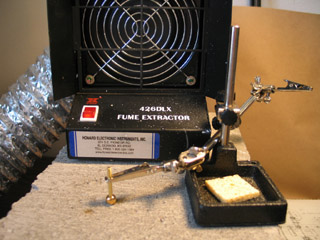
Before we begin, I want to show you an image of the general setup. For fire safety, we're going to do this job on top of a cinder block. The "helping hands" tool is going to hold the work piece. Although we're using lead-free solder, it should be noted that rosin can release irritating fumes. For this reason, I have a small exhaust fan set up just inches behind where I'm doing the soldering. You can read my previous tutorial on how to assemble a desktop exhaust system like this one here.
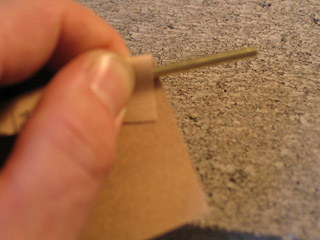
Step 1: Sand the rods. Metals tend to be coated with an invisible layer of oil -- which can prevent solder from adhering. Rubbing the rod with some fine-grit sandpaper removes the oil and creates a better surface for joining.

Step 2: Prepare bits of soldering wire. Cut a few inches of your soldering wire into tiny little bits, no longer than 1mm each. The smaller, the better: they'll melt more quickly and easily when they're small.
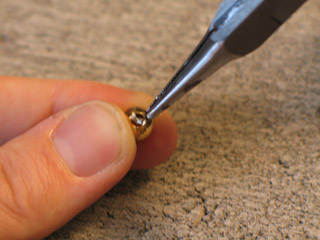
Step 3: Put solder bits inside bead. Keeping a finger over one of the holes, use your needle-nosed pliers to put approx. 5 - 8 bits of solder inside of the bead.
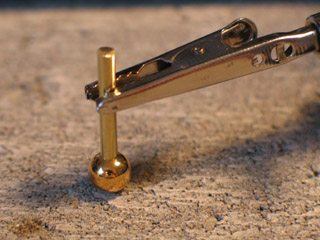
Step 4: Put ball and rod in "helping hands". Gently twist the rod into the bead, being careful not to push out the bits of solder. Set the bead and rod upright on the cinderblock, held in place by the "helping hands".
Step 5: Heat bead with butane micro-torch. This is kind of tricky... Light up your butane torch and heat the ball for 5 - 10 seconds. If you don't heat it long enough, the solder won't melt; if you heat it too long, the solder will fry into smoky oblivion. It takes some practice to get a sense for how long to keep the heat on the bead. One trick I've come up with is to use an eye dropper to set a droplet of water on the top of the rod. Watching to see when it starts to boil gives me some sense of how hot the work piece is.
...Timing and temperature is particularly important when you do a rod that has balls on both ends. If you heat the second ball too long, the solder job on the first will fry, and you'll lose that join. Sometimes you find yourself repeatedly fixing one side of a ball-and-rod assembly, only to discover that you've broken the opposite side.
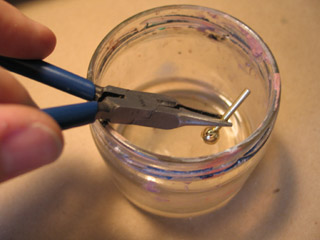
Step 6: Quench the work piece. Use your needle-nosed pliers to dunk the soldered ball and rod in water. This is not technically correct; for the strongest join, one should wait for the piece to air cool. I'm not that patient. My joins have seemed to survive pretty well, nonetheless. The "helping hands" may be hot when you finish soldering. I find it useful to squirt the clamp with water from an eyedropper; this cools it down quickly.
Step 7: Test the join. Give the ball that you've just soldered a good push and pull to see if it comes loose from the rod. If it does, re-sand the rod and try again. Even if it seems sturdy at this point, however, realize that you may still wind up having to fix it later. The pressure that the join undergoes when it's turning between tightened sandwich plates is more than you can easily exert with just your hands.
Leap from here to...