May 2006 archives
you are here [x]: Scarlet Star Studios > the Scarlet Letters > May 2006
<< before
April 2006
after >>
June 2006
May 31, 2006
planning a steel armature
by sven at 8:00 am
I'm in the process of collecting the materials necessary to build a steel armature. There are so many things to consider... Ack! Gotta write some of this down, just to clear my head.
OK, so take a look at this brass armature that I made:
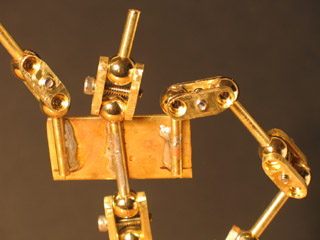
My new armature is going to be very similar -- only made out of steel. There are six elements in this armature design that need consideration:
- balls
- sandwich plates
- screws
- rod
- solder
- bar for torso and pelvis
1. BALLS
A) Type 302 stainless steel balls
Within the amateur stopmo community, most of us have learned how to make steel armatures from Lionel Ivan Orozco ("LIO"). He has three key tutorials on his site: making an open hole double ball joint, drilling metal balls, and brazing balls to rod. LIO also authored a section of Marc Spess' e-book, Secrets of Clay Animation Revealed!, which covers the same material.
LIO recommends type 302 stainless steel balls from smallparts.com. I can get a 100 count box of 1/4" balls from smallparts.com for $10.75. Their flat rate for ground mail is $8.95. That's $19.70 total. [Note: shipping goes up if the order weighs more than 10 lbs.]
I could also just buy a box of 25 balls for $3.25. My brass armature used 28 balls... I suspect the steel armature will only use 20 -- but there need to spares in case I make mistakes. Particularly given that these balls need to be drilled, which is an error-prone part of the construction process.
I wanted to know if I could get steel balls for less by buying locally. After checking the yellow pages listing for "bearings", I called Applied Industrial Technologies, Kaman Industrial Technologies Corporation, McGuire Bearing Co, and Motion Industries Inc. Only McGuire was able to help. They have seven type 302 stainless steel balls at their Salem store -- but not in the 1/4" size. If I wanted 100 of the 1/4" type 302 stainless steel balls, they could have some shipped from Illinois. The price would be 35¢ each -- thus $35 for 100 -- plus shipping, which would be $6 - $10.
Lesson learned: type 302 stainless steel balls are a fairly exotic item. Even when shipping costs are included, smallparts.com is the best place to purchase; it's $19.70 versus $40+ -- so ordering through a local store costs more than twice as much!
[Another interesting thing I learned in the process: bearings are rated for "grade". The smaller the number, the more perfectly smooth the balls. Grade 100 is typical. Grade 10 and grade 1 are also available -- though not through smallparts.com. I was advised that the difference between these grades is not visible to the naked eye, and that grade 100 should work perfectly well for my applications.]
B) An alternative method: using beads instead of bearings
On my brass armature, I used hollow brass beads for balls in the "open hole double ball" joints. To the best of my knowledge, I'm the only person who's come up with this solution.
...It worked remarkably well, and has two big advantages. First, because the beads have holes in them, drilling is much simplified -- you've already got pilot holes, and just need to enlarge the openings. Second, because the beads are hollow, there's space on the inside where you can put little snippets of solder -- all you have to do is heat the exterior of the bead with a micro-torch. The thing that you'd expect to be a problem -- the end of the rod extending through the opposite side of the ball -- turns out to not be a problem at all. The lip of the sandwich plates prevents the ball-rod piece from rotating to a point where the rod would begin to impede rotation.
I purchased my 8mm brass beads from A Bead Source (15831 SE Division St.). The largest hollow stainless steel beads that they sell are only 6mm. I've asked for the 8mm size to be ordered; an employee wrote a note for the owner -- but I'll have to call back periodically to see if the beads are actually in stock yet. This makes me want to see if I can't find an online bead seller, so I can just order the item myself...
I've also looked in Beads Forever (3522 SE Hawthorne) and Beads at Dusti Creek (4848 SE Division); A Bead Source is the best stocked of the three. Checking the yellow pages, I see that there are a few other bead stores that might be worth calling. Dava Bead And Trade (1815 NE Broadway) looks like a decent possibility.
A Bead Source carried what appeared to be 8mm carbon steel beads; however these were simply drilled -- not hollow. Drilled beads would not work. When you drill bearings yourself, you essentially create a little cup for the liquid solder to sit in. When you use a hollow bead, there's a space inside the bead where the solder can rest. If there's a hole that's drilled all the way through the sphere, then there's nowhere for the solder to rest.
A Bead Source also carried 8mm hollow silver-plated beads. Given that some solders contain silver, it seemed likely that these could work as an alternative to stainless steel. I picked up a bag of 25 for $2.95 for testing.
2. SANDWICH PLATES
For sandwich plates, LIO recommends "cold roll steel flats" that are 1/8" thick and 1/4" wide, which can be purchased online from either smallparts.com or onlinemetals.com. I believe the proper material from smallparts.com is "STEEL, COLD ROLLED - Rectangular Bar Type C1018", which costs $2.60 for a 36" length (longest available). I believe at onlinemetals.com "Mild Steel Rectangle 1018 CF" is the same thing; a 36" length only costs $1, and lengths up to 8' are available. Both companies charge a basic fee of $8.95 for shipping. Note that while onlinemetals.com is cheaper, it does not seem to carry bearings of any sort -- so it probably makes more sense to purchase both balls and sandwich plates from smallparts.com, at the same time.
A little galled at how much shipping costs, I decided to research local metal suppliers. It seems the best place to start for this research is in the yellow pages, looking under "Steel Distributors & Warehouses". In Portland, the four suppliers that look to be worth visiting are: Eastside Steel, Metal Supermarkets, The Steel Yard, and Pacific Machinery & Tool Steel.
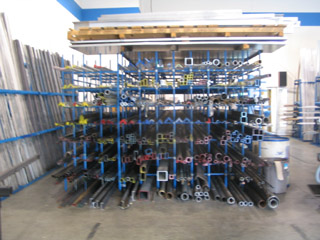
Eastide Steel and The Steel Yard keep their materials outdoors, and deal only in steel stock. They seem adequately friendly towards artist-types, but the premises felt "rough" in a way that made me a little uncomfortable nonetheless. ... Metal Supermarkets was excellent. They carry aluminum, brass, and steel; their stock is all indoors; and the staff were remarkably courteous and helpful. This is a national chain, and from what I've seen at this one branch, I recommend it highly. ... Pacific is on the other side of town from me; I haven't had a chance to visit it yet. I get the impression that it is another indoors multi-metal supplier.
I purchased a 6' length of 1/8" x 1/4" "cold-finished" 1018 carbon steel at Metal Supermarkets for $8.42. Compare that with $1.62 for a 6' strip from onlinemetals.com, or $5.20 for two 36" strips from smallparts.com... I'm really surprised to find it's costing less to buy metals online than in-person. Of course, and there's also shipping costs to consider -- and it's quicker to buy stuff in person.
Something interesting that I learned about buying metals: when you're buying in-person locally, the prices change daily. The price of metals at any point in time is linked to the stock market. With Metal Supermarkets, what you can do is check their website (which is organized very nicely) for what item you want, and then call the store to ask for a quote. Pretty easy. [I don't know why online metal suppliers are able to sell their products at fixed-prices.]
3. SCREWS
Screws are easy: I've got an Ace Hardware less than a mile from me -- just buy 4-40 socket cap set screws from their little bins, however many you need for the project. One interesting discovery... They offer both black "course" 4-40 screws, and stainless steel. I don't understand what "course" refers to... Generally a "course" screw has fewer threads per inch -- but both of these have 40 threads per inch. I know that I like the stainless steel, though -- so it's a moot issue.
4. ROD
LIO recommends "type 01 carbon steel rod, or cold roll steel rod". There are a great many types of steel, and I haven't figured out what "type 01" is yet. I found and purchased something a while back that I think I'm going to try to use... It's 5/32" music wire from the K&S Tube & Wire center at Bridgetown Hobbies & Games (3350 NE Sandy Blvd).
What is music wire? It's not what you think of as "wire" -- it looks like rod. I checked smallparts.com and found "Straightened Spring Steel Music Wire", which appears to be the same thing. When I search Wikipedia for "music wire", I get the entry on "piano wire", which says:
Piano wire is a specialized type of wire made for use in piano and other musical instrument strings, as well as many other purposes. It is made from tempered high-carbon steel, also known as "spring steel". Music wire is another name for piano wire: it is used for the cores of strings, which may be wound with other materials.
...Since this passage says "high-carbon steel", I'm going to guess that it's roughly equivalent to what LIO describes.
5. SOLDER
On my brass armature, I used standard 60%-tin / 40%-lead wire with a rosin core. I want to get lead out of the equation. Solders also sometimes contain Cadmium or Antimony -- I want to avoid these as well.
LIO recommends 1/32" diameter Safety-Silv 56 from Harris. I found and purchased a kit of 1/16" Safety-Silv 45 at Irontech (6417 SE Powell) that contains 1 oz of silver brazing alloy and 2 oz of Stay-Silv white flux. I'm very pleased with the MSDS, which clearly states what metals and chemicals are contained in the package. However, the price is steep: $24. Youch! ...I guess you're paying for the silver: the "45" in the name refers to 45% silver content.
About a week later I found some 1/32" Safety-Silv 56 at what looks like a mom-and-pop shop, Jones Welding Supply (11230 NE Sandy Blvd). It cost $12.50 for 1 troy ounce, but didn't include the flux (which I already have). Having looked around a little in welding supply stores now, my sense is that Harris brand Safety-Silv is very common. The particular store you visit may not have the exact silver-percentage or diameter you're looking for, but they should be able to order it pretty easily. The Harris website shows that they have an enormous selection of products -- but they don't sell to individual consumers online.
Looking closely at Ace Hardware, I found some more options for lead- and cadmium-free silver solder. Ace carries Alpha Fry brand soldering wire. Product #53982 is 1/16" wire that's 98%-tin / 2 %-silver and comes with a separate tube of flux. Product #62963 is 1/32" wire that's 96%-tin / 4%-silver and has a rosin flux core. Product #62964 is 1/16" wire that's 96%-tin / 4%-silver and has a rosin flux core. These last two products cost $3.49 and $3.79 (I forget which is which).
The Harris brand soldering wires cost about six times what the Alpha Fry stuff costs. Harris has a much higher silver content -- which makes for a stronger bond. An advantage of the Alpha Fry wire, though, is that it has a rosin core -- making it easier to work with, especially when using the "hollow bead" technique I described earlier. One more significant difference: the melting point for Alpha Fry is 430 degrees Fahrenheit; Harris has a melting range between 1250 and 1370 degrees Fahrenheit. The Welder's Handbook by Richard Finch says that butane burns at 3900 degrees, so my micro-torch ought to be fine. (Still, a note of concern is raised in my mind.)
In addition to welding supply stores, one can find silver solder at jewelry supply stores. A quick trip to Ed's House of Gems (7712 NE Sandy Blvd) confirmed what I've read online: jeweler's have a different language for soldering. They sell silver solder in three categories -- "soft", "medium", and "hard" -- and they don't seem to include MSDS info. I decided that I'm just going to avoid buying soldering materials from the jewelry-making world.
6. BAR FOR TORSO AND PELVIS
I had hoped that I could just purchase some 1" wide cold-finish 1018 carbon steel at Ace Hardware. What they stock, though, is "weld steel" and "plated steel" (which looks galvanized to me) from Steel Works. Neither of these looks right -- so I expect I'll wind up making a quick trip back to Metal Supermarkets.
I'm also curious to take another look at the K&S Stainless Steel Center at Ace Pearl Hardware (1621 NW Glisan St). ...I don't know how well this shiny stainless steel stock would mesh with the carbon steels I've purchased; I'd like to purchase a snippet for testing.
posted by sven | permalink | categories: stopmo
May 30, 2006
choice of metal for armatures
by sven at 8:00 am
It appears that there are mainly just four metals used in creating metal-jointed armatures:
- Brass: Easy to find, easy to cut, easy to braze. Seems only to be used in amateurs' armatures. Reacts badly with foam latex, due to there being copper in the alloy. The armature can be wrapped or sprayed to protect the latex, but it's still a risk.
- Steel: A strong material, but rather heavy. More difficult to find -- need to go to professional metal suppliers, rather than hobby stores. Brazes easily. Can be used safely with foam latex. Sparks when cut.
- Aluminum: Lightweight. More difficult to find -- need to go to professional metal suppliers, rather than hobby stores. "Cannot" be brazed; pieces are generally secured using very small screws (4-40 or smaller). Typically requires a milling machine -- not just drilling and cutting. Aluminum balls not recommended for ball joints: too soft. Can be used safely with foam latex.
- Phosphor bronze: Noted as having a particularly "smooth" feel. Material is difficult to find -- needs to be special-ordered, even from a pro metal supplier. Reacts badly with foam latex, due to there being copper in alloy. Even among professional armaturists, it seems esoteric; its use may (?) have come from the Trnka studio.
If you want to make armatures at the pro-level, steel seems to be the standard. I suspect that this is primarily due to it being safe for use with latex. Aluminum has the advantage of being lighter -- but this is counterbalanced by the fact that it's difficult/impossible to braze.
I'm in the process of collecting the materials that I'll need for making a steel armature. Even if I'm just a hobbyist, I'd like to do pro-quality work. And I'm interested in steel just for the sake of experiencing different materials hands-on.
However, I've begun to question the assumption that steel is necessarily superior to brass. If I understand correctly, brass works fine with silicone. Brass is easier to find than steel, and doesn't spark when you cut it. So, if you're making silicone puppets, shouldn't brass be the preferred material?
I have a suspicion... For a very long time, foam latex was the pinnacle of pro puppet-making. Foam latex puppets require steel armatures. Silicone is relatively new on the scene. I suspect that people still feel that steel is the "professional" and "superior" material -- but only because they haven't disentangled the actual needs of the casting materials from what kind of armature is required.
I was very interested to read this on an SMA thread:
[Henry] Selick recently mentioned, in an interview relating to his work on "Life Aquatic", that he's basically abandoned foam latex in favor of Dragon Skin, which is silicone based, I believe.
It looks like silicone may be the future. ...Perhaps brass is the future, too?
posted by sven | permalink | categories: stopmo
May 29, 2006
intermission
by gl. at 2:01 pm
let me quickly talk about two things:
first, on saturday i went to a gocco "flash and swap meet" w/ shu-ju wang, the local gocco expert. she's got a riso sp-275 flash unit that doesn't require the cute little flash bulbs. i flashed some new screens, but i didn't actually print much: i should have asked if anyone needed something goccoed! one of the screens i flashed was this picture i took of myself via photobooth at the mac store just the day before:

it looks like the "flash & swap meet" might be a regular thing, so next time i want to remember to bring scissors, tape, treats, and um, paper to print on. :)
second, when i look at the logs, i often wonder who "weefeelfine.org" is. thanks to drawn, i now know: we feel fine gathers sentences from thousands of blogs to construct how the internet is feeling. you get to see the data in several ways:

this is a format called "madness," with each point being a written feeling from someone -- or ocassionally, a picture. here's a picture with its blog text superimposed onto it:

[i mean most days i feel fine im okay nothings wrong at all]
if the radiohead from "ok computer" and "kid a" wanted to make a website instead of an album, this is what they'd make. if i haven't made it sound interesting yet, then i'm obviously doing it wrong. go look!
posted by gl. | permalink | categories: links, printing
if I went with foam latex...
by sven at 8:00 am
At this point, I'm thinking I'll probably go with making a silicone puppet next -- not foam latex. But I've done a bunch of research... And if I don't write down what I've learned, it'll go to waste. This post can be where I pick up again, if I come back to doing foam latex later.
THE FOAM LATEX ITSELF
I took at look at three brands of foam latex: Burman, GM, and Monster Makers.
All three brands cost roughly $30 for the basic 1 quart kit (shipping not included)... Burman costs $29; GM costs $32.50 (from Tim Vittetoe Originals, the most convenient distributor relative to my location); Monster Makers costs $30.
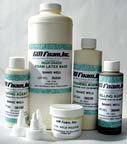
I think the deciding factor for me is quality of instructions -- and on this criteria, GM excels. The GM Foam website has run schedules that are specific to three common types of kitchen mixers: Mixmaster, KitchenAid, and Hobart. The instructions that I've hunted down for Monster Makers aren't so specific -- although they do give more information about using different recipes for different purposes. Burman does not provide online instructions that I've been able to find.
In general, GM foam feels the most user-friendly to me. The Burman website seems geared for professionals in the special effects industry; you have to really know what you're looking for in order to find it on their website. As for Monster Makers, I'm a little soured on them after having ordered my "self-skinning flexible expanding urethane foam". When I made my purchase, I also ordered two books -- but I got two copies of the same book, rather than the two different books I asked for. Furthermore, I asked repeatedly for instructions and an MSDS for the urethane foam, but never received these things.
GM foam is recommended by Kathi Zung. Her Do It Yourself! Foam Latex Puppetmaking 101 DVD is invaluable for getting a sense of how foam latex works -- so her advice also weighs in heavily.
Yep, my mind's made up -- I'll go with GM.
...There's something more worth saying about Monster Makers foam, though. Apparently Monster Makers actually carries McLaughlin Foam -- just under their own name. I found this very interesting story from Tom McLaughlin about how he pioneered the use of theatrical foam latex in the 1970s -- but then his recipe was stolen!
Apparently Tom is the guy that produced the foam that was used to make Miss Piggy, the critters from The Dark Crystal, Yoda, and Jabba the Hutt. Yowza! GM foam was used for Amadeus and the aliens on Star Trek: Next Generation / Voyager / Deep Space 9. Also impressive... But having made Yoda? That pretty much makes you my God.
[Tom also authored "Silicone Art" -- a difficult-to-find book that I'm trying to hunt down.]
...If I wind up spending any significant amount of time working with foam latex, then my second order of materials might have to be McLaughlin foam.
AN OVEN FOR CURING
I was hoping to find a large convection toaster-oven for curing foam. Something small enough to fit on a counter, but big enough to handle fairly beefy puppets. I found a pretty decent selection at Target. What we really need to know is the interior dimensions -- so I grabbed a ruler from the store's school supply section, and measured all the in-stock models.
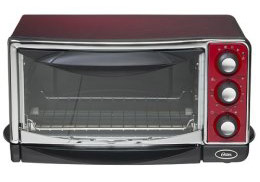
My top pick was the "Oster 6-Slice Toaster Oven - Red" for $60 (apparently on sale for $50 right now). The interior dimensions: 4.75" tall, 11.5" wide, 10" deep. This was pretty much the roomiest toaster oven that I could find for $50 or under. And yes, I confess, the sexy red exterior also helped sway me. ...Still, I'm left with the uncomfortable feeling that the first mold I make will wind up being too big for this thing.
So I looked for used ovens.
I looked in the used appliances room at Standard Appliances (5240 SE 82nd Ave). The cheapest oven they had was $200 -- still too much. ...I kept my eyes out while driving around town and finally found a "store" called Associated Bargain Barn on NE Martin Luther King. The employees are amazingly rude; there's just a narrow path through the single room of junked-out machines back to their office; and the business cards don't even have a street address on them. BUT, they said that they'd sell an oven with a non-functioning stovetop for $30. And that's all I really need. They'd had "seven" for sale the week before, but were sold out when I visited. Doesn't matter -- I feel like I've found the place where I can get my cheap oven.
Where to put it? I think the only workable solution is to store it in the garage. When I do an actual foam run, then I can wheel it out into the driveway, plugged in with an extension cord. And if I find that I don't like foam latex? It ought to be pretty easy to take the junker back to the folks who sold it to me -- just to get rid of it.
A KITCHEN MIXER
GM Foam has schedules for doing foam runs on the Mixmaster (Sunbeam), the Hobart "KitchenAid" mixer, and the Hobart (which has a 20 quart bowl). I shopped around online, looking at Walmart, Sears, Target, and Amazon.com. The best price I found was $98.72 for the Sunbeam Heritage Mixmaster at Walmart.
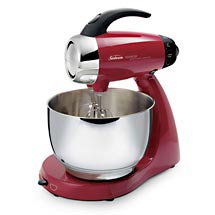
However, when I was shopping in-person at Target, I noticed that they sell spare bowls for the KitchenAid... Ah-ha!
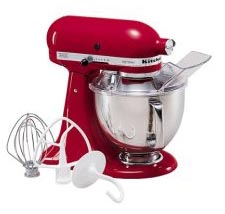
See, I already have a "KitchenAid Artisan 5-qt. Stand Mixer - Red" -- but I was looking for a new machine, because once foam latex goes in the bowl, you never eat out of it again. What I could do is just buy a second KitchenAide bowl and whisk-attachment -- or better yet, just a whisk and then an old aluminum bowl of some sort from Good Will. I'm sure that with a garbage bag and some cardboard for a splash guard, I could construct a protective covering for my "kitchen motorcycle". Checking Amazon.com, I see that a new whisk attachment might cost me around $31.
GRAND TOTAL
Let's see here...
- $32.50 ... GM Foam 1-Quart Starter Kit, from Tim Vittetoe Originals
- $30.00 ... oven without functioning stovetop, from Associated Bargain Barns Inc.
- $31.00 ... whisk attachment for KitchenAid mixer, from amazon.com
...That's $93.50. Figure in something for shipping and a cheap bowl from Good Will, and the grand total probably comes out to just about $100. Not bad at all!
posted by sven | permalink | categories: stopmo
May 28, 2006
silicone or foam latex next?
by sven at 8:00 am
I've got a puppet in progress right now that will be cast in flexible expanding urethane foam ("cold foam"). It will have an outermost skin of latex, which will be painted directly into the ultracal 30 mold. The armature will be made of aluminum armature wire.
I'm committed to seeing the puppet through -- but already I'm pretty sure that I won't be using this techinique again.
After this puppet, I want to make either a foam latex puppet or a silicone puppet. I suspect that one of these two materials will become my default for casting puppets here-on-out. Pros and cons for each...
Foam latex:
- Pro: It's light and fluffy.
- Pro: It's reasonably easy to repair if you need to tear it open for surgery -- which is particularly important if you're going to have a metal-jointed armature that needs tightening from time-to-time.
- Pro: Painting "only" requires PAX paint and talc.
- Con: It rots over time -- in perhaps as little as 6 months to 3 years.
- Con: It's difficult to mix right; there are four components that need to be frothed, and timing matters.
- Con: It's tricky getting the foam to cure; it's sensitive to temperature, humidity, and barometric pressure.
- Con: You need a dedicated oven and kitchen mixer -- which take up space, and are an additional cost.
- Con: It's vulnerable to brass (due to copper content) and to oils... Like the natural oils on your hands.
Silicone:
- Pro: It doesn't rot. It should last at least 30 years.
- Pro: There are only two components (well, three with slacker/deadener) -- and you don't have to froth them in a mixer.
- Pro: The curing doesn't require baking. It should work so long as you get the measurements right and stir well.
- Pro: You don't need to make space for a stove and kitchen mixer.
- Pro: Brass armatures shouldn't pose a problem.
- Con: It's rather heavy.
- Con: It's difficult to paint; the only thing that sticks to silicone is silicone.
- Con: Repairing tears is difficult or impossible; this makes it hard to tighten a metal-jointed armature.
- Con: It's vulnerable to sulfur, which is found in many brands of plasticene.
- Con: Silicone is somewhat more expensive than foam latex.
The notion that foam latex is going to rot so quickly is really appalling. ...But then, it's what Ray Harryhausen used. I wonder if part of me would always feel incomplete, if I didn't try making a foam latex puppet at least once? A thought experiment: If there was a class in Portland on making foam latex puppets, and the tuition was $250 -- and I got to keep all the tools and materials -- would I take that class? I think the answer is YES! -- in a heartbeat!
I've been pricing it out, and I think that I could actually get a foam latex set-up for only $90 - $100. ...But then, suppose that after I try it I find that don't want to keep working with latex? (Did I mention that it rots?) I'd be stuck with a big clunky oven eating up my precious space. If I got a used oven for cheap, I could probably just sell/give it back to the store where I got it. Even so, it feels weird to go through all that trouble and expense if I don't know that I'm going to stick with this material.
In the long run, I suspect that I'll wind up working with silicone. I just can't stand the idea of my puppets rotting away before my eyes. The main worry with silicone is that I'll need to get into the puppet to tighten joints -- but won't be able to. ...From what I've read so far, I think that I can cobble together a solution for painting the stuff. And all the other "cons" seem pretty surmountable.
I guess, then, that I ought to try silicone next. It's more likely to be the material that I want to stick with. If it's not, then I can try foam latex with a clear conscience. Or hey -- even if I love silicone, there's nothing preventing me from trying foam latex later on -- just for the sake of having the experience.
posted by sven | permalink | categories: stopmo
May 27, 2006
our fantastical future history
by sven at 8:00 am
At our "house adoption" party we handed out comment cards printed with this mesage:
Please write about an outrageous fictional event that will happen at our new house sometime during the next ten years. A little after 8pm we'll be walking over to the studio side of the house, and then we'll read aloud the fantastical future history.
The foretold events have now been meticulously assembled into their proper chronological order... At last the story can be told!
1.
Fueled by the success of Sven's film at the HPL film festival, the house becomes a gathering point for Lovecraft fans. Each fall, dozens of people from across the country camp out on the lawn. Eventually, when an argument over how to pronounce "ftagn" erupts into fisticuffs, the police put an end to the shantytown.
2.
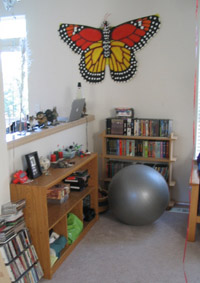
The spirit of Mothra possesses the giant butterfly on the wall and proceeds to fly around the neighborhood, dive-bombing at random.
the aforementioned butterfly
3.
You will be visited by an unruly llama from northern Peru. You will need to devise inventive ways to pacify him. (Fortunately, he happened to arrive on the day of your annual goat cheese festival.) Alas, the fabulous feta has soothed the savage beast, and he'll remain with you for the following years in which you'll knit colorful socks and scarves from his wool.
4.
All of the shirts in your closets will wake in the night and sneak out to go dancing on the butte with the food they steal from the fridge!
5.
In the year 2010, Gretchin will walk downstairs to boil her morning tea. She will find massive cracks running through the vinyl and carpeting, and the ground pushing through. Out of these gaping holes will pour seething masses of ants. Ants as thick as ocean waves. Raging and roiling heaps of them, opening the fridge and investigating every corner of the house. In horror, Gretchin will move about the house by standing on one chair and then positioning a second chair and stepping onto it. Sven decides to buy a blowtorch to rid them of the pestilence. When he torches the ants, only more pour out from the depths of ant Hell. Eventually Sven and Gretchin capitalize on their misfortune and start selling ant pies. Ant soap. Ant soup. Ant shampoo... Lots of organic ant products.
6.
4:45am, 2012
Gretchin is awoken by an odd beeping noise. She walks the house seeking the source.5:07am
Unable to find the source, Gretchin wakes Sven. She explains that the beeping has changed tone and frequency a few times and seems to originate from the vicinity of the garage. As they descend the stairs, the beeping takes on a musical quality.5:13am
Sven and Gretchin open the door to the crawl space under the house and find it flooded with a rich, color-shifting light that is synched with the now nearly erratic beeping. Their eyes adjust and they make out the small metallic object hovering a foot off the ground.Gretchin is shocked to realize the visitor is an alien robot...
...Sven is shocked to realize he can understand the robot, and begins to formulate his response...
7.
In 2012, Sven and Gretchin run for president, vowing to co-facilitate the nation with fairness and Collage Nights for all. Once again at the forefront of the digital revolution, the campaign is orchestrated entirely from Powell Butte via the art blog "Scarlet Letters." The "Svetchin" party's overwhelming victory inaugurates a new golden age of American creativity... Which lasts until the artists dissolve all countries and planet Earth joins an intergalactic federation of planets.
8.
At 3am the Russian mafiyah bursts into the house and dances a mazurka.
9.
There will be a fab musical theater production put on by a visiting theater/dance troupe, sort of like a vaudeville troupe, from another galaxy. Sven and Gretchin will like them so much that they will go on tour with them for a year.
10.
After the alien abduction Sven and Gretchin aren't quite the same. To restore normality, they purchase 3472 rolls of aluminum foil and 97 tubes of crazy glue to redecorate both the inside and outside of the house. Their plan works beautifully and they make the cover of Modern Art magazine.
11.
Willie Nelson on his 80th birthday tour gets lost while trying to find I-205 to go South to his next concert in Silverton. Somehow his bus ends up going East on Holgate and then up Raymond. He finally, even though he is still a man, gets out at [our street address] to ask directions.
[Editor's note: Willie Nelson was born April 30, 1933. Presumably, then, this event takes place in 2013.]
12.
"Gretchin?" Sven called out distractedly --
"Yes?"
"Did ya remember to curb the winsnippets?"
It was the tenth anniversary of the Centaurian occupation, and the whole street was abuzz with preparations for Enunciator Day.
"Damn!" cried Gretchin, "I did not!"
"But the hognobbets are coming to visit! An uncurbed winsnippet... And zoola in the midst of his cyclic!"
"Not to worry," called Gretchin, "I'll just swap them with the Eeklamorphs!"
13.
A gnome will return and live in the attic, creating havoc and many eerie bumps in the night.
Mari, hunter of gnomes
14.
Just as you are about to pay off the house [in 2036], a host of angels in 3-piece suits come to the door. You let them stay in the studio, where they defeat the Nigerian spam syndicate. The world rejoices and there is peace on Earth, good will to men.
posted by sven | permalink | categories: miscellany, studio space
May 24, 2006
if i buy a milling machine...
by sven at 8:00 am
I very much want to build metal-jointed armatures for my puppets. I've come up with a relatively simple brass design that can be made with handheld power tools. However, I'm interested in graduating up to making steel and/or aluminum armatures. Ones with joints that make sense for the anatomy: e.g. knees that only bend on one axis of rotation.
That probably means: buying a milling machine.
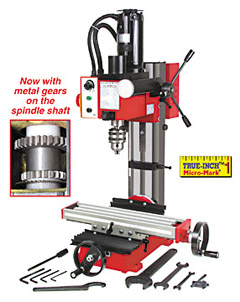
I've been doing a lot of research. At this point in time, I think that I would choose to buy a MicroLux Mini Milling Machine from Micro-Mark for $590 (that's including shipping). However, I haven't fully committed to buying any machine -- not just yet.
For my own sake, I need to summarize what I've learned so far...
1. CROSS SLIDING VISE?
A while back, I bought a drill press at Home Depot -- which I returned a few days later. ...Immediately after leaving that Home Depot, I stopped at a hardware store that I'd never been in before: The Tool Peddler (9907 SE 82nd Ave). Inside, I discovered this tool I'd never seen before: a cross sliding vise. The cross sliding vise looked very much like the X/Y table on a milling machine. It made me wonder: can you use a cross sliding vise to turn a drill press into a milling machine?
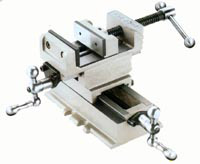
I posted my question on SMA. The answer I got back was that a drill press isn't really built to deal with the sideways stress. Mike said that the machine will vibrate and give you sloppy cuts. Nick said that he's tried using a drill press to mill aluminum (which is soft) and failed. Jon Frier warned me that he had tried milling with a drill press -- and has scars from the attempt!
I went back into the store to have a second look at the vise, and was told similar things by an employee: the cross sliding vise is really just for precision-positioning. You might be able to use it for milling wood -- but trying it on metal would be a Bad Idea.
2. PRICES
For making armatures, you don't need a full-sized milling machine. There are "micro" mills and "mini" mills -- and either of these sizes will suffice. In general, it seems that micros cost more than minis -- you're paying for miniaturization.
From what I've read, it looks like a good mini is going to cost at least $500, and a good micro is going to cost at least $650. The price range for minis I've looked at runs from $399 to $525. The micros fall into two groups: $240 to $260, and $650 to $995. All of these prices are without shipping. Also, these are prices for the machines only -- milling bits, clamps, or other accessories all have to be purchased separately.
Micro mills I've looked at:
- Procon = $240 ($375 with milling table?)
- Harbor Freight = $259.99
- Sherline = $650 / $775 / $995
- Taig = $680
Mini mills I've looked at:
- Cummins = $399
- Procon = $405
- Harbor Freight = $459.99
- Micro-Mark MicroLux = $524.95
- Grizzly = $525
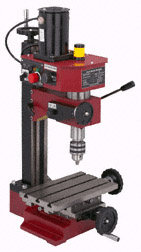
The Harbor Freight micro milling machine seems to be the cheapest milling option available. Unlike the Procon (whose price is unclear), I can buy it locally and avoid shipping costs. However, it's remarkably heavy for a micro; its X/Y table is quite small; and it only has two speeds. The cheapest option is worth mentioning -- but I think I would have more confidence purchasing one of the fancier machines. We're going for precision metalworking here. (And "you get what you pay for.")
3. WEIGHT AND SIZE
For me, weight and size have probably been the most significant consideration after cost. My studio space is a spare bedroom. I don't have a proper metalworking shop -- and I don't have a lot of free space. This would seem to indicate that I should get a micro mill.
Comparing height, width, and depth is cumbersome (even for me!); a comparison of weight should give an adequate sense of how big these things are...
Micro mills I've looked at:
- Procon = 15Kg without table (33 lbs.)
- Harbor Freight = 103 lbs.
- Sherline = 33 lbs. / 36 lbs. / 38 lbs.
- Taig = 65 lbs.
Mini mills I've looked at:
- Cummins = over 150 lbs.
- Procon = 40Kg (88 lbs.)
- Harbor Freight = 150 lbs.
- Micro-Mark MicroLux = 110 lbs.
- Grizzly = 153 lbs.
If weight and size are the primary considerations, then Sherline is the clear winner. Reading through the setup instructions, I see that you do need to attach the Sherline mill to a board, to create stability -- but you don't need to (and shouldn't) secure it to a workbench. It appears that all other mills (including the Taig) need to be bolted to a heavy table.
4. STRENGTH
The strength (or "beefiness") of a mill seems to be a matter of two factors: (1) what kind of metals it's able to cut, and (2) how rigid the milling column is.
On two threads over at SMA, professional armature fabricator Lionel Ivan Orozco ("LIO") advises that the extra mass and power of a mini mill (vs. a micro) can be advantageous.
LIO uses a Grizzly mini mill (as well as a 400+ Lb. Enco!) -- however, he's quick to point out that with intelligent design, there's still a lot that one can do with a micro.
Tom Brierton, another professional armature fabricator, gets good results with a Sherline. In his book Stop-Motion Armature Machining: A Construction Manual, Tom says
"Sherline miniature mills and lathes can cut the following metals quite easily: all grades of aircraft aluminum, brass, and mild to semi-hardened steel, such as the 303 and 404 series steels. Anything beyond the hardness of 440 will require very specialized cutting tools and jobber drill bits, which are very expensive. It has been the experience of the author that rarely is there a need to go beyond the 440 hardness when building stop-motion puppet armatures, as these metals are quite sufficient for armature purposes." (p.21)
...So, it appears that the Sherline is limited in terms of what materials it can deal with -- although it's unlikely that you'll need metals that it can't cut -- not within the realm of stopmo. Still, it's worthwhile to realize that size does limit the versatility of the Sherline.
[As I'm reviewing this portion of Tom's book, I now see that he says "Sherline machines must be securely mounted on a table, preferably with screws and bolts." This seems to contradict what Sherline says on its website.]
With regards to rigidity, the difference between a Sherline and a Taig is visible in their photographs.
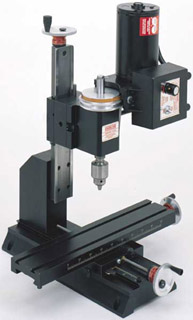
Look at the milling column of the Sherline...
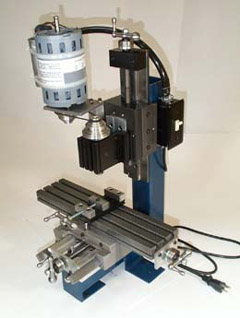
Now look at the milling column of the Taig. You can see that it's much more solid. ...The Taig website boasts about their micro mill's strength:
"This is the machine you don't have to baby. The Micro Mill is a rugged precision instrument that has plenty of rigidity. Its machined, ground and stabilized steel bed has a life-time ball bearing spindle, coupled with a six speed positive vee belt drive. Spindle speeds in geometric progression from 525-5200 RPM (CR version 1000 - 10000 rpm) provide the power to "HOG" 1/8 inch cuts in mild steel or the speed and precision to "dust" a few tenths (compare that to other mills of similar size on the market, you can't!)."
It appears that if strength is the primary concern in choosing a mill, then the Taig wins out over the Sherline. However, a Taig pretty definitely has to be screwed down onto a workbench -- so at that point, you might as well go for a mini like the MicroLux.
5. MINIS VS. MICROS
There a few differences between the minis and the micros worth mentioning...
(1) The milling heads on the micros can turn 90 degrees in either direction; the milling heads on the minis can't turn -- but their milling columns can turn 45 degrees in either direction. It sounds like this is a point in favor of micros -- however, after asking folks on SMA and looking in Tom's book at how specific armature joints are made, I find that you probably want to avoid tilting the milling column entirely. It's unnecessary -- and "tramming" the column to make sure it's perfectly vertical sounds like a very tedious process.
(2) The minis can double as drill presses -- the micros can't. The minis all have a wheel on the side that allow you to easily plunge a drill bit into a work piece; the micros can only lower their drill bit slowly, using very small increments of movement. Getting two machines for the price of one -- both a milling machine and a drill press -- seems like a significant benefit to me. [Correction: It appears that the Procon and Harbor Freight micro mills can double as small drill presses.]
6. COMPARING THE MINI MILLS
An interesting fact about the minis is that at least five brands are all made at the same Chinese factory: Grizzly, Harbor Freight, Micro-Mark, Homier, and Cummins. LittleMachineShop.com has a very useful comparison chart for these five brands. [I have been unable to find any info for Homier Mobile Merchants' "Speedway" model, and have thus excluded it from consideration.] Procon appears similar to these brands, but seems to be produced in a different factory.
Now, on to comparing the various brands of mini mills with one another...
The Procon website is confusing -- and as I am looking at it today, the link to its page about mills seems to be broken. The Procon also appears to be a metric machine. I'm disqualifying it from my considerations.
The Cummins ($399) and Harbor Freight ($459.99) both seem to be somewhat less expensive because they have only two speeds. From what I read, being able to control the speed at which you mill each particular kind of metal is very important. Having only two speeds is a significant deficit. However: There are at least two Harbor Freight stores here in Multnomah county; all of the other brands seem to only be able via mail order. Thus, Harbor Freight gets some extra points... With their brand, I wouldn't have to pay shipping costs.
The Grizzly ($525) and the Micro-Mark MicroLux ($524.95) are essentially identical in price -- and even when shipping is considered, they only differ by $5. The Grizzly is heavier: 153 lbs. versus 110 lbs. The MicroLux's lighter weight should probably be considered as a point in its favor.
The tipping point in favor of the MicroLux may be that it has "true-inch" feed screws and dials. As the LittleMachineShop.com comparison chart explains,
"The MicroLux mini mill has one unique feature; the table feed dials both advance 0.050 inch per revolution. On all the other mini mills the dials advance 1/16 inch per revolution. The 0.050-inch per turn is easier to use than the 0.0625-inch per turn of the other mini mills. Micro-Mark will have you believe that the other mini mills have metric dials, but they do not."
I've looked at the Harbor Freights dials in person and can attest: .0625-inch per turn is really strange-looking and counter-intuitive. It's difficult to explain; suffice it to say that I walked away from the store not understanding how one would actually work that dial.
So, when it comes down to it, it looks like both the Grizzly and the Microlux are very good machines. LIO has a Grizzly. And, I feel it's worth mentioning, Kevin Kelly's "Cool Tools" website advocated for the Grizzly (though not in comparison to anything else). On the other hand, both Yuji and Eric Scott over on SMA have opted for the MicroLux, and seem very happy with the machine. ...For someone who's not a pro like LIO, it sounds like the "true-inch" dials make the MicroLux slightly easier to work with -- giving it a slight edge.
7. PICKING THE MACHINE FOR ME
It seems that my first choice for a milling machine would be the MicroLux ($524.95). It's strong: having both rigidity, and the power to cut different metals with ease. It's versatile: being able to serve both as a milling machine and a drill press. It's somewhat easier to use than other mini mills: having both a variable speed control, and "true-inch" dials. It's less expensive than the micro-mills. And at 110 pounds, it's not light -- but it's also not completely unmanageable.
The "big" problem with the MicroLux is that it commits me to also buying/making a sturdy workbench that it can be screwed onto. So, my second choice for a milling machine would have to be the Sherline Model 5400 Deluxe Mill ($775).
...The basic Sherline mill (Model 5000, $650) is a bit smaller than the Deluxe -- but also lacks the "laser engraved scales on the table and base" -- which seems a little unreasonable. Having an incremented ruler built into the X/Y table feels essential; the Model 5000 seems inadequate. The high-end Model 2000 ($995), on the other hand, seems like over-kill. The "Deluxe" seems to be Goldilock's "just right" compromise.
[Note: As I double-check info now, it appears that the Model 2000 may be the only Sherline with a milling head that can turn 90 degrees -- the others seem to be fixed in place.]
A Sherline is the most lightweight option. There is conflicting info, but it appears that one can merely attach it to a wooden tray -- which then allows one to put it away when it's not being used. It has variable speed -- whereas the Taig has only six speed settings, and the Procon and Harbor Freight micro mills only have two. Sherlines are the best documented of all mills (micros and minis) that I've seen, and there's a vibrant online community of users.
Really, I think the only sticking point that's really preventing me from buying a MicroLux right now is: "Where am I going to put it?" ...I'm having trouble imagining where I want to put a heavy workbench.
That makes me begin to wonder if the Sherline might be the better option after all. BUT... It's more expensive -- by $250 -- and I have to remember that there's bits, clamps, and accessories to buy, as well as the machine itself. And it's also helpful at this point to recall what Yuji said while discussing his purchase:
"I chose the mini mill and lathe because I wanted something beefier than the Sherline. I got to use Sherline equipment with Tom Brierton last year when he gave a workshop here in Los Angeles. I thought they were good little machines but there were too many little things I didn't like about them too. Now that I have been working on my Micro Mark machines for a few months, I am very happy. And the fact they are cheaper, well that's just icing on the cake."
Yuji's kind of vague -- but his comment does help me feel more confident about going for the MicroLux.
SO! I guess the question I'm left with is: what am I going to do for a workbench?
8. THE WINNERS
This post is long and rambling, so let me summarize in another way. In the "small affordable milling machines" competition, I'd like to announce awards in three categories:
- cheapest machine: the Harbor Freight micro mill ($259.99, if bought locally)
- strong and versatile: the Micro-Mark MicroLux mini mill ($589.95, shipping included)
- small and portable: Sherline Model 5400 Deluxe micro mill ($775, shipping not included)
...And the winner for best overall value: the Micro-Mark MicroLux mini mill ($589.95, shipping included)
posted by sven | permalink | categories: miscellany, sculpture, stopmo
May 23, 2006
the drill press mistake
by sven at 8:00 am
It seems like there's a progression of complexity for puppet armature designs:
- Mike Brent: aluminum armature wire, epoxy putty bones, nuts for tie-downs
- Nick Hilligoss: aluminum armature wire, wooden body block, T-style tie-downs
- Susannah Shaw: aluminum armature wire, K&S plug-in limbs
- Lionel Ivan Orozco ("LIO"): "open-hole double-ball" joints made from steel strips, bearings, and rods.
- Tom Brierton: multiple types of joints, milled from aircraft aluminum stock
I've gotten to the point where I can make a Susannah Shaw design pretty comfortably. For a while, I thought it was reasonable to just take the next step up -- getting only what I would need in order to make a LIO armature... That meant: a drill press, and some special-order metal stock.
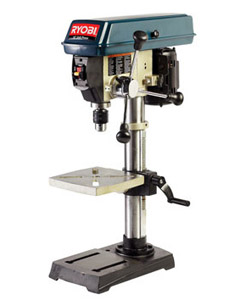
About two months ago, I actually went ahead and bought a drill press. I was reading and re-reading LIO's tutorial on how to drill type 302 stainless steel balls. In the photos, he uses a 10" Ryobi drill press. I could see in Nick Hilligoss' tie-down tutorial video that he uses a Ryobi bandsaw. Ryobi seemed like a trustworthy brand. Affordable, too: the 10" drill press only costs $99 at Home Depot. After coveting it for weeks, I finally decided that my ultimate purchase was a foregone conclusion, and that I might as well quit putting it off.
However, I wound up taking the drill press back just a few days later -- never even having taken it out of the back of the Svan.
Reason #1
At the point of purchasing a drill press, you enter into the world of tabletop machines -- which take up quite a bit of space. If a milling machine were able to both mill and drill, then perhaps for the sake of space I ought to just save up and get the more versatile machine.
LIO ranted a little at me that a drill-press is an essential tool in any shop. That helped goad me into purchasing the drill press. He's an authority that I respect... But did I feel like I truly understood why I need both tools? No. So I decided I should take the drill press back. I can always re-purchase it later, if I finally understand why both are necessary.
Reason #2
I realized that I just didn't know enough about machining metal yet. I was depending entirely upon other people's tutorials and advice. When I'd ask a question on SMA, I could see my own ignorance reflected back in what I wrote, and it just seemed ridiculous.
My new resolve: I'm a smart boy -- I can own the knowledge of metalworking for myself -- no more dumb questions -- go forth and read up on the subject! So, I drove to Powell's Technical Books and purchased The Home Machinist's Handbook by Doug Briney and Tabletop Machining by Joe Martin (owner of Sherline).
Research research research....
posted by sven | permalink | categories: sculpture, stopmo
May 22, 2006
creative world
by gl. at 3:33 pm
three more art events last week:
* a staged play reading: lost wavelengths
"DJ and self-styled musicologist Murray stalks the wilds of Middle America in search of the strange and wonderful songs of amateur musicians for his public radio program. From among a parade of odd, self-deluded and deranged outsiders, he hopes to lure “Enola Guy” - a mysterious, death-obsessed guitarist who never grants interviews or plays in public - into the open."
it sounded like an interesting concept, but it was sort of dull and really thick with innuendo & sexual jokes (and in my experience, when theatre people don't have anything to say, they leap to innuendo. it's very tiresome). during the conversation w/ the author, i realized he had wasted a prime opportunity to use the "parade of odd, self-deluded and deranged outsiders" as a greek chorus, reponding to the events as they unfold on stage.
* alberta art hop
also disappointing, as very little of the art insprired me. the theme this year was "the art of surprise/the surprise of art" and the non-juried show had lots of pieces from people who ignored the theme or barely played with it. there were four exceptions: a "virus" with a tiny chest of drawers inside, a 2-d piece that open two different ways, a large metal sculpture with a small crank that spun the contents of its head around, and a wall piece w/ wooden gears that spun a corndog through a cheery sky and then *dinged* a large bell unexpectedly. outside that exhibit, there were two others worth mentioning: the grace academy had an exhibit of poetry combined w/ woodcut prints from 8th graders, and there was a participatory drawing space nearby. i bought a cd from sassparilla, who made music sven & i danced to on the sidewalk, but everything else on alberta (we're talking 25 blocks, people!) was pretty blase.
* "create the world"
i still really love this event, which goes out of it way to have a variety of offerings for different learning & social styles. well managed yet casual, it has a high potential for whoo-whoo but doesn't go there unless you want it to.
i was there for about 12 hours and there were at least three times more presentations than i could attend, but i attended presentations like "You can learn to draw," "Are Men Oppressed?," "Core strengthening with the Big Blue Ball," "Building Rapport & Credibility: An Intro to Status Work," "Peaceful Parenting: Less Conflict, More Connection," "Juggling Fun," "Drum, Shake, Rattle and Roll Circle," "Allowing Serendipity" (and an impromptu paraffin dip, both from the woman who created deja shoes), "Mystery of Watercolor Revealed," "Creative Leadership in Community Well Being," "Improv Warmup and Story," "Evening readings--poetry and prose," tango lessons and finally we pushed aside the dining room table to swing dance at the end of the night.
i also shared a presentation this year presentation about "the benefits of a daily writing practice" and made a small, succinct handout i oughtta put online at some point. none of these presentations were more than 1/2 hour long: in between you snacked on delicious food and browsed the book/magazine/clothing exhange and explore the grounds and continued talking to people. i re-met some people i had only met last year and we were all genuinely glad to see each other. and dude, there's a treehouse!
posted by gl. | permalink | categories: exhibits & events
learning metalworking
by sven at 8:00 am
[Last week I wrote a comment over at Shelley Noble's "Notes from Halfland" blog that seemed worth re-posting here. I have thoughts about fleshing it out into an illustrated tutorial -- but best to share it as-is for now.]
Prior to February, I had never done any metal working. Period. In fact, I clearly remember the message I wrote to Mike saying how the thought of metalworking scared the bejeezus out of me. His encouraging words got me over the hump, to the point where I decided that I'm probably a smart-enough sort of person to be able to get the job done. [THANK YOU MIKE!!]
There were several distinct steps for me in learning what I know so far.
#1. Cutting a strip of aluminum. I started with a hacksaw and trying to hold the metal down by hand. Couldn't do it. I got a drillpress vise -- wrong kind of vise. I got a small clamp-to-the-table vise and wax for the hacksaw blade. That worked, but my cuts were sort of crooked. I tried using a dremel cut-off wheel, and suddenly cutting metal was like slicing butter.
#2. Drilling and tapping a brass strip. Drilling was pretty easy right off the bat. What I didn't realize at first was that normal drill bits work fine. If they're labeled HSS, that means "High Speed Steel", which can easily cut the softer metals (brass, aluminum, copper). HSS bits are probably what you have by default; you can get carbide bits at a hardware store, which are even more durable. ...Tapping just requires buying a little specialized tool so you can screw threads into a hole. I was so proud when I showed Gretchin a simple hole with a screw in it -- and I had made the threaded hole myself!
#3. Soldering. I needed to learn soldering so I could attach little brass nuts onto square K&S tubing, so I could make plug-in armatures like Susannah Shaw describes. (Neither super glue nor epoxy putty made adequate bonds.) My first frustration was learning that a zinc nut wasn't going to attach to the brass K&S -- it had to be brass-to-brass. I discovered that I had to sand the parts a little to make sure that they were clean. Then it took a little bit of fiddling to figure out where to press the soldering iron and how to hold the soldering wire effectively. ...But then, poof! I knew how to solder!
#4. Safe ventilation. Reading online, I found out that the fumes from soldering -- both from the lead and from the rosin core -- are hazardous. (My other main worry had been the fumes from epoxy glue.) My desk isn't in front of a window, so I needed a way to suck the fumes through dryer ducting that I bought at Home Depot. I tried an air brush spray booth -- it was way too big for my desk! I found some tiny desk fans made specifically for soldering and ordered one from Amazon.com. I figured out a way to modify it so it could vent through the ducting. The write-up on my solution is available over at Scarlet Letters.
#5. Using a torch. When it came time to attach balls onto rods, the soldering iron couldn't get the metals hot enough. I wound up using a butane micro-torch -- actually the kitchen brulee torch that I got two Christmases back! Flame scares me, and it took a little time even when I was in the kitchen to get comfortable with using something that's 1200 degrees hot. Using it for metal working, it wasn't bad at all -- as soon as I figured out that I ought to work on top of a cinder block, and that a small "helping hands" clamping device from Radio Shack was necessary to hold things for me while I heated them.
...And that's actually everything I know!! Each step was a big deal to me -- but once learned, it's just like adding a new media to the art pantry: pastels, acrylics, clay...
Oh -- one other step that was a meaningful hurdle: ordering materials online. It was really weird to be buying something that I'd never touched in person before. Buying "self-skinning flexible expanding urethane foam" from MonsterMakers was where I got over that. I'm going to need to order type 302 stainless steel balls from smallparts.com soon -- I wouldn't be able to if I hadn't already broken the online-buying barrier.
(Not a barrier, but another little bit of learning: Walking around the hardware store looking at nuts and bolts and screws long enough to know the difference between 4-40, 6-32, and 10-24; the difference between a socket cap screw and a machine screw; the difference between brass, zinc, and stainless steel screws... It's been really useful to be able to recognize these things by sight.)
posted by sven | permalink | categories: sculpture, stopmo
May 21, 2006
thinking about set design
by sven at 8:00 am
I've been thinking about set design for stopmo films.
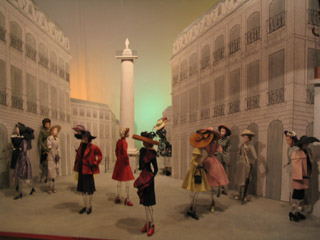
Back on Sunday May 7, Gretchin and myself and our friends Todd & Kristen made an excursion to the Maryhill Museum of Art, about 90 minutes east of us. I was really excited to go see their collection of Theatre de la Mode dolls, which I had discovered previously in a book titled Théâtre de la Mode: Fashion Dolls: The Survival of Haute Couture that was being sold at Fabric Depot (700 SE 122nd Ave).
"Doll" is perhaps a misnomer. These are 1:3 scale (27" tall) mannequins with wire mesh bodies and white clay heads reminiscent of Greek sculpture. They were created in post-WWII France, in a (successful) attempt to revive the fashion industry. More than 70 unique dolls were created by leaders of the art/fashion world; they were displayed in sets created by noted theatrical designers (e.g. Jean Cocteau). The dolls are amazing art -- but I think it's probably the sets that are really sparking my imagination.
...Unfortunately, the dolls weren't actually at the Maryhill Art Museum when we visited! They were temporarily on loan to the Washington Museum of History and Industry ("MOHAI") up in Seattle. However, by a strange serendipity, Gretchin and I wound up traveling to Seattle the following weekend (May 12). How could we not go see the dolls? It seemed fated.
So, yes, I finally got to see the dolls. :-)
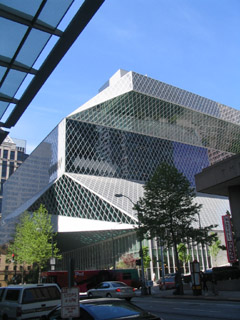
While we were in Seattle, we also made a visit to the Seattle Public Library. Gretchin had been there before, and raved to me about the architecture. Wow! She wasn't exaggerating -- it's a truly fascinating design... And one of the few examples of postmodern architecture that I've really grooved on.
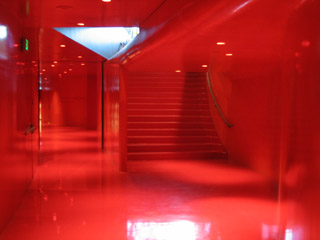
The part of the library that I'm most taken with is in the core of the building: it's built to look like the interior of an enormous heart! The walls are red -- like the color of Mickey Mouse's shorts -- and the hallways curve away from you like ventricles... I would love to make a set for a stopmo film that looks like that!
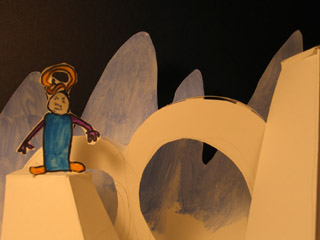
Now, backtracking to the Monday after we didn't see the Theatre de la Mode dolls...
On May 8th I spent a happy two hours using cardstock to brainstorm 3D spaces for my puppets to inhabit. (I may not have seen the dolls and their sets in person at that point in time -- but I had come home with a fist full of Theatre de la Mode post cards!)
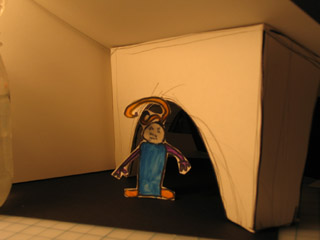
I bought a whole ream of this white cardstock at Arvey Paper & Office Products (1005 SE Grand Ave) a while back. It's proved really useful on a number of occasions. It doesn't take paint like I'd want, however; acrylics make it warp. ...True, I could use foamcore -- but paper's quicker, more inexpensive, and more recycleable when I'm just brainstorming.
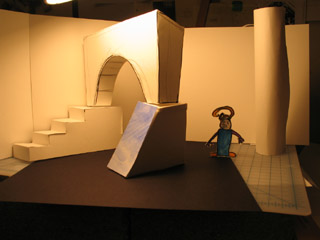
After a while, I wound up with several bits that I just kept rearranging: a staircase, an arch, a platform, a pillar, some flat walls. I could see making a bunch more of these pieces to experiment with. ...Sort of like playing with wooden blocks!
It's funny: as I fooled around with my little paper props, I found myself thinking increasingly spatially. When I went to bed that night, all sorts of interesting spaces were occuring to me -- as if I'd unlocked a part of my imagination that's always been dormant.
posted by sven | permalink | categories: miscellany, stopmo
May 20, 2006
sculpting: a wingless bird creature
by sven at 12:00 pm
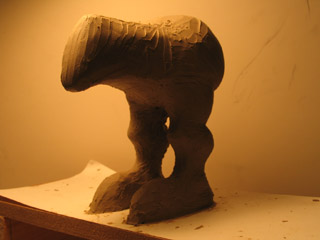
Two weeks ago I started doing a sculpt for a humanoid puppet. I was going to use this sculpt to make my first-ever two-piece mold... However, I've put that project on hold. The mold-making experiment could go horribly wrong -- it'd be foolish to put a huge investment of time into a sculpt that might just get wasted.
Instead of the humanoid, I've gone ahead and made a simpler beastie -- a sort of wingless bird-creature. I think I'm going to name it "buttons", after a raven-critter from Amy Winfrey's wonderful online cartoon series, Making Fiends. (A little homage, y'know?) ...Just one problem: I put too much effort into this sculpt to use it as a first test, either!
Oh well. I'm thinking now that I'll do something ridiculously simple for my two-piece mold test. Like, say, a severed arm. If that goes OK, then I'll go forward with casting "Buttons" in flexible expanding urethane foam.
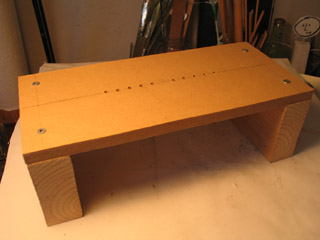
New invention: A puppetmaking table. Puppets have tie-downs -- screws that come up from underneath the table, fitting into nuts in the feet. This little table has holes in it for tie-downs, so I can easily work with the puppet in a standing position -- but still be able to lift it up or rotate it when necessary. I made a whole series of holes, all 1/2" apart, so the table can accommodate puppets with different gaits.
I think I've come up with a pretty useful tool here... My only complaint: the table's just a little too wide. It's 12" across; 8" probably would have been plenty.
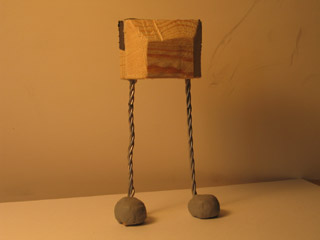
As I understand it, when you're making a puppet from casting materials, you usually create two armatures. A rough one that just holds the clay up while you sculpt. And the good armature, which goes inside the final puppet. I thought I'd be clever and make just one armature...
The one you see above has three twisted strands of 1/16" aluminum armature wire in each leg. The legs are glued into a block of pine with epoxy glue. The feet are metal nuts attached to the wires with plumber's epoxy putty. The nuts are set on top of thin pieces of wood (with holes, so the screws can pass through) -- just to make the soles a bit flatter.
It's a well-constructed armature. But it's not going to work for the final puppet. I can already tell that the leg wires aren't going to be nearly strong enough to pose the puppet's legs. The sculpt wound up being a lot beefier than I expected.
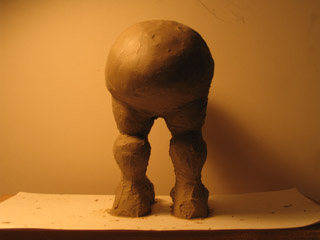
It took three hours to build the armature and puppetmaking table; it took another four to do the actual sculpt. Before adding plastilene, I covered the armature with plastic wrap so it would be protected.
I had a lot of fun... There's something really appealing about working with actual 3D volumes, rather than just 2D representations. I specifically wanted to share the photo above because I was really pleased with how the backs of the legs turned out. Neat shapes.
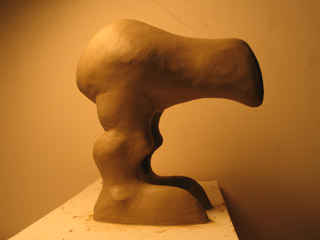
...And here's the finished sculpt! I used turpenoid with a brush to smooth it out. It's pretty close to what I had in mind. I think I'm beginning to get the knack for this "sculpting" business. ;-)
posted by sven | permalink | categories: sculpture, stopmo
mhcc visual arts student show reception
by gl. at 10:03 am
the reception for the mhcc visual arts student show was thursday. we hadn't gotten in the door very far before marti saw us and took us to what i call the "calligraphy ghetto" for unmounted pieces. most of my pieces were there because she ask me to participate at the very last minute, so i hadn't managed to frame any of the pieces. but very few of any of the calligraphy pieces were framed this year, and so most of the submissions were in this glass case. fortunately, born was already framed thanks to sven's amazing foamcore & copper wire creation, which marti loved and was showing off to everyone. (ooo, and worth mentioning: i sold "born" even before the show began! yeah!)
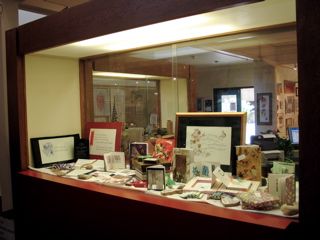
[the "calligraphy ghetto" for unmounted pieces]
last year the calligraphy pieces were more integrated into the rest of the show, which is a mix of all the different arts mhcc has to offer: sculpture, design, pottery (the pottery studio has a ton of wood stacked in front of it for the wood-fired kiln this weekend), drawing, painting, metalworking & jewelry. marti has almost convinced sven to take a metal-working class, in fact, as she led us away from the reception and down to the studio to show its array of delicious tools & enamels. will he resist the temptation? kim graham's sculpting class is most important right now, but maybe next year... ;)
posted by gl. | permalink | categories: calligraphy, exhibits & events, other art
May 19, 2006
artist's way open studio review (may)
by gl. at 5:32 pm
it was hot last night but not as hot as it had been the day before, so i am grateful. it was plenty hot enough in the studio, though, which prompted me to break out the fan and make lavendar lemonade. i gotta figure out how to get people moving during the events; most people don't get up to drink, snack, or play with other materials. forgot to put out the tea bags & the "please come in" sign. doh!
we tried another guided intent: "identity," and i managed the format a little better this time. and though i had a hard time personally with the writing this time (i just couldn't get my brain to shut up and focus), i got a good title from it:

["i choose the moon": click the image for the other collages]
this is a neat piece because it's so monochromatic: the only color comes from the reddish stars. of course this piece has a lot of shiny detail: the moon is a swirl from one of those silver paint pens, the stars are a unique faceted print, and the round thing on her heart is a small nut with a little moving gear attached to it -- i love its dimensionality and its interactive quality as the gear spins. (sven found that for me one day on the springwater corridor trail.)
in addition to the collages, sven & jen (a salem participant we met at last month's event) created a collaborative collage animation in under 20 minutes! (from conception to copying the file to celeste to be uploaded):

amazing!
i'm finding it more difficult to finish a collage during a facilitated event. very little of my piece was glued down before i had to talk about it. that actually worked out okay: the little gear nut was a piece i added afterwards instead of a larger rusty metal bracket-thing i had been planning to use.
so the big news is that i'm breaking collage night into two events: the guided intent event i've tried for the last couple of months will move to the first wednesday of the month. this event will have the potential for various mediums & a facilitation fee. but i'll keep the free collage night on the third thursday of the month and it will return to its casual roots. a little something for everyone! plus, our waitlists have been getting longer and so i'd like to give people some more options.
posted by gl. | permalink | categories: artist's way
May 13, 2006
the ambassador
by sven at 9:52 pm
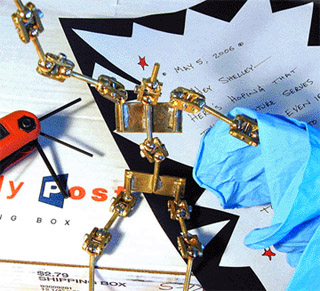
Remember that brass armature I completed back at the end of March? I've sent it (on loan) to Shelley Noble down in California. Shelley's been experimenting with different kinds of armatures for her stopmo production, "Halfland" -- and I wanted her to get to try out a ball-and-socket model.
She's very excited. And I'm just thrilled to add a little bit of my energy to this wonderful project. ...Best wishes, Shelley!
posted by sven | permalink | categories: miscellany, stopmo
May 12, 2006
kim graham sculpting class
by sven at 12:32 am
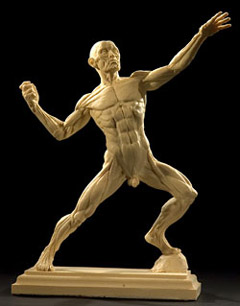
I just tonight discovered that Kim Graham is running a "Sculpting the Human Body" class Saturdays 10-2pm, June 3-24. In a heartbeat, I knew: I must be in that class!
Kim's studio is up in Georgetown, WA -- a three hour drive from where I live. But this is a person I'd eagerly travel great distances to learn from.
I met Kim last November at the art marketing workshop by Marty Rudolph. Kim's work is magnificent, gorgeous, astonishing. Her personality is electric.
I am so thrilled to have this opportunity!!
posted by sven | permalink | categories: classes & workshops, sculpture
May 9, 2006
mhcc visual arts student show
by gl. at 6:12 pm
i was asked with extremely short notice to participate in another art show! so if you're in the far reaches of gresham for some reason in the next couple of weeks, stop by the mhcc visual arts student show, which runs may10 (tomorrow!) though may26. the gallery is open monday-friday 9 a.m.-4 p.m. the reception is may 18 noon-2 p.m., but since it's such an odd hour, i don't expect anyone to go.
but if you get a chance to see the show, you'll see the originals of several pieces i've shown on the blog:
the original study for "notification," the piece I sold at the 4x4 show:

"born," an excerpt from an original poem i exhibited at gresham city hall last year:

"miracle," a simple but elegant einstein quote (and the only thing that's for sale):

a couple of cards I made for sven:


and a weathergram with an original poem on it:

i hope someone manages to see the show even though i probably won't see you at the oddly-timed reception. if you do, drop me a line, eh?
posted by gl. | permalink | categories: calligraphy, exhibits & events
May 8, 2006
event full
by gl. at 11:07 pm
last week was an eventful art week:
grace weston's show at city hall opened thursday. having seen some of her amazing work as promotional pieces at the job club for creatives, seeing them large & glossy was a treat: the pix shone with color, depth & clarity. very impressive.
ceramics showcase: one of my artist's way independent study students was at the oregon potters association show, and though i didn't find her until the very end, it was still an amazing thing to wander through. a piece i found especially fascinating was a set of cups with poetry set in raised braille. sven's eyes were wide the whole time and he was almost scampering in delight. we capped the evening by racing to the hawthorne bridge to watch the cinco de mayo fireworks above the river, reflecting in the skyscraper windows like digital confetti.
stonehenge & the maryhill art museum: a hidden gem about an hour and a half from here in the wild windy moors of eastern washington lies an unexpected stonehenge imitation, perfect for picnics and tremendous views. nearby is the maryhill art museum, which is actually quite charming on a quiet sunday afternoon, with historical artifacts from the queen of roumania, a native american raincoat made from seal intestines, lord leighton's lush raphaelite "solitude," rodin sketches & casts, and "visible storage" on each floor. they even had a contemporary art/farm synthesis exhibit, including an intriguing series of cryptic panels from megan murphy and work from bonnie meltzer! another visitor who was "pushing 80" was impressed by the exhibit and wanted to tell me about her life on a local dairy farm. add an outdoor sculpture garden and at least 20 peacocks roaming around, and the maryhill art museum is a very memorable place. plus there was a neat set of roads only accessible to pedestrians & bikes; after a tiny meandering cow creek you are treated to a tunnel of silver-barked trees that leads to a large deserted cow pen to explore and a meadow that may be a good place to watch for meteor showers. but oh, it's so windy! and there just aren't any good restaurants nearby. sven was also sad to discover the maryhill's "theatre de la mode" mannequins were on tour in seattle, but still, a good time was had by all.
pcc artbeat: another opportunity to see grace weston, who presented a lecture entitled "the lie that tells the truth" all about staged photography. grace creates staged vignettes that combine humour & wit w/ psychological tension. pcc bought 5 of her works earlier this year and so she talked about other photographers who use similar techniques and then talked about her own evolution from b&w 35mm film to controlled environments saturated with color. she even brought some of her props!
and last but not least, i leave you with an interesting article about different ways to title art.
posted by gl. | permalink | categories: exhibits & events, links
May 6, 2006
house adoption party
by gl. at 10:47 pm
we had a marvellous house adoption party monday to celebrate "adopting" the house and studio after living here for years and finally buying them (may 01 is our official date!).
we had savory snacks and waited for everyone to arrive, at which point we toasted the house with a game and a poem. then we all walked next door and toasted the studio, partaking of sweet snacks and sharing outrageous fictional futures (and later, exploring the handmade books and andy goldsworthy library).
since dan couldn't attend, he sent us a sweet little poem:
Check your attic
for a gnarly gnome
before you dare
to call it home
this became the basis for the "gnarly gnome hunt" to let people explore the house. we photocopied this gnome onto card stock and hid him:

we also read a great poem dayna contributed from afar: "house-keeping" by marge piercy.
in addition to poetry & games, we had an "enforced creativity" exercise: as each person arrived, sven asked them to write a fantastical fictional future for us in the house. this was met with some dubiousness, but when we shared them in the studio later (we each read someone else's future), they were all daring and imaginative and funny. in the next 10 years sven & i will apparently encounter intergalactic visitors, willie nelson, the spirit of mothra, the russian mafiyah, an unruly llama and another gnome. in addition, our home will host a shanty town for hp lovecraft devotees, a mysterious alien robot and angels in 3-piece suits who will rid the world of nigerian spam. the shirts from our closet will go dancing on powell butte and our foil-lined house will be featured in modern art magazine. we will travel with an intergalactic musical theatre troupe, begin to sell organic ant products and run for president, ushering in a new golden age of american creativity. see? we'll always have something to look forward to! even better, we now have a rich supply of unexpected imagery and poetry to work with in the future.
and though we did not ask for physical gifts, we got some wonderful ones, anyway. for instance, we received an amazing hand-made alphabet block print from alex:

and a hand-painted card from his wife, amelia.
jalex brought us a cutting of a plant that's been with her for as long as sven's known her, and it even used to live in the studio when it was jalex's home. we also received experimental fondue cheeses from laura; kristen & todd brought marscapone to share; colleen brought homemade chocolate cupcakes; and michaelmas brought two of everything saint cupcake had left except for the banana chocolate-chip cupcakes (because c'mon! who likes those?).
thanks to all, near & far, who contributed to our house adoption party! you are the heart of the studio!
posted by gl. | permalink | categories: studio space
May 3, 2006
new project: cold foam puppet
by sven at 10:21 pm
After what seems like forever, I finally got back into the studio tonight. I'm starting a new project: making a stopmo puppet with "flexible expanding urethane foam" (cold foam) and a latex skin.
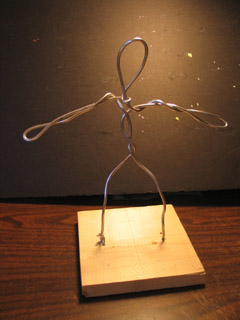
The first step is to make a sculpt out of oil-based clay. Then I'll make a mold out of ultracal 30. Then I'll paint in liquid latex and let it dry. Then I'll put the puppet's armature into the mold, and fill it with the expanding foam.
In making the sculpt, you need an armature to help support the clay. This is NOT the same armature that will be inside the finished puppet. For supporting the sculpt, I used 1/8" thick aluminum armature wire. The base is a piece of wood that I've drilled several holes in, so I can weave the wire through.
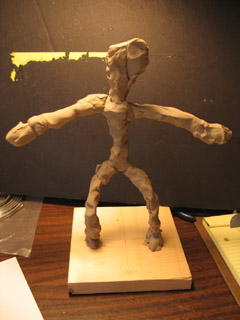
I've been experimenting with different types of oil-based clay. From what I've read, the two most popular brands are Roma Plastilina Clay and Chavant Plastiline. Plastilina often has sulfur in it, which interacts badly with latex. Chavant produces an oil-clay called "NSP" (Non Sulphurated Plastine) that's safe; I don't think Roma has a similar product.
According to the Chavant website, there are only two distributors of NSP in Portland: Stephenson Pattern Supply and Lash Quality Molds. These aren't your typical art supply stores; you're only going to know that they exist if you're doing pretty specialized work...
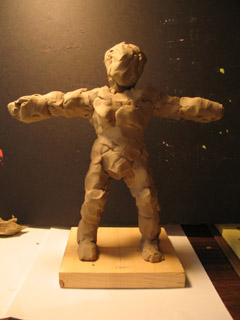
Stephenson Pattern Supply is a wholesaler in the industrial district that has a sign saying they don't accept orders for less than $150 of materials... They mean to scare off browsers; I was fortunate, and they deigned to sell me four pounds of NSP and a bag of ultracal 30 -- despite what the sign said. They're the only place in Portland that sells ultracal 30. [Interesting note to those in the know: This must be where Ralph Cordero shops -- there was a Toxic Mom's Studio sculpture in the lobby!]
Lash Quality Molds is a one-woman operation in an unmarked building way out by the airport. You have to call for an appointment. The owner (whose name I forget at the moment) was a neat person; she gave myself and another fellow a tour of the premises. I saw silicone molds being assembled -- and a monumental sculpture in the back room that was being prepped for casting. The owner recommended that I try J-MAC Classic Clay. It's non-sulphur, and she says the "brown firm" outsells everything else she carries by 80%. Well... I had to give it a try!
Comparing the NSP to the J-MAC, the NSP is more oily. The J-MAC feels more like water-based clay. ...I think I like the J-MAC a lot!!
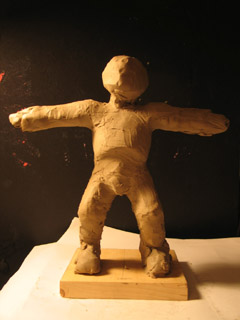
In all honesy, I've hardly worked with clay at all previously. This is very new to me -- but it's feeling really right.
I do know that I generally like to work reductively -- so I began the sculpt by building up way more clay than I'm going to need. I don't have a drawing that I'm working from; I'm improvising... Happily shaving the lumpy mass into smooth volumes with my one trusty loop tool. I find myself starting with the ribcage, and then everything else evolves from there. The front of the ribcage arcs around to the small of the back; the spine is S-shaped; there's a line that swoops around from the butt to the knee... And so on.
I'm charmed. It's like learning constellations: From the Big Dipper, you arc to Arcturus -- and from Arcturus, spy Spica. :-)
