you are here [x]: Scarlet Star Studios > the Scarlet Letters > tutorial: desktop ventilation
<< before
art updates
after >>
mhcc calligraphy: class 10 (final project)
March 22, 2006
tutorial: desktop ventilation
by sven at 4:55 pm
Many of us who are working on stopmo puppets labor in dungeon-like basements. Although we know that we should have "good ventilation" while working with toxics, it just doesn't seem possible -- so we play dumb. This is not OK!
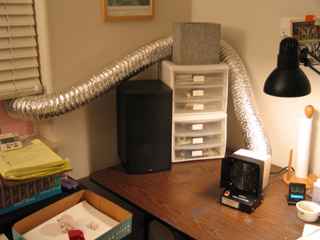
In this post I'll show you how to build your own desktop ventilation system. Please -- if you work with materials such as super glue, epoxy glue, epoxy putty, barge cement, turpenoid, acetone, or soldering wire while making your puppets -- strongly consider making a ventilation system siimilar to this one for yourself!
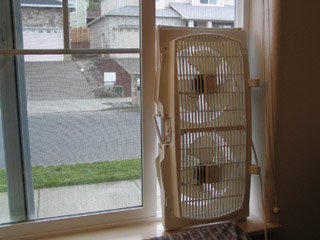
It takes a while to get new a ventilation system set up. In the meantime, at least put a fan in your window.
[Addendum: And be sure that the fan is sucking air out of the room, rather than blowing air in.]
When you're working on something toxic at a desk, you usually have your face right over the nasty stuff. Opening a window will help keep the fumes from building up in the room -- and using a fan to suck the fumes out will help even more. If you're just using a fan, though, you're still breathing in the fumes as they rise up from your work.
What you want is for the fumes to be actively sucked away from you, in a way where they don't go past your face as they escape.
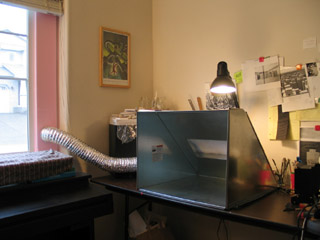
My first strategy for good ventilation was to purchase a Paasche hobby shop spray paint booth ($269 before shipping). But unfortunately... I HATED it!
The spraybooth takes up my entire desk. And although it's collapsable, it is not nearly as easy to set up as I had initially hoped.
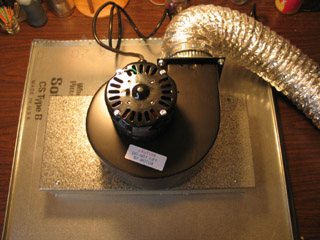
Storing this thing is another problem. Look at how huge that motor is! ...Much discouraged, I wound up returning the spray booth to the store where I had purchased it.
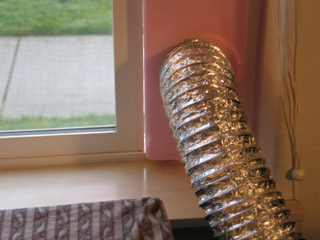
One thing about the spraybooth solution that did work well was the way that I vented it out the window. The insulation foam doesn't have to live there forever; I just pop it out of the window between work sessions. [In this picture it looks like there's a crack of light between the foam and the sliding window -- but I realized later on that the foam could fit even more snugly if I just pushed it into the window frame a little farther.]
...After finally admitting to myself that the spraybooth wasn't going to work out, I resumed research. Luckily, right around this time I was exploring soldering. I stumbled upon this useful quote on the Art Glass Association's website:
"Most fluxes contain zinc chloride that is harmful to the skin and eyes, and toxic if ingested. Read the labels on all chemicals you use for safety precautions. Flux also produces fumes when it is heated (as in soldering) and you need to work in a well-ventilated area.Well-ventilated means MOVE THE AIR - DON'T JUST OPEN A WINDOW. There are small, portable fume removers made specifically for eliminating flux fumes, available through your local stained glass retailer. If you find that you are getting frequent headaches or sinus problems, you may be breathing fumes. One rule of thumb - if you can smell what you're working on, you probably need to move the air a bit more, or invest in a fume remover."
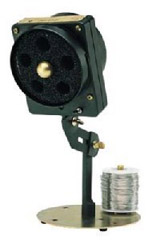
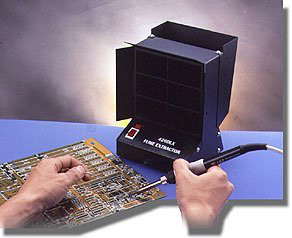
This site on soldering safety recommended the Edsyn Fuminator for soldering fume extraction. That was the most explicit product recommendation I could find. Hunting around on Amazon.com and elsewhere, I found that the Fuminator's main competition seems to be the Xytronic 426DLX fume extractor. ...So the problem became how to choose between the two.
What's important here? First of all, we need something small that won't take up a lot of desk space. Folks doing soldering (unlike folks doing airbrushing) have this same need -- which is why fume extractors are also a good option for puppet-makers. Second, we need something that has powerful sucking capabilities.
Airflow is measured in CFM (Cubic Feet of air per Minute). According to this Fuminator product info sheet, "the maximum air flow with both filters installed is 21 cfm." According to this Xytronic product info sheet, the 426DLX's "max. air volume" is "95/115 CFM". So, although the Fuminator has a sexier design and is more expensive ($79.95 at Amazon.com), it appears that the Xytronic 426DLX is really the better purchase for our purposes.
[This write-up on the Paasch spray booth says that it "provides approximately 80 to 100 LFM air movement." That's Linear Feet of air per Minute... These companies certainly don't make comparison-shopping easy!]
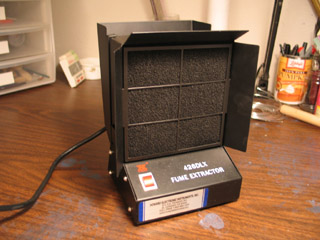
At present, the Xytronic is being sold for $59.95 at Amazon.com. With shipping and handling, it cost about $64, and took about a week to arrive.
One thing that I did not 100% understand when I ordered the Xytronic is that tabletop fume extractors aren't intended to be attached to a hose for venting. The fan sucks air through a carbon filter, and simply vents out the back. This raises a question: Would it make more sense just to buy a simple fan? I don't think so. What we need is a very small, very powerful fan -- which is what the fume extractors have. It's hard to find plain fan with these qualities.
...And, even though the fume extractors weren't built to attach to ducting, I feel it's easier to attach ducting to these than it would be to a fan. So I'm sticking with the Xytronic.
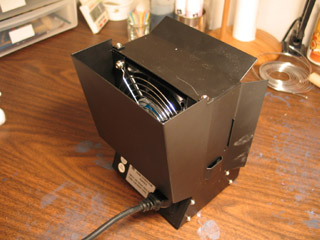
As you can see here, the Xytronic has a plate on its back that directs air upward and out of a slot on top of the device.
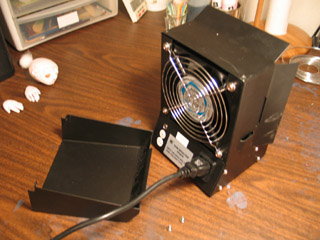
Removing the back plate was a simple matter of taking out a few screws. In order to maximize air flow, I also chose to remove the filter. The filter is supposed to be replaced every month, so the device is built to make removal of this part easy.
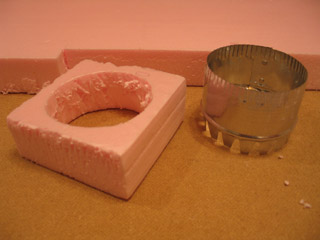
What we need now is an adaptor, so we can attach ducting. I started by measuring the back of the Xytronic, and then cutting out a square of insulation foam that matched its dimensions.
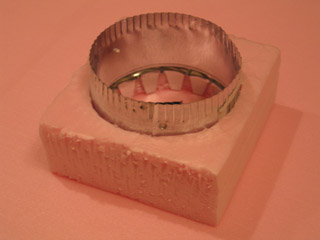
If you go to Home Depot and look in the aisle where they carry air ducting supplies, you should be able to find an adaptor that looks like the one above. Trace the adaptor's outline onto the foam, and then cut this circle out with a steak knife. Trim as needed so you can fit the adaptor snugly into the hole.
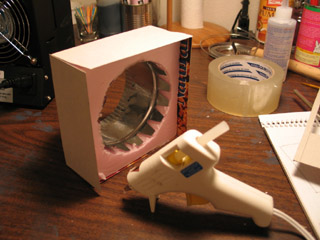
This next step is mostly just to disguise the ugly pink foam. I measured the sides of the foam square, and cut out rectangles of cereal box cardboard to cover them. The cardboard is wider than the foam on three of the sides so we can easily fit it around the Xytronic.
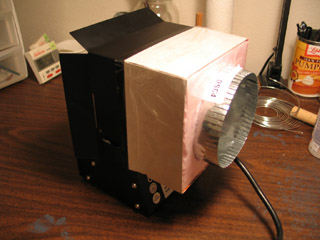
Press the pink foam square against the back of the Xytronic. The cardboard lips should wrap around the top and sides of the device. Now attach this adaptor that you've made onto the fan using clear packing tape. Seal up any cracks you notice where fumes might escape.

The ducting is the same kind that comes out the back of a clothes dryer. Attach it to the tin ducting adaptor using a hose clamp. The foam that sits in the window frame also has a tin adaptor in it, and the ducting is attached with a hose clamp there, too.
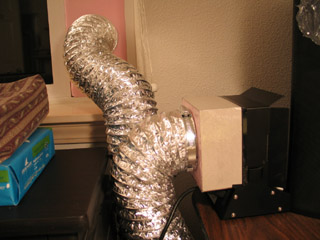
Here's the completed desktop ventilation system, tucked away at the side of my desk. The ducting is still a bit awkward -- but it's a far better solution than the spraybooth.
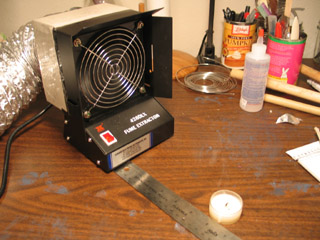
But wait! There's one more thing that you need to do. You need to understand the range at which the ventilation system is effective.
Turn on the Xytronic. Light a candle, and then blow it out. If everything is working properly, the smoke will be sucked into the ventilation system. OK -- now lay down a ruler. How far away can you pull the candle before the smoke just wafts up into the room?
I found that the suction is only effective when the candle is within 6 inches of the fan. That's not really very far -- but remember, this system is designed to deal with small jobs, like when you're using epoxy glue or soldering. Be mindful of the range when you work -- and even when the Xytronic is turned on, be sure to wear a respirator rated for organic solvents for additional protection.
Good luck, and play safe!
posted by sven | March 22, 2006 4:55 PM | categories: sculpture, stopmo