you are here [x]: Scarlet Star Studios > the Scarlet Letters > brass armature complete
<< before
process and product
after >>
trixie update
March 30, 2006
brass armature complete
by sven at 11:59 pm
Tonight I finished making the brass armature!
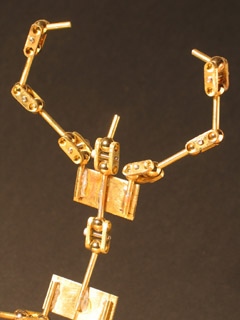
There are more pictures of the full armature at the bottom of the post. Let me first talk a little more about its construction...
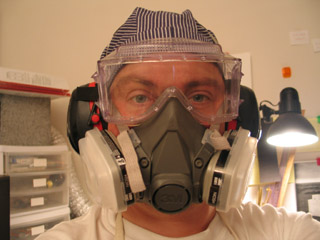
Here's the get-up I've been wearing during the making. The cartridge respirator may be over-kill -- but it has a tighter fit than a paper dust mask, and I really don't want brass dust in my lungs. I've recently purchased a welder's hat; brass filings were actually hitting me in the forehead and getting in my hair while I was grinding. I've replaced the AOSafety brand goggles in this picture... They have their ventilation holes on the bottom rather than on the sides, and occasionally dust was flying up at my eyes through them.
Dust has been getting everywhere... I think my next safety purchase needs to be a shop vac that I can clamp to the table while I'm grinding -- suck the dust away as it is made, rather than having to clean it up later.
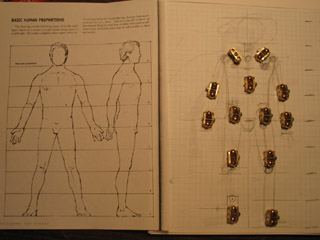
For this project I'm starting with an armature design, rather than a character design. To figure out how the armature should be proportioned, I consulted "Designing the Doll: From Concept to Construction" by Susanna Oroyan. This puppet will be eight head-sized units tall.
The armature is 10 inches tall. That's a little larger than the 9" = 6' scale I've been aiming at -- but I felt it needed to be bigger to accommodate the width of the joints. Oh well; I guess it will wind up being a monster of some sort.
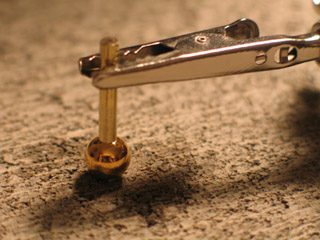
The balls for the joints are hollow brass beads. I widened the holes to 1/8" using a drill. The existing holes acted as pilot holes, which made things very easy.
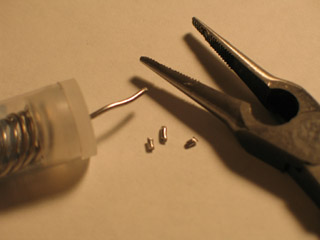
To attach the balls to the rods, I snip several very small pieces of solder and put them inside the hollow bead. Then, I put the rod through the bead. I clip one end of the rod into the "helping hands", and let the ball slide down onto the table. ...Or rather, down onto the cinderblock that I was using as a table while soldering. The cinderblock actually made for a very nice work area -- it raised everything up to a comfortable height.
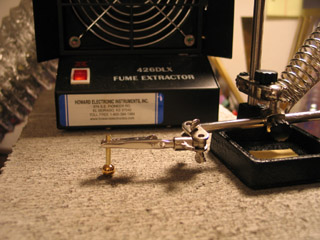
I used a butane micro-torch to heat the ball, melting the solder inside. A soldering iron would not work for this project -- it has to be a torch. ...After heating the ball (about 6 seconds) I'd use an eyedropper to shoot water at it. Then I'd grip the mostly-cooled workpiece with my needle-nosed pliers and quench it in a jar of water. I realize that this may weaken my joins -- but it seemed that the hollow beads were trapping heat, and for such a time-consuming project I was unwilling to spend additional time waiting for them to cool on their own.
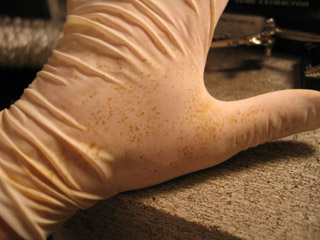
I've read in several places that brass reacts with latex... Check out the discoloration of my glove in the photo! It may be that this wasn't due to the brass, but rather due to the solder flux and solder fumes -- or the invisible layer of oil on the brass -- but I suspect it's the brass. Subsequently I switched to my nitrile gloves. They were also discolored somewhat, which surprises me.
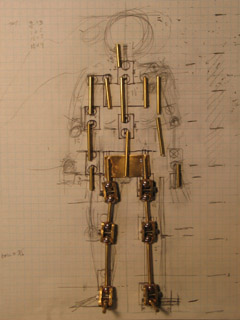
I got pretty much everything from the hips down done Sunday night. I meant to finish the project on Monday -- but I caught a cold and couldn't muster the energy to go back to the studio til today (Thursday). ...I gotta say, compared to making the sandwich plates, cutting rod and soldering on beads is pretty fun. It goes quickly, and requires very little measuring.
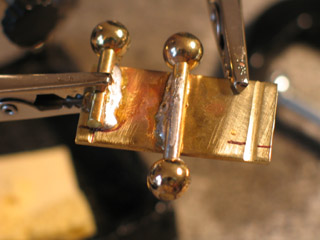
To attach rods to the brass strips that would be the torso, pelvis, and feet, I first created little grooves for them to sit in. I started the grooves with a jeweler's saw, then deepened them with a triangular needle file, and then rounded the grooves with a round needle file. Soldering the middle rod in the pelvis and torso was tricky -- the "helping hands" couldn't reach. I wound up using small C-clamp, which the "helping hands" could then prop up.
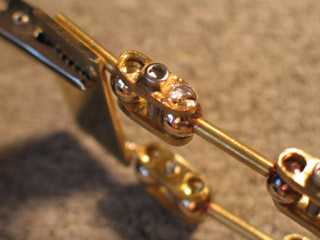
I knew that I didn't want to have double-jointed elbows and knees -- so at these points on the armature I "froze" one of the balls in each joint in place with solder. This worked out very well -- better than I expected, actually...
See, as I had been creating the "barbells" for the limbs, I discovered that if I overheated the second bead, the solder job on the first bead might also melt. I was worried that the problem would be even worse when I was freezing beads in place, because I'd have to be directly heating a bead I'd already done solder work on. Wouldn't the previous solder job quickly melt and be ruined? ...Well, apparently not.
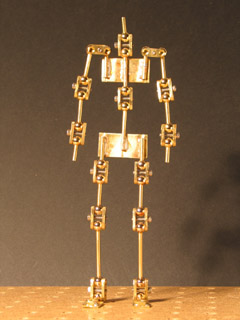
And here we are! The completed armature!
It seems to work very well... But I have had to make some repairs. There's more stress on the joints when you try to spin them in place than when you move them from side to side. In a few places the rod broke loose from the bead when subjected to this stress. It wasn't hard to fix, though -- at least not while I had all my soldering gear already out.
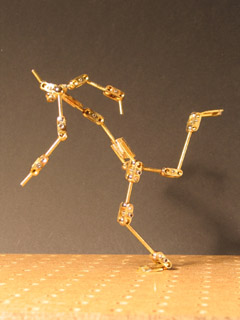
The armature easily holds its own weight while standing on one foot and leaning. I even posed it at an extreme lean so that the "head" was an only inch from the floor; the ankles still held their pose!
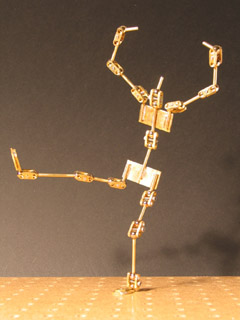
In terms of attaching a head and hands, I think what I'll do is epoxy glue some square K&S tubing onto the wrists and neck. Then I can use the plug-in system that I've explained previously, which I used on the Percy puppet.
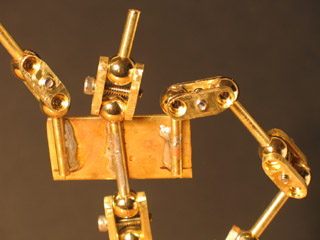
Looking back at my records, it appears that it took just a hair over 19 hours to make this armature. That doesn't include the first attempt at mass-producing joints, which I consider a failure. Yowch -- 19 hours is a lot of labor for just one of these...
What's most important here, perhaps, is that I now have a prototype armature that following models can build upon. Mass-producing a generic joint worked OK -- but I think on my next model I would instead use long sandwich plates for the upper legs and the upper arms. Every place there's solder, there's a potential break point; using long sandwich plates would automatically eliminate four solder points on each limb.
I'm proud of this piece... But getting this taste of what a metal-jointed armature can be like -- it makes me want to be able to machine joints that are even more anatomically correct (e.g. knees that can't bend sideways). You realize what that means? ...I'm fantasizing about getting a micro mill!
posted by sven | March 30, 2006 11:59 PM | categories: stopmo