you are here [x]: Scarlet Star Studios > the Scarlet Letters > tutorial: how to make a puppet's limbs removable
<< before
puppet #2: construction notes
after >>
happy birthday, blog!
February 11, 2006
tutorial: how to make a puppet's limbs removable
by sven at 9:26 pm
If you're making stopmo puppets, then this is just a fact of life that you have to accept: wire armatures break.
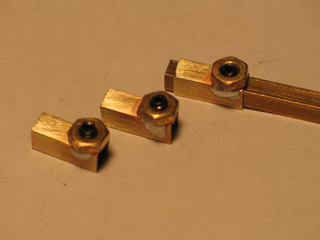
A lot of work goes into making a good looking head and hands... You want at least to be able to save these parts if an armature breaks. So wouldn't it be a good idea to make an armature with removable parts? I know of two people who have systems for removable parts: Susannah Shaw, and Juergen Kling (follow the "shop" link). Both work on similar principles, but Susannah's is somewhat easier for the amateur to accomplish. Her's is the one that I'll be demonstrating here.
Here's what Susannah says in her book, "Stop Motion: Craft Skills for Model Animators"...
"It's always a good idea to be able to remove head, hands and feet, as they often need extra work -- so glue on a section of square brass sleeving K&S of sizes that will slot into each other for arms and hands, and head and neck. K&S is square brass tubing that you can buy in any model shop. It comes in different sizes allowing a smaller size to fit into a larger, giving a firm, well-located joint. (K&S is only available in imperial sizes.) An M3 nut is soldered onto the larger piece of K&S at the wrist, neck and ankles. This allows the grub screw to be used to hold the smaller size of K&S in place. This in turn holds the wire in place. The strands of wire are then epoxy glued into the relevant pieces of K&S to form the armature." (p.53)
Susannah's book is excellent -- probably the best general book on stopmo available at present -- go buy it! ...However, it took some work to figure out exactly how to accomplish what she describes and to find U.S. equivalents for the parts, so I offer this tutorial as a supplement. [Refer to my most recent puppet work to see these joins in action.]
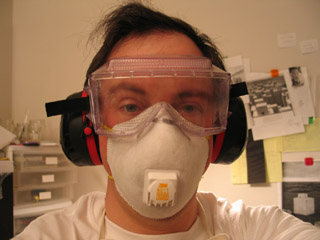
Safety first. We're about to create brass dust -- you don't want to breath that stuff. So wear a dust mask. The ones that have a funny little plug in front are more comfortable. Wear goggles that protect your eyes on all sides; tiny bits of brass most definitely do shoot up at your face. Cutting metal is loud... I recommend wearing earplugs, which are cheap. I bought myself some safety ear muffs, which last longer, are more comfortable, and don't get lost. All of these things should be available at your local hardware store. They're also available at Amazon.com.
"K&S" is a brand name. K&S has a standardized "hobby metal center" display that you can find in many stores; it looks like this. Here in Portland, I know that I can find K&S at Ace Hardware, Columbia Art and Drafting Supply, a model railroad store, and a hobby store that specializes in remote-control cars and airplanes.
The two pieces of square brass tubing that I'm using are 5/32" and 3/16" in diameter. They fit snugly within one another, but are able to slide easily. Each piece is 12" long, and costs roughly $1.50.
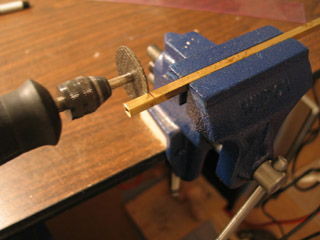
I've found that my join only needs to be about 1/2" long. To cut the tubing, I recommend using a dremel tool with a fiberglass cut-off wheel. A hacksaw works OK -- but I felt that I got a sloppier cut. Either way, you're going to need to hold the tubing steady while you saw. If you're using a hacksaw, you might be able to just hold the tube against a table. However, any sort of clamp will make the job easier. Here, I'm using a 3" vise that I bought for $20 at Home Depot. It just clamps to the table -- so you don't have to drill screws into your desk, which is nice. ...This is my first vise, and it has made my work SO much easier. :-)
The two pieces of K&S don't have to be the same length. If you want them equal, though, it works just fine to slip one inside of the other and then make your cut. An "ultra fine point" sharpie marker works well to mark your measurements on the brass. After you've made your cut, there will probably be metal burs; you can use the flat face of the cut-off wheel to grind them down. Watch out: after cutting, the brass is hot!
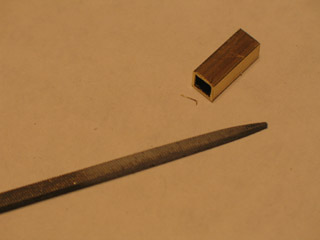
I have a small square-shaped file that's very useful for getting rid of burs on the inside of the tubing. This is necessary, or else you won't be able to fit the smaller tube back inside of the larger. This file is also a very useful tool for picking up small pieces of K&S and putting them in the vise.
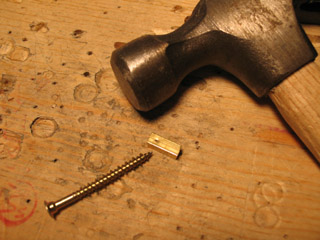
Next, we're going to drill a hole in just the larger piece of K&S. At this point I lay one of the nuts that's going to be soldered on on top of the K&S to figure out where the hole goes. I mark that spot with the sharpie. When you drill, the drill bit is going to want to slide around on the metal's surface. To fight this, I made a little dent in the K&S using a spare screw I had lying around. This will help get the drill started.
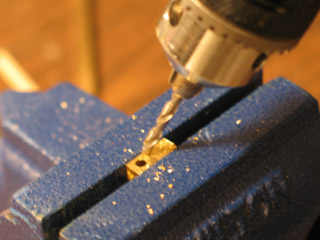
We're going to drill the hole in the K&S with an electric drill. Look at your drill bits; if they say HSS (High Speed Steel) on the side, then they're adequate for cutting soft metals (brass or aluminum). If you cut thicker material than this tubing, be aware that you'll probably want some sort of lubricant -- even just using a little water will help. I've broken two 1/16" HSS drill bits during the past few weeks, so I've replaced these smallest bits with carbide, which is sturdier.
To get a really exact hole, I started with a smaller bit, and then enlarged it with a bigger one. My first hole was 1/16"; I enlarged it to 7/64". Remember that you want the hole to be a little larger than the diameter of the screws you'll be using.
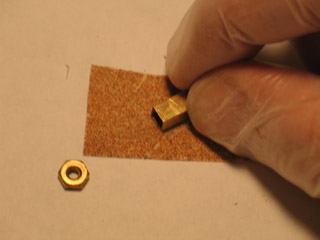
OK, we're about to solder the nut onto the tubing. I've tried using super glue and epoxy putty as alternate means for adhering the nut: neither worked. When you tighten the screw, it acts like a tiny, powerful jack and breaks the glue or tears the epoxy putty. The only bond that's going to be sufficient is molten metal. It's got to be soldered on.
The nut has to be made of brass. I'm not sure what normal nuts are made out of, but when I tried to solder them to the brass tubing, I couldn't get a bond to occur. Soldering brass to brass, however, works great.
The brass hex nut is measured as "4-40"; that's one size smaller than 6-32. What Susannah calls a "grub screw" seems to be sold as a "socket set screw" in the U.S. Get yourself socket set screws that measure "4-40 x 1/8". These are the smallest nuts and screws that I could find. Happily, both are available at my local Ace Hardware store. The nuts cost me 11 cents each, and the screws cost 13 cents each. Get yourself a bunch, so you can feel free to make mistakes.
To prepare the surfaces for soldering, go over them with sandpaper. Make sure that you do the sides of the K&S and the nut, as well as the faces that are going to be touching. It's actually the sides where the bond is going to happen. You can't see it, but there's a film of oil on the metal that will prevent the bond; sanding removes it. I wore gloves at this point to avoid adding any fingerprint oil back into the mix.
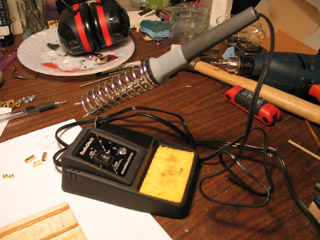
I got this soldering iron for about $30 at Radio Shack. You can get soldering irons for as low as about $7, but I wanted the one that had a built-in holder. (I'm paranoid about burning down the house.)
For solder, I chose a wire with a rosin core so I wouldn't have to apply flux in a separate step. The "rosin core" is liquid acid that makes the brass more receptive to bonding. I chose a very fine solder, "diameter .050", made of 60% tin and 40% lead. I don't know if this is the very best solder to use, but it seems to have worked well. I found it at Ace Hardware.
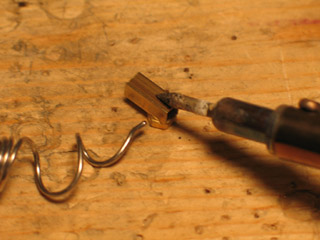
The trick with soldering is that you don't actually touch the soldering iron to the solder. Instead, you heat up the brass and then touch the soldering wire to it. I found that it worked well to put the socket set screw into the nut, and then put the nut underneath the K&S with the screw nested inside its hole. This allowed me to hold the whole thing down with the soldering iron from the top, giving me space to touch the soldering wire to the sides, where it would run down onto the edges of the nut. [The photo should help make this clearer.]
If you overheat the work piece, it will give off smoke -- and that smoke has lead in it. Very toxic. Have the best ventilation that you can manage for this part of the job . I switched to my "organic solvents" respirator for this part of the work... I don't think that this is quite the right safety measure; I'd appreciate it if anyone who knows better would let me know how best to deal with fumes while soldering.
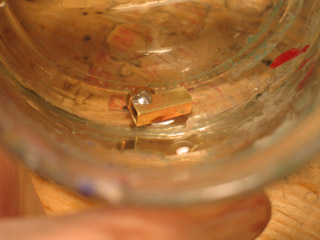
After I finished adding solder to the piece, I picked it up with the little square file and dumped it in a jar of water to cool it off. ...Voila! A join that will allow you to make removable puppet limbs!
posted by sven | February 11, 2006 9:26 PM | categories: stopmo