January 2006 archives
you are here [x]: Scarlet Star Studios > the Scarlet Letters > January 2006
<< before
December 2005
after >>
February 2006
January 30, 2006
sculpting: new test snippets
by sven at 12:30 am
I've done a bunch of little test snippets with different sculpting materials this past week. Lots of things to show you!
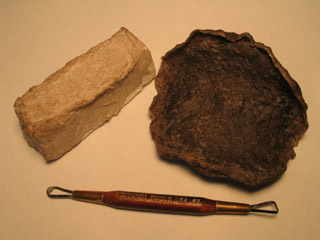
The papier mache mash I wrote about on Jan. 23 has finally dried. I think it took about five (maybe six) days. The stuff that I baked turned dark and tough; it reminds me of a chew toy you'd give to a pet dog... I'll never try that again. The unbaked stuff turned a pale gray; it has potential. I'm thinking about how I could use it for stopmo animation sets.
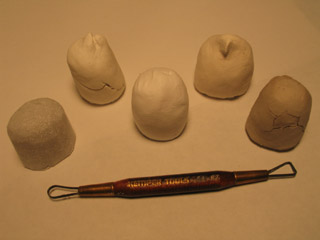
Here are several test "fingers" I made using different materials. From left to right:
- insulation foam
This is a bit of carved insulation foam without anything on it. The rest of the tests involve spreading different substances on top of one of these. - "Sculpt It!"
This feels like a high-grade Play-Doh; sort of soapy, very slightly springy. When I try to put it through the pasta machine, it becomes flakey. Loop tools work poorly. It smooths easily with fingers. It starts feeling dry to the touch after 10-15 minutes, but remains workable longer. It shrinks while drying; since it was applied over a foam core, this made it crack. - Foam Putty
I found this at a model train store. It has a very fine powdery grain, like spackle. It has the consistency of very light frosting. It can be spread, but is impossible to sculpt; it's only good for filling in cracks in pieces of foam, I think. It didn't crack while drying. - Creative Paperclay
The fiber content is very fine. Smoothing with fingers works OK; water helps. Loop tools work pretty well, but leave a rough grain that needs smoothing; sometimes using the loop tool leads to crumbling. Doesn't go through the pasta maker well. Doesn't adhere to the foam core easily. Cracked while drying. - air-drying clay mixed with wood flour
Wood flour is sawdust that's been ground into a fine powder. Here I was trying to reproduce the Noah's Doll technique. It was difficult to mix the clay and wood flour -- very crumbly. When I added water, it became very messy. I think perhaps I'm missing an ingredient: maybe wheat paste. Once I got this stuff mixed, it was indistinguishable from regular clay. Cracked while drying
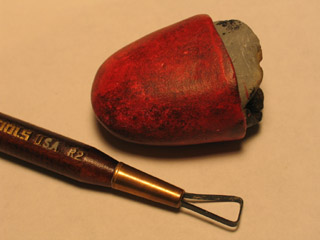
I wasn't very happy with any of the preceding materials. Then I had an epiphany... Try sculpting in three layers: a core of foam, covered with a hard shell of epoxy putty, and a "beauty layer" of Super Sculpey on the outermost surface. I tried it -- and was thrilled! This is technique I've been searching for, like, forever. Now it's just a matter of refining it.
I particularly need this technique for making stopmo puppets... Last weekend I was brainstorming, doing sketches of characters that I could turn into new puppets. In the process, I discovered that most of my characters have over-sized heads. This is a big problem for two reasons. One: the weight of these heads -- if they're solid -- is going to bend my puppets in half; they won't be able to stand up. And two: Super Sculpey doesn't bake well if it's more than about half an inch thick -- solid heads would either crack, or not cure at all. Solution: make hollow heads!
[Added benefit: Super Sculpey for the top layer can be put through the pasta machine. When you lay Sculpey sheets over the epoxy putty shell, you know exactly how thick they are. That means that it should be really easy to guess how long the head needs to bake. ...With the Moon Baby puppet, I had a terrible time trying to figure out what my baking time should be.]
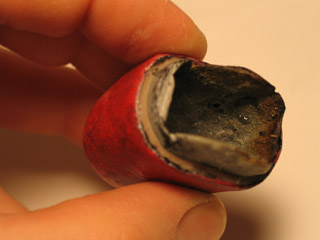
If I make a hard shell of epoxy over a soft base form, it should be easy to hollow it out to make a hollow puppet head. How should I do this? I've come up with a five possible options so far, and am still exploring...
- Work on a base of foam, dissolve it out using acetone.
- Work on a base of foam, melt it out with a heat gun.
- Work on a base of foam, use a rasp to rake it out of the shell.
- Work on a base of plastilene, use loop tools to dig it out.
- Work on a base of plastilene covered with cling-wrap, dig and pull it out.
On the snippet above, I tried the acetone trick -- using nail polish remover, actually -- but it didn't work for me.
Then I tried a heat gun; that worked very well -- but it releases toxic fumes, so this isn't a very good option.
I have only just purchased a suitable rasp -- I still need to try using it. (It's what's recommended in the Noah's Doll tutorial.)
Plastilene: that's probably the way to go. It's what I try out in this next experiment...
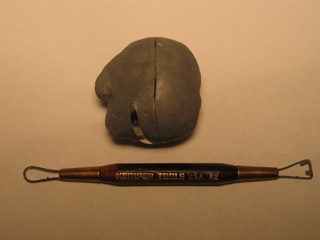
I didn't really get the photos I'd like to have for explaining this next thing... What you see above is a piece of Roma Plastilene that I've already covered with plumber's epoxy putty. I only wanted a very crude form; detail work would go on top of this, using Super Sculpey. I roughed out a nose and a chin...
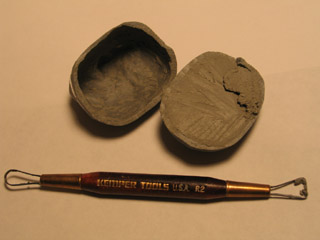
I cut the epoxy putty shell in half with a hobby saw. In this picture I've already scooped the plastilene out of half of the shell -- but you can see that the other half is still filled.
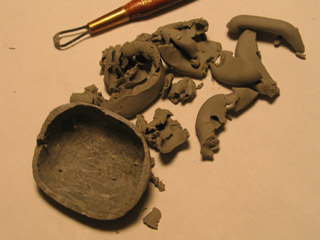
This picture maybe gives you a better sense of what it's like to dig out the plastilene. It comes out fairly easily -- but leaves a waxy residue. On my next try, I'm planning on covering the plastilene form with cling-wrap; that ought to make it easier to get out cleanly.
When I dug out the plastilene from the first half, I was dismayed to discover that the shell wasn't entirely solid yet. It was definitely firm -- but bendable. I was worried that the plastilene had reacted with the epoxy chemically, preventing it from curing. Since I'd been working outside on the porch, to give myself good ventilation, I also wondered if cold weather was impeding the cure...
To my great relief, the epoxy was rock hard the next day. Lesson learned: 20-minute epoxy is workable for five minutes, and hard to the touch in twenty -- but it may be a few hours before it's fully cured.
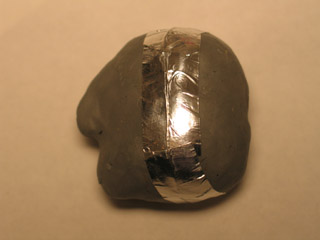
Here I've taped the two halves of the head back together using metal tape. I found it at G.I. Joe's -- a NorthWest automotive and sporting goods store -- in the auto section. I've been told you can also find metal tape in with the plumbing supplies at a hardware store or at Home Depot. My thinking here: since the Super Sculpey layer is going to be baked, I want an adhesive that's going to hold up under heat. Metal tape seemed right for the job.
I haven't gotten around to putting Super Sculpey on this snippet yet -- but I'm very pleased at how firm and lightweight it turned out to be. Yay!!
Oh... I should mention that the previous snippet -- the red tongue-like one -- was painted with acrylics. I tried "tonal underpainting" for the first time. It's a technique that was used by the old masters, where they would do their painting in black and white, and then "colorize" it with glazes. For the "tongue", I sponged on a black undercoat, sponged on a speckling of white, and then used a large soft brush to apply thin coats of red. I'm simply in love with the results. It's got such depth of color... I'm eagerly looking forward to exploring this painting technique further.
posted by sven | permalink | categories: sculpture, stopmo
January 29, 2006
now showing: "Experiments in Super8" and "Two Men, One Pair of Glasses"
by sven at 12:30 am
You can finally see the work I did for my Super 8mm Filmmaking class!
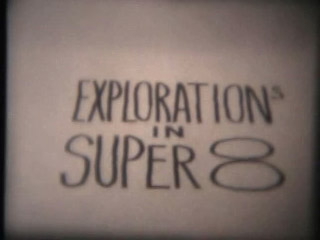
Here's my final project, "Explorations in Super8". It's 3min 14sec in length, so expect a long wait while downloading. Sadly, more image quality was lost when I went from Super8 to DV. Sigh... I knew going into this project that I was working in a lossy medium.
I've previously written in-depth descriptions about how each effect was achieved. You may want to refer back:
Amusing / irritating note: When the film was finally developed, I discovered that in several shots the camera is zooming out. I didn't do that. What happened? There was a knob on the lens that you would rotate to adjust the zoom. While I was shooting, its own weight would cause it to slowly and imperceptibly descend from its initial position -- thus causing the zoom effect!
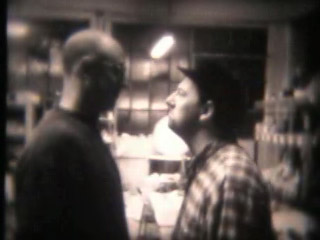
As a bonus, here's the "Two Men, One Pair of Glasses" film that Andy Weinstein and I made as a quick in-class exercise. No one else wanted it, so I figured I'd use the reel for practice doing video transfer -- before potentially chewing up or melting my own precious celluloid. This is also 3min 14sec in length.
It's out of focus a lot of the time... Let's you and me say that was intentional: the camera man needed glasses too. ;-)
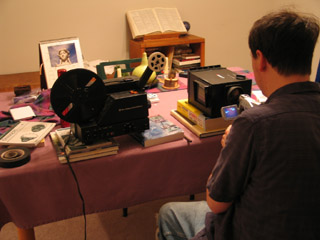
How did I get the Super8 footage digitized? Here's a shot of me setting up the video transfer. Inside that black box is a mirror, so the light from the Super8 projector can shoot directly into the DV cam. Very fussy work, trying to get everything lined up correctly and in focus. ...And then you turn off the lights.
posted by sven | permalink | categories: classes & workshops, movies, stopmo
January 28, 2006
mhcc calligraphy: class 3 (and artist's way prep)
by gl. at 12:18 am
shhhhh! i skipped calligraphy class today! i was on the way there and turned around about stark and came back home. well, actually i stopped at fred meyer first for some curtain rods for the curtains i bought at craft warehouse that i want to hang in the studio -- except it turns out that i just bought giant fabric, not curtains at all. heh.
i have the first artist's way independent study student of the new year coming over tomorrow, which means the studio had to get a shakedown today. we do pretty well keeping the studio clean when we run classes and host events, but if it sits too long between guests we pile things up and don't dust, so when classes begin again i have to mop & wipe the counters & clean the sinks (ink in sinks!) & dust, etc. etc. earlier in the week sven rented a steam cleaner so all the carpets are clean.
each time i run the artist's way creative clusters or host an event, we tend to make improvements to the studio. for instance, for the first cluster in this studio sven made the flat files and hung the star lamps in the living room. for the fall clusters we added a scarlet star lamp on the porch and a small red cd player, along with clearly labeled, consolidated & organized art supplies in the kitchen. this time the spring clusters will get pretty, colorful pots on the steps and a "scarlet star studios" sign below the window, as well as a large "pocket" curtain holding an array of small treasures & delights. the kitchen now holds colorful glasses, mugs, plates & special tea.
posted by gl. | permalink | categories: artist's way, calligraphy, studio space
January 27, 2006
safer - but still not safe enough
by sven at 8:03 am
Epoxy putty is an amazing sculpting material... But it gives me the willies.
So far, I've discovered several types of putty: plumber's epoxy putty, Magic Sculpt, Apoxie Sculpt, milliput, and Green Stuff. All of these brands come in two parts -- a resin, and a hardening agent -- which you knead together to activate. Working time varies from about 5 minutes to 3 hours, depending on which product you use. When the putty dries, it's extremely sturdy -- but can easily be sawed, drilled, or sanded.
However, epoxy resins are extremely toxic. This fact seems to frequently be downplayed or ignored by manufacturers and hobbyists. This fellow, for instance, in demonstrating how to mix resin and hardener, doesn't wear any gloves. Elsewhere on his site, he talks about using his saliva (!!) to smooth the putty. ...That's a great way to ingest toxins -- don't do it!
I've been trying to research how to approach toxins in the art studio intelligently. My best plan at present is to wear vinyl safety gloves, a respirator rated for organic solvents, and set up a desktop airbrush spray paint booth to vent fumes to the outside. At present, I have the respirator, and am using latex gloves. I still need to get a spray booth, and the gloves should be upgraded.
To check if my plan makes sense, I consulted Kim Graham -- a truly amazing sculptor whom I met at the art marketing workshop in November. Kim recently left working in the special effects / fantasy sculpting industry -- largely because she was beginning to develop sensitivities to some of the sculpting media. (She's moving into fine art ceramic figures and Art Nouveau fireplace facades -- please, look at her stunning website!) ...She's known people who've died from misuse of art materials -- so I asked about that, too. Here's what she wrote me:
"You have taken all the necessary safety precautions. The vinyl gloves are your best protection. Magic Sculpt, Apoxie and Plumbers putty are all Epoxy that has been loaded with some powders like talc. The resins can seep into your skin, and over time cause nerve death in your fingertips. If you are only using this stuff once or twice a week you will be fine with just gloves, but if you are using it constantly, all the precautions are a good idea. A good rule of thumb is if you can smell it, you are sucking it into your lungs.It is the liquid form of Epoxy that will give you some real trouble. That and the volatiles used to thin it, like paint thinner, Lacquer thinner and Acetone. These are the most deadly and the ones that lead directly to the deaths of those people. These substances shred cells and do it quickly. All of the precautions should be in place every time you use them! Lacquer Thinner and Acetone are the most dangerous. Their purpose is to breakdown molecular bonds aggressively. The two people that I knew, and I hesitate to call them friends, did some downright stupid things. I watched in horror when one of them used acetone to wash his face and hands like it was water! The other was a professional fiberglasser and refused to wear a respirator, even when I bought him one, because it was uncomfortable. His job was to spray epoxy gel coats onto furniture. In order for epoxy to be put through an air gun it has to be cut 30 to 50% with acetone. Essentially he was atomizing this toxic brew and breathing it wholesale into his lungs. True, you will not be handling epoxy in quantities that will hurt you immediately, just be warned that this stuff resides in fat cells and can stay in the body for years. It is the accumulated damage that can get you."
Sobering words of caution. Stopmo folk using epoxy putty for puppet construction, heed the warning... "nerve death in your fingertips!"
Last night I tried working with plumber's epoxy putty outside while wearing the respirator and latex gloves. It's better than what most people would do -- but I'm still uncomfortable. I have the sense that resin fumes are probably passing through the latex. My hands feel dry, and I'm just really hoping that it's due to the plastiline and other materials I handled during the evening, not the epoxy.
Also, I could occasionally smell the epoxy through the respirator. That's not too surprising -- a respirator cuts down on how much vapor gets through, but it's not 100% effective. Even so, I'm getting increasingly antsy to get that spray booth. It'll make me feel better when I have the means to forcably suck the fumes away from myself and vent them outside.
posted by sven | permalink | categories: sculpture, stopmo
January 24, 2006
scrap workshop: art journaling
by gl. at 12:45 am
on saturday sven & i attended an art journaling workshop at scrap taught by none other than fellow portland artist's way meetup member melanie sage. dayna & her daughter also came, so half the class was artist's way folks!
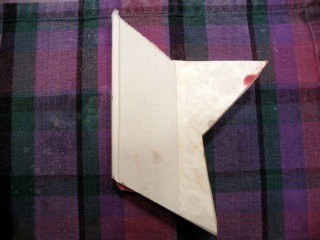
i got this altered book at first impression while i was flyering earlier in the month: it was definitely one of those purchases i knew i would regret not getting, even though it took me a while to figure out why it was cut in such an odd shape...
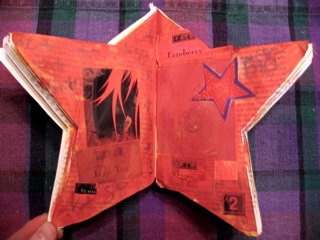
...but it's a star when it opens up! how could i resist?
what you're seeing here is the first exercise we did in the workshop, where we were told to pick out 10 things from the benevolence of the scrap warehouse -- and then immediately trade them w/ the next table (meh!). we then had five minutes to add items to the pages (memo to self: always bring your own glue stick to an art workshop, and if you're hosting the workshop, carry twice as many as you think could possibly be needed :). it was very similar to the exuberant collage excercise i do the first day of artist's way: don't think, just DO! then we wrote about "letting go" and added acrylic paint.
this piece needs more work to add depth & texture -- even though we wrote, hardly any of it shows through. of course, the great thing about art journaling is that you can completely paint over any pages you don't like (which is, in fact, what sven did on one of his pieces, and it worked!).
as these pages dried we got to pass around several yummy art journals melanie brought: i wish i could have had more time w/ them. her work is personal and vulnerable w/ layers & doors & hidden bits. you know i can't resist the hidden bits! :)
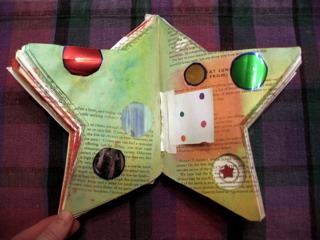
this was the second exercise, where we picked up three different colors from peerless watercolor cards (i've loved those for years and it was nice to see someone else in love w/ them, too!), then added words & phrases we had cut from old book pages. alas, the star book pages are so thin they were easily saturated with water and stayed so wet so long the words wouldn't stick. so instead, i added the shiny metallic dots and tried playing with a hinged door. i also punched out a big hole in several pages in the lower leftmost corner and collaged a spiral & star beneath it. i was trying to use the eyelet setter, too, but the paper was still too wet and it just ended up tearing a hole (right tip of star).
so alas, as you can tell, this awesome star-shaped book doesn't have very much usable page room and the pages are so thin water tears them up pretty easily, so i see some book alterations in my future. melanie suggested gesso (which will also help cover the text: half-visible text would ordinarily be cool, but this is apparently a diet book and a whole journal of it will drive me nuts), gluing several pages together for strength, and possibly tearing some out to allow for thicker pages.
it was good to meet melanie & i see possibilities for the star journal. you can't beat scrap's price & they have a pretty good working space for individuals -- but it wasn't a good setup for 8 people. four people, yes; 8 people doing messy collage work, definitely not. but i sure am glad i wore art clothes! sven brought an apron. :)
afterwards, dayna walked away with a load of great found paint & stamping supplies; i left with some fabric samples and a tiny green carpet square that said "grass!" to me; and sven walked away w/ a million dollars worth of foam core & colored sand & colored grass/raffia & plastic tubs for, like, $5. hooray for scrap!
posted by gl. | permalink | categories: classes & workshops, sketchbook
January 23, 2006
experiment: papier mache mash
by sven at 12:00 pm
There's a papier mache technique where you grind your paper into pulp, rather than cutting it into strips. It's called "papier mache mash". You might be familiar with Celluclay... This is the same idea. Mash isn't new, though; from what I've read, it's about as old as papier mache itself.
For years I've wanted to try making mash. Friday night I finally gave it a whirl.
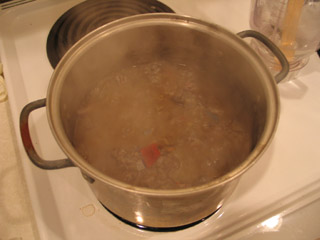
I looked at a few recipes online, but didn't really abide by them. I started by chopping a copy of The Oregonian into 1"x1" squares with a swing-arm cutter. (Once a week, though we never asked for it, someone tosses a copy of this newspaper at our house... At last: a good use for the damned thing!)
I threw about half of the paper bits into a pot of boiling water and cooked it for 20 minutes. Note that I'm using a pot that's only for art projects -- don't eat out of it! The newspaper ink forms a black ring around the rim that's never going to come off.
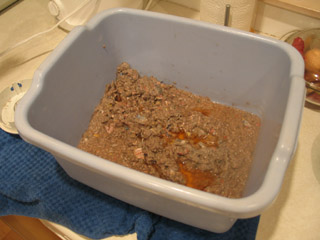
I dumped the boiled newspaper in a tub to cool. Looks nasty. I read somewhere that you should only use the black and white portions of the paper, not color supplements. Sure enough, the glossy color pages didn't really break down into pulp very well. I think they're also responsible for the water turning reddish.
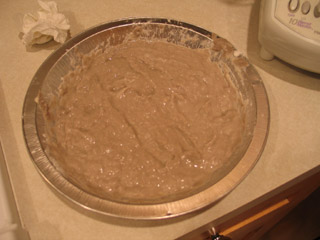
Wearing disposable latex gloves, I put a few handfuls of pulp into a blender with some more water. Again, this is a not a food-safe blender -- it's only for art. (I picked it up for under $10 at Goodwill.) After pureeing the pulp into a sort of paste, I poured it into a tin pie pan, and mixed it with flour.
From what I read online, it looked like an acceptable option to use flour paste as a binder. It may be, however, that this only works if you boil the flour first. I was curious to see what would happen if I didn't boil it -- so I'm not going to be surprised if this experiment is a total flop.
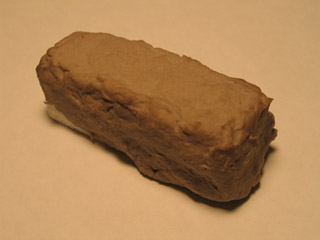
The mash seemed too wet to me, so I endeavored to squeeze out some of the water. I put a handful in a piece of cloth and twisted. This didn't work very well. Mash that was directly against the cloth dehydrated -- but the mash in the center of the ball stayed wet. When I tried to mix the dryer and wetter pulp together, the mash turned frustratingly lumpy.
Nonetheless, I took about half of the mash and spread it onto a snippet of styrofoam. It's not very easy to work with... If the mash doesn't have enough water content, it wants to be clumpy. If you wet it, you can get a farily smooth surface -- but then it's slick mush that's difficult to form.
Forty-eight hours later, there are thinner patches on the "brick" that have dried -- but I don't expect the thing to be fully dry for another two to three days.
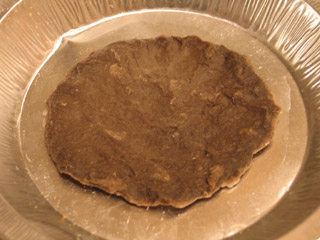
I decided to take the remaining mash and bake it in the oven. I wanted to see if I could dry it out faster that way.
The results were... disturbing. I got a waxy, glutinous, fleshy gray pancake. I think this is largely a result of the flour content. Really, it's kinda vile.
Forty-eight hours later, the pancake's edges have started curling... But it hasn't lost that fleshy texture. I don't think it's ever going to dry out right. Ew.
CONCLUSIONS:
When I've tried Celluclay, I was fairly frustrated with it. It's either clumpy, or a slick mush that's difficult to form -- and it takes days to dry out. The same is true with the mash that I made.
Good: Newspaper and flour are about as cheap as it gets. If a large area needs to be covered with something vaguely clay-like, this could be acceptable. It looks like the mash will dry pretty hard; it should be possible to sand and drill it. It's pretty good for making seamless, organic surfaces. Leftover pulp can be safely thrown into the compost heap.
Bad: It's labor intensive to create: plan on at least an hour to prep. You need a big pot (with a lid), a stirring device, a tub, and a blender -- none of which can ever touch food again. It's messy. The boiling pulp wants to spit, and it's hard not to drop little splatters on the counter occasionally. And when the tarry ink separates from the paper, it will adhere to whatever it next comes in contact with. It's difficult to shape the pulp. And it takes forever to dry.
Next steps: Despite all this, I haven't given up on mash yet. For my next go, I want to try using toilet paper for pulp. It's relatively cheap, fine-grained, and inkless. I think I'm also going to try mixing the pulp with white glue, rather than flour paste. I suspect that Elmer's glue, even if it's watered down, will probably help the stuff dry faster.
posted by sven | permalink | categories: sculpture
January 22, 2006
comic homage to moon baby
by sven at 10:11 pm
My brother drew a comic using Moon Baby and the Sven blocks!
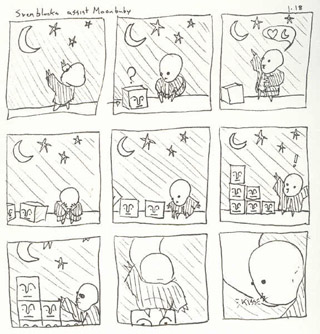
Here's what he had to say about it on his art blog:
"This will probably make my brother do a double take. I used two of his characters and two of his themes in this comic. Moon baby and the Sven blocks both come from his recent explorations into stopmo. If you look through Scarlet Star, you'll see Love and The Moon constantly show up in his work (well, at least I think they do). Pardon any off character sheet drawings, I didn't look up what they looked like before I started drawing."
...Wow. I wish I'd thought of that story line. (Thanks, Bro!)
posted by sven | permalink | categories: movies, stopmo
January 20, 2006
mhcc calligraphy: class 2
by gl. at 11:46 pm
i had a little epiphany about italic today: many of the letters are just one stroke! in most calligraphic hands, each letter is composed of multiple strokes: for instance, the "a" is three strokes, the "g" is four strokes. but in italic, the "a" can be done in one stoke and the "g" in two! doing them with reduced strokes not only makes them vastly quicker to write, but it immediately affects the counters & spacing and automagically produces sweeter, thinner upstrokes. it's completely counterintuitive, though, because ordinarily you're taught only to pull a stoke, never to push it (except maybe in copperplate).
i've been using zig markers because they're a lot easier to travel with, but i really miss the crisp flow of ink, so i think i'm going to try a fountain pen next week.
i was feeling restless today and left a bit early because i've already created the magic book twice and still have leftover bubble paper from last time. turning right instead of left puts you on the historic columbia highway, which i took all the way past horsetail falls. thanks to the all the recent rain, that whole network of waterfalls is particularly stunning and new ones are tumbling from the rocks in abundance.
posted by gl. | permalink | categories: calligraphy, classes & workshops
January 19, 2006
artist's way open studio (january)
by gl. at 11:59 am
another evening where we began with a full studio and ended up with half a studio. we had a nice time -- it was a comfortable, familiar group -- but i'm frustrated because we had four people on a waiting list who could have come if three others hadn't flaked out at the very last minute.
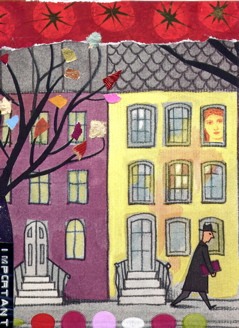
["this is important": click the image to see the other collages]
i've tried appealing to fairness and responsbility. next month i'm going to attempt overbooking the studio for 8 participants and if that doesn't work, the free collage night will no longer be free.
also: tonight i could not get iphoto to export a photo less than 80k -- even for photos i have already successfully exported at 40k! to get "this is important" up i had to run it through preview first. any ideas about how to export smaller file sizes in iphoto? now that i have celeste, i'm really looking forward to have a smaller, happier workflow.
posted by gl. | permalink | categories: artist's way
January 18, 2006
mhcc calligraphy: class 1
by gl. at 11:11 pm
i'm taking the third class in the three-round cycle of mt. hood community college calligraphy classes, this time in italic. i've never actually taken an italic class before and after years of trying to train myself out of a slant, i need to become familiar with the 5-degree slant that makes italic both quick & elegant.
below is a monoline italic, which means i'm not doing it w/ a chiseled nib to give it the appropriate thicks & thins, but a blue sparkly gel pen instead. i'm surprised & relieved to find italic's basic letterforms are easier than expected:

and in fact, if i were using a copperplate nib instead of a gel pen, the letterforms aren't really that much different.
i know the gashlycrumb tinies so well that i often use it for calligraphy practice, but i think i'm going to begin learning gorey's "utter zoo alphabet" as an additional abecedarium.
posted by gl. | permalink | categories: calligraphy, classes & workshops
January 16, 2006
scenes from "Explorations in Super8"
by sven at 12:00 pm
I turned in my final project for the "Super 8mm Filmmaking" class at on Sunday (Jan 15). I tried to turn it in twice on Friday (the deadline), but no one was at Radius Studios (grrrrr).
I feel like this class is jinxed. I just wouldn't be surprised at all if my film cartridge somehow got lost in the mail. So, I will now spoil all surprise and describe exactly what I did for this project. I'm hoping that when I get the developed film back, I'll be able to do a transfer to digital and put it online. But, like I said, I'm not holding my breath.
I shot one complete film cartridge. A cartridge contains 50 feet of film, which works out to be around 3 minutes 30 seconds of screen time. To keep track of where I was in the roll of film, I used graph paper to make worksheets -- marking off one square for each frame shot.
I took quite a few "making of" shots with the digital camera... Not everything's covered, but you'll get the idea.
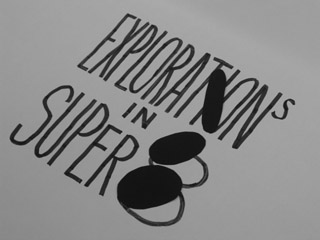
Opening shot: The words "Explorations in Super8" write themselves on a white backdrop. The camera angle changes, showing that the words were actually written on a surface that was at an angle. The closed spaces of the the letters P, O, R, and A -- and of the number 8 -- sequentially turn black, as I put pieces of black paper over them. These cut-out shapes then all slowly tilt sideways. All the cut-outs on the left slide over to the right and are consumed by the black shapes there (the "O" of exploration and the "8"). The remaining "Explorations in Super8" logo appears again later in the film.
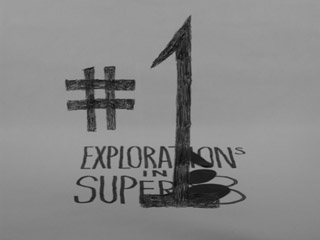
The number "1" seems to write itself on top of the logo...
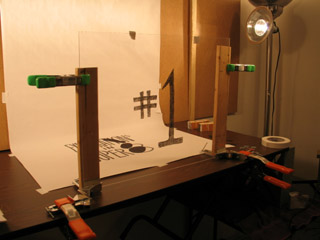
...This effect was achieved by writing the number "1" in grease pencil on a sheet of acrylic "glass". I was very pleased with the strategy I came up with for making the glass stand up. As you can see in the photo, each side of the glass is clamped to a piece of wood. These two pieces of wood are held in corner clamps. The corner clamps are then clamped to the table using two more clamps (a total of six clamps).
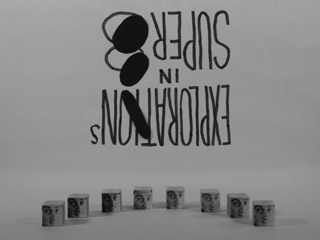
Eight blocks that I made previously, ones with photocopies of my face on them, present themselves in a half-circle. The middle two swap places. The next two out knock heads and return to their places. As do the next two out. The last blockhead on the left runs over to the one on the far right and tips him over.
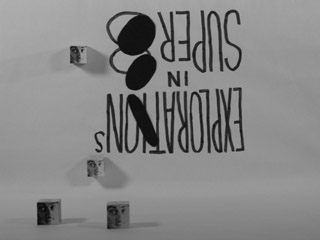
The blockheads start running around the set willy-nilly. Some slide across the floor; others slide up, down, and across the wall. One comes down the wall and gets on top of a block that's on the floor.
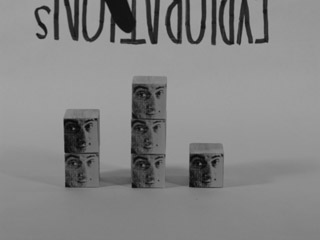
A little comedy: a totem pole of two blocks, a totem pole of three blocks, and a single block all stand next to each other. The middle one looks at the others and seems pleased that it's the tallest. The one on the left rams it while it's not looking, and then everyone is equally two-blocks-tall.
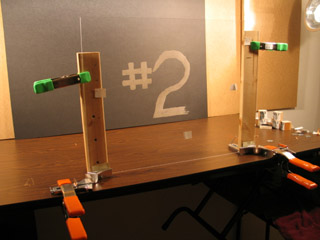
The first exploration used a predominantly white set, where butcher paper was the backdrop. The second exploration dealt with sets that were predominantly black. Using the same trick that I used for "#1", I animate "#2" appearing by writing with a white grease pencil on the glass sheet. In both cases I also animated the numbers erasing themselves.
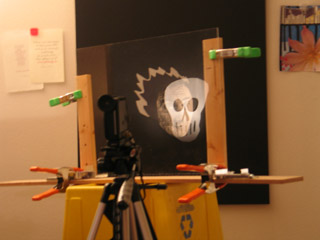
My face, floating in blackness, is replaced with a ghostly skull. See my post on "compositing, retro-style" for details.

A spaceship rockets between the stars. As it zooms past, the stars spin in its wake. The spaceship is a drawing cut out of paper; its exhaust is made out of green tissue paper.
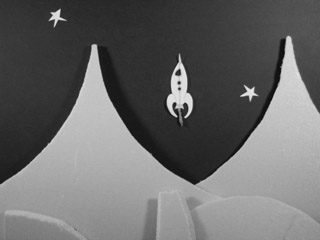
The spaceship fires its retro-rockets and gently lands on an alien world. The mountains and hills are made from scraps of blue insulation foam.
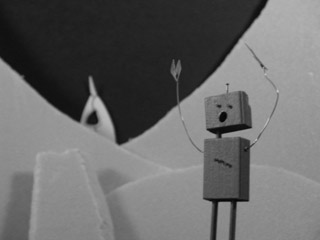
A panicking robot runs by in the foreground. The focus changes, and we see the landed rocket in the background.
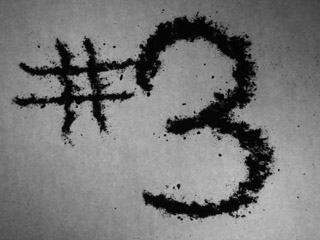
Having done "light" and "dark", I decided to do "wet" and "dry". Exploration #3 is animation done using sand (dry concrete mix, actually). After I draw the "3", I animate it disappearing -- by vacuuming up a little bit of it at a time.
(For how-to details, read "animating: sand, paint, shadow.")
Three O's appear. They turn into two eyes and a mouth. The mouth smiles -- and then frowns, and tears fall. The lines that make up the eyes connect themselves to the mouth, and the resulting snake wriggles its way off screen.
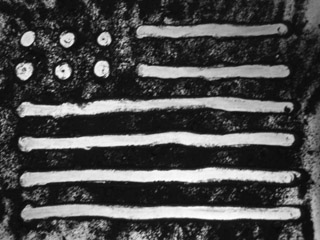
New scene: I cover the entire screen with sand. I wipe some away, so that white shows through, and an American flag appears. I make the stripes seem to flap in the wind. The flag dissolves, and the mushroom cloud from an atomic bomb appears. (Clearly I was free-associating here!) The cloud disappears, and random zig-zag lines mark the sand for a while.
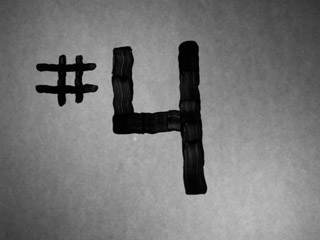
On to "wet" animation! A number four paints itself on the glass, and then erases itself.
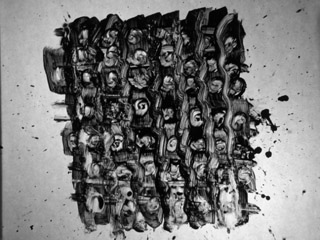
I splatter paint onto the whiteness a little at a time until there's a black puddle. The puddle turns into a checkerboard. The checkerboard becomes a more ornate "weaving" pattern.
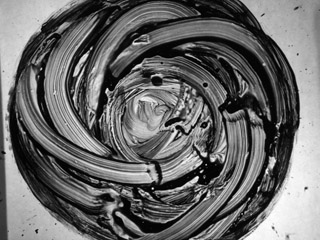
Circles radiate out from the center. A spiral takes its place. The spiral pattern becomes a wild whorl. The whorl resolves into a painting of a human eye, which blinks once. The paint is gradually wiped away, until it looks like a bagel. Bites disappear from the bagel until it's gone. (I must have been hungry!)

I thought it would be interesting to use this retro medium, Super8, to film digital images. I think there's an impulse, if you're using super8, to try to make everything look "old-timey." Why ignore the existence of digital? Maybe hi-resolution digital captured on low-resolution Super8 will create an interesting visual effect... ?
For the transition to this section, I quickly made a three dimensional "5" in LightWave and set up a scene where it would rotate. Rather than rendering out this footage, I simply advanced the frames manually in preview mode, and snapped a shot each time with the super8 cam.
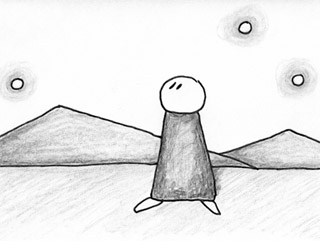
I experimented with reusing animations that I've made previously. The first one, "star", shows a person looking at the sky... They see something and point at it; they reach out a hand, and catch a falling star. This animation exists as a QuickTime movie. I advanced it one frame at a time on an Apple Cinema Display, taking two shots of each frame with the super8 cam.
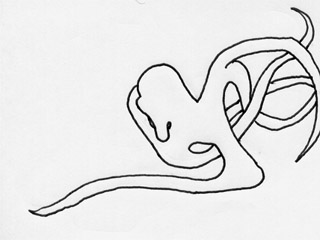
The second animation I recycled is called "dot". It was an improvization where a dot morphs into all kinds of random shapes. Both "star" and "dot" can be seen in their original forms at my old "Sven's Animation" site.
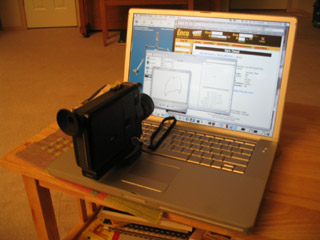
For "dot", I tried filming the movie off of the laptop rather than from the workhorse computer. I shot this using the macro setting -- and have a suspicion it'll probably be all blurry. I tried filming "dot" three times in succession: once at 3 frames for each drawing, once at 2 frames per drawing, and once at 1 frame per drawing.
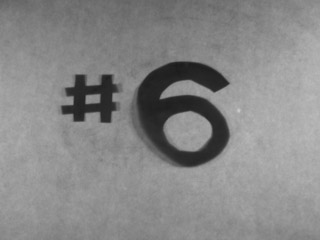
For the sixth and final exploration, I decided to work with shadow puppets. The shadow of the number six appears, and then disappears.
(For how-to details, read "animating: sand, paint, shadow.")
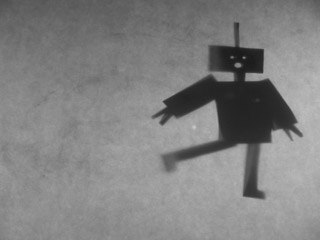
A shadow robot waves, shakes its head, and walks off screen.
Random geometric shapes -- squares, rectangles, triangles, circles -- appear and disappear in interesting patterns. A circle and triangle form themselves into a timer, which goes through two revolutions.
At this point, my best guess was that I had 10 - 20 seconds of film left. I brought Gretchin over to the studio and had her help me with the final shot. I wanted to have this last bit be live-action, and I needed her help to actually run the camera.
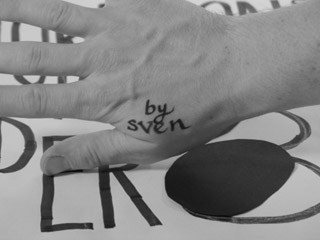
Gretchin -- fine calligrapher that she is -- wrote "by sven" for me on my the back of my hand...
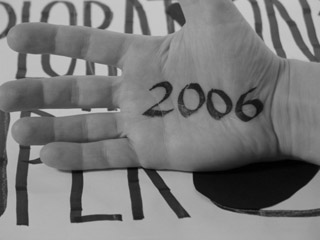
I show the camera the back of my hand: it says "by sven". I turn my hand over and "2006" is there, written on my palm. Just as I finished showing my palm to the camera, we think we heard the camera run out of film...
THE END!
posted by sven | permalink | categories: movies, stopmo
January 15, 2006
animating: sand, paint, shadow
by sven at 6:00 pm
For the Super8 final project I tried out several animation techniques that I've read about, but never had enough interest in to actually pursue: sand, paint, and shadow.
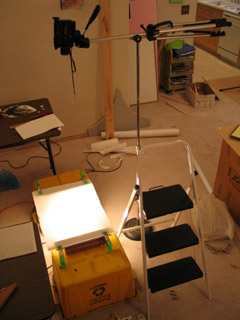
Animating sand and animating paint both had a similar setup. You work on a horizontal piece of glass, lit from below. You put your sand or paint on top of this glass, and film with the camera above.
The super8 camera has a minimum focal distance of 4 feet (unless you use macro). My sheet of acrylic "glass" was raised up about 18" off the ground by two recycling bins. This meant I needed to get the camera pretty high up in the air -- and it had to point directly down, which the tripod wasn't built to do.
So, I took the camera and tripod as one piece and put them in a microphone stand! ...A little wobbly, but a very workable solution.
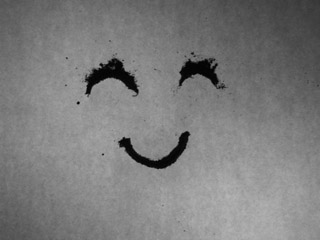
With sand, I put a piece of white butcher paper on top of the glass -- to prevent scratching, and to diffuse light. I didn't have any proper sandbox sand around, so I used some of Gretchin's dry concrete mix instead. Concrete has lye in it, so I was careful to wear latex gloves while working with the grit.
Sand was kinda fun to work with. ...Dropping pinches of it onto the glass wasn't very precise -- and trying to pick it back up to move it somewhere else was fairly irritating... But pushing around little lines was pleasant. And spreading sand across the whole sheet and then making lines with negative space was also pretty good -- so long as the image didn't need to be very fussy.
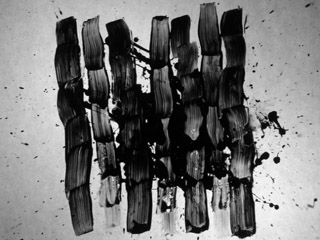
For animating paint, I took the sheet of paper off the top of the glass and instead clamped it onto the underside. I started off by dripping black tempera paint onto the slick surface -- Jackson Pollock style -- and then proceeded to move it around with brushes (occasionally re-wetting the surface).
This I liked a lot. It was very much like finger-painting: the process being more about moving paint around than capturing a single static image. And the light shining up through the glass really illuminated the texture of the brush strokes nicely. Just beautiful.
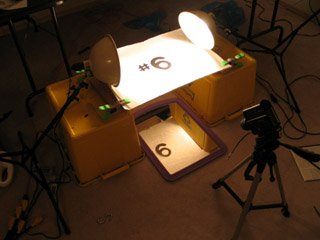
For filming shadows, I needed to change the camera setup. I put the white butcher paper back on top of the glass, and pointed the lights downward at it. The shadow puppets sit on top, held in place by gravity. The image I wanted to capture was going to be underneath the glass.
If the camera were directly underneath the glass, then the glass would have to be at least four feet up in the air (due to focal distance). That would have been really awkward to work with. So instead, I put a mirror on the floor, and pointed the camera at that. The focal distance was measured not from the camera to the mirror -- but rather from the camera to the mirror and then up to the glass.
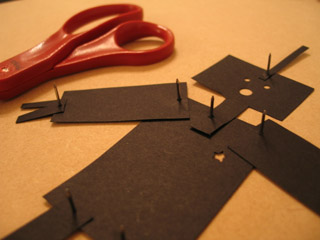
Shadow puppets are typically hinged with thread, I believe. But I was feeling lazy. I wanted to use brads (the metal fasteners you find on large manilla envelopes) -- but we didn't have any on hand. So, in a pinch, I used small wire nails for my joints. Pointy -- but effective!
The robot pictured above was cute, but not a very practical puppet. The shoulders would bump into the neck if I moved them too far. If I make shadow puppets again, I must remember to make sure that none of the joints interfere with each other.
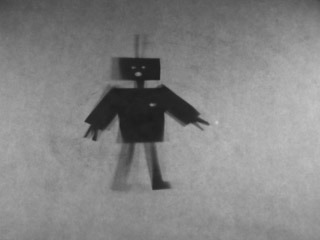
Animating the shadow puppet was a real pleasure when I was only moving one limb at a time. The arms moved wonderfully smoothly. But when I had to move the whole body -- that was trouble. All the joints would flail wildly, dragging behind the main torso.
Another problem I ran into was bad lighting. Because it was easiest to just lean the lights inward, I had beams coming from two sides. The puppet didn't always lie totally flat upon the glass, which meant that side-lighting could wash out some of the shadows I was trying to create. If I had had light coming from directly above, it probably wouldn't have mattered so much if the puppet wasn't lying entirely flat; all the shadows would be perpendicular to the glass.
Conclusion: Having known about these animation techniques for years, I'm glad to have actually tried them now. I doubt that I'll return to them any time soon... But if I do, I expect it'll be paint that I pick up again. It has a really lovely improvisational quality about it -- and it would be interesting to see what I could do with it if I were working in color. Any serious work, though, would probably require oil points -- which is an investment I'm not quite ready to spring for yet.
posted by sven | permalink | categories: movies, stopmo
January 14, 2006
compositing, retro-style
by sven at 11:59 pm
I finally finished the Super8 final project Thursday night; it took 19 hours to complete actual shooting. I squeezed in a lot of interesting experiments, so I'm going to break this story up into more than one post.
The trick I'm most proud of was making a ghostly skull appear in place of my face -- without any use of digital compositing!
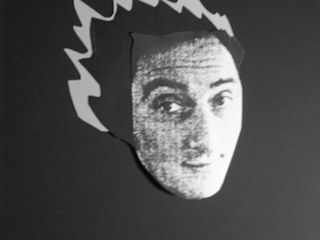
Note: Super8 is, of course, actual celluloid. What you see here are photos that I took with a digital camera from the same angle as the Super8 cam, so I could document my process.
The "ghost" trick begins with this image of my face. The image is just a photocopy, blown up from a photograph that I had lying around. The photocopier lopped off the edges of my head -- so I cut out some paper to make that fiery "manga" hairstyle.
As you watch, the face is slowly replaced...
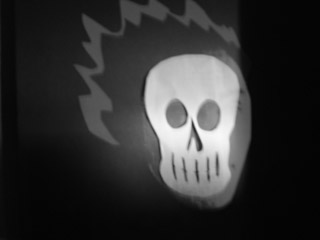
...by this skull, which is a paper cut-out.
How did I achieve the effect? Well, it's a little tricky to explain.
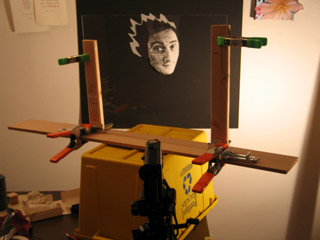
The key to the effect is putting a plate of clear acrylic "glass" between the camera and the image of the face. The glass is at a 45 degree angle, so it will reflect whatever is on the wall to the camera's left.
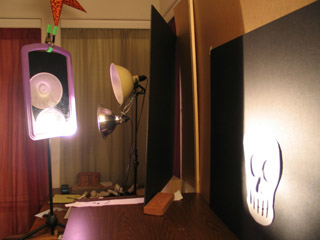
On the wall to the left of the camera, I taped the skull onto a piece of black foamcore. If there's no light on the skull, then there's no reflection on the glass that the camera is looking through. But, throw some light on that skull, and then a reflection appears. If I subsequently turn down the light on the image of the face, then I can almost get it to disappear, so we're left seeing only the skull.
My problem here was in trying to isolate the lighting... If there's any light at all on the skull, then we're going to see some reflection of it in on the glass. The ideal solution would have been to have a spotlight focussed on the skull that was controlled by a dimmer switch. That way I could keep the skull in darkness, and then gradually illuminate it. ...But I didn't have a dimmer switch.
So, what I did instead was have a light pointing away from the skull, but aimed at a mirror. For my purposes, I clamped the mirror to a microphone stand. When the time comes to illuminate the skull, I swivel the mirror on the microphone stand, and the light is bounced onto the skull. Overly complicated -- but pretty effective.
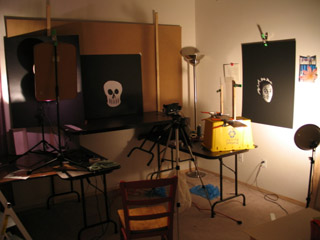
Here's a picture of the whole setup. As you can (hopefully) see, I've got two light sources: one on the left pointed at a mirror, which will illuminate the skull -- and one on the right that's pointed directly at the photo of my face. When it comes time to film the trick, what I do is animate the lights turning. ...For each frame of film, I incrementally turn the one light away from the face -- and the other light so that it's illuminating the skull. Run the film at 18 fps, and the metamorphosis appears!
My understanding is that this is an old theatrical trick... I think it was used around the end of the 1800s to make "ghosts" appear on stage, next to live actors. The trick there, too, was putting a big inclined sheet of glass between the audience and the stage.
More recently, I've seen the trick put to use in science museums, using a two way mirror. At the traveling "Star Trek: Federation Science" exhibit, for instance, I recall there being a station where you could sit in front of this pane of glass, and as you raised the lights on the other side, you could see a Klingon face superimposed over your own. Neat gimick.
Since compositing is so easily done in digital, I don't know when I'll ever need the "ghost" trick again. It's labor intensive, and relies on a complete control of lighting sources, which is difficult to achieve...
Note to self, in case I ever do attempt it again, though: An even more effective means to isolate the light on the skull would be to put a board between the light and the skull, with a "keyhole" in it... Cut out a skull shape in the board, so all extraneous light is truly masked and only a thin beam can shine through.
posted by sven | permalink | categories: movies, stopmo
January 13, 2006
poem: lot's wife at the new year
by gl. at 11:59 am
michaelmas thought i should post this. i thought of the first few lines and the title on new year's eve and every few days added a couple of more lines until suddenly it was done. i'm suprised i'm not a pillar of salt already; i'm always looking back.
lot's wife at the new year
lot's wife sings "auld lang syne"
and kisses all the men in gomorrah
while holding a tiny bottle of champagne.
she knows she can't look back, so
she buries the past
keeps moving forward
pretends nothing else matters.
she's giddy, sparkling
in a sequined dress
and laughing like
there's no tomorrow.midnight is magic
but the dark, dull hours before dawn
are tangled thick with fear and hope.
the men are now sprawled and snoring
on the couches in rumpled tuxedos
and the long hours stretch before her.
which will it be:
a year of salt
or a year of honey?
i think you know the answer....january 13, 2006...
posted by gl. | permalink | categories: writing
January 12, 2006
mission accomplished
by gl. at 11:59 am
154 artist's way flyers are up in portland now, exceeding this term's goal of 150 -- which was more than double the 70 i got up last time. whoo and hoo! i even attended an open house for the person who got me into dinnergrrls & i spread the saint cupcake love, bringing 6 delectable tiny cupcakes to share w/ her suitemates (with several artist's way infocards tucked into the box, of course! :). i am SO relieved to make this goal. everything else is just sweet, sweet gravy!
this post has been brought to you by the central library, art media (again), the IPRC lobby, reading frenzy & powell's.
posted by gl. | permalink | categories: artist's way
January 11, 2006
explorations in super8
by sven at 12:05 am
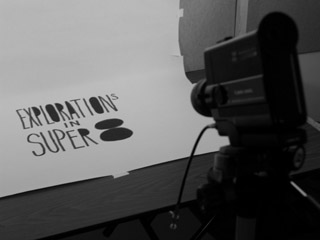
So, Monday I finally began shooting my reel of Super8 film.
Ultimately, I decided that I'd have to be crazy to shoot animation I care about on Super8. As I stood in the kitchen Sunday night, thinking about this project -- which might turn out blurry, will be very difficult to get online, and could take up to 20 hours to shoot -- the exact words that went through my head were: "Do I hate myself?"
...So instead of wasting my "Mud & Metal" script on this project, I decided to film a series of improvised experiments in animation. It'll still take me a hella lot of time -- but at least this way there's no risk of heartbreak.
Title: "Explorations in Super8." ...I'd meant to title it "Experiments in Super8", and when I got to the end of animating the first word, found myself wondering why the letters didn't fit as planned!
posted by sven | permalink | categories: classes & workshops, movies, stopmo
January 10, 2006
how to have an opinion about art
by gl. at 4:13 pm
one of the hardest things about being an artist's way facilitator is having an opinion about art. i used to be incredibly critical & cynical, but one of the great things artist's way gave me was kinder eyes towards the art of others. as rob has said, "'bad' art is often a preliminary stage, larval -- even embryonic -- for the good stuff. We can help to guide it along, give it sunlight and water and sing to it, or we can crush it, piss on it, darken hopes and souls." i'm very much of the opinion that artist's way is less about Art and more about living a more creative life, and part of that involves a certain amount of forgiveness and generosity, both for yourself & others. it's like being able to taste the love in a homemade pumpkin pie, even if it has too much dark molasses in it.
when facilitating, i don't have an opinion at all about the art that gets made because artist's way is about the process, not the result. but i also believe there are legitmate uses for criticism, and i was really conflicted about how to legitimately like or dislike a piece of art w/o betraying my neutrality as a facilitator or the tenets of artist's way.
 on thursday i think i finally figured it out. i went for an artwalk on first thursday with a group that was initially enthusiastic but became discouraged pretty quickly, rolling their eyes and raising their eyebrows & crossing their arms, moving to a bar to complain about the state of the art world. i have to admit, a lot of art gallery art doesn't usually appeal to me, but it often inspires me to make my own, and i like to immerse myself in all the influences. but the stumbling block for the group was hildur bjarnadóttir's "overlap" and its neighbor, victoria haven's "the lucky ones," both understated, abstract & geometrical, with distinct flavours of portland grunge. the group felt these pieces were lazy and obvious and incomprehensible as Art. i didn't really like them, either, but i didn't as actively dislike them and the strongly negative group reaction disturbed me. i didn't feel like i wanted to have to defend a show i didn't feel strongly about. can you dislike something and still be glad it exists?
later that night i discovered the key is to give yourself a chance to engage with the art before deciding whether you like or dislike it. after you've applied some form of response to it (like, say, the phenomenological/aesthetic/artistic responses i introduce in the creative clusters :), then you can hate it. but to hate it on a purely visual level means you're viewing it as entertainment, not art. we often say a piece doesn't "speak" to us, but often we don't try to talk to it; we just look at it and move on. if you view art as a form of creative self-expression, you have an obligation to try to engage with it, to ask questions, to look for the story. this is where viewer/artist collaboration can happen, and it should be the artist's obligation to help with that process (unfortunately, most artist statements distance the viewer even further). if after attempting to respond to the piece it still doesn't work for you, then fine! but now you have more to base your opinion on than whether your 4-year-old niece could make something better.
the other part of the solution, which came a couple of days later, was finally settling into a workable distinction between creation, craft & art. st. francis of assisi wrote, "he who works with his hands is a laborer. he who works with his hands and his head is a craftsman. he who works with his hands and his head and his heart is an artist."
aha! so if the mystery ingredient for art is heart, an intention of creative self expression, then i can appreciate pieces that don't move me for their craft, or even dislike them if i find myself unable to find their heart. this is a huge relief: not being able to have an opinion about art has made me feel hypocritical and a little schizophrenic. bless you, father; i shall go forth & sin no more.
(btw, my favorite pieces from first thursday were from james jack's "ink" series, a beautiful exploration of calligraphic forms and sink marbling. these pix don't do it justice.)
posted by gl. | permalink | categories: artist's way, exhibits & events, writing
January 8, 2006
script: mud & metal
by sven at 9:55 pm
Yesterday I wrote a new script. I'm very excited about it... When it was done, I read the whole thing through... and cried! (Of course, I have the benefit of perfectly heartbreaking mental visuals to go along with it.) I used the new story generating strategy a third time, brainstorming ideas as a numbered series. Read them as a text file.
This is the story of a young robot losing the human that takes care of him, told in three acts. ...I say "acts" -- but it's really a short piece, probably four minutes long -- reading more like haiku than theatre. Still, there are three distinct movements: the first is a "gotcha" gag; the second is straight comedy; the third: tragedy. ...I like how the the third act hits just that much harder because you were laughing only a moment ago.
Anyway, without further ado, here's the script:
MUD & METAL
January 7, 2006
ACT I.
They're a little unnerving
And we're so dependent on them.
What if they rose up against us?
Still...
Some of my best friends are human.
ACT II.
Human: After we're gone, you'll still be here
I tried to make you everything I'm not.
Robot: Why? Are you ashamed?
Human: We are... hungry, unhappy, smelly, confused.
People are made of clay.
But you -- metal is immortal.
Robot: I wish I could fart.
ACT III.
I can't always tell
if you're sleeping.
I wait
and I worry
If you die
who will take care of me?
posted by sven | permalink | categories: movies, stopmo, writing
January 7, 2006
Attention Surplus Disorder (ASD)
by sven at 4:17 am
Thursday I had crazy laser focus and wound up creating a complete stopmo short: all the way from getting the idea to having a compressed movie ready to put online. Biggest one yet by far: 1 minute 20 seconds -- that's one thousand nine hundred thirty eight frames that I shot!

I didn't start the day with any particular project in mind. I just wanted to keep experimenting. So, using my new story generating strategy, I brainstormed 18 ideas for films that could use blocks as main characters. Read them as a text file.
After 2 hrs 15 min, this is the idea I decided I wanted to run with:
#013 FIRST PICK
Back to writing words on the backdrop. Maybe as the characters speak, words are added to the backdrop without erasing the previous ones. The dialogue is added increasingly quickly and angrily, until the air is blackened with accusations. If I were easily able to do it with Super8, I'd then have everything go still, and let it all fade away, being replaced by a clear white backdrop again. If I were going for crude, one of the characters would then say: "So, wanna f*ck?" Or, the punch line, after all the furor could be "I love you." Or I could try to steal that beautiful scene between Tara and Willow on "Buffy the Vampire Slayer" where Tara says "I know we have so much to repair... but could we be kissing now?" (paraphrase). ...In this set up, the cubes hardly move, except maybe to twist and turn a bit while talking. All the action is in what's being written up above them. This is probably not more than a minute-long gag: as the air gets increasingly cluttered with words, you either have to focus on the words or the cubes -- you can only really show the whole conversation written above the cubes and have it remain legible early in the game.
...It's not all hashed out -- but you can see the germ there.
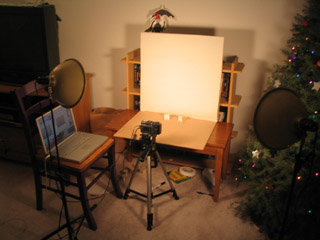
I was working in the livingroom again -- but this time I bothered to set up better lights -- and I put my 2'x2' hardboard "stage" up on the piano bench, so I'd be able to place the camera more easily. I was sloppy with the backdrop, though -- it's a piece of of big newsprint folded over another piece of hardboard, not even taped on. It shifted a little during the shoot -- but I got lucky, and it didn't give me too much trouble.
The real pain this time was when I'd bump the camera. With such small characters, I had to have the camera right at the edge of the set -- forcing me to contort around it to do the animating. Important lesson: I think I'm going to make a point of using larger puppets in the future, so the camera can be farther back, giving me more elbow room. Glad I learned this while working in digital... A Super8 cam is much trickier to focus; bigger puppets will save me a lot of grief.
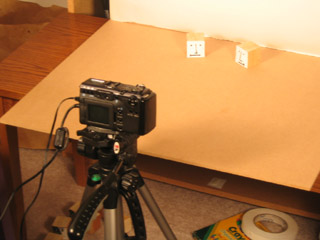
For folks who are wondering about tech details, here's the scoop. I'm shooting photos with a Canon Powershot G5 digital camera. I'm using the laptop computer to activate the shutter release, using a software application that came with the camera: RemoteCapture. The computer is a Macintosh PowerBook G4. I've been doing research on framegrabber software, but none was used on this project.
...Overall, I'm thrilled with the piece. There are some glaring problems: I bumped the camera several times, there are pauses that last too long, the spinning sequence is too slow, and the blocks' "body language" doesn't always make sense. Even so, it's a complete story -- which counts for a lot. And there are several bits that came out really well -- like when the zig-zags shoot around and you see the action carry over from one shot into another, and when the word "really?" seems to wrap itself around the cube.
It took seven hours, non-stop, to shoot. That's about 11 seconds of footage per hour. My previous experiment with animating blocks averaged out to 10 seconds of footage per hour -- so it looks like I'm pretty consistent (at least with these puppets). I finished the thing at 2:45 in the morning. Exhausted...
But euphoric. :-)
posted by sven | permalink | categories: movies, stopmo, writing
January 6, 2006
while moon baby's in the hospital...
by sven at 11:59 pm
Tuesday and Wednesday I did a few more simple stopmo experiments. Can't let Moon Baby being in the hospital bring everything to a halt!
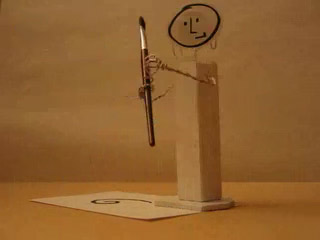
Tuesday night I went over to the studio; threw together a bit of 2"x2" pine scrap, masonite, and bronze (?) wire; painted it all white, and taped on a paper face. ...Voila! New puppet.
It only took about an hour to make; I consider it a throw-away. The masonite base is so I don't have to worry about tie-downs and walking for a while; it just slides around. The arms are too stiff to do much with... However, I did try something new: drilling holes in the torso, and weaving the strands of wire through -- a good idea that I'm borrowing from Nick Hilligoss. I also gave this puppet some fingers using very thin aluminum wire, just to get a feeling for what that would be like.
Earlier Tuesday afternoon I was brainstorming story ideas. When I was making this clip, I had this story germ in mind:
"a solitary artist [...] nightly looks at the stars, paints them and paints them, and ultimately releases a star into the sky from his own chest"
I liked the look of the puppet interacting with the paintbrush -- but it also turned out to be pretty difficult making it grip the prop. Puppet hands aren't people hands; that's something I'll have to remember. Maybe they'd grip better if I exaggerated the length of the fingers?
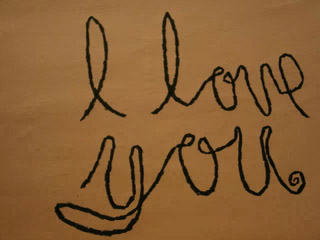
When the painter in the first clip is making his spiral line, that was drawn in with a black crayola marker. ...I wanted something without fumes! The look was so appealing, I decided to try something else with the markers.
The light in this second clip is pretty awful -- I've been doing my work on the livingroom floor again. Gretchin was typing on the couch, so I wanted to hang out with her. ...This experiment was a nice surprise for her when she finally looked up, too. :-)
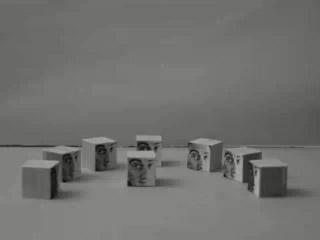
I did this third clip the following night, after being out doing Artist's Way postering all day. Again, terrible lighting in the livingroom -- and I forgot to turn off the camera's auto-focus for the first bit. Still, this was my longest stopmo clip to date -- 363 frames @ 24 fps for 15 sec.
Like I said in my last post, I'm thinking now that the final project ought to be done animating objects rather than puppets -- hence the blocks. The blocks were cut off the same 2"x2" piece of pine that the artist puppet came from -- using a miter saw to get straight lines. I taped on photocopies of my face just to make them a bit more interesting. I chose to go with black and white because the Super8 final project will ultimately be shot on b/w filmstock.
My lesson while working on this clip: it's easy to make things zip around on screen way too fast! Move the objects in even tinier increments, and have them pause longer -- 24 frames per second is a lot of space to fill.
posted by sven | permalink | categories: movies, stopmo
January 5, 2006
story writing experiment
by sven at 2:17 pm
For a couple of months I've been going to "Church of Art" meetings. This is a small group of artists (mostly painters) that meets once a month at World Cup Coffee for a show-and-tell session about what they've been working on. One of the members recently wrote:
"One of my favorite artists, Corita Kent would push her students to come up 50 or 100 ideas for a project. She said that when you scrambled through the first easy ones, then worked harder for the next ones and really had to scrape for the last ones, you found out what you were made of."
I like this idea very much! It's very much in line with my "quality through quantity" ethic.
...Also on my mind, this post from Pjotr Sapegin that I found on the StopMotionAnimation.com "story" forum. (Pjotr's from Norway -- be nice about his spelling.)
When you write a film-script, the dialog comes last in the prosess. You should write a short Sinopsis first, to have your story strate. Then you write a Treatement, where you brake your story in to the sceens, and there might come a little-bit of the dialog. When you are satisfied with it, you write the actuall script, basycaly, felling up your treatement with the dialog.
Storytelling, admittedly, is one of my weak points. I'm a very visual thinker -- more comfortable quickly sketching a storyboard than trying to work out a film idea using just words. This has led to problems with "Let Sleeping Gods Lie": I find myself now trying to rewrite both the beginning and the ending, because what looked good in pictures stopped making sense when I had to actually explain what was going on. I swore that for the Super8 class' final project, I'd try to do better.
So, with the two quotes above in mind, I set out to develop the "moon baby helps a star" story. I set for myself a goal of writing 50 to 100 different concepts, each with a serial number, and only a paragraph long. ...I spent two hours writing and made it only to 25 -- but it was a good experiment, and served its purpose.
I figured out that I could do a pretty good story about a dragon stealing a star, scared away when Moon Baby -- aided by fireflies -- creates a terrible shadow on the wall of the monster's lair. However, this story would take more puppets and more shots than I have time for right now, in the context of the Super8 class. My second-choice story deals with a solitary artist who nightly looks at the stars, paints them and paints them, and ultimately releases a star into the sky from his own chest. This is much more doable...
But at the end of it all, I've been convinced that I should go for something simpler still. I'm holding onto the Moon Baby concept -- possibly for submission to the quarterly StopMoShorts.com competition? In the meantime, I'm looking into what I can do with animating objects, like blocks. "Something is better than nothing" -- being too ambitious could easily prevent me from finishing anything for Super8.
...Want to see those 25 story synopses I wrote? Read the complete text file.
posted by sven | permalink | categories: movies, stopmo, writing
all stopmo, all the time
by sven at 12:22 pm
Lately we have a lot of traffic coming through Scarlet Letters looking at my stop-motion animation work. ...Thank you AnimateClay.com!
As you may have noticed, though, Scarlet Star Studios does a lot more than just animation. ;-)
To better manage topics, I've just added a "stopmo" category to the blog. To see all my stopmo posts at once -- or to bookmark the page that deals only with stopmo -- go to: http://www.scarletstarstudios.com/blog/archives/movies/stopmo/
posted by sven | permalink | categories: administrivia
January 4, 2006
and now for a word from our sponsors...
by gl. at 11:53 pm
i've procrastinated promotional work for the february artist's way creative clusters long enough: i meant to begin in december, but it vanished in the holiday haze and *poof!* and here it is january already.
though i had small creative clusters in fall, because my conversion rate for them was pretty high, vickie recommended i try simply extendeding my reach this time. so my goal is to distribute flyers or business cards to 150 different individuals & sites, doubling the 70 i had in fall. this requires a much more structured distribution strategy, which is both tiring and tedious. however, it does give me the opportunity to explore more of portland; it's amazing how one can become accustomed to what one already knows.
sven has been pounding the se pavement while i've been working on nw & ne. we've discovered hollywood is very unfriendly towards flyers (a woman at sweet indulgence even lied to me!), whereas alberta & fremont are welcoming of them. sven said burnside was a tough street, too. sven can consistently distribute 27 flyers in a 4-hour time period, but it takes me 5.5 hours to do 21. at that rate, the cost per flyer is relatively high, even at minimum wage (now $7.25/hour in oregon, so that makes each flyer worth about $1.50 each in labour alone).
before working the lists we began with 30-40 sites and as of today, we are up to 128 sites. i'm pretty confident we'll reach 150 pretty quickly now: i still have some nw to finish and sw to begin, but i also have a slew of networking events lined up this month. my weakest point is north (like the mississippi area) and gresham/clackamas sites.
oh! but i got my first registration today! and it's not at all related to any of the promotion i've just written about! oh, the irony!
completely unrelated:
reason 3,015 why i love portland: the museum of modern materialism, which i discovered across the street from cinema 21 yesterday while trying to juggle flyers, an umbrella and an ipod nano. the museum is a big red vending machine which dispenses a colorful plastic ball w/ trinkets inside for 50 cents (very much like my beloved poetry gumballs). my art piece included a small handful of tiny napoleon-style army men (too bad they're too tiny for mph's mensies; maybe i'll give them to grace weston); a 6-sided die; a simple sticker w/ the words "stay awake!" printed below an alien head; a piece of translucent holographic plastic w/ an embedded honeycomb pattern; and scraps from a language workbook, perhaps, that say things like "say these words in alphabetical order: flute, trumpet, oboe, clarinet."
posted by gl. | permalink | categories: artist's way, exhibits & events
January 1, 2006
things that have never been
by gl. at 11:19 am
"now let's welcome the new year, full of things that have never been." (rilke)
the scarlet star studios site hasn't even been around for a full year yet, but it feels like we've done at least some of what we've wanted to do w/ the blog: write as part of the creative process, talking about creative experiments as well as creative successes.
mph writes in "who knew":
The thing that’s pretty cool about what’s going on over at ScarletStarStudios’ blog is the way stuff is getting documented. You get to see what’s being done as it’s done, you get to read about the decisions that are being made to make stuff happen, and you get a stronger sense of the “ferment” part of “creative ferment” instead of being reduced to spectator status where it’s the “consumer’s” job to wait passively until Art is Presented for Appreciation.
I think it must be fairly hard to be that honest, because other artblogs I’ve come across sometimes stumble into an attempt at creative transparency that becomes a sort of droning lecture on how perfectly the process was executed instead of a conversation or narrative about the inevitable pitfalls along the way. The “lecture” format inevitably ends back where lectures do … a black box that spits out Art for Consumption.
That isn’t to say that I think every artist or creative type should be a documentarian. It isn’t going to be for everybody. It’s kind of the same with corporate blogging and the Cult of the “Authentic Voice.” Some people have it, and their company blogs are a credit to their company and themselves; other people don’t and they’re just part of the branding strategy.
which makes me breathe a huge sigh of relief. he gets it! i write what i want to read, and mph's description of creative transparency is exactly what i want to read. :) i'm fascinated by the creative process, which is just one of the reasons why i facilitate the artist's way.
another reason we like to write is because one of our "problems" is that we're inspired to create in lots of different mediums, and sven & i create in entirely different modes. our breadth is unusual, and this is a "problem" for most art marketing, which wants you to be rarified in your niche. but writing about what we do lets us cross-pollinate to create strange and fascinating flowers. jane levy campbell called us "a real Renaissance pair!" when she discovered our site and i thought that was one of the best compliments we could have received.
i also write to maintain my momentum. this might seem contradictory because writing about the art we make takes a lot of time. but i'm beginning to formulate a newtonian art theorem: a body in motion tends to stay in motion; a body at rest tends to stay at rest. if i stop making art, then it's harder to start again. writing gives me enough of a break to breathe without allowing me to come to a full stop where inertia might claim me. writing is another form of creation, and it often helps to clarify & reinspire the next project or step.
and of course, we write because we've been inspired by the writing of others. we've gotten a lot of traffic lately from animateclay & the stopmo boards (hi, there!), a couple of the many sites that have fed sven's recent insatiable research in stop-motion animation. so it's great to think we have something to give back. but stick around! we may not always write about stop motion, but we'll always write about something interesting and fun!
posted by gl. | permalink | categories: miscellany