you are here [x]: Scarlet Star Studios > the Scarlet Letters > Nice model... But can you animate it?
<< before
new stopmo puppet - in progress
after >>
sets for "moon baby helps a star"
December 27, 2005
Nice model... But can you animate it?
by sven at 12:15 am
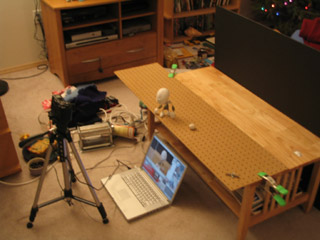
I've been very focused on learning how to build puppets to animate... Yesterday I suddenly realized that I've neglected learning how to actually put them in motion!
When I think about it, I really haven't done much animating at all. The last time I worked with animating objects was nearly two years ago. You can still see those experiments at my old Sven's Animation site. Since then, I've been working mostly with LightWave 3D for the "Let Sleeping Gods Lie" project -- but that too has been mostly about modeling so far.
So I set to the task of learning and re-learning the basics of stop-motion animation. ...And thanks to Jason Gottlieb's definitive tutorial on compressing stopmo for the web, you get to see all eight tests that I've done so far! Some of these are pretty bad -- but I include them here because the learning process (beginning from zero) may be interesting.
I'm using a Canon PowerShot G5 camera attached to a Macintosh PowerBook G4. Using the software RemoteCapture (which came with the camera, I think) I can activate the shutter release without touching the camera, and the images go directly to the computer, rather than into the camera's memory card.
In RemoteCapture, these are the steps to get ready for shooting:
- in "preferences", select the folder you want shots to go to
- now in the "shooting remote" window, set size to "small/fine"
- in the same window, hit the button to turn the view finder on and then adjust zoom
- put the puppet in shot and take a test shot
- if it's in focus, then set the autofocus (AF) to "locked"
- delete the test shot
- ...and go!
After all the shots have been captured, I use the software QuickTime Pro to open the shots as an "image sequence". The newly created movie is then saved. It's from this master that I create the compressed versions you see here.
In my first test (above), the camera is just sitting on the floor, and I'm scooting a bottle of embossing powder (a Christmas stocking stuffer) across the floor. The picture vibrates, going in and out of focus... This is because I didn't have the auto-focus locked yet.
In this next clip, I'm moving the embossing powder again (this time upsidedown) -- but with the auto-focus locked. There's still some variation in light, but this is because I'm using daylight (which changes as clouds pass) and my shadow occasionally falls in the frame.
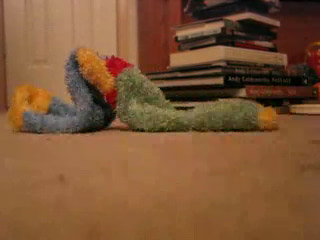
Moving a solid object in a straight line? Not very interesting. So I grabbed another stocking stuffer -- a fuzzy sock -- and made it worm its way across the floor. Cute! But now I realized that the foreground is really blurry. That's because the camera's just sitting on the ground; it can't focus both on the foreground and the midground at the same time.
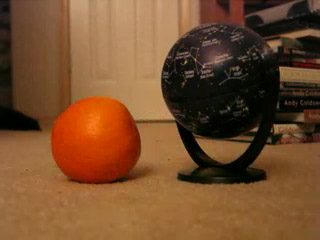
In the fourth test, I put the camera on top of three DVD cases -- that was enough to get rid of the blurry foreground problem. This time I wanted not just to imply character, but to show a relationship between two beings. The star globe reacting to the orange is fairly compelling, I think.
...This was the last test I did before going to bed on Christmas night.
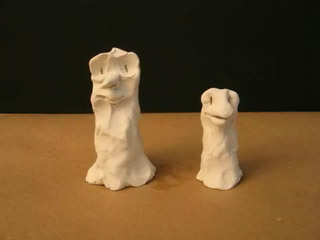
This afternoon I dove into some more elaborate tests. I commandeered the livingroom cofffeetable, leaned a big piece of black foamcore against it for a background, and taped down a piece of butcher paper. I pulled out some Sculpey, and after conditioning it by running it through a pasta maker, created some very rough characters.
In my imagination, what's happening here is two tree beings get blown around by the wind; the little one cries out a complaint, and the old one blinks its eyebrows dispassionately; the little guy sneezes, and with a few more blinks, everything goes back to normal. ...But it all goes so fast, I don't think the "story" gets communicated.
At this point I realized that I hadn't really paid any attention to timing. Every frame, I just pushed my puppets forward a little more -- so they were in constant motion. What about pauses? What about figuring out how long you want specific actions to last? For that matter, what about really planning out the story in advance?
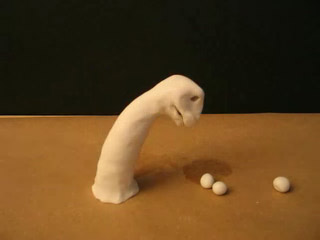
For this sixth test I drew a very quick storyboard. The dinosaur-head creature is supposed to notice the fruits, reach down and gobble up one, then another, and then stretch himself out on the ground in order to reach the third. It occurred to me that as an animator, one needs to develop a good sense of how long a second, half-second, and quarter-second are. So in the storyboard, I made a note for how long I thought each motion should last. I was pretty happy with this approach.
But before I could even get the dino's mouth down to the first fruit, it tipped over! D'oh! Here we have an object lesson in the importance of attaching your puppets securely to the set.
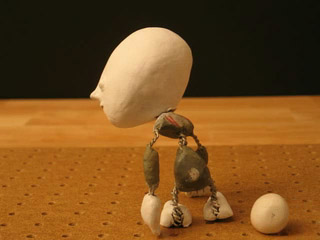
Seeing that it was time to begin playing with my actual puppet-in-progress ("Baby"), I got out a scrap of pegboard and clamped it to the coffee table, hanging over the edge (see the photo at the top of this post).
The little animation of Baby interacting with this Sculpey ball works pretty well. I guesstimated how long I wanted each action to last, and helped myself keep track by counting each section of shots out loud : "1... 2... 3... 4... 5... 6!"
The foot that's tied down swivels in place when Baby turns. That doesn't look right; the foot should always be firmly planted in one place. There's also a moment when an arm swings wildly, where I either didn't give it enough time, or wasn't thinking about what was motivating the action.
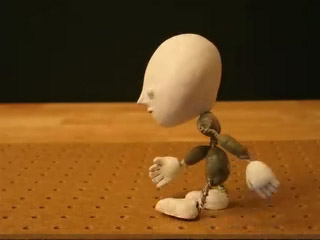
Finally, my eighth test: a walk cycle. I've been shooting 24 frames for each second -- using the frame rate associated with film cameras rather than DV, in order to get the classic learning experience. Sending baby from one side of the screen to the other required 178 photos, which took me just a hair over an hour to shoot.
Beginner animators obsess over walk cycles. You have to realize, though, that a good deal of action happens when characters are basically standing still. Getting walks right is a technical skill -- but what we ultimately need to focus on is acting. ...I say this in part because I could see myself being one of those people who gets stuck on striving for technical perfection, rather than using the puppets to tell a story. No, Sven!
If you just look at the feet, the walk worked out pretty well. The arms, though, are swinging way too much. With hands that drag on the ground, Baby would probably carry them in front of himself, rather than swinging them at all. The head is also painfully jerky. This is probably exactly the sort of situation where a gauge would be helpful -- perhaps one that tracks the position of the nose. [Oh yeah -- and in one frame you can see my hand in the shot!]
Problems that I knew were inherent in the Baby puppet became much more obvious. He's too small: only 5 inches tall. It was hard to manipulate his legs; and I could tell that the lack of upper arm bones (which I couldn't fit in) made a big difference while animating. He's also top-heavy. He'd jiggle a little when I posed him -- but the ankles did OK holding their shape. Note to self: ALWAYS test whether or not an armature can stand on one foot while leaning forward, before you get too invested in the puppet!
...And there you have it: eight quick tests to help me learn animation. I really recommend this process; if I had dreamed up a fancy story first, I'd have been bogged down with trying to overreach my skill level. But by grabbing whatever what was at hand, I made fast progress learning. Tomorrow I have to turn my attention to the Super8 final project -- but I can tell that if I just allowed myself to continue doing experiments without expectations, it wouldn't be long at all until my growing level of competency would start producing keep-worthy clips -- which might then be woven into an interesting whole.
posted by sven | December 27, 2005 12:15 AM | categories: movies, stopmo