you are here [x]: Scarlet Star Studios > the Scarlet Letters > new stopmo puppet - in progress
<< before
scary solstice from scarlet star studios!
after >>
Nice model... But can you animate it?
December 23, 2005
new stopmo puppet - in progress
by sven at 9:29 pm
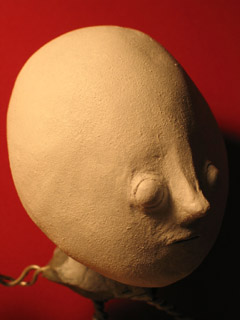
For several weeks I've been obsessed with learning how to make puppets for stop-motion animation. I studied and studied -- and now I'm making one of my own...
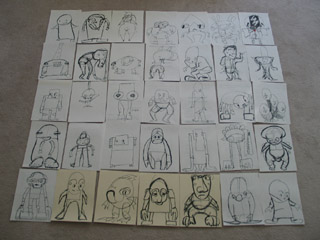
How I came up with the design is interesting... I was experimenting with different ways to generate stories for my Super8 final project. I tried:
- photographing improvised dioramas
- quickly brainstorming story elements, drawing each one on a separate piece paper
- writing ten one-paragraph-long story ideas as quickly as I could
- beginning from the characters: sketching pictures of possible puppets
[So far, working with dioramas has worked the best. I found that when I drew story elements, I tended to only draw solitary characters -- working with "dolls", on the other hand, immediately implied relationships. Writing story ideas, I tended to come up with poetry -- neat, but it felt too abstract.]
...When I tried doing character designs, I managed to spit out 35 sketches in about an hour and a half. I used fat crayola markers on the backs of junk typing paper -- it was nice not to be inhaling toxic fumes! The sketches were rough, but conveyed emotion... From this, I just had to leap into constructing them in 3D!
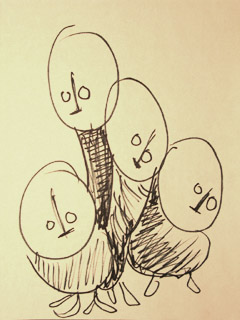
I'm surprised myself that I chose this picture to start with. But for some reason, the little "baby" on the far left really spoke to me. In my imagination, I see this shy family of what's-its cowering in a cave somewhere, eyes almost blind from disuse, whispering unintelligible things to the moon when they occasionally creep up to the outside world at night.

I started puppet construction by drawing a quick outline of the character on another piece of paper, marking out where I thought the bones should be. I took some sculptor's aluminum armature wire (1/16", I think), folded it in half, and used a hand-held drill to twist the two strands together. Interesting: the wire becomes a straight and stiff rod in the process... It's easily bent -- but this first transformation fascinates me.
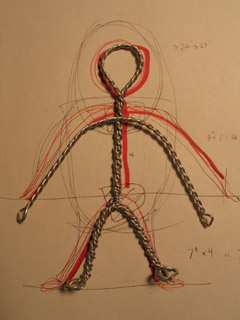
I created three lengths of twisted wire: one for the legs, one for the arms, and one for the spine and head. The lengths for the legs and head I folded and twisted a second time, so they'd be four-strands-strong. These bits turned out smaller than I expected -- when you twist the wire, it shortens noticably.
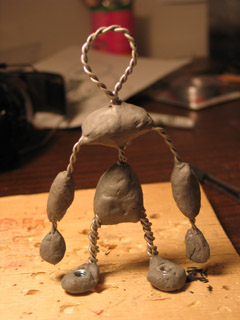
Next I created some "bones" out of plumber's epoxy putty. The armature here is about 5" tall -- which is overly small -- so I couldn't make all the bones I'd imagined. Nothing in the legs, and bones only in the forearms.
This is my first time working with epoxy putty... Overall I liked it. It starts setting up in about 5 minutes, and is steel-hard in 20. Since I wasn't creating any details, that was plenty of time. (Glad I wore latex gloves, though.)
Notice that I epoxied some bolts onto the feet loops. The armature is able to stand up because there's a bolt coming up through a hole in that piece of wood, screwing into the foot.
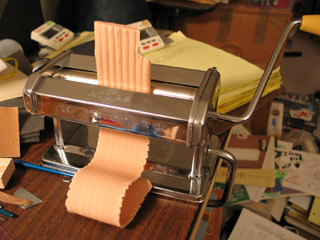
For my first puppet I figured I'd just have a single-expression face -- expressiveness would have to come from body language. I got out some Super Sculpey and "conditioned" it by putting it through a pasta maker several times. ...I got the stuff to begin working with Sculpey quite a while back (last year?), and I tried a few tests then -- but this is really my first time doing a serious project with the material.
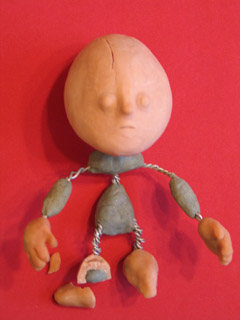
I used Super Sculpey to put on a head, hands, and feet. I smoothed the head by using a loop tool and then brushing with isopropyl alcohol. The rubbing alcohol is supposed to act as a solvent, softening the sculpey; it did somewhat, but I was disappointed. Turpenoid is stronger; I'll be trying that next time. ...Even so, I got a pretty darned smooth head. I wasn't as concerned with the hands and feet this time around, and didn't work them too hard.
You're suppossed to bake Sculpey at 275 degrees for every quarter inch of thickness. I guessed that there were places on the head a full inch thick, so I chose to bake it for an hour. That was a mistake. I got severe cracks in the head, a pinky fell off the hand, and one of the feet broke. Meh.
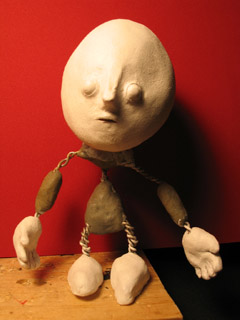
According to Smellybug's insanely cool tutorial on maquettes, the way to fix cracks is by putting superglue in, smearing on Super Sculpey, smoothing it with turpenoid, and then hitting the spot with a heat gun. I tried this and only wound up adding some scorch marks to the puppet. However, I found that I could just smear Sculpey into the cracks like you'd use wood putty on a nicked chair; it was fine even without baking.
After making repairs, I sanded the head even smoother, and then painted all the Sculpey bits with four coats of white acrylic. I used a bit of kitchen sponge to do the application, which gives the whole piece a really neat stone-like texture. I think I like it better than brush-work -- but in the future I might try using an airbrush to get an even finer surface.
That's where things stand at present!
Notes on what could be improved:
- 5" is too small a scale -- puppets should probably be between 8" and 14" tall
- bake Super Sculpey at a lower temperature for a longer time (200 degrees?)
- a basecoat of black paint, with white sponged on top of that, and then color stains, would probably give me a better look
- try using an airbrush next time?
- I shouldn't have used tin foil to bulk up the head; it's a little loose on the wire
- there should be a more distinct neck; the head almost rests on the shoulders
- the shoulders could have been wider
- truly flat feet would work better; bolts on top of wire loops = uneven footing
- I think Nick Hilligoss' T-style tie-downs would be easier to work with on set
(Still, I'm very enthusiastic about what I've accomplished so far.)
posted by sven | December 23, 2005 9:29 PM | categories: movies, sculpture, stopmo