December 2005 archives
you are here [x]: Scarlet Star Studios > the Scarlet Letters > December 2005
<< before
November 2005
after >>
January 2006
December 29, 2005
little black tears
by sven at 1:05 am
My poor puppet "moon baby" has broken!
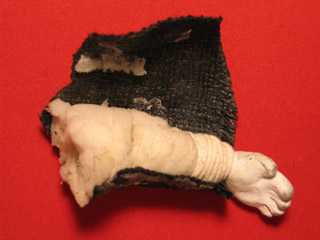
I worked all day on finishing my new puppet... And then his left arm snapped off. This setback would be devastating -- but I'm trying not to let the hurt in too deeply; I need to believe that I can still save my baby.
And everything was going so well...
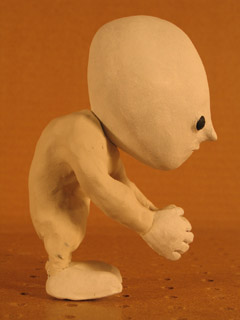
The first thing I did today was paint Moon Baby's eyes black. I'd been intending green, but time's at a premium, and this was simpler. It reminds me of the eyes of your stereotypical "Close Encounters of the Third Kind" alien -- and of a great white shark -- and of the tree spirits from "Princess Mononoke". I like it.
I thought maybe I could cut corners by encasing the armature in unbaked Sculpey. When I did so, it turned out that the puppet became too heavy -- the ankles couldn't support the extra weight. Still, it was a good exercise: it helped me get a better sense of the physical dimensions I was after.
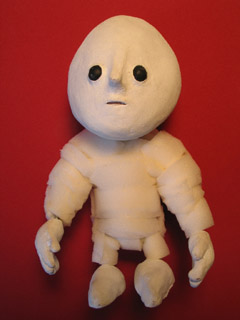
So, I went back to my original plan: to cover baby's body with poly foam. It's probably for the best; it's better to put in extra time making a good puppet up front, rather than be cursing the puppet later while you try to animate it.
A week or so ago when I went out shopping for foam, I found something wonderful: "Poly Foam Weatherseal Self Stick Tape" from Frost King. I want to strongly recommend this material to stopmo puppetmakers who are using the build-up method. This tape is 3/4" wide, 1/4" thick, and came in a 17' long roll. It's intended for insulating windows, and I found it in the hardware section of Fred Meyers (our local department store). It cost maybe $3.00.
...It's the kind of foam that you would normally use for bulking out a puppet -- but because it comes in tape form, you don't have to deal with messy, toxic sprayment! It's also good for creating a symmetrical body mass; you layer small, precisely measured pieces of foam -- rather than having to whittle down a huge block. Really, it was a joy to work with.
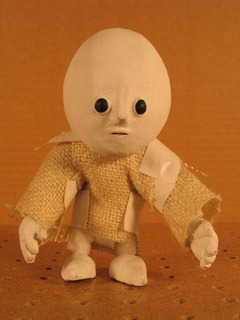
For Moon Baby's costume I wanted a sort of black burlap muumuu. I had some tan burlap on hand, so I dyed it black with india ink. It did the job -- but also rubs off on the hands over time, which leads to smudging baby's head. I thought it would be a good idea to paint the back of the fabric with liquid latex. It had a loose weave that I wanted to seal, and I figured a stiffer fabric would move less randomly when I was animating. This was probably a mistake; the stiffness impairs the armature's ability to hold its shape, somewhat.
I created a pattern for the costume by trial and error using pieces of paper and tape. When I thought I had it right, I tried out the pattern using burlap -- but not the burlap I'd treated with latex yet. Looking at the burlap, I made some further changes to the pattern, which I now drew onto graph paper. I cut these templates out, and using a yellow watercolor pencil (because it was at hand), marked out my cut lines on the black stuff, and cut.
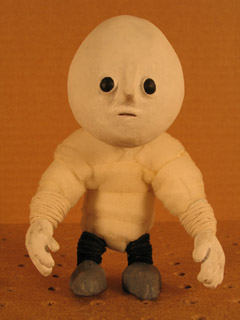
At this point I realized that I should deal with the wrists, ankles, and neck before going farther. These bits (I gather) are always difficult to construct. I decided that with the look I'm going for, it would be adequate to just wrap them with string. I thought about painting the string with latex, but then decided it wasn't really necessary. The string for the ankles was dyed black using india ink again. The ends of the string were fixed in place with a dab from the hot glue gun.
Now I started attaching the muumuu. A while back I read that professional costumers in the theater have a trick for quick clothing construction: they use a hot glue gun to make their seams, instead of a sewing machine. Perfect! I hot glued the arms of the costume directly to the body...
...At which point I realized that the arms weren't bending as easily as they should anymore. The poly foam "muscle" combined with the costume was just too springy, and baby couldn't hold a pose without it slowly sliding out of place. So I tore open the sleeves, and tried cutting through the foam -- incising rings down to the "bones", so the joints could move more easily.
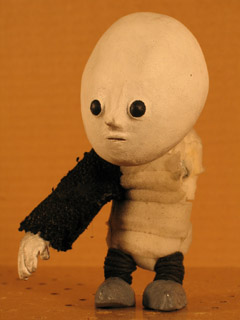
That's when it happened. The arm just snapped off.
At first I thought I must have nicked the wire -- which is death for an armature. But now as I look at it, I see that the wire broke right where it goes into the epoxy putty. Maybe the arm was working as a lever, and all the strain was put on that one point. I've read about people reinforcing the entry point with silk thread... Maybe that's what I should have done.
...I'm hopeful that I can still salvage this puppet. I've already put at least twelve hours into him, and have grown fond of the character. I think maybe I can drill new holes into the epoxy and replace the wire. But it will be difficult.
I'm left with questions about how other puppet makers deal with musculature. Replacing the wire will fix the problem, but what should I have been doing with the foam in the first place? Was incising the foam at the joints the right way to create mobility? What if I tried wrapping string in these areas, too?
My next step is going to have to be writing a sad post to the www.stopmotionanimation.com forum...
posted by sven | permalink | categories: movies, stopmo
December 28, 2005
sets for "moon baby helps a star"
by sven at 11:10 pm
Yesterday I started work in earnest on making a stop-motion animated short -- spurred on by the approaching deadline for the Super8 class' final project. Tentative title: "moon baby helps a star".
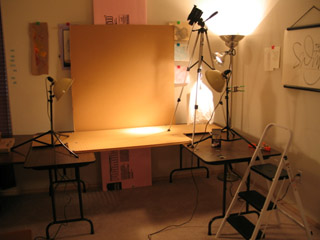
I commandeered Scarlet Star Studio's meeting space and began assembling sets. My basic set up involves two tables with pegboard bridging the gap between them. Since pegboard is pretty flexible, I reinforced each of my two big scraps with wooden rails. I've got three spot lamps that I borrowed from Radius Studio; super8 requires a lot of light. I put a little step ladder next to the table so I could easily get up there and take shots looking down at the set.
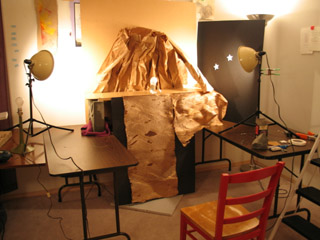
I like to brainstorm with my hands, seeing what I can make with what's around me. I like the sense of improvization... And in this case, it helps me avoid fantasizing about things that I don't have time to construct. At this point in the game, I'm still working out what my story is going to be; the impromptu sets I've been trying out are suggesting story ideas as much as anything else.
One interesting thing I discovered while doing this physical brainstorming: it's helpful to have the set about a foot higher than table-level. When I'm sitting in a chair, this puts the floor of the set close to eye level -- so I don't have to crawl under the table to screw in the tie-downs. In the photo above, you can see that I've put one of my pegboard scraps up on bricks, and have a test set thrown together.
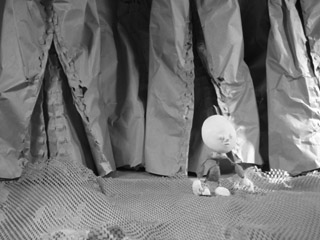
I've found it very useful to have a digital camera handy while I'm playing around like this... It allows me to try out different camera angles, and later on I can string the photos together into a sort of storyboard. Since the Super8 film stock I'm working with is black and white (and silent), I took all my test shots in b/w.
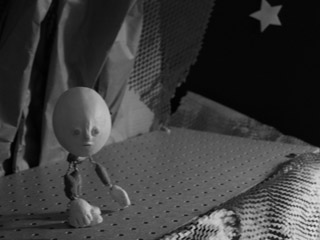
The cave walls are made out of butcher paper that was packing material in a box of art supplies that Gretchin ordered. It had such an interesting texture, I knew it would come in handy when I got around to animating! In that same box, there was also this interesting paper mesh... Turns out it's excellent for creating a floor texture that still allows tie-downs to pass through.
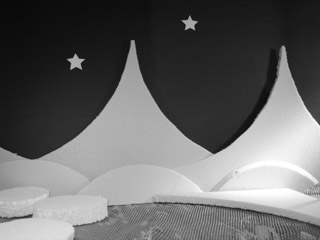
Here's an exterior shot. The dark sky is two huge pieces of black foamcore. The mountains and hills are leftover insulation foam from a sculpture project several years ago. The stars were decorations I made for our tent when we went to Burning Man in 2004.
So, the story as I've imagined it so far: Black shadow creatures steal a star from the sky and whisk it down into the depths of a cave. "Moon Baby" -- a name that Gretchin suggested for my new puppet, which I'd been referring to as just "baby" -- also lives in this cave, and discovers the kidnapping. He steals it back from the amorphous nether creatures, and after consulting either a map or some sort of guardian being, journeys to the entrance of the cave. Stepping into the outside world, he throws the star back into the heavens, and all the stars above dance in joy.
posted by sven | permalink | categories: movies, stopmo
December 27, 2005
Nice model... But can you animate it?
by sven at 12:15 am
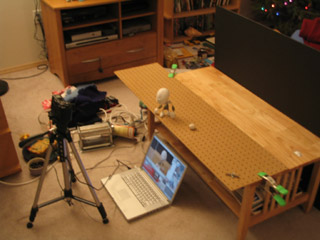
I've been very focused on learning how to build puppets to animate... Yesterday I suddenly realized that I've neglected learning how to actually put them in motion!
When I think about it, I really haven't done much animating at all. The last time I worked with animating objects was nearly two years ago. You can still see those experiments at my old Sven's Animation site. Since then, I've been working mostly with LightWave 3D for the "Let Sleeping Gods Lie" project -- but that too has been mostly about modeling so far.
So I set to the task of learning and re-learning the basics of stop-motion animation. ...And thanks to Jason Gottlieb's definitive tutorial on compressing stopmo for the web, you get to see all eight tests that I've done so far! Some of these are pretty bad -- but I include them here because the learning process (beginning from zero) may be interesting.
I'm using a Canon PowerShot G5 camera attached to a Macintosh PowerBook G4. Using the software RemoteCapture (which came with the camera, I think) I can activate the shutter release without touching the camera, and the images go directly to the computer, rather than into the camera's memory card.
In RemoteCapture, these are the steps to get ready for shooting:
- in "preferences", select the folder you want shots to go to
- now in the "shooting remote" window, set size to "small/fine"
- in the same window, hit the button to turn the view finder on and then adjust zoom
- put the puppet in shot and take a test shot
- if it's in focus, then set the autofocus (AF) to "locked"
- delete the test shot
- ...and go!
After all the shots have been captured, I use the software QuickTime Pro to open the shots as an "image sequence". The newly created movie is then saved. It's from this master that I create the compressed versions you see here.
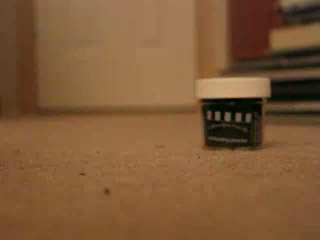
In my first test (above), the camera is just sitting on the floor, and I'm scooting a bottle of embossing powder (a Christmas stocking stuffer) across the floor. The picture vibrates, going in and out of focus... This is because I didn't have the auto-focus locked yet.
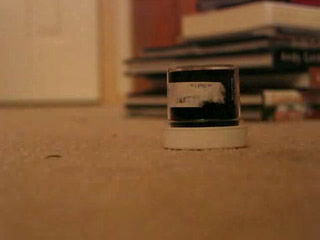
In this next clip, I'm moving the embossing powder again (this time upsidedown) -- but with the auto-focus locked. There's still some variation in light, but this is because I'm using daylight (which changes as clouds pass) and my shadow occasionally falls in the frame.
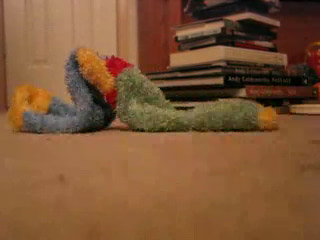
Moving a solid object in a straight line? Not very interesting. So I grabbed another stocking stuffer -- a fuzzy sock -- and made it worm its way across the floor. Cute! But now I realized that the foreground is really blurry. That's because the camera's just sitting on the ground; it can't focus both on the foreground and the midground at the same time.
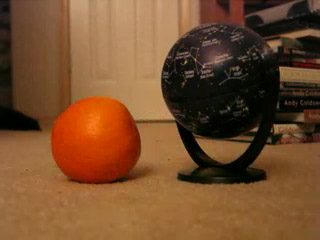
In the fourth test, I put the camera on top of three DVD cases -- that was enough to get rid of the blurry foreground problem. This time I wanted not just to imply character, but to show a relationship between two beings. The star globe reacting to the orange is fairly compelling, I think.
...This was the last test I did before going to bed on Christmas night.
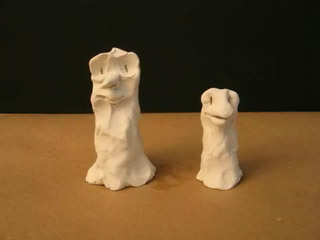
This afternoon I dove into some more elaborate tests. I commandeered the livingroom cofffeetable, leaned a big piece of black foamcore against it for a background, and taped down a piece of butcher paper. I pulled out some Sculpey, and after conditioning it by running it through a pasta maker, created some very rough characters.
In my imagination, what's happening here is two tree beings get blown around by the wind; the little one cries out a complaint, and the old one blinks its eyebrows dispassionately; the little guy sneezes, and with a few more blinks, everything goes back to normal. ...But it all goes so fast, I don't think the "story" gets communicated.
At this point I realized that I hadn't really paid any attention to timing. Every frame, I just pushed my puppets forward a little more -- so they were in constant motion. What about pauses? What about figuring out how long you want specific actions to last? For that matter, what about really planning out the story in advance?
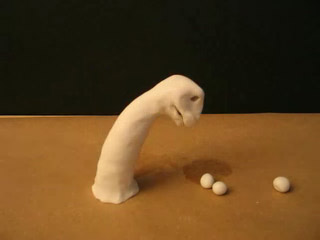
For this sixth test I drew a very quick storyboard. The dinosaur-head creature is supposed to notice the fruits, reach down and gobble up one, then another, and then stretch himself out on the ground in order to reach the third. It occurred to me that as an animator, one needs to develop a good sense of how long a second, half-second, and quarter-second are. So in the storyboard, I made a note for how long I thought each motion should last. I was pretty happy with this approach.
But before I could even get the dino's mouth down to the first fruit, it tipped over! D'oh! Here we have an object lesson in the importance of attaching your puppets securely to the set.
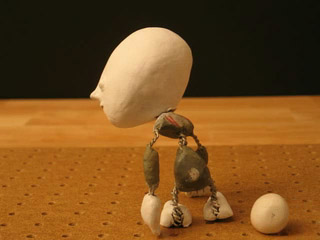
Seeing that it was time to begin playing with my actual puppet-in-progress ("Baby"), I got out a scrap of pegboard and clamped it to the coffee table, hanging over the edge (see the photo at the top of this post).
The little animation of Baby interacting with this Sculpey ball works pretty well. I guesstimated how long I wanted each action to last, and helped myself keep track by counting each section of shots out loud : "1... 2... 3... 4... 5... 6!"
The foot that's tied down swivels in place when Baby turns. That doesn't look right; the foot should always be firmly planted in one place. There's also a moment when an arm swings wildly, where I either didn't give it enough time, or wasn't thinking about what was motivating the action.
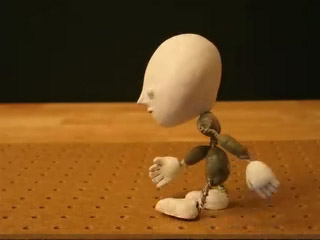
Finally, my eighth test: a walk cycle. I've been shooting 24 frames for each second -- using the frame rate associated with film cameras rather than DV, in order to get the classic learning experience. Sending baby from one side of the screen to the other required 178 photos, which took me just a hair over an hour to shoot.
Beginner animators obsess over walk cycles. You have to realize, though, that a good deal of action happens when characters are basically standing still. Getting walks right is a technical skill -- but what we ultimately need to focus on is acting. ...I say this in part because I could see myself being one of those people who gets stuck on striving for technical perfection, rather than using the puppets to tell a story. No, Sven!
If you just look at the feet, the walk worked out pretty well. The arms, though, are swinging way too much. With hands that drag on the ground, Baby would probably carry them in front of himself, rather than swinging them at all. The head is also painfully jerky. This is probably exactly the sort of situation where a gauge would be helpful -- perhaps one that tracks the position of the nose. [Oh yeah -- and in one frame you can see my hand in the shot!]
Problems that I knew were inherent in the Baby puppet became much more obvious. He's too small: only 5 inches tall. It was hard to manipulate his legs; and I could tell that the lack of upper arm bones (which I couldn't fit in) made a big difference while animating. He's also top-heavy. He'd jiggle a little when I posed him -- but the ankles did OK holding their shape. Note to self: ALWAYS test whether or not an armature can stand on one foot while leaning forward, before you get too invested in the puppet!
...And there you have it: eight quick tests to help me learn animation. I really recommend this process; if I had dreamed up a fancy story first, I'd have been bogged down with trying to overreach my skill level. But by grabbing whatever what was at hand, I made fast progress learning. Tomorrow I have to turn my attention to the Super8 final project -- but I can tell that if I just allowed myself to continue doing experiments without expectations, it wouldn't be long at all until my growing level of competency would start producing keep-worthy clips -- which might then be woven into an interesting whole.
posted by sven | permalink | categories: movies, stopmo
December 23, 2005
new stopmo puppet - in progress
by sven at 9:29 pm
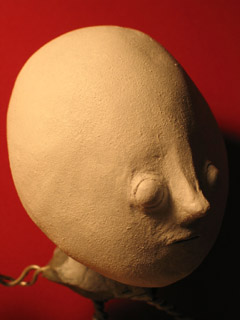
For several weeks I've been obsessed with learning how to make puppets for stop-motion animation. I studied and studied -- and now I'm making one of my own...
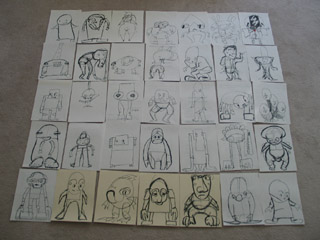
How I came up with the design is interesting... I was experimenting with different ways to generate stories for my Super8 final project. I tried:
- photographing improvised dioramas
- quickly brainstorming story elements, drawing each one on a separate piece paper
- writing ten one-paragraph-long story ideas as quickly as I could
- beginning from the characters: sketching pictures of possible puppets
[So far, working with dioramas has worked the best. I found that when I drew story elements, I tended to only draw solitary characters -- working with "dolls", on the other hand, immediately implied relationships. Writing story ideas, I tended to come up with poetry -- neat, but it felt too abstract.]
...When I tried doing character designs, I managed to spit out 35 sketches in about an hour and a half. I used fat crayola markers on the backs of junk typing paper -- it was nice not to be inhaling toxic fumes! The sketches were rough, but conveyed emotion... From this, I just had to leap into constructing them in 3D!
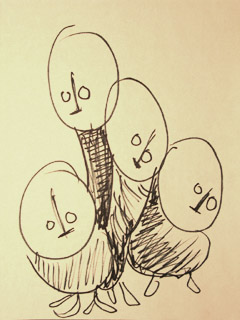
I'm surprised myself that I chose this picture to start with. But for some reason, the little "baby" on the far left really spoke to me. In my imagination, I see this shy family of what's-its cowering in a cave somewhere, eyes almost blind from disuse, whispering unintelligible things to the moon when they occasionally creep up to the outside world at night.

I started puppet construction by drawing a quick outline of the character on another piece of paper, marking out where I thought the bones should be. I took some sculptor's aluminum armature wire (1/16", I think), folded it in half, and used a hand-held drill to twist the two strands together. Interesting: the wire becomes a straight and stiff rod in the process... It's easily bent -- but this first transformation fascinates me.
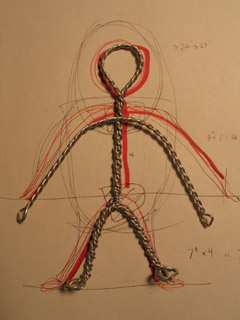
I created three lengths of twisted wire: one for the legs, one for the arms, and one for the spine and head. The lengths for the legs and head I folded and twisted a second time, so they'd be four-strands-strong. These bits turned out smaller than I expected -- when you twist the wire, it shortens noticably.
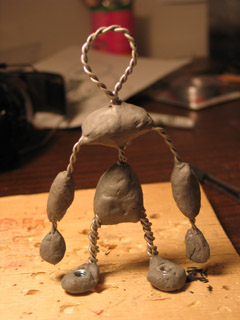
Next I created some "bones" out of plumber's epoxy putty. The armature here is about 5" tall -- which is overly small -- so I couldn't make all the bones I'd imagined. Nothing in the legs, and bones only in the forearms.
This is my first time working with epoxy putty... Overall I liked it. It starts setting up in about 5 minutes, and is steel-hard in 20. Since I wasn't creating any details, that was plenty of time. (Glad I wore latex gloves, though.)
Notice that I epoxied some bolts onto the feet loops. The armature is able to stand up because there's a bolt coming up through a hole in that piece of wood, screwing into the foot.
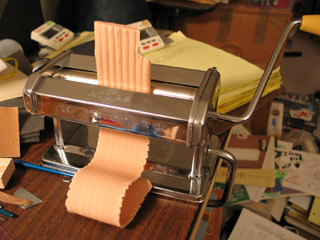
For my first puppet I figured I'd just have a single-expression face -- expressiveness would have to come from body language. I got out some Super Sculpey and "conditioned" it by putting it through a pasta maker several times. ...I got the stuff to begin working with Sculpey quite a while back (last year?), and I tried a few tests then -- but this is really my first time doing a serious project with the material.
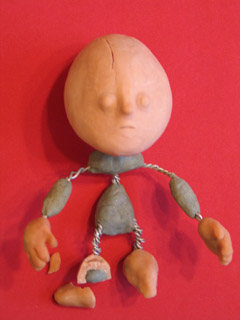
I used Super Sculpey to put on a head, hands, and feet. I smoothed the head by using a loop tool and then brushing with isopropyl alcohol. The rubbing alcohol is supposed to act as a solvent, softening the sculpey; it did somewhat, but I was disappointed. Turpenoid is stronger; I'll be trying that next time. ...Even so, I got a pretty darned smooth head. I wasn't as concerned with the hands and feet this time around, and didn't work them too hard.
You're suppossed to bake Sculpey at 275 degrees for every quarter inch of thickness. I guessed that there were places on the head a full inch thick, so I chose to bake it for an hour. That was a mistake. I got severe cracks in the head, a pinky fell off the hand, and one of the feet broke. Meh.
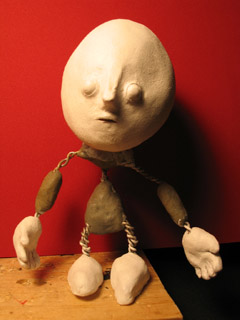
According to Smellybug's insanely cool tutorial on maquettes, the way to fix cracks is by putting superglue in, smearing on Super Sculpey, smoothing it with turpenoid, and then hitting the spot with a heat gun. I tried this and only wound up adding some scorch marks to the puppet. However, I found that I could just smear Sculpey into the cracks like you'd use wood putty on a nicked chair; it was fine even without baking.
After making repairs, I sanded the head even smoother, and then painted all the Sculpey bits with four coats of white acrylic. I used a bit of kitchen sponge to do the application, which gives the whole piece a really neat stone-like texture. I think I like it better than brush-work -- but in the future I might try using an airbrush to get an even finer surface.
That's where things stand at present!
Notes on what could be improved:
- 5" is too small a scale -- puppets should probably be between 8" and 14" tall
- bake Super Sculpey at a lower temperature for a longer time (200 degrees?)
- a basecoat of black paint, with white sponged on top of that, and then color stains, would probably give me a better look
- try using an airbrush next time?
- I shouldn't have used tin foil to bulk up the head; it's a little loose on the wire
- there should be a more distinct neck; the head almost rests on the shoulders
- the shoulders could have been wider
- truly flat feet would work better; bolts on top of wire loops = uneven footing
- I think Nick Hilligoss' T-style tie-downs would be easier to work with on set
(Still, I'm very enthusiastic about what I've accomplished so far.)
posted by sven | permalink | categories: movies, sculpture, stopmo
December 21, 2005
scary solstice from scarlet star studios!
by gl. at 12:30 am

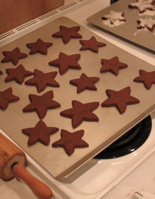
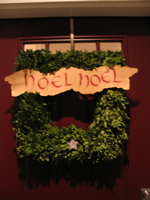
3 things to know about these photos:
that cool scarlet star at the top of our artfully blurry tree is new this year: it showed up the day after we thought it would be cool to find one (thank you, serendipity!). what you don't see is that it's also decorated with the amazing tin stars sven made for my 31st birthday, when he built a scale replica of the burning man in our driveway and set it on fire. the stars fell out as the man burned.
i've never made christmas cookies before. what better place to start than with scarlet(ish) gingerbread stars? this is the second batch, where i got fancy with icing and jiggering w/ the timing & thickness so they'd remain soft.
this is our first square wreath, decorated with another tin star and a "noel noel" banner i've had since i was just beginning calligraphy as a member of the summit scribes in colorado springs. man, that was probably about 7 years ago.
a scary solstice to all! and to all a good night.
posted by gl. | permalink | categories: calligraphy, miscellany
December 17, 2005
don't go, gocco!
by gl. at 8:32 pm
 kyrie told me that gocco is "going out of print" as it were, and will cease production on machines & supplies. i really didn't want to believe it after just spending an abundant amount of money on a setup about a month ago, and having to project the expense of hoarding screens & bulbs for the forseeable years is making my eye twitch.
so i tried to contact the portland gocco rep but never heard back from her, so i tried shu-ju wang, whose energy & talent finally propelled me into getting my own -- and she confirmed the dreadful news.
there seems to be some hope that another manufacturer will pick up the patents or manufacture supplies. i have no idea how feasible that really is, but if i had any ideas on how to actually make that happen, i would be happy to try. in the meantime, i finally (!) joined the gocco-printers group and am participating in the "save gocco!" campaign. what else can i do?
posted by gl. | permalink | categories: links, printing
December 16, 2005
mhcc calligraphy: class 10
by gl. at 10:08 pm
i'm so tired my tongue feels thick and my hands disembodied. but finally, the final project is finished! i showed you the draft, but the final piece is done with a tape 1 nib and a "firefly" pen, which is the manufactured form of my favorite tool, the soda pop pen. the roman caps are lettered w/ calli scarlet on arches text wove (i know! after i disavowed it! but this ink surprisingly works fine w/ this fickle paper); the red stain is four different flavours of red inks with surprisingly different hues & gold leaf in its center.
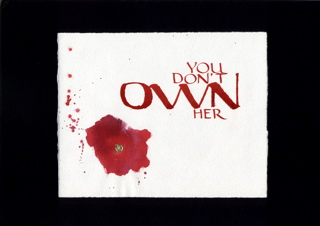
[it looks so small surrounded by black. click for the larger version.]
even though i began this project earlier in the week, i finished the last of 21 attempts at 5:30 this morning. as i was detailing & packing the piece to take to class this afternoon, everything went wrong. while erasing the lines, one tiny dot smudged. i stopped and scraped it away w/ an exacto. while blowing some loose fibers away from the scraped spot, the gold leaf blew right off the red stain and off the table. i got up, got some glue and gently wiggled another piece of gold leaf in place. as i was leaving the studio, i dropped my sturdy cardboard portfolio and managed to gouge a ragged chunk from the "N" in "own" -- fortunately, not in a way that really distorted the letterform, as the gouge occured in the middle of the leftmost downstroke and the folded pen uses a lot of ink.
i don't normally do this, but i've actually used a little photoshop to edit some of the obvious blemishes because it was so heartbreaking to have it fall apart on me like this. will i make another? i don't know. probably not. i think the smarter thing to do is follow the "notes on making art" model and just create another: quality through quantity. still, it would be nice to use it for a portfolio piece....
it was difficult to share this in class because it is so obviously a "statement" and most calligraphers scribe innocuous song lyrics or bible verses. i've invoked him before, but i keep having to remind myself of charles pearce: calligraphers should write in their own words; calligraphers should develop their unique & possibly even political voice. afterwards i had one positive response from a woman i've been talking to over the term, but everyone else obviously didn't know what to say and a couple of people looked like they were afraid to look at it directly lest it infect them.
and now to sleep, perchance to dream...
posted by gl. | permalink | categories: calligraphy, classes & workshops
December 15, 2005
artist's way open studio (december)
by gl. at 11:59 pm
so the proposed "rsvp fee" has been delayed a month, as we had a full house tonight except for one person who emailed me because she was sick. sven was in vancouver at a home-buyer education class which depressed him because he's almost due for a new morning pages journal and would have prefered to have been at collage night tonight instead. it was subdued but productive, with one nice new person & a few rough edges. nobody drank the egg nog, though.
the collage below has shiny red stars and a gold piece underneath "a forest." i wish i had a good way of capturing shine when scanning. also, the flower petals extend past the border of the piece and even a little further than you see here.

["a winter's night": click the image to see the other collages]
i'm up late and i'll be up even later because my mhcc final project is due tomorrow. i thought i was further along on it than i am because whenever i get good text the graphical element isn't right, and whenever the graphical element is cool, the text isn't. the problem letter this time 'round is "o," especially with a soda pop pen.
posted by gl. | permalink | categories: artist's way
December 14, 2005
purty pictures
by gl. at 11:43 am
i've added pictures to all our non-blog pages and modified some content, especially the portland artist's way page and the studio page. that's been a long time a'comin'.
posted by gl. | permalink | categories: administrivia, artist's way
December 12, 2005
psc monthly meeting
by gl. at 10:03 pm
we introduced each other again because there were some new people and we had to mention what our favorite christmas song was. what if you don't celebrate christmas? i thought. calligraphers love songs like "silent night" and the "holly & the ivy" with the occasional rebel enjoying "jingle bell rock." but of course, when my turn came, i had to admit that when december rolls around, i break out the very scary solstice cd.
met a lovely new person who has a lot of energy and is eager to meet people and learn more. i think she'd have a lot to offer to and gain from a creative cluster, so i gave her a couple of cards for the portland artist's way creative clusters.
and i can't believe it, but i've volunteered to help create the website! it'll probably happen in january. the president, who feels responsible for creating the site on top of resurrecting a formerly dead calligraphy society, has already done a lot of the hard work like picking a host & getting a domain name & working out much of the layout/copy; i don't mind putting it online and maintaining it. and i so want them to have a website, as i was frustrated to be unable to find any info about them before i became a member.
and apropos of nothing: today i got red shoes! let's go dancing. :)

posted by gl. | permalink | categories: calligraphy, miscellany
December 11, 2005
keep the little flame flickring
by gl. at 9:47 pm
wow! as a letter junkie, how could i not fall in love with spell with flikr? :D
(found via arteliance, who linked to "notes on making art." thanks!)
posted by gl. | permalink | categories: calligraphy, links
December 10, 2005
scarlet star studies
by gl. at 11:38 pm
i was excited to send the scarlet star studios dba ("doing business as") registration off a couple of weeks ago but didn't want to mention it until i got the confirmation back. i paid an extra $5 to receive a confirmation, and it was a good thing i did, because the state decided we were "scarlet star studies" instead. guess i'll be amending that monday...
btw, because i attempted some google-fu but could have saved myself some time, energy and a phone call to my new tax person: if you want to file a DBA/ABN in oregon, use filinginoregon.com, which is the oregon secretary of state corporate division. just one form & $50 for two years!
but make sure you print very, very, clearly.
[update 12.16: we got the corrected paperwork yesterday! we are officially scarlet star studios! :D]
[update 12.19: wow, that didn't take long. we received our first business junk mail today: 3 different companies wanting to us to enable credit card processing. geesh.]
posted by gl. | permalink | categories: administrivia, links
December 8, 2005
research: stop-motion puppet construction
by sven at 9:24 pm
I stayed up way later than I should have last night -- researching how to make stop-motion puppets. And I'm very excited about what I've learned. I'm going to break this into sections...
I. RESOURCES
By far, the best general resource I found was at StopMotionAnimation.com: their Stop-Motion Newbie Guide rocked my world.
Really -- I've been fascinated with stop-motion animation for years, and this site taught me things that I'd never seen addressed before. ...It was valuable to the extent that I feel compelled to list what's included in their index:
- Chapter 1: A Basic Overview of Puppetmaking Techniques
- Chapter 2: Building a Wire Armature for Your Puppet
- Chapter 3: Building up a Classic Stop-motion Monster
- Chapter 4: Properties of Different Clays
- Chapter 5: Claymation or Stop-Motion - What's the difference?
- Chapter 6: Choosing a Camera for Stop-motion
- Chapter 7: The Importance of Using Gages
- Chapter 8: Stop Motion Software
Three other sites had outstanding tutorial sections: Stop Motion Works, AnimateClay.com, and www.StopMoShorts.com. Whatever educational gaps StopmotionAnimation.com left, they filled in pretty nicely.
Stop-motion animation is a rarified art -- and I'm pleased to discover what seems to be an enclave of amateurs and professionals dedicated to keeping it alive. StopMotionAnimation.com seems to be the heart of their community -- and StopMoShorts.com seems to be where they're showing finished works amongst each other. Not for prizes -- just for the love of it.
...It's very exciting for me to discover StopMoShorts.com -- they have filmmaking challenges every two or three months and seem easygoing about posting submissions. I'm seriously considering grooming future animation projects for display there...
I'm beginning to recognize the names of individuals who -- by their actions -- lead in the "StopMo" community. Four who have personal sites that have helped me greatly:
One more name I want to squeeze in: Kathi Zung. She has a homemade DVD titled "Do It Yourself! Foam Latex Puppetmaking 101" available on her website. I saw it mentioned on Kevin Kelly's Cool Tools site a while back (via Gretchin), and promptly ordered the thing. It's not where I'm going with puppet construction at the moment -- but it was truly an excellent introduction to the topic.
II. PUPPET CONSTRUCTION OPTIONS
I'm going to condense a bunch of what I learned...
Constructing a puppet for animation can be divided into two phases: (A) the armature, (B) the armature's covering.
Phase A. There are basically two sorts of armatures: (1) ones made out of bent wire, (2) ones with machined joints.
Phase B. There are basically three ways to cover the armature: (1) clay, (2) couch cushion foam, (3) foam latex.
Wire vs. Machined Armatures. When you bend wire, it has a bit of rebound; machined joints can be positioned more precisely. Wire suffers metal fatigue over time; machined joints are more generally more durable. However, it's difficult and expensive to machine your own armature.
Differences in coverings. As Mike Brent says, "clay puppets are the easiest to make and the hardest to animate". When you push clay, it smooshes -- so you have to keep resculpting it as you work. ...Foam latex probably gives you the best ability to sculpt your puppet; however, it is very tricky getting the latex to gel correctly, and it can be a fairly expensive route.
...Which leaves couch foam. With this technique, you build musculature with the couch foam (urethane), and then cover it with liquid latex rubber. According to Richard Svensson, this is what you use for "creating the King Kong-Harryhausen-type monster, dragon, dinosaur, etc". The downside: latex rubber disintegrates after about 5 years -- but then, clay and foam latex aren't particularly permanent media, either.
Considering the options, I think it's clear that any 3D puppets I create will probably have a wire armature, and be covered with urethane and liquid latex rubber.
III. CONSTRUCTION DETAILS
Now that I've decided what kind of puppets I want to make, let's take a closer look at the four main steps in their construction...
Step 1: Armature
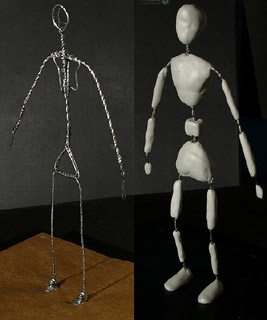
From what I've read, it sounds like the best wire to use for armatures is aluminum -- it doesn't fatigue too quickly. Several armatures I've seen show more than one strand of wire wrapped together. My guess is that braided wire is more reliable: if one strand breaks, the others are still functional.
You don't want the entire "skeleton" to be bendy -- you want to create some "bones". This can be done by putting segments of the wire through metal tubing, or wrapping them in epoxy putty, or simply by wrapping them thickly with tape. Mike Brent said this about epoxy putty: "It's used to create solid 'grab points' that allow you to feel and easily move the puppet under the padding, and also it helps to lock the twisted wire together permanently".
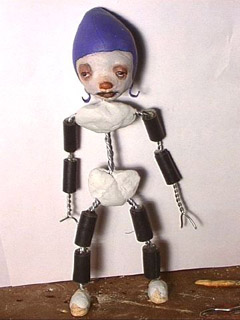
The following two photos were very helpful to me:
Step 2: Tie-downs
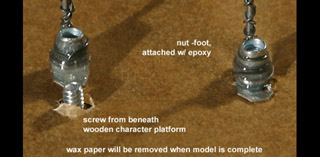
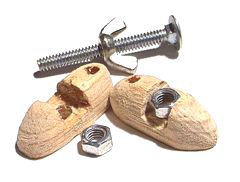
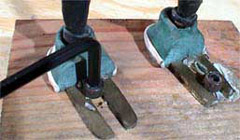
How do you make sure your puppet doesn't fall over? Bolt it to the table! You have a choice: bolt from above, or bolt from below. If you bolt from above, you can just have a slot in the puppet's foot where the screw goes. If you bolt from below, you might build a nut into the foot, and then have the bolt come up through a hole in the table. Either way, it's probably best to drill the holes before you start animating, so you won't get sawdust all over and accidentally tip over the puppet.
These photos were particularly useful to me:
How do you hide the holes in the table? Filling them with plugs that you can pop out when you need to is probably the best option. At www.StopMoShorts.com the tutorial section contains an excellent animated movie on tie-downs by Nick Hilligoss -- followed up by a great article by Mike Brent about how to hide the holes.
Step 3: Covering with urethane foam
Apply couch foam to the armature using spray glue. Trim it into the shape you want using little scizzors. Nick Hilligoss' site does the best job of explaining this process. Richard Svensson, however, does a somewhat better job of showing how one can shape musculature.
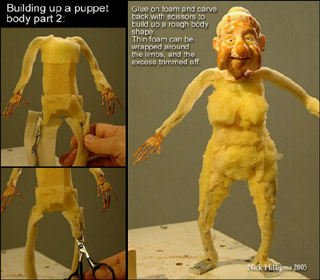
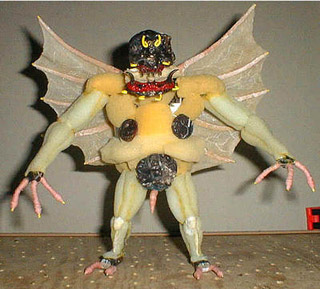
Step 4: Latex rubber skin
In his article on "Building up a Classic Stop-Motion Monster", Richard Svensson does a good job of describing how you sculpt a model, create a mold from it, and then cast a thin latex skin -- which one attaches to the bulked out puppet, much as a taxidermist would. When you're closing up seams in the skin, use liquid latex; rather than brush it on, use a sponge to get a smoother surface.
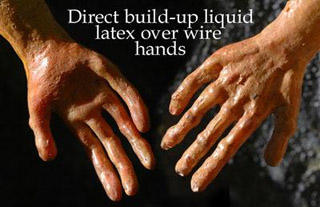
Another great trick for liquid latex: fingers can be built up by applying successive layers of latex directly to naked bits of wire.
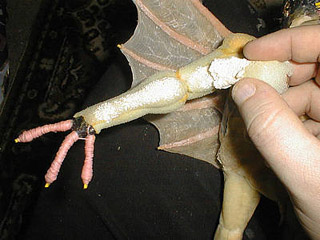
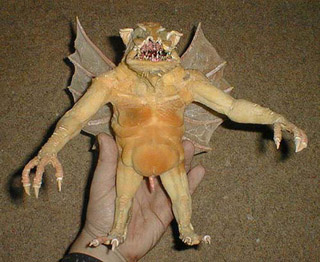
Closing Remarks
Phew! A lot of details... I'd just like to restate that I am so grateful to Mike Brent, Nick Hilligoss, Joshua Mosely, and Richard Svensson for the tutorials they've put up online -- it's so much easier to understand this art form when you can look at the pictures. If you're interested in StopMo, then please, go visit their sites!
posted by sven | permalink | categories: links, movies, stopmo
test: stop-motion puppet armature
by sven at 5:50 pm
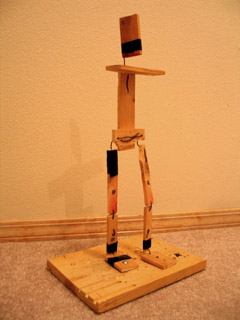
Last night after I got back from Super8 class, Gretchin unpackaged her new computer, "Celeste". An important event! An addition to our computing family! Gretchin set the machine to upload all the files from her old laptop, "Eliot"... And suddenly we had an hour and a half to kill, waiting.
I thought to myself: "I wonder if I could build a stop-motion monster puppet in 90 minutes?" --And in a flash, off I ran to the studio.
Above, you see the results. I didn't have time to make arms or flesh the thing out -- but with some scrap wood, wire, and nails, I got a decent head, torso, legs, and feet.
How to attach the wire for joints to the wood? At first I tried wrapping the wire around and between little nails. That was a miserable failure, and actually wound up breaking the wood. So I tried drilling holes and threading the wire through. That worked pretty well -- except in the ankle joints, where the wire remained too loose.
The whole thing stands up pretty nicely if you leave it alone... But if you push it, it'll start to lean. Lesson learned: you need to have thicker joints in the legs, and your thickest joints in the ankles. The whole body is a lever, applying force at the point where the feet meet the floor...
There are holes in the feet so I could use screws to quickly fix them to the set's floor as the puppet walks forward. However, I don't think I'll be doing anything more with this armature. It's not bad -- but not good enough for extended use in animation. That's OK; the point was just to try, and to see what would happen.
This test convinced me that I need to do further research on armature construction. More on that to come...
posted by sven | permalink | categories: movies, stopmo
Super8 class takes a long break
by sven at 5:01 pm
Last night the Super 8mm Filmmaking class met for just an hour. We watched the two one-reel films that the class made two weeks ago. [We were supposed to have seen them last week, but the film didn't get sent out for developing on time.] ...The film I helped make looked pretty good: good continuity of action, decent lighting -- a few out-of-focus shots, though; and pixelation with three-shots-per-pose was jerkier than I'd hoped.
Film equipment was distributed. Now folks go off to do their final projects. Having second thoughts, I took a couple of lamps to help with lighting whatever animation I settle on doing.
We decided when we'll meet next. It turns out that we're not going to meet again until January 11, when we'll learn how to do editing. January 18 is tentatively the day when we'll all meet to view our final projects. So, the latest we can turn in our film for developing is December 29.
... I'm kinda appalled that we're going to be meeting in January. When I signed up for this class, I understood it to be a five week class. Originally, we were supposed to be done by Dec. 7! I don't think I have any conflicts, and I consented to the new dates -- but I'm shocked that the class schedule was not actually set in advance.
I suppose I shouldn't be surprised. When I showed up for what was supposed to be the first night of class I discovered that the class had been pushed back a week, and by some snafu I hadn't been notified. I only signed up for the class because I wanted to get a general sense of what it's like to work with real celluloid -- and I've gotten that. But -- and I'm sorry to say it -- I think this is probably the most poorly organized class I've every participated in.
posted by sven | permalink | categories: classes & workshops, movies, stopmo
December 7, 2005
artist's way: week 13
by gl. at 11:10 pm
as the final meeting of the fall creative clusters, we were treated to fantastic omega projects, delicious bowls of stone soup, and tearful goodbyes.
i love the stone soup exercise because the artist's way secret is not really about Art at all: it's about living a creative life, even for seemingly mundane things like soup. each cluster creates a unique soup that's symbolic of their contribution & synergy. the tuesday group created a sausage soup (and two people brought carrots, so we had a lot of carrots!), while the wednesday group brought so many types of veggies we couldn't fit them all in the pot! the wednesday cluster also brought dakota bread & a soft, sour brie cheese to accompany the soup, and we finished off w/ homemade guiness brownies. it was a feast, and an appropriate end to the 3-month journey we've traveled together.
the omega projects are like final projects but they aren't worth 50% of your grade. (as i kept reminding them, "you can't fail artist's way!") it gives cluster members an opportunity to explore one of the arts we've done during a creative cluster or to strike out on their own. because while i very much enjoy creating the opportunity for them to create art at the studio, the point of going through artist's way is to learn to create art outside the studio on your own. :) anyway, some really phenomenal pieces, including a beautifully packaged homemade tangram set & a set of collaged bowling pins!
i passed out comment cards, little glass scarlet stars packaged in tiny red envelopes & copies of sven's "notes on making art" which were requested last week. the best artist's way clusters spontaneously bring gifts for each other because they're so excited to share their projects: the wednesday group gave each other little "inspiration boxes" filled with tiny collage-able objects, little inspirational magnets, seashells from the oregon coast, and small homemade accordian books. one of the participants even made one an accordian book for sven, even though she had never met him. wow! how cool is that?
and now i have a little less than 2 months to promote the february clusters. *takes a deep breath*
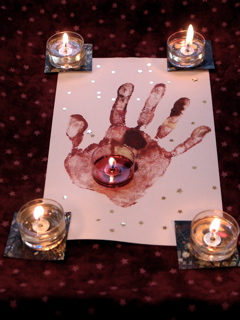
center (faith): a red handprint w/ gold accents, anchored by flames and darker squares of painted paper, the hand is supported by a net of tiny golden stars that twinkle between its fingers, and a dark red tealight glows in the center of the palm. i created this as an artist response for my friend terrilynn, whose college-aged daughter has a brain tumour that's just resurfaced after an operation she had in high school. terrilynn & i created the handprint before i shaved my head in 2001 & the little squares are part of an art project we're working on.
music: kd lang's ingénue, which is a great album to listen to while eating a bowl of homemade soup.
posted by gl. | permalink | categories: artist's way
December 6, 2005
mhcc calligraphy: class 9
by gl. at 11:26 pm
when xmas & blogging collide: we create gilded versals at last week's mhcc class. guess who's getting a gilded versal for xmas? :D fortunately, i'm guessing michaelmas will find the information here interesting & worth "tarnishing" the surprise. the scanner doesn't show shine so well, though. ergh.

this is considered in draft status until i clean up the edges, reoutline it & burnish it. gilding looks easy, but of course it isn't. it's time-consuming & fussy & messy. even with fake gold leaf kits (as opposed to shell gold, which is more authentic and costs proportionally more), there are several laborious steps after you draw your versal:
- bulk up a layer of gesso
- let it dry
- add a layer of adhesive
- let it dry
- no, really. let it dry. or when you add gold leaf, it will come up, and you will have to lather, rinse, repeat.
- when tacky, gently float a thin sheet of gold leaf over your piece, trying to get as few wrinkles as possible
- place a piece of paper over it & burnish w/ a bone folder, trying to get the gold leaf to cover all the adhesive elements
- brush off the leaf excess with a softsoft brush
- scrape up the edges of ragged gold and excess adhesive w/ tinytiny xacto strokes to expose your versal lines
- brush away all the bits
- re-ink
- place a very soft cloth over the piece and use a burnisher (or a bone folder) to make the bits shine.
- keep burnishing
- keep burnishing
- pause
- keep burnishing
- tada! pretty, huh? breathe. try to focus anywhere further away than your nose.
when i created this versal at mhcc, it was originally an asymetric design w/ just an M and a B in its right counter. but i drew it on a separate piece of paper because i don't feel confident enough to draw directly onto an original. i rarely do. then i did a basic graphite transfer -- which reversed the B and became the basis for the backwards S (michael's middle name is stuart). i loved the balance & playfulness this created. sweet, sweet serendipity!
also, i was inspired last week to create an artistic response to a political issue (alas, this is one case i could have done without inspiration, though):

this is also a draft, but i see a lot of potential in it. that's four different colors of red ink.
and we don't usually post links (why not?), but here are two i find totally worth mentioning:
keri smith posts a template for a "magic book," which is how marti has us make the abecedariums at the beginning of each term. i'm thrilled to have the instructions because i can just barely do it when marti's there to show us, and it is definitely a cool technique to know.
the gocco is definitely my kind of cute & convenient, but this "cheap screen printing tutorial" wins super mega bonus points for being clever, easy, cheap & equally non toxic.
posted by gl. | permalink | categories: calligraphy, classes & workshops, links, printing
December 4, 2005
the power of the portfolio
by gl. at 11:22 pm
we attended jill kelly's holiday open house today. jill kelly is a local author, editor & creative facilitator we keep running across via joanne, creative job club, vicki's art show, the last japanese garden writing workshop, and the art marketing workshop. (and i am shocked & suprised to discover we haven't written about the japanese garden workshop or vicki's art show!)
as naturally shy people, we stayed at the peripheries and nibbled the savory snacks -- until sven whipped out his 2005 art portfolio (a simple black plastic photo album) and then we brought down the house! we were almost the last to leave! we met more people in the last 20 minutes then we did the rest of the party. and of course, upon reflection, what would a party of creative spirits bond over? art! man, i gotta make me one of those! ;)
also of note: before the party we stopped by the mac store and picked up tara, our new terrabyte backup drive! when i get a chance (probably after i get my own shipment of apple goodness this week: a new 12" powerbook & nano!), i'll do the gigabyte shuffle: the 500gb drive will become the new moviemaking device and the 200gb drive will become the new media storage device (definitely itunes, possibly iphoto, but we're not sure yet).
posted by gl. | permalink | categories: administrivia, exhibits & events
December 3, 2005
test clip: dancing
by sven at 1:49 am
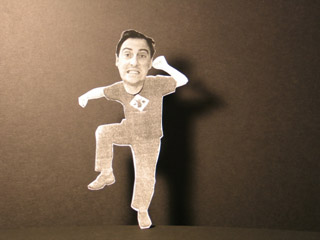
Yesterday afternoon I did a really neat film experiment in preparation for my final project in the Super8 class.
I set up a digital camera on a tripod and used the remote to take some photos of myself: full -body shots and head shots. I printed them out on an inkjet printer, enlarged them on the photocopier, pasted them to black cardstock, and cut out the bits I wanted to keep. On my desk, using my desklamp for lighting, I set up two pieces of black foamcore -- one for the backdrop, one for the ground. I have a scrap piece of wood with drill holes in it, which I put a dowel in. Then I taped the heads and bodies to the dowel and took more photos. I imported 54 stills into QuickTime as an image sequence at 6 frames-per-second...
And thus made an 8 second movie clip!
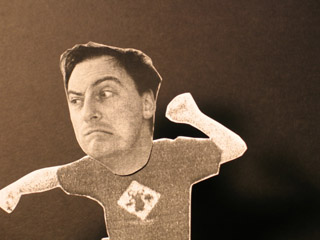
If you want, you can download the clip.
- Length: 8 seconds
- Format: QuickTime (.mov)
- Size: 2MB
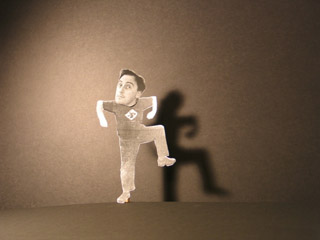
- The shadows are excellent... I could create this same clip (including shadows) entirely in digital space -- but it just wouldn't be as rich.
- There's some fluctuation in the lighting. It seems to be a matter of where the camera is pointing when it takes its light meter reading. The figure changes; the background doesn't. If I make sure the reading's being taken off the background, things seem to be OK. [I could also probably put the light meter on manual.]
- 6fps seems about right. Since Super8 shoots at 18fps (as opposed to normal film's 24fps, and DV's 30fps), I probably want to click three shots of each pose.
- The facial transitions are a bit abrupt. For my brain, my guess is that it takes a minimum of half a second to read an expression. Since the eye really focuses on the face, this is important.
- I could have done with more tweens for the leg movements.
- Cardstock cut-outs bend. This can be an advantage. It allows me to get the foot below the edge of the foamcore that I'm using as the ground. It doesn't look right if the foot is standing right on top of the line.
- The "ground" was at an angle. I like it. It might be useful for some "forced perspective" effects.
posted by sven | permalink | categories: movies, stopmo
December 2, 2005
3D storyboard: "Stole My Heart"
by sven at 11:54 pm
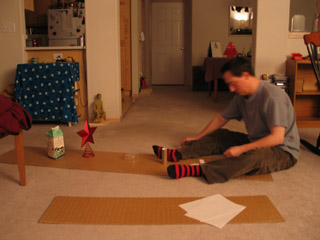
I'm a visual thinker. When I've tried to brainstorm movie scripts with friends, I can't do it. They're imagining a story through words -- I have to draw pictures to show them what I'm thinking.
Last night I wanted to begin creating a story to film for the Super8 class' final project. Where to begin? With collage! I went to my DVD shelves and started blindly picking out titles. I'd try to think of the most memorable scene from the film, and then I'd draw a little illustration of it. After doing this about eight times, my brain was percolating with ideas for my own scenes.
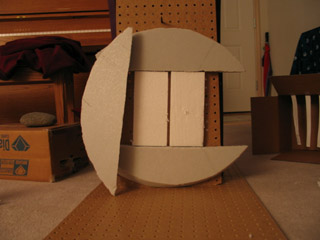
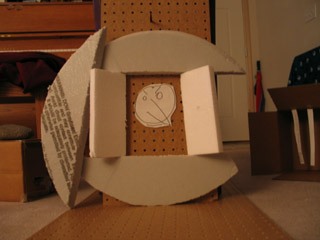
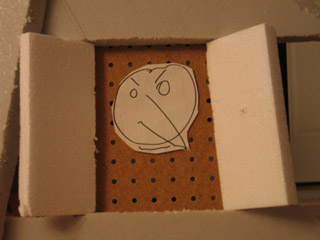
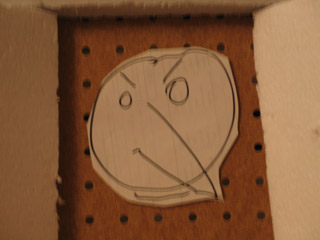
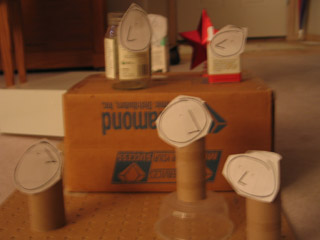
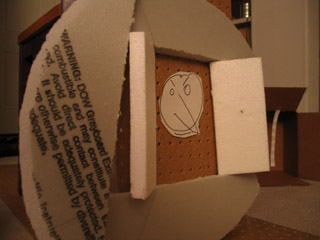
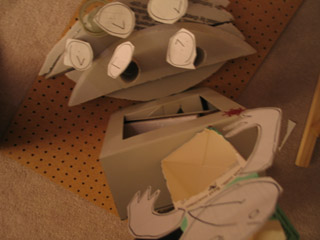
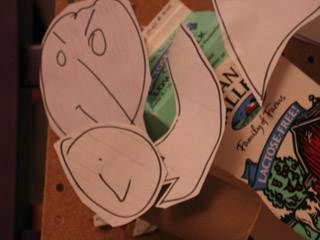
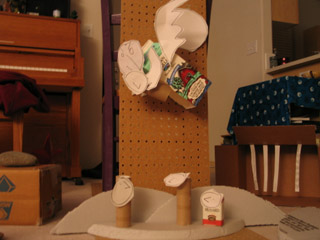
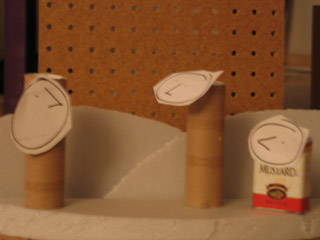
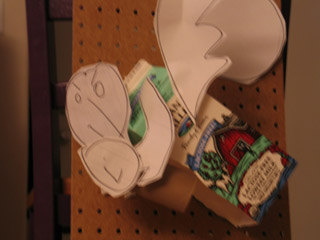
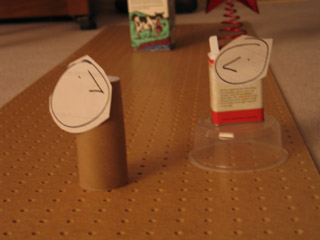
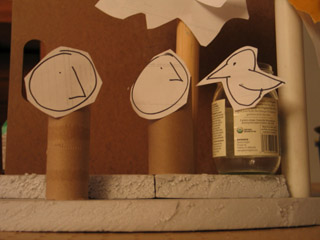
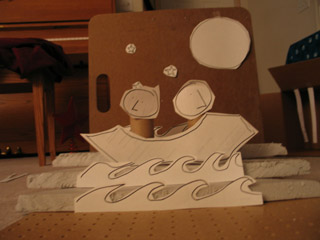
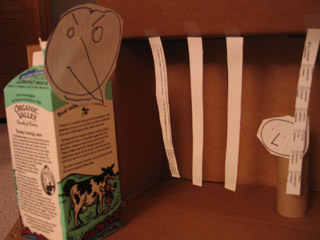
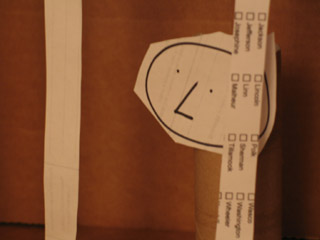
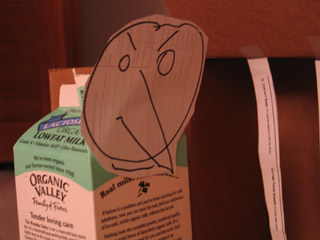
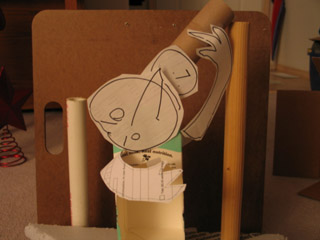
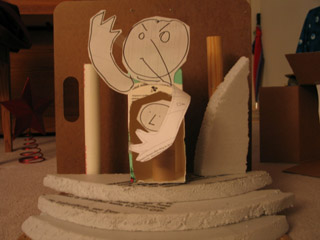
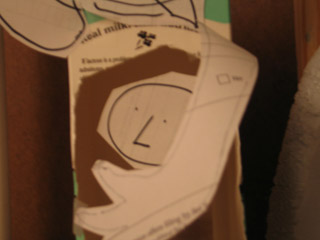
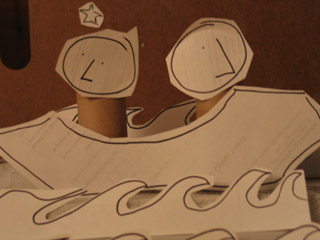
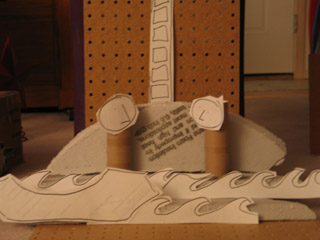
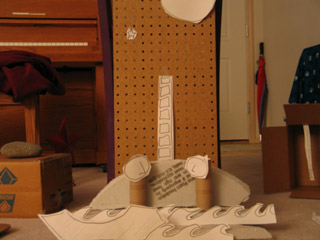
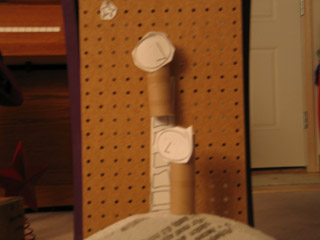
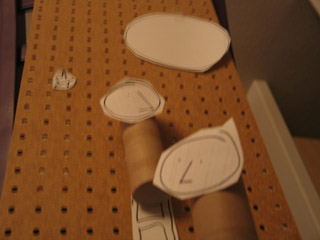
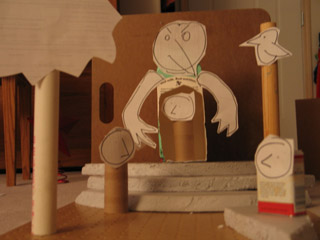
I didn't just want to do a 2D storyboard this time, though. I went to the garage and brought out leftover masonite from the pegboard project. I went to the recycling bins and pulled out printer paper. I started making people by taping sharpie-drawn faces onto toilet paper tubes, and throwing together hills by stacking scraps of polystyrene foam.
Work fast. Instead of drawing ideas for scenes, I cobbled together little dioramas and took snapshots of them with the digital camera. I didn't create them in order -- I pieced them together into a story this afternoon. I'm really excited about the process: it was energizing, and so much richer than working just in 2D. Work from the hands, not the brain.
...Too bad the story's too long to actually use for my Super8 project. D'oh!
Nonetheless, here's the quick'n'dirty story I came up with: "Stole My Heart"
posted by sven | permalink | categories: movies, stopmo
super8 class @ radius studio
by sven at 6:02 pm
So, I'm taking a "Super 8mm Filmmaking" class taught by Mark Brandau at radius studio.
I'm a digital boy; digital is what finally made filmmaking accessable to me. But there's a sense of lacking street cred -- I wanted to take this class so I'd have a more tangible sense of what it means to shoot on real film and to edit celluloid by actually cutting and taping it together.
Plus, the price was right. Only $130 for five 2-hour classes, and the cost of film and developing is covered. That last bit's the knock-out. I've always dreaded not knowing how much the cost of real film would add up to... With Super8, I now know that we're talking about $12 for a roll of film, and about $16 to develop it. That's for just three and a half minutes -- fifty feet of celluloid, yo. Maybe not as bad as I imagined -- but still, it's comforting to have it covered on my first, experimental outing.
I've been to three classes so far. It's very informal. Mark has a collection of maybe ten cameras that he's gotten off of eBay and from thrift stores. The first night, we leapt in, and each got to shoot thirty seconds. It was supposed to be developed by our next meeting, but someone simply forgot to mail out the rolls (they have to go to Seattle). Still, not a bad start to the class. My one complaint is that the seven students weren't given a period for introducing ourselves. Anonymity is an odd dynamic to start off on, even if there's just ten hours of class time.
For the second class we broke up into two groups, each got a roll of film, and we shot a story that night. A few folks didn't show up, so there were just two of us in my group. We came up with a story about two men who share one pair of glasses. Man A wakes up, drives to the meeting point, hands his glasses to Man B, and then Man B drives home and goes to bed. The driving sequences were done with pixelation (my idea, of course) -- and I managed to break a chair while scooting around. Oops.
The third night, I'm sorry to say, was just awful. Mark showed us how to hand-process film. It's like developing photographic film... You put it in a light-fast container, and sequentially add and drain chemicals. It's a neat thing to know how to do -- but 45 minutes of just watching Mark shake a plastic container nearly killed me.
Next Wednesday we meet briefly to view the films we shot during the second class, and most students will pick the camera they want to use for their final project. Me, I knew what I wanted and checked out a camera at the end of this week's class...
I gotta to do something with animation. It's a childhood dream. King Kong, Ray Harryhausen -- if I'm only ever going to do Super8 once, then I have to try walking in the footsteps of the masters.
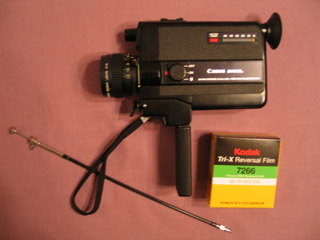
The cameras are all different models. Me, I'm holding a Canon 310XL. I'll be shooting on Kodak Tri-X Reversal Film. I also borrowed a remote shutter release cord, so I don't have to touch the camera itself and inadvertantly muck up the shot -- which matters, if you're doing animation.
Ee! I'm excited to finally try something I've always wanted to do. Also a little dismayed at the imprecision of it... I'm really worried about getting the shots in focus and adequately lit. It's difficult, but I'm trying to find a good emotional balance between going hog-wild -- and not getting too invested in a product that might come out really crappy.
posted by sven | permalink | categories: classes & workshops, movies, stopmo


